Jump to content


fitting of the front flares


  • Please log in to reply
19 replies to this topic

#1 _Shelly`s LX_

_Shelly`s LX_
  • Guests

Posted 21 April 2017 - 02:13 PM

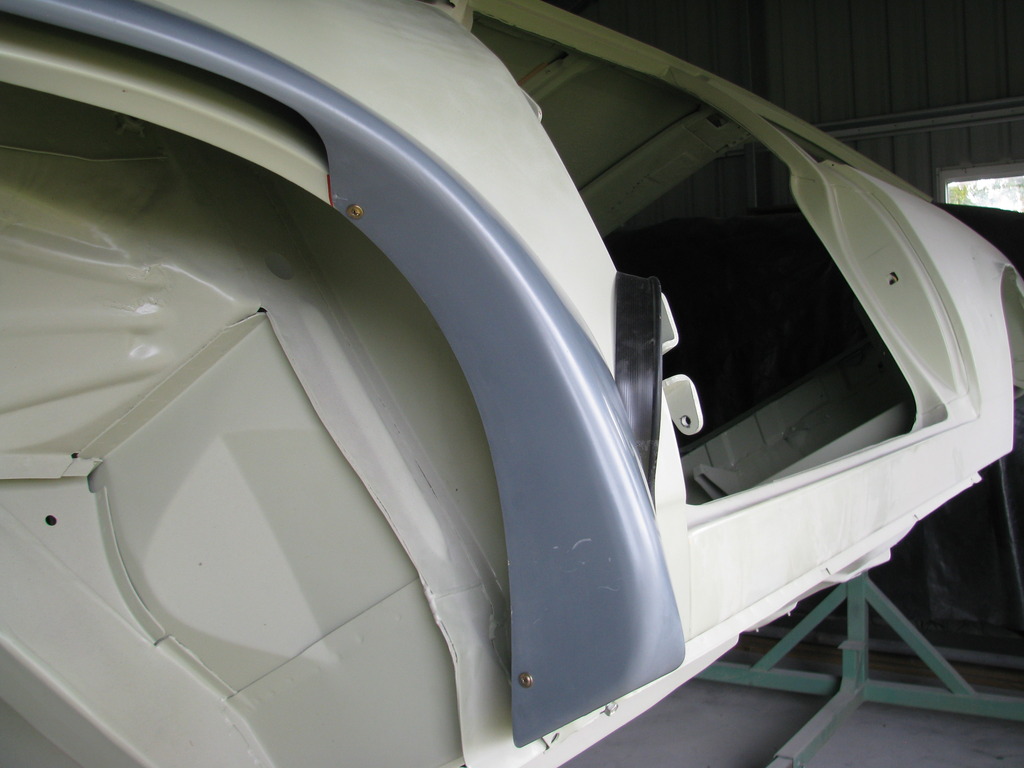
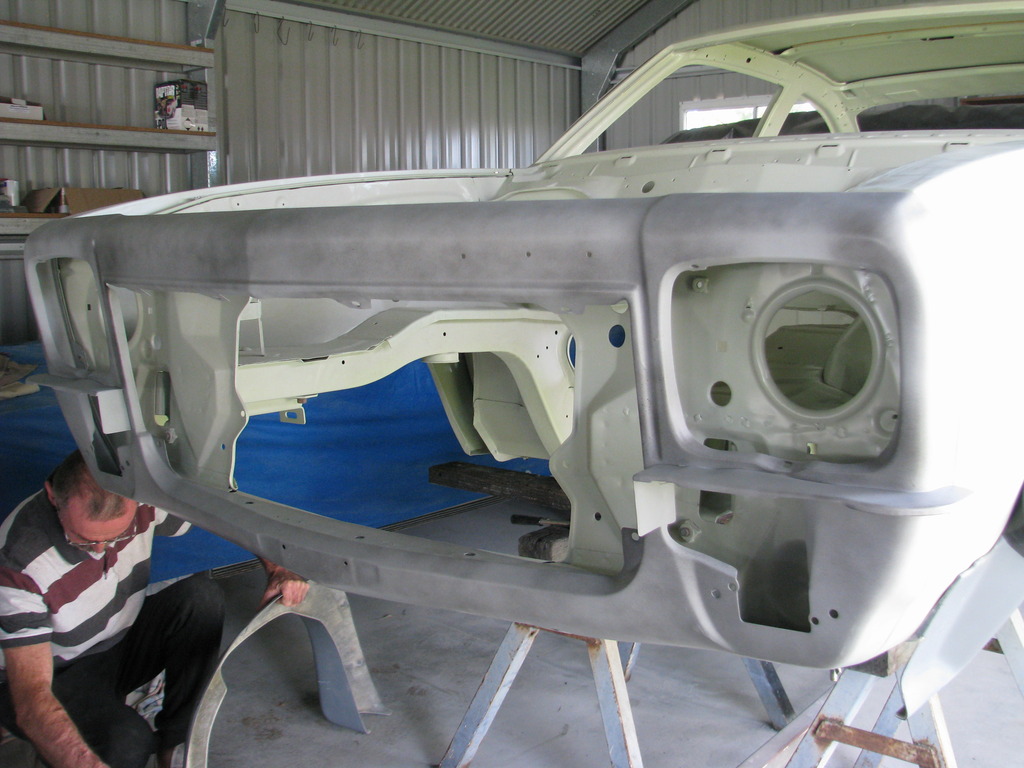
well time has come to fit the front flares i think nosecone needs to be put on as well as guards then the flare and front spoiler to match 

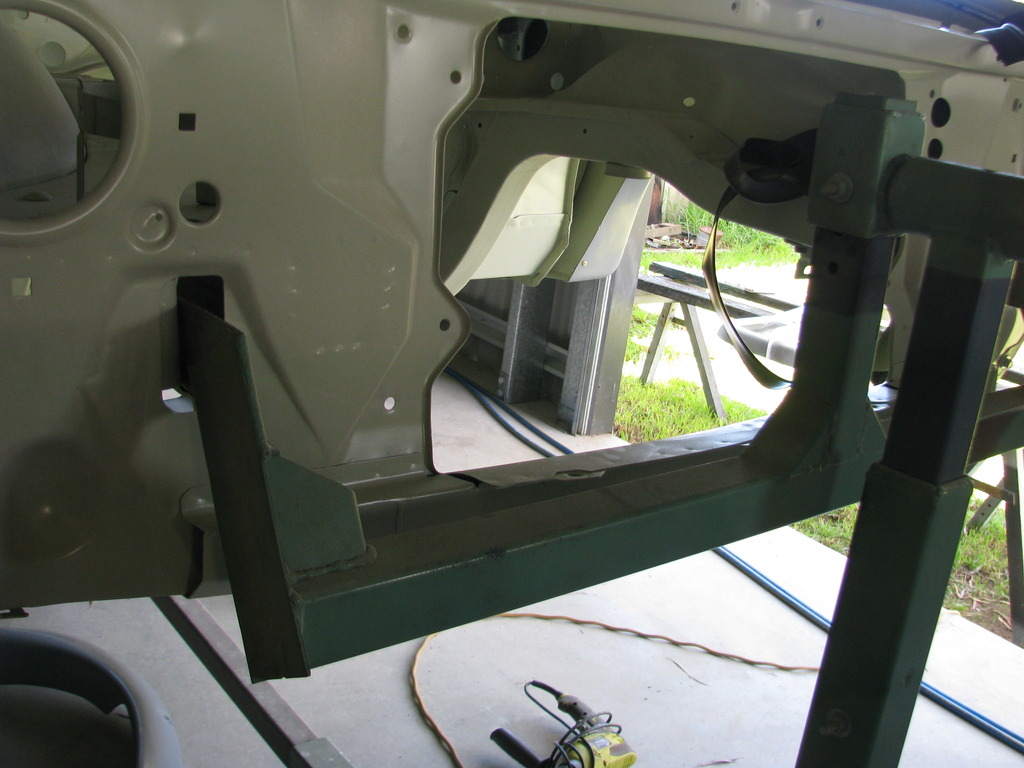
my helper has linned up back part of front flare and started drilling i cringed  [to much a hurry] 

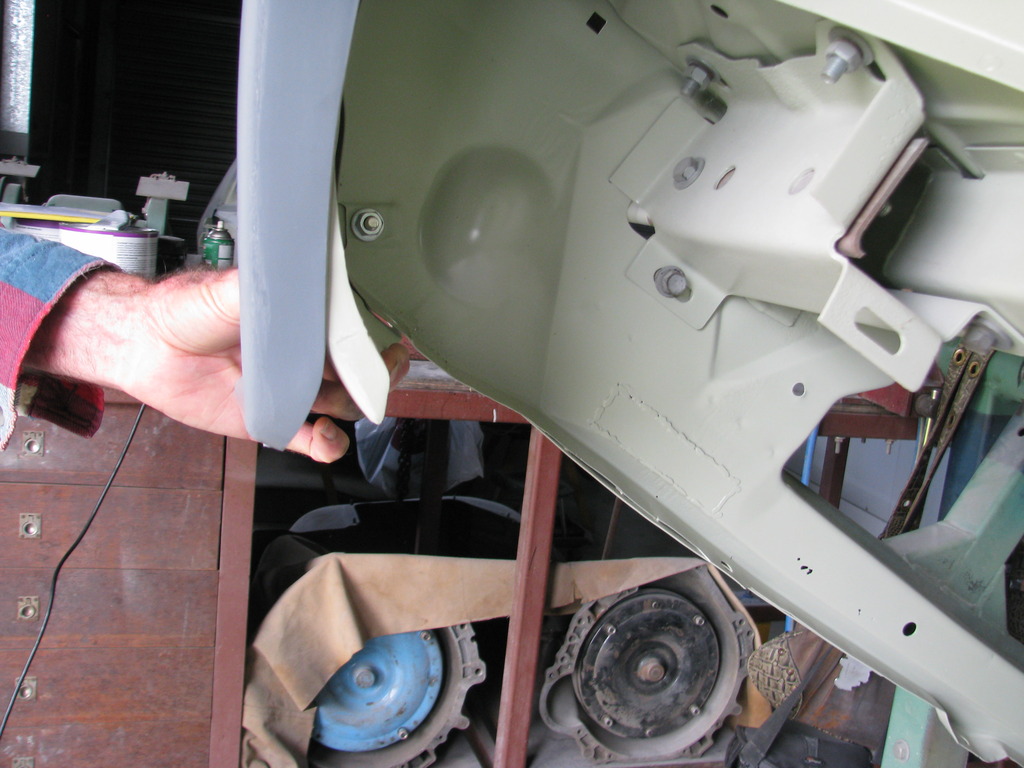
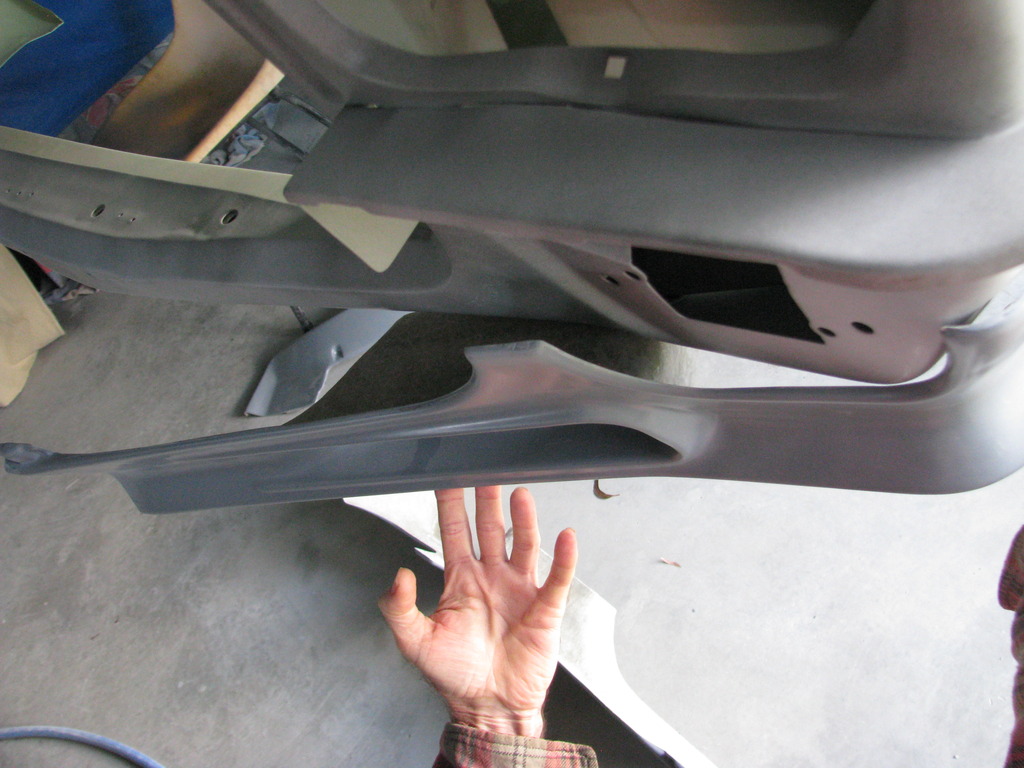
whats done is done is all i was told =here is the issue please view pics

IMG_7599.jpg

should i trim front guard to match flare

IMG_7601.jpg

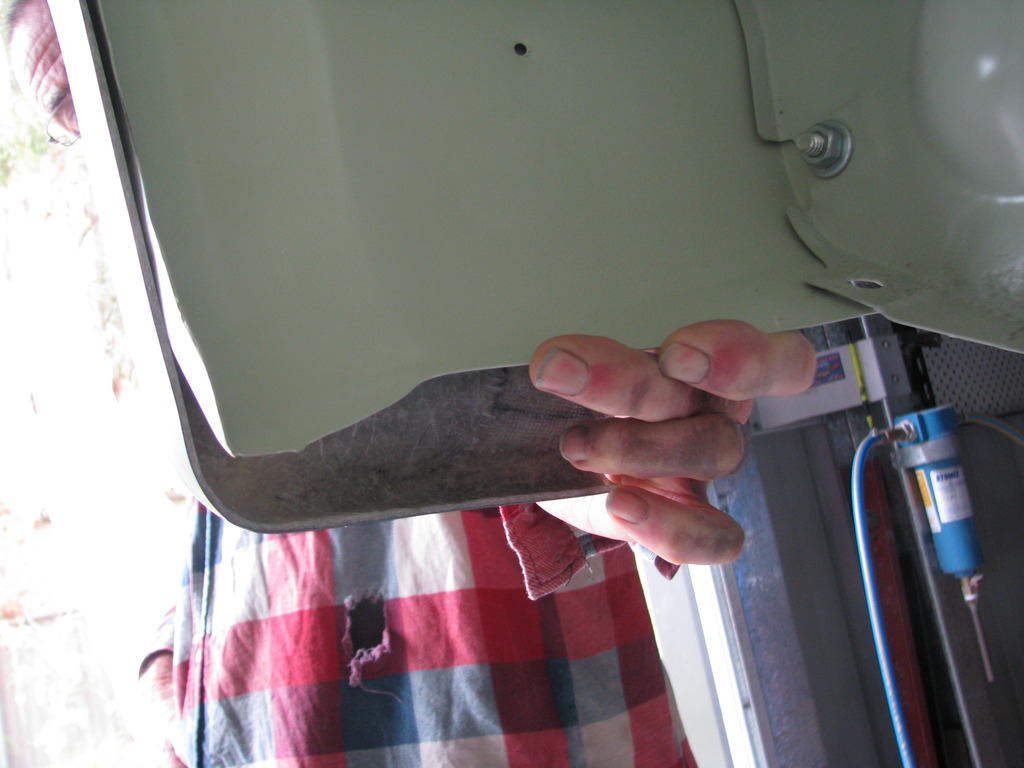
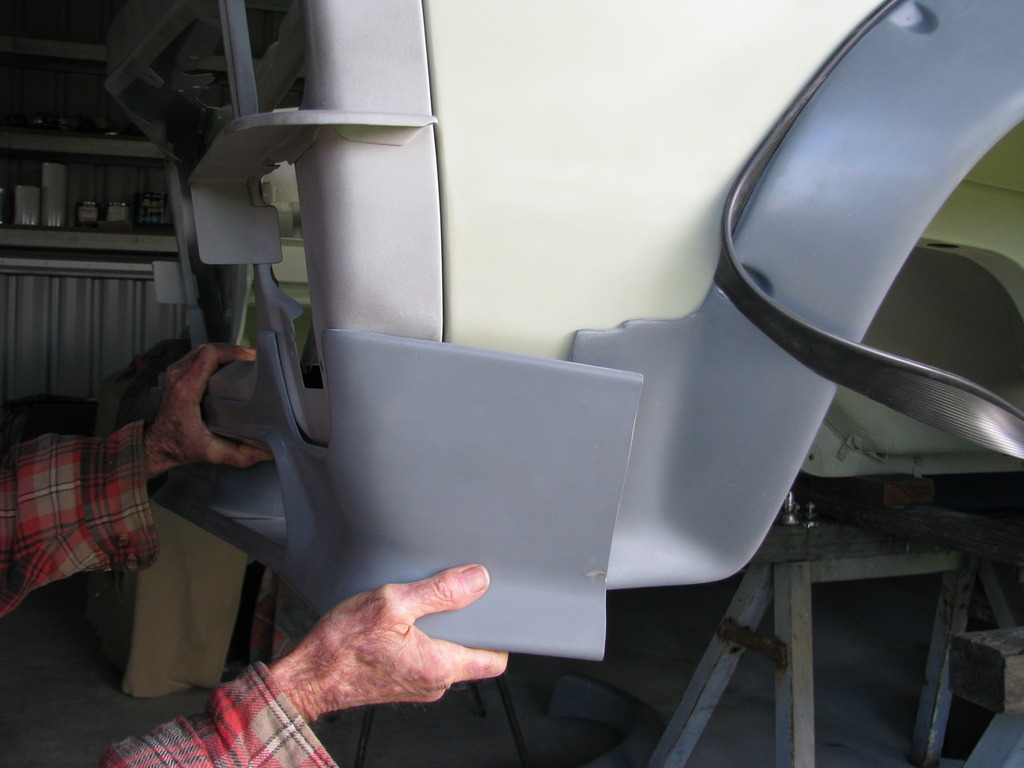
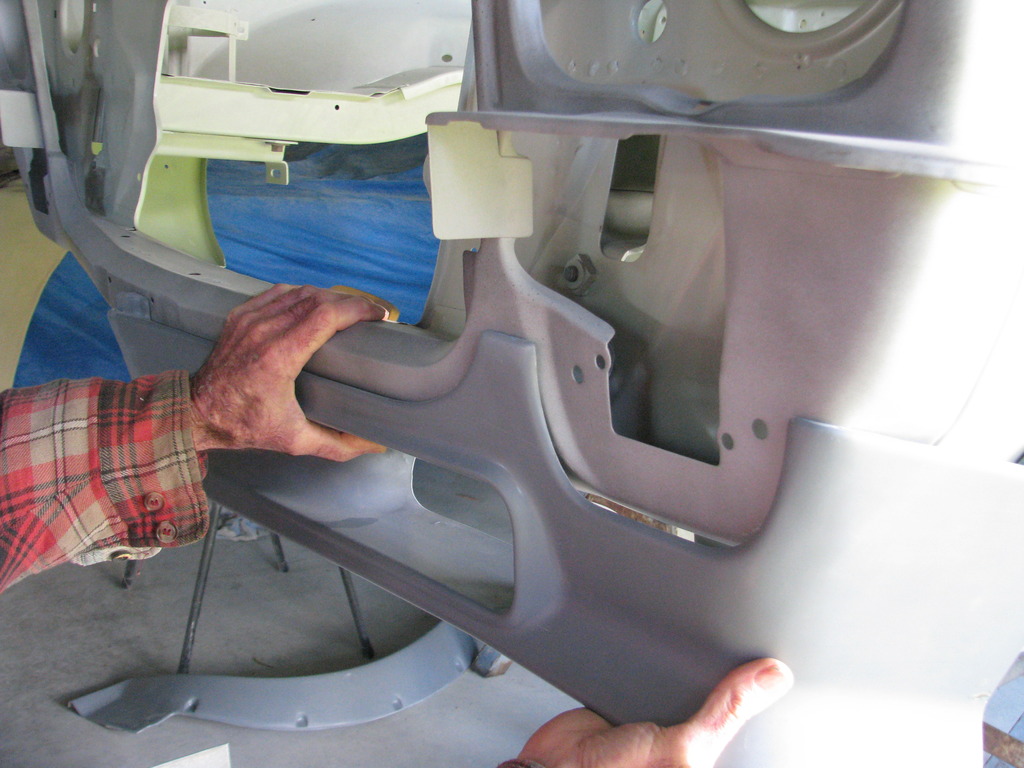
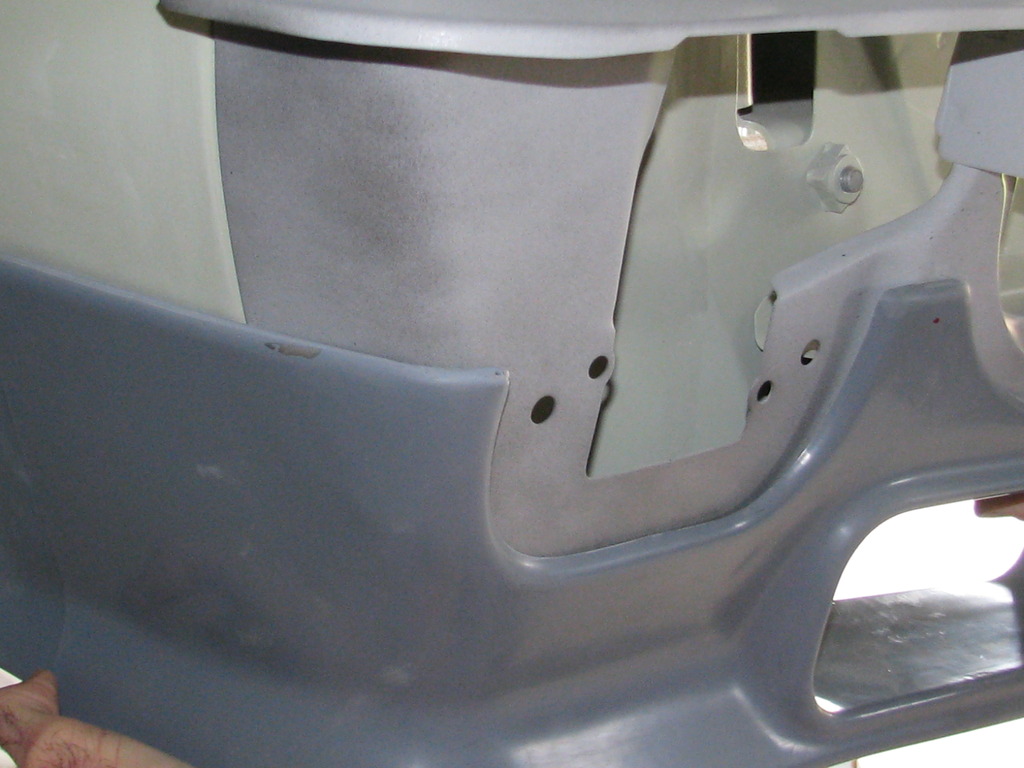
this is issue at frontIMG_7612.jpg

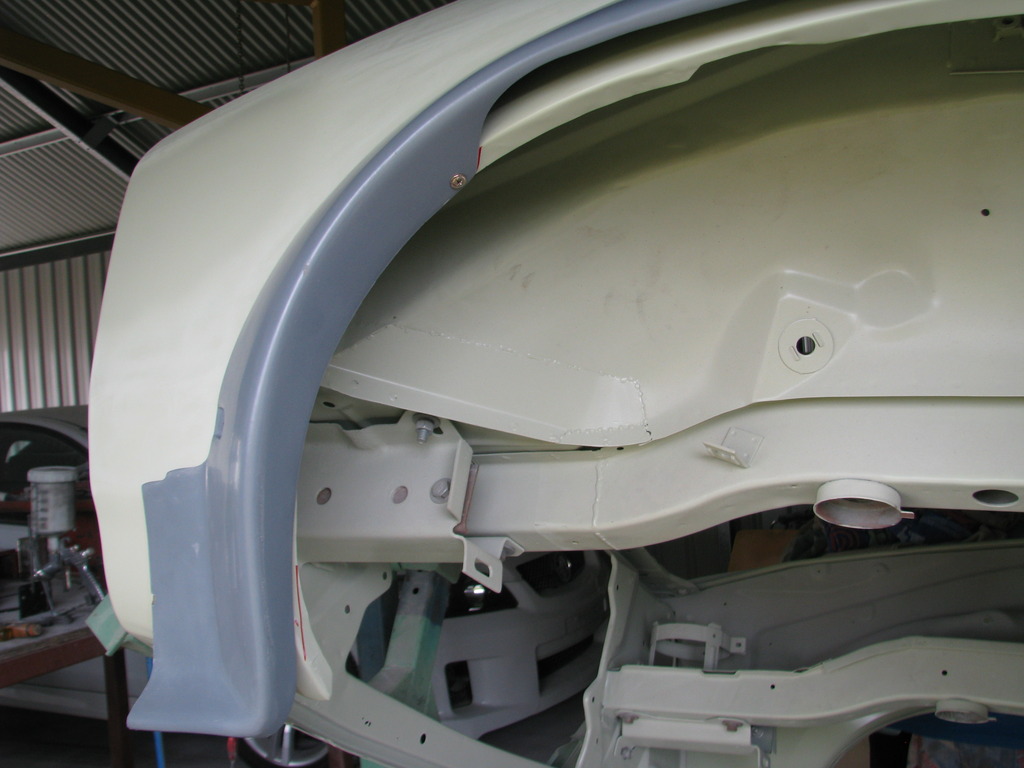
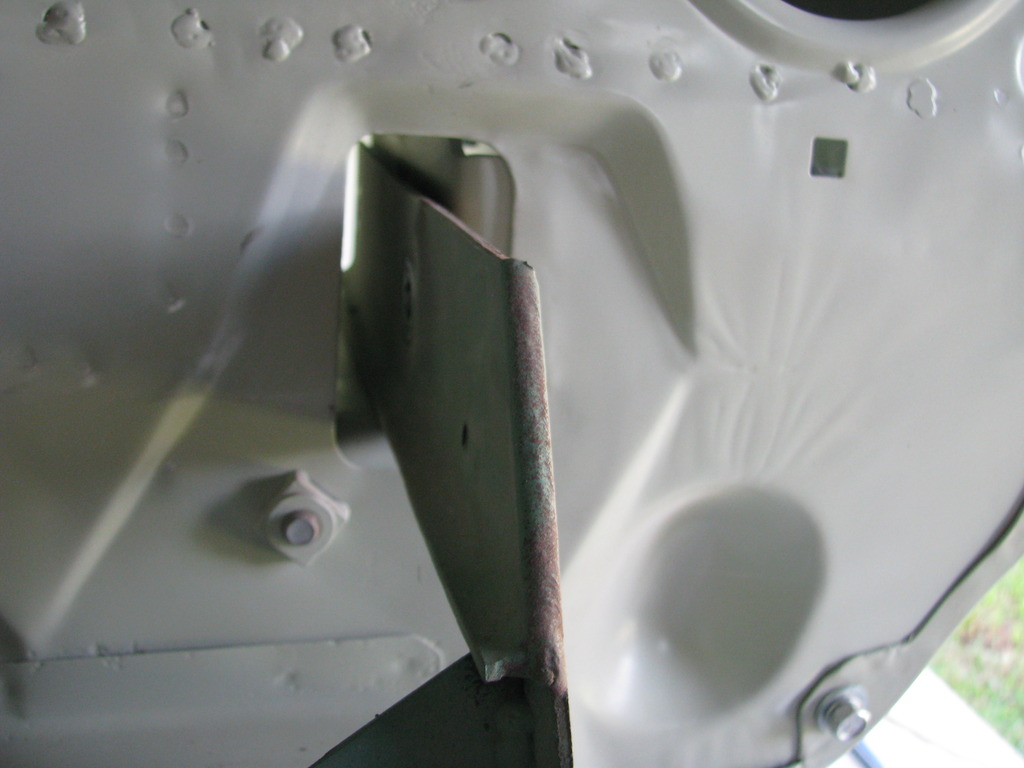
... then at the back of wheel arch front guard i have this issue 

IMG_7609.jpg

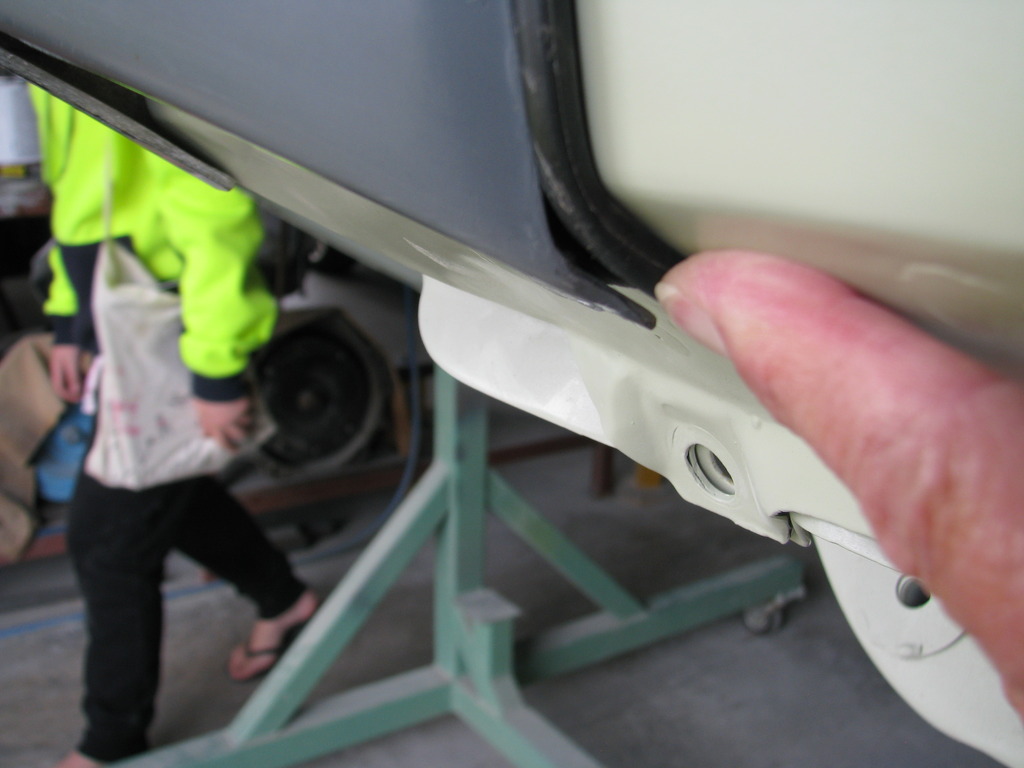
when we put screw in hereIMG_7614.jpg

at the top it pops out the bottom lug under guard

my issue for the day i packed up and left in dismay :o


#2 _Shelly`s LX_

_Shelly`s LX_
  • Guests

Posted 21 April 2017 - 02:16 PM

i know the flares can flex but would this crack the flare and when painted what will give ? my helper spun out and said dont grab it and pull in he just got flare and placed it on guard ?


#3 arrimar

arrimar

    "Have you still got that Torana!"

  • Members
  • PipPipPipPipPipPip
  • 3,121 posts
  • Location:brisbane
  • Car:Salamanca L34, Absinth LH SLR/5000, Caribean Blue LH 5.0, C250 Merc,
  • Joined: 13-January 06

Posted 21 April 2017 - 04:35 PM

Put your nosecone on and set the spoiler height first. Otherwise no matchy-matchy left to right.

#4 Statler

Statler

    Heckler Extraordinaire

  • Administrators
  • PipPipPipPipPipPipPip
  • 6,282 posts
  • Name:Col
  • Location:Mackay Qld. Whitsundays for all you back packers!
  • Joined: 20-May 06

Posted 21 April 2017 - 05:01 PM

You really need to have all the front panels on & aligned to finish spec.


If you are running flares then it's safe to assume that you will also be running wide rims/tyres?

The leading edge on the front guard will have to be cut off to allow for tyre clearance. 


It's best to have the front assembled. Turn the wheels to 3/4 lock, have someone sit on the front bumper & then align the flare.


#5 Bigfella237

Bigfella237

    Socially Distant

  • Members
  • PipPipPipPipPipPipPip
  • 4,371 posts
  • Name:Andrew
  • Location:Far South Coast of NSW
  • Car:(s) not as many as I'd like but more than I've got space for!
  • Joined: 31-October 14

Posted 21 April 2017 - 08:51 PM

Another thing I'd suggest is to tape the front and rear flares on, then stand well back and look at how they line up with the style-lines of the body and with each other.


You see so many flares fitted cock-eyed (too high at the front or rear) because people are too focused on where the flare wants to sit, not where it should sit.


Even the best moldings often require a little 'adjustment'...


#6 mick_in_oz

mick_in_oz

    Forum Fixture

  • Members
  • PipPipPipPipPip
  • 666 posts
  • Name:Mick
  • Location:Western QLD
  • Car:LX Hatchback
  • Joined: 12-June 11

Posted 21 April 2017 - 10:26 PM

Everything said above is spot on! Listen to Andrew about where they need to be rather than where you feel they fit best.


As above, align to finish fit all of the front panels, tape on both front flares and spoiler, and stand back and check the bottom side edge of the spoiler sits level with the ground/sill and that the wheel arch of the front flare looks right rather than pointed up towards the front somewhat, like plenty do. You will probably end up with the spoiler low enough to almost or actually be able to see the ground between the indicator cutout and the nose panel, there really will be a gap if the spoiler is sitting about right. Cut the front lower corner off the guard, cut the wheel arch off the guard AS CLOSE AS YOU DARE to the bolt holes, cut off and weld up the Firewall/A Pillar seam, if you have deep dish wheels or a taller tyre combo then maybe take come out of the firewall/pillar area (another 2"), if you get this keen you will have to also cut the lower back corner of the wheel arch off the guard along with more of the flare.


#7 Statler

Statler

    Heckler Extraordinaire

  • Administrators
  • PipPipPipPipPipPipPip
  • 6,282 posts
  • Name:Col
  • Location:Mackay Qld. Whitsundays for all you back packers!
  • Joined: 20-May 06

Posted 21 April 2017 - 11:21 PM

 You will probably end up with the spoiler low enough to almost or actually be able to see the ground between the indicator cutout and the nose panel, there really will be a gap if the spoiler is sitting about right.

Huh? 


pruple%20front_zpsbfl0y4jz.jpg


#8 76lxhatch

76lxhatch

    That was easy!

  • Members
  • PipPipPipPipPipPipPip
  • 7,152 posts
  • Location:Unzud
  • Car:SS
  • Joined: 04-August 08
Garage View Garage

Posted 22 April 2017 - 07:02 AM

... cut the wheel arch off the guard AS CLOSE AS YOU DARE to the bolt holes, cut off and weld up the Firewall/A Pillar seam ...

I prefer to leave a little below the bolt holes and hammer it out to form a new lip. This puts some strength back into the guard so it will keep its shape without relying on the flare, and provides a rounded edge should the tyre ever find its way up there.

Definitely a lot more cutting to do yet if you're putting decent sized wheels and tyres on.

#9 mick_in_oz

mick_in_oz

    Forum Fixture

  • Members
  • PipPipPipPipPip
  • 666 posts
  • Name:Mick
  • Location:Western QLD
  • Car:LX Hatchback
  • Joined: 12-June 11

Posted 22 April 2017 - 07:51 AM

Col, different spoilers will sit differently, but i bet if we got up close to that car we would go close to seeing the gap I'm referring to. That pic is a good guide as to where the spoiler is likely to sit, with a decent gap between the indicator lens and the top of the spoiler cut out, you see way too many where the spoiler is too high and the result is the flare is pointed up at the front and it looks awful from the side with the wheel arch of the flare wrong.


The originals were cut with oxy as far as i know and left with the dags and all the mess.


#10 tsn007

tsn007

    Forum Fixture

  • Members
  • PipPipPipPipPip
  • 1,010 posts
  • Name:Tony
  • Location:LIVERPOOL, NSW
  • Car:LX hatch, LX sedan
  • Joined: 25-April 07

Posted 22 April 2017 - 07:51 AM

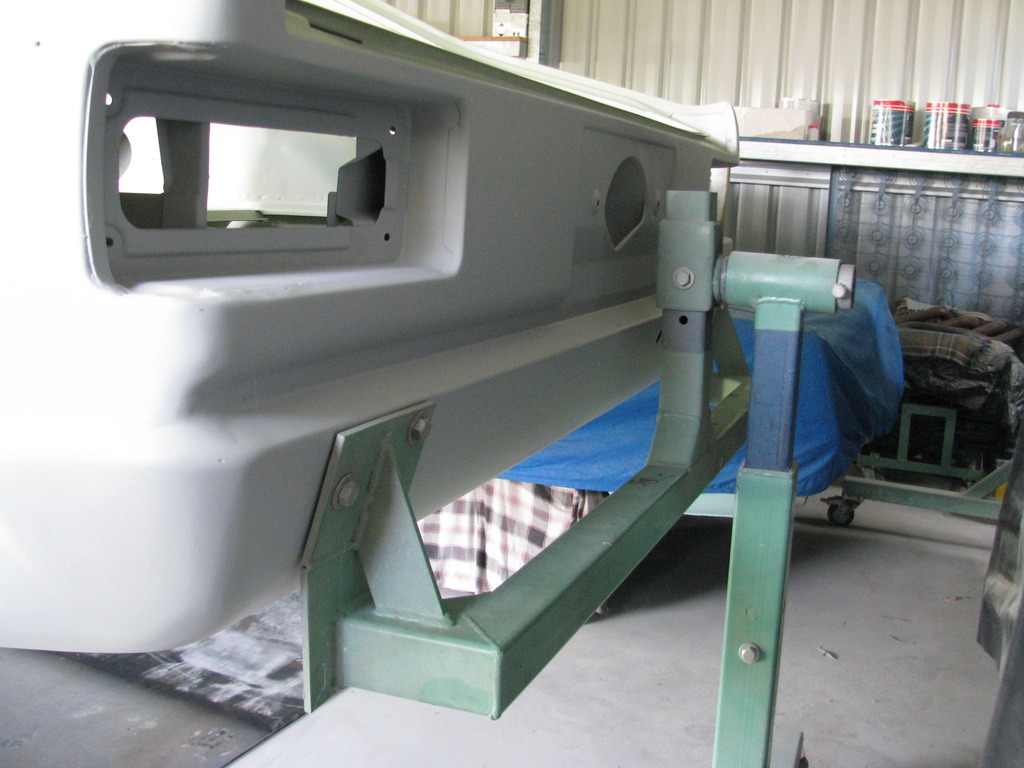
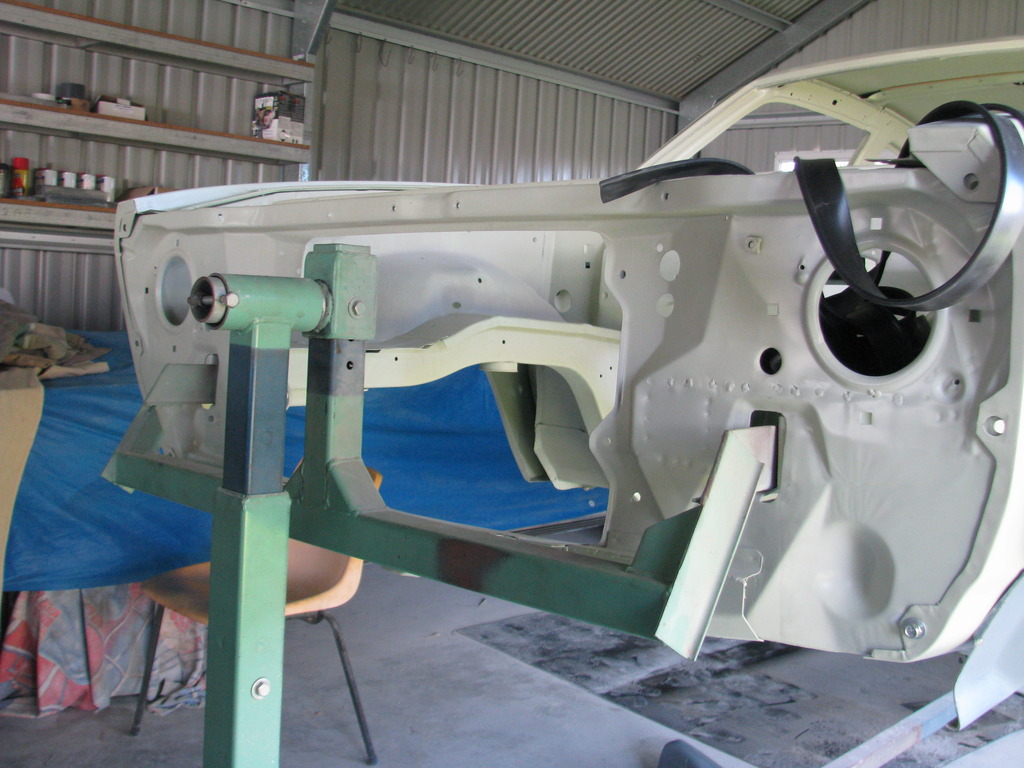
sorry to change the subject


any chance of more front and rear pictures showing how the rotisserie has been mounted to the bumper holes


thanks 


#11 Statler

Statler

    Heckler Extraordinaire

  • Administrators
  • PipPipPipPipPipPipPip
  • 6,282 posts
  • Name:Col
  • Location:Mackay Qld. Whitsundays for all you back packers!
  • Joined: 20-May 06

Posted 22 April 2017 - 09:05 AM

Col, different spoilers will sit differently, but i bet if we got up close to that car we would go close to seeing the gap I'm referring to. That pic is a good guide as to where the spoiler is likely to sit, with a decent gap between the indicator lens and the top of the spoiler cut out, you see way too many where the spoiler is too high and the result is the flare is pointed up at the front and it looks awful from the side with the wheel arch of the flare wrong.


The originals were cut with oxy as far as i know and left with the dags and all the mess.

Just need to leave enough room between the top of the spoiler & the grill opening for the 'smile' to fit.

Even if the car doesn't have the 'smile' trim the gap still needs to be there. It's a good reference point.


#12 Bigfella237

Bigfella237

    Socially Distant

  • Members
  • PipPipPipPipPipPipPip
  • 4,371 posts
  • Name:Andrew
  • Location:Far South Coast of NSW
  • Car:(s) not as many as I'd like but more than I've got space for!
  • Joined: 31-October 14

Posted 22 April 2017 - 09:54 AM

any chance of more front and rear pictures showing how the rotisserie has been mounted to the bumper holes


There's heaps of threads on this forum about rotisseries Tony, most just use an old set of original bumper brackets (or a facsimile thereof).


I prefer to leave a little below the bolt holes and hammer it out to form a new lip. This puts some strength back into the guard so it will keep its shape without relying on the flare, and provides a rounded edge should the tyre ever find its way up there.


I saw on one of those US car resto TV shows where they TIG'd lengths of welding rod around the wheel arch after they cut it, to add strength back in and save cutting the tyre instead of folding it as you say, probably a bit more work but it looked pretty good once it was done.


Edited by Bigfella237, 22 April 2017 - 09:54 AM.


#13 Rockoz

Rockoz

    Lotsa Posts!

  • Members
  • PipPipPipPipPipPip
  • 3,965 posts
  • Name:Rob
  • Location:Cowra NSW
  • Joined: 21-September 08

Posted 22 April 2017 - 09:58 AM

Most of the flares available these days have too much curve in them.

As each mould has been taken off a flare that has been made from a mould of another flare the shape tends to contract.

The distance across the wheel arch decreases.

It depends on what generation mould was used as to how bad it will be.

If you approach the fitment with that in mind then you will see where they need to be modified to get a better fit.

It is likely you will need to modify the flare front and rear to get a good fit


#14 _Shelly`s LX_

_Shelly`s LX_
  • Guests

Posted 24 April 2017 - 06:44 AM

sorry to change the subject


any chance of more front and rear pictures showing how the rotisserie has been mounted to the bumper holes


thanks 

IMG_7619.jpg

IMG_7627.jpg

IMG_7617.jpg

IMG_7616.jpg

there ya go tony for your eyes only


#15 _Shelly`s LX_

_Shelly`s LX_
  • Guests

Posted 24 April 2017 - 06:49 AM

My helper is very clever when it comes to steel work the more rust we cut out and more steel he put back in the rottiserrie was off it tilted a little because of new weight 

and anyway

back to the flare issue 

IMG_7628.jpg

we put the nose cone on and 1 flare has so many gaps to guard 1 flare fits well but appears straight no cures the 2 front peices 1 is good fitting and the other needs to be chopped in 2 spotts will get pics and put them up this arvo thanks for all your help 


#16 _Shelly`s LX_

_Shelly`s LX_
  • Guests

Posted 28 April 2017 - 06:20 AM

IMG_7629.jpg

IMG_7630.jpg

IMG_7633.jpg

passanger side front spoiler is so way off has to be cut 2 times = brake duct thingy to high up and the part that meets the wheel arch flare seems to point towards ground

IMG_7639.jpg

the drivers side front spoiler has 1 issue the part near the blinker hangs into blinker cover area to much

the drivers side wheel flare has  also a few issues has to be cut but cant decide where


#17 grumpy xu1

grumpy xu1

    Lotsa Posts!

  • Members
  • PipPipPipPipPipPip
  • 2,809 posts
  • Name:Gary
  • Location:Queensland
  • Car:lj xu1
  • Joined: 01-February 10

Posted 28 April 2017 - 07:51 PM

I'd suggest looking at some original photos, or photos of original a9x's with a magnifying glass ect, fit the indicators & you should have a much better idea of where & how much to cut. & your obviously going to have to get some fibre glass and resin ect. You will probably have to do the front bottom corners of the flares & the bottom back corners with it, quite often they need grinding out for clearance depending on tyre size ect, but I'll be surprised as other's have stated if you don't have too. If you don't plan on trial fitting the front end & tyres to check, then I'd do that. Theoretically all the components should be trial fitted & gaps checked, don't be afraid to sand the fibre glass a little & add a little to get a nice fit. Gary.

#18 _76lxJAS_

_76lxJAS_
  • Guests

Posted 28 April 2017 - 10:45 PM

Isn't it the factory fitted v8 HBs that had the flare's? Lol..

#19 _livo74_

_livo74_
  • Guests

Posted 22 June 2018 - 11:13 AM

ah the fun of fitting aftermarket flares on a torana LOL


#20 _livo74_

_livo74_
  • Guests

Posted 22 June 2018 - 11:21 AM

a


Attached Files


0 user(s) are reading this topic

0 members, 0 guests, 0 anonymous users