
Hi all.
Doing a bit of work to the engine bay and like the look i have seen on some cars where they appear to join the inner guard to the chassis rail. Can anyone tell me if there are any issues with flexibility or paint cracking if they are joined?
Also, are they welding them together or using a sandable/paintable seam sealer?
Appreciate any input.
Engine Bay Guard Seams
Started by
_LH4ME_
, Nov 03 2020 10:04 PM
19 replies to this topic
#2

Shiney005
 View Garage
-

- Members
-

- 9,029 posts
Oh My, Don't you post alot
- Name:Laurie
- Location:Dubya Hay
- Car:Toyota Mirai
- Joined: 19-January 12
View Garage
Posted 04 November 2020 - 12:03 PM
Got any pictures of what you have seen?
#3
Toranamat69
-
- Members
-
- 2,117 posts
Forum R&D Officer
- Location:Brisbane
- Joined: 07-November 05
Posted 04 November 2020 - 12:29 PM
I see little to no benefit stich welding the seams. Plenty of chance of warping something. I will be seam sealing and painting over mine no welding.
#4
mick_in_oz
-

- Members
-
- 666 posts
Forum Fixture
- Name:Mick
- Location:Western QLD
- Car:LX Hatchback
- Joined: 12-June 11
Posted 04 November 2020 - 07:54 PM
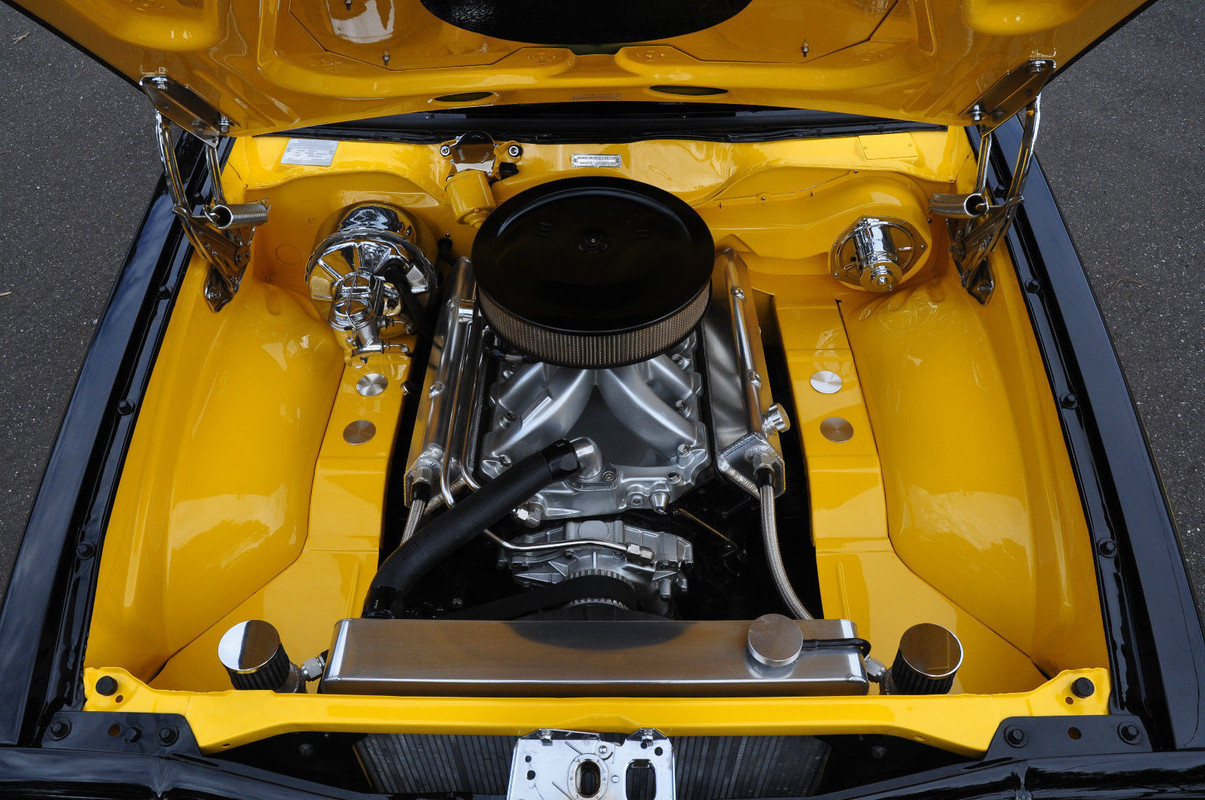
Here's mine, smoothed and welded, done a lot of years ago now. It's showing signs of movement near the welded corner with minor cracks in the paint.
The car has been drag raced for many years with roughly 480HP, left front in the air with near standard suspension, so its working hard to do this.
Attached Files
-
 IMG_5156-1.JPG 249.82K
26 downloads
IMG_5156-1.JPG 249.82K
26 downloads
#5
_LH4ME_
_LH4ME_
-

- Guests
Posted 04 November 2020 - 09:25 PM
Thanks for the relies fellas. Yep that is exactly what im talking about thanks mick in Oz. Looks very tidy with that seam covered. So would you say that a flexible seam sealer would be a better option than welding?
#6
_LH4ME_
_LH4ME_
-
- Guests
Posted 04 November 2020 - 09:28 PM
Toranamat69, will you be using something similar to the Sika seam sealer? Would you do this after epoxy primer when you are using a bit of body filler on other areas of the engine bay?
#7
Toranamat69
-
- Members
-
- 2,117 posts
Forum R&D Officer
- Location:Brisbane
- Joined: 07-November 05
Posted 04 November 2020 - 10:54 PM
Hi LH, yeah I reckon something like seam sealer. There is a worths product too.
I'm doing the metal work then getting my car done from there at a shop. I'll most likely pay them to do it.
I recon the ultimate would be 2 pac primer everywhere then seam seal then sand and prime those bits again so they are perfect.
I'm doing the metal work then getting my car done from there at a shop. I'll most likely pay them to do it.
I recon the ultimate would be 2 pac primer everywhere then seam seal then sand and prime those bits again so they are perfect.
#8
Shiney005
View Garage
-
- Members
-
- 9,029 posts
Oh My, Don't you post alot
- Name:Laurie
- Location:Dubya Hay
- Car:Toyota Mirai
- Joined: 19-January 12
View Garage
Posted 05 November 2020 - 02:53 PM
Here's mine,
What is under your brake booster there Mick? Line locker?
#9
Cook
-

- Members
-
- 1,502 posts
Forum Fixture
- Location:Melbourne
- Car:LX Hatch
- Joined: 27-February 15
Posted 05 November 2020 - 08:38 PM
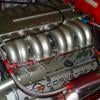
Hi LH4ME. Don't take it from me as knowledgeable but I had mine seem welded, mainly to ensure no independant movement between the inner guard and chassis, then die grinded then skimmed with filler and primed/painted as per the rest of the engine bay. From my limited use of seem sealer I would be interested to see how you get it smooth enough to paint over. Also how well will paint adhere to it long term. Cheers Ron
Attached Files
-
Engine bay Photos2.jpg 129.47K
6 downloads
#10
Bigfella237
-

- Members
-
- 4,368 posts
Socially Distant
- Name:Andrew
- Location:Far South Coast of NSW
- Car:(s) not as many as I'd like but more than I've got space for!
- Joined: 31-October 14
Posted 05 November 2020 - 10:02 PM
What is under your brake booster there Mick? Line locker?
Electric vacuum pump, Laurie.
I prefer the seams myself...
#11
Shiney005
View Garage
-
- Members
-
- 9,029 posts
Oh My, Don't you post alot
- Name:Laurie
- Location:Dubya Hay
- Car:Toyota Mirai
- Joined: 19-January 12
View Garage
Posted 06 November 2020 - 07:49 AM
Hi LH4ME. Don't take it from me as knowledgeable but I had mine seem welded,
You have shedloads of threads devoted to your hatch Cook, but not a thread on the whole build where we can see some overall progress. Looking at that engine bay picture above, I for one would love to see some photos of the whole car. 
#12
Cook
-
- Members
-
- 1,502 posts
Forum Fixture
- Location:Melbourne
- Car:LX Hatch
- Joined: 27-February 15
Posted 06 November 2020 - 11:20 AM
Thanks Laurie. I haven't done a build thread as the bulk of the work is/has been done by those more experienced and knowledgeable than I. To be honest I don't have a decent photo of the whole car as I only concentrate on one aspect at a time (not great at multi-tasking lol). I am contemplating doing a run through once the car is complete and pass on my experiences. FWIW I can tell you the colour is Azzuro Thetis. I'll send through a recent pic of the engine bay when I can get it uploaded from my phone. Cheers Ron
#13
Cook
-
- Members
-
- 1,502 posts
Forum Fixture
- Location:Melbourne
- Car:LX Hatch
- Joined: 27-February 15
Posted 06 November 2020 - 11:40 AM
#14
Shiney005
View Garage
-
- Members
-
- 9,029 posts
Oh My, Don't you post alot
- Name:Laurie
- Location:Dubya Hay
- Car:Toyota Mirai
- Joined: 19-January 12
View Garage
Posted 06 November 2020 - 01:21 PM
Very nice!!!
#15
_LH4ME_
_LH4ME_
-
- Guests
Posted 07 November 2020 - 09:23 PM
Thanks for the replys fellas. Both very nice engine bays. I hope mine will look half as good as those.
#16
mick_in_oz
-
- Members
-
- 666 posts
Forum Fixture
- Name:Mick
- Location:Western QLD
- Car:LX Hatchback
- Joined: 12-June 11
Posted 09 November 2020 - 09:22 PM
Yup Vacuum Pump, Hella UP28 series.
I think even with seam sealer it'll crack the paint if its got a good amount of HP or you have a big right boot.
I like the clean welded seam, but I feel left open is likely best if its driven in anger often.
#17
_LH4ME_
_LH4ME_
-
- Guests
Posted 15 November 2020 - 09:27 PM
Just an update on this.
I ended up applying the Sika 227 with caulking gun and then brushed down with thinners to smooth it out because the old finger dipped in thinners method didnt work too well.
It sanded pretty well with a wet 360 grit but some imperfections have shown up after high build was laid down.
Ill tidy them up and then i reckon it will come up okay with colour.
It is pretty fiddly and messy because that sealant is so damned sticky.
#18
_LH4ME_
_LH4ME_
-
- Guests
Posted 15 November 2020 - 09:33 PM
Some photos of the imperfections. They werent too obvious before the high build
Attached Files
-
B946144B-A6A7-46B3-817B-2E4785FE11B1.jpeg 251.83K
4 downloads
-
AE8277E3-BB9D-47CC-8226-88A87C3E51CF.jpeg 104.04K
3 downloads
-
75A2C86B-D747-481F-9B3F-7EDEBFF4DB73.jpeg 139.47K
3 downloads
#19
_LH4ME_
_LH4ME_
-
- Guests
Posted 22 November 2020 - 03:38 PM
Just want to do another update for those of you thinking of doing this mod.
Sanded the imperfections and hit it again with hi build. Its come up good this time.
In conclusion, the Sika 227 seam sealer has worked well. It is a bit messy so you will need thinners when applying to smooth and clean up on the run.
It sands okay - not quickly, but dont leave too much excess if possible.
It sets quickly without sagging and You can paint over it without a problem.
Attached Files
-
08C622D1-7D72-41E8-9909-95352327BFBA.jpeg 149.22K
3 downloads
-
43CF23E7-863F-4719-9B6E-3B6ED99C8C32.jpeg 144.66K
3 downloads
-
041D4974-E3BC-49C5-964A-482960D5637C.jpeg 154.1K
3 downloads
#20
jeffblanco
-

- Members
-
- 344 posts
Forum Fan
- Name:Mando
- Location:Adelaide
- Car:LX Hatch
- Joined: 29-October 16
Posted 24 November 2020 - 09:18 PM
Hi Guy's,
this is what my engine bay looks like.
Not smoothed over completely but tidied up.
Painter should start in about a weeks time.
DSCN0560.jpg 100.62K
4 downloads
DSCN0563.jpg 111.29K
4 downloads
DSCN0562.jpg 69.25K
2 downloads
DSCN0561.jpg 136.89K
3 downloads
Regards Mando.


0 user(s) are reading this topic
0 members, 0 guests, 0 anonymous users

