


Article description: Front Brakes by Rory
Category: Brakes, Wheels and Tyres
Date added: Jun 27 2009, 08:46 PM
Article starter: enderwigginau
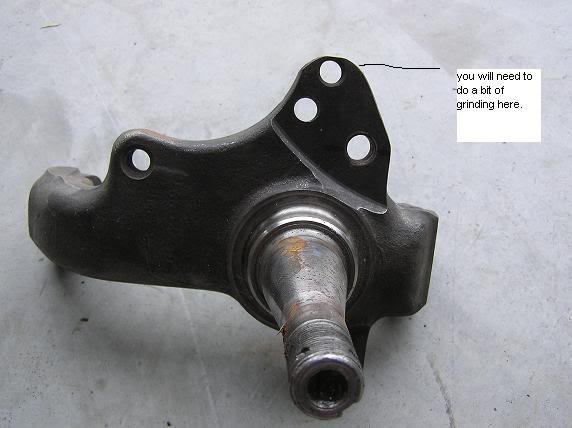
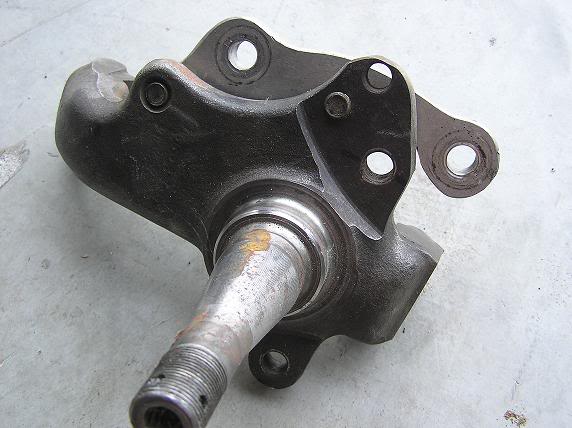
OK..The first thing you need is a set of HQ style stub axles. HX one tonner are better as they are heat treated and are the same as A9X, you can see the heat treat blue lines quite clearly half way along the stub. You will need to do a bit of grinding on the shoulder to help clear the caliper.
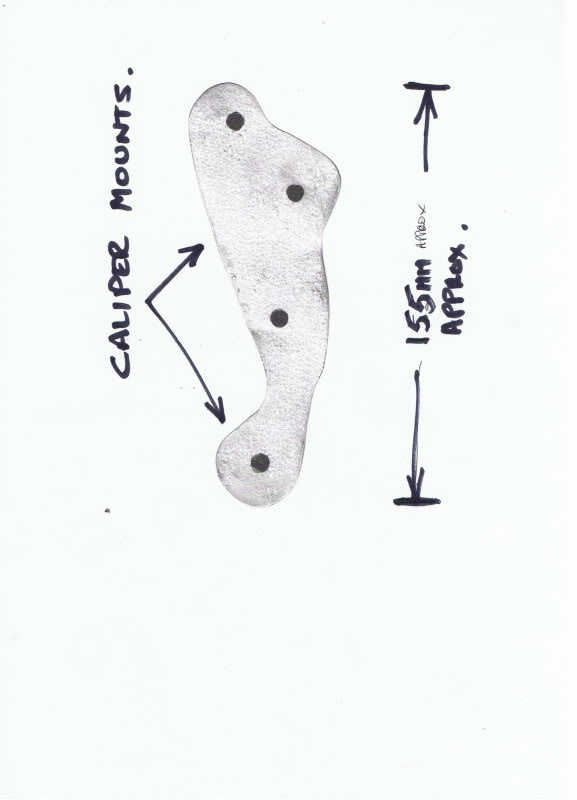
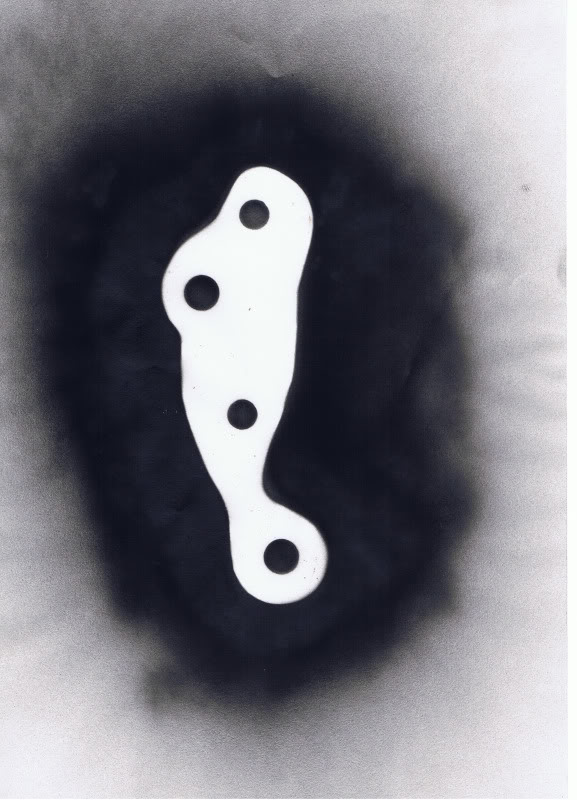
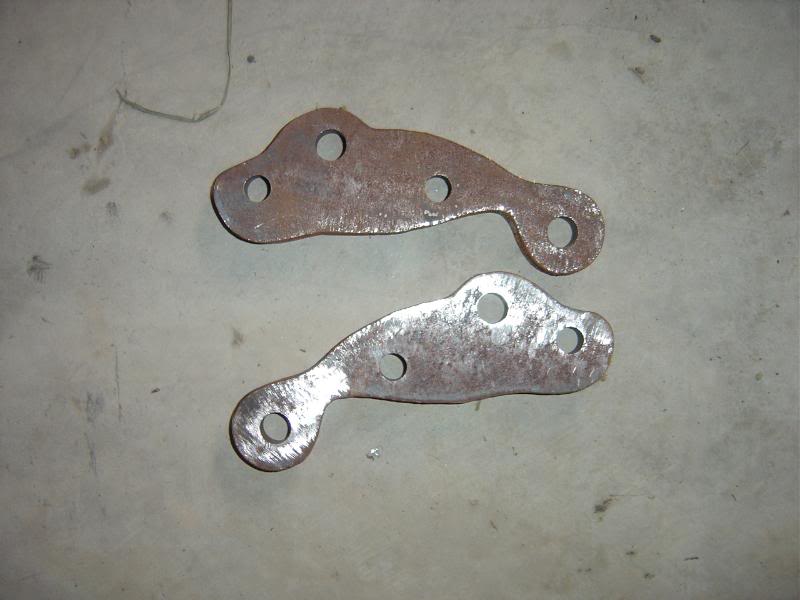
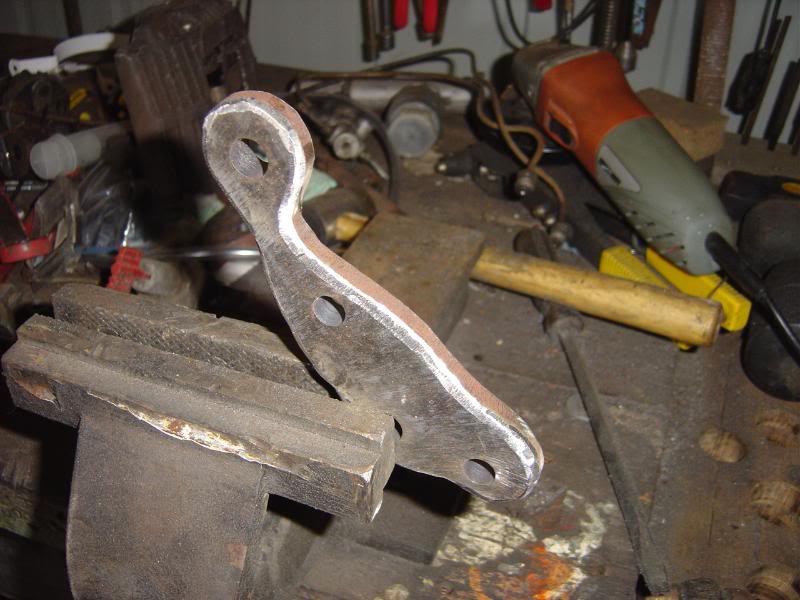
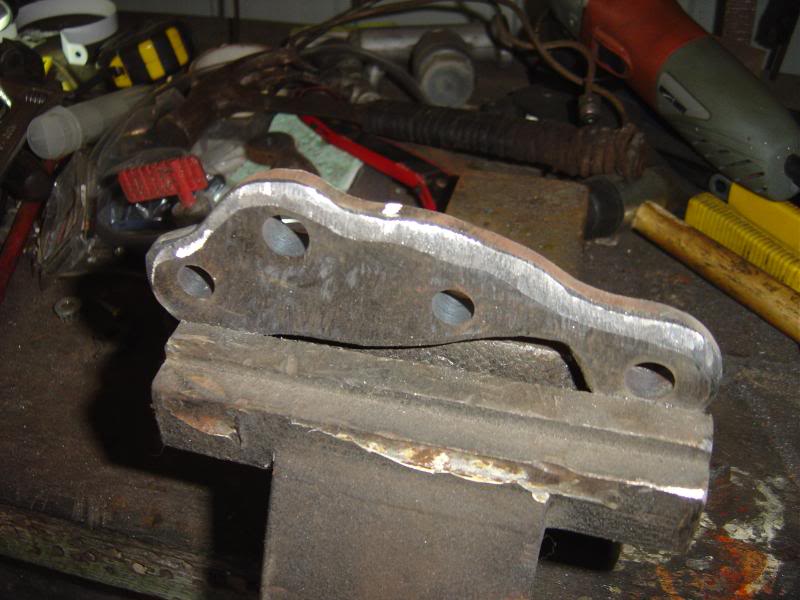
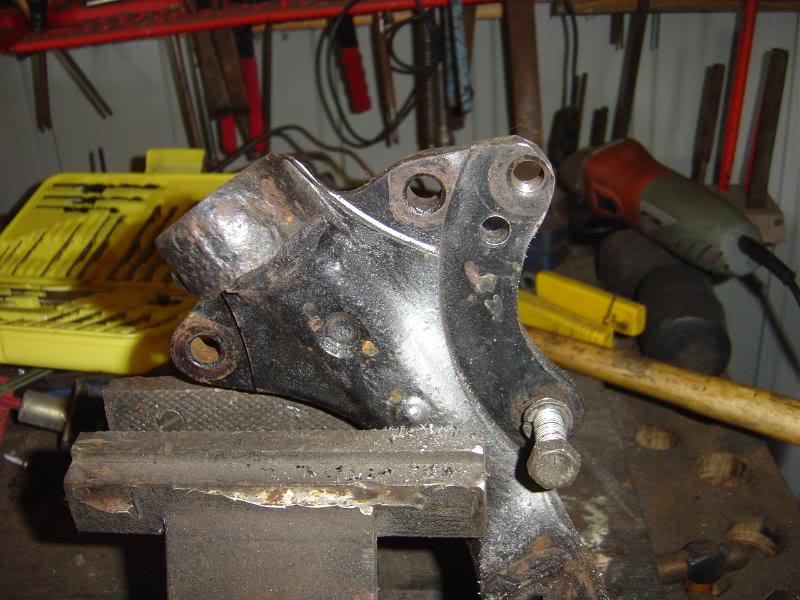
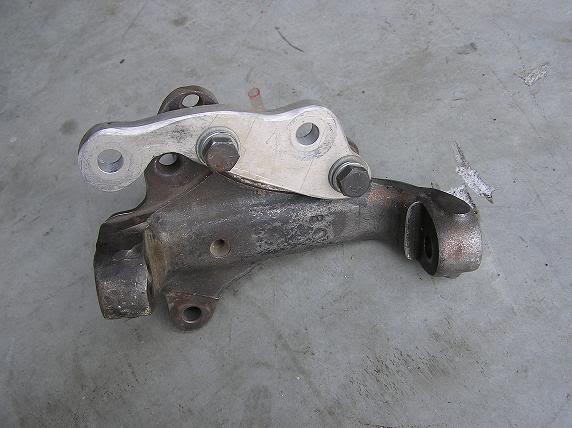
Next are the brackets, I uploaded the template to Photobucket but cant get them to print at the right size. If you enlarge them on a photocopier to about the measurements you will have the template. Someone might know how to get them out of Photobucket at A4 size. Or email me and I will fax it to you.The brackets need to be 1/2" in thickness, I got a machine cutter to knock them out for me.. The holes are easy to work out. Start in the top about the middle of the meaty piece, then measure down the exact distance as the mounting holes for the stubs and the caliper. Just centralise the holes in the middle of the bracket as you see them. Do the caliper mounts from the bottom of the dogleg back up, that way you cant be too wrong.I beveled them off on the top edges, it will become apparent as we move on. Rocket did his in alloy plate and I tried that but they bent so I now use steel plate. Look at the template and the pics..the 3 holes are basically in a line.
Here is a more accurate bracket template.
Email me and I will fax it. Or blow it up until you get 155mm total length.
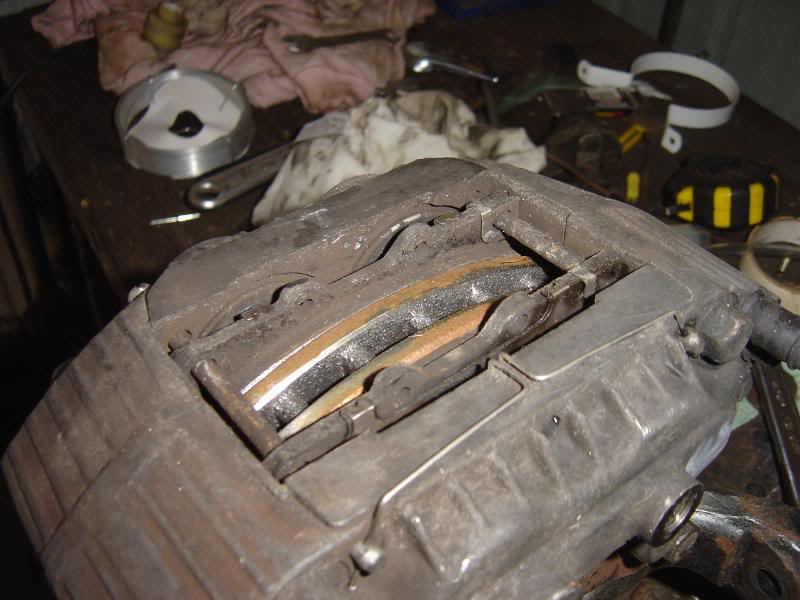
Next are the calipers.
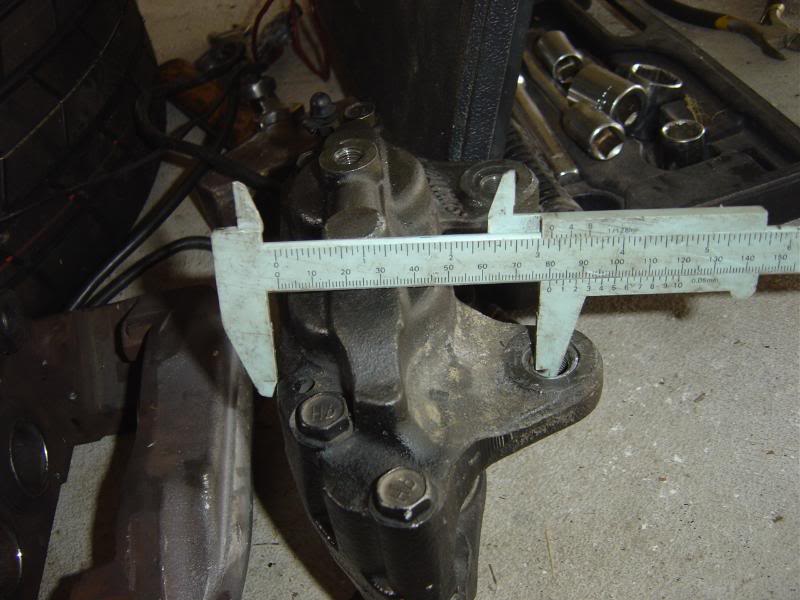
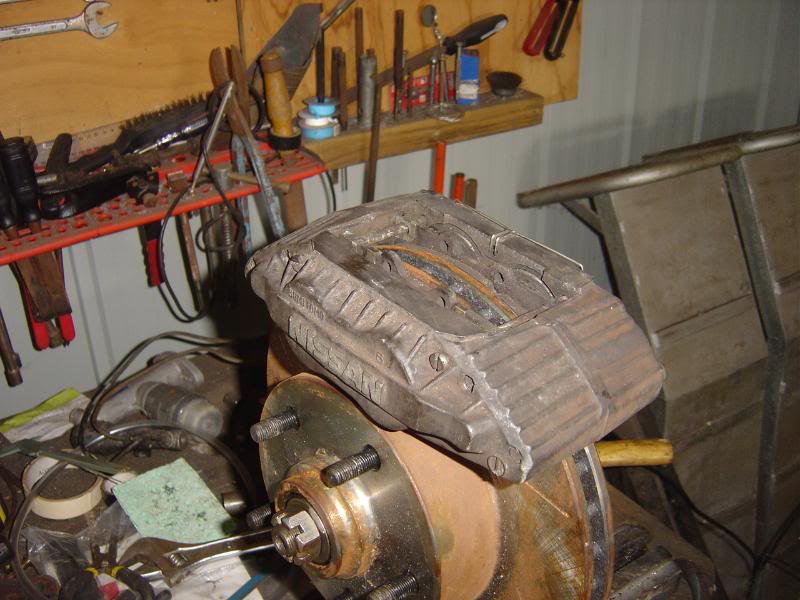
Early R32 GTR Skyline, any R32 GTS or GTS-T or 300ZX are all the same. Be careful as there are too different sizes in the mounts. You need 80mm measured like the pic...not 90mm mounts.
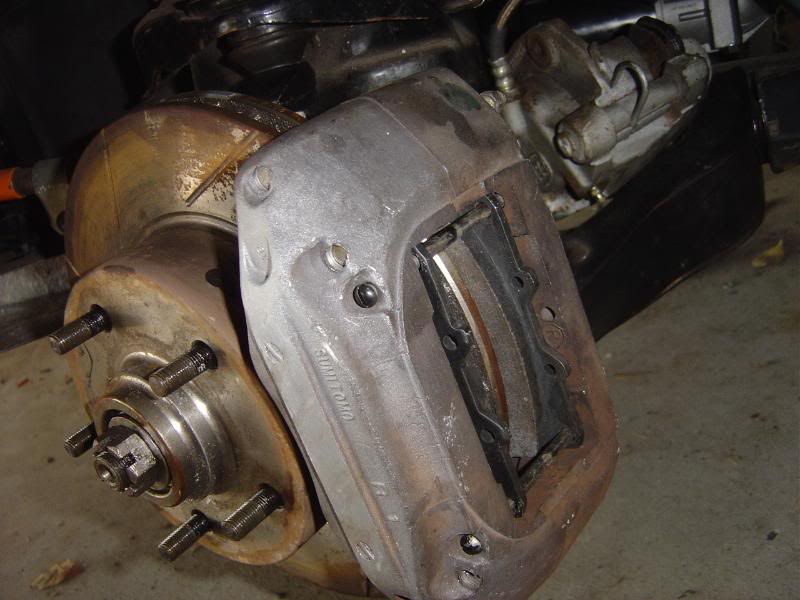
If you try to fit the others you will be missing half the disc with the pad and probably wont get 15" wheels on. They will look like this:
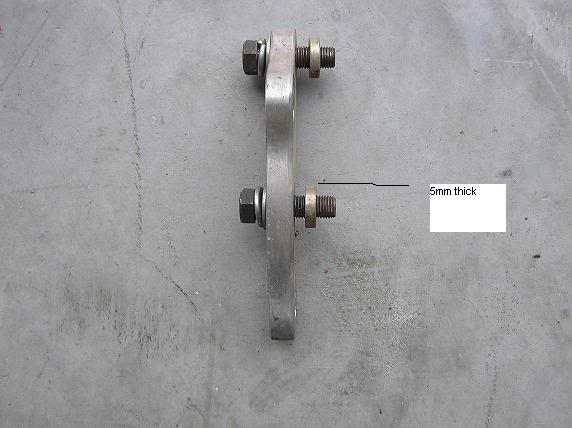
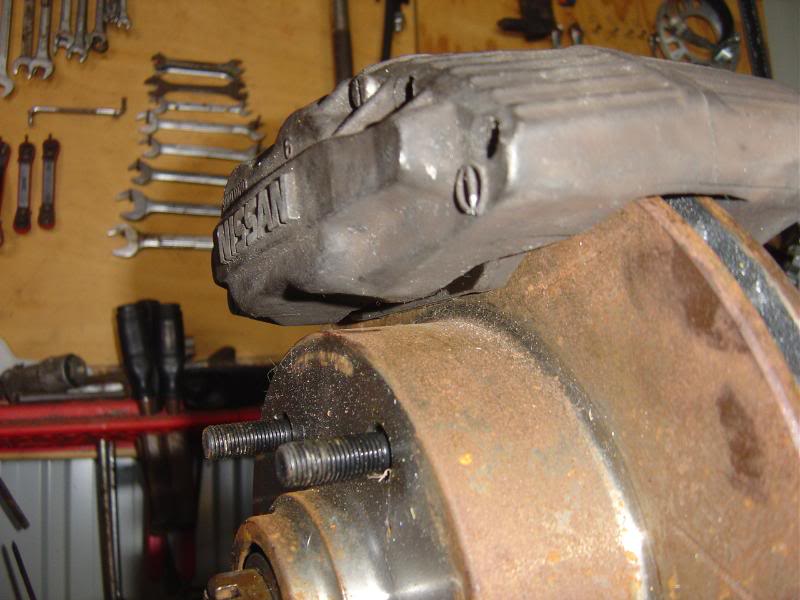
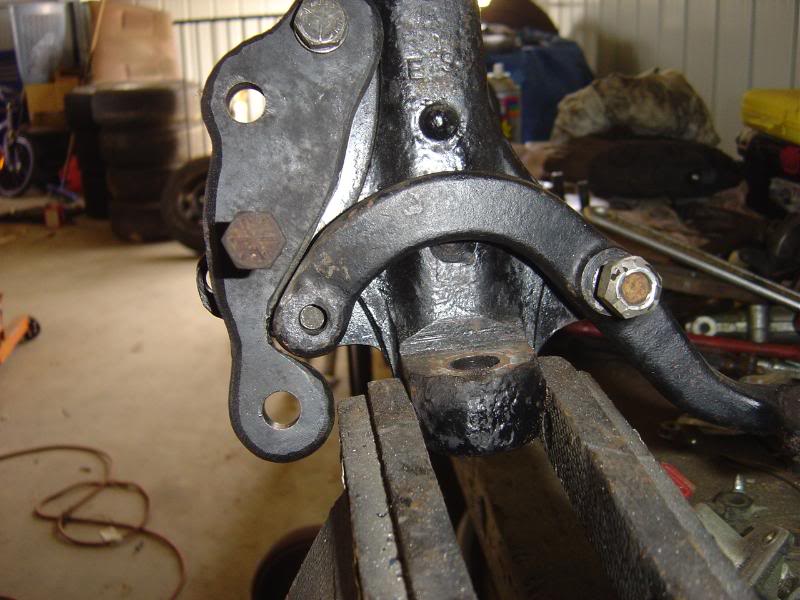
Now fit the disc to the stub. Then the bracket. You will need a 5MM spacer as in the pic:
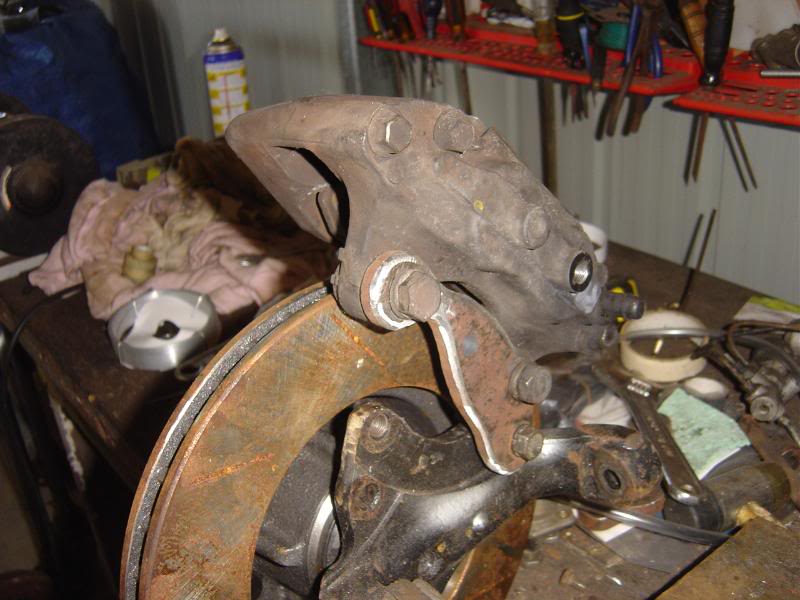
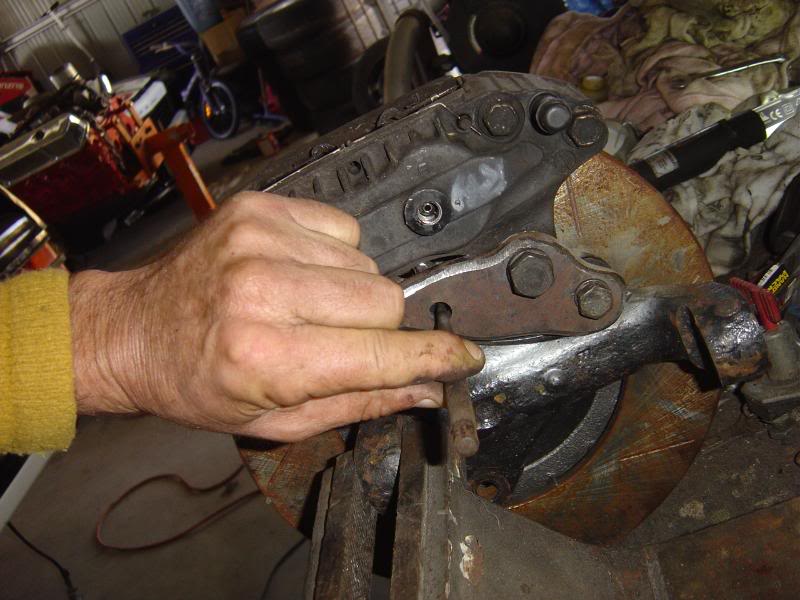
Next bolt the caliper onto the bracket using the top bolt hole., its the only one there anyway:
What you are going to do now is swing the caliper down until the pads are even around the top of the disc. On the outside you can check the pads are sitting in the meat of the disc.The 5MM spacer basically centralises them on the rotor. Dont sit them right down as they will touch the caliper, look under the outside and get the edge of thepad in the bite part of the rotor, this will give you clearence off the rotor. If not sure, spin it to make sure it doesnt touch but if the pads are sitting just down about 2mm at the top you will be right.
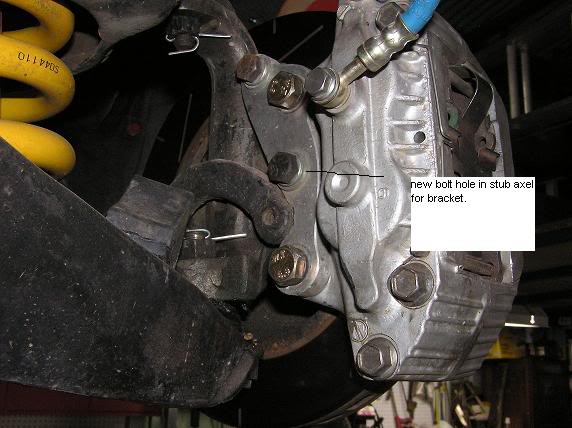
When thats in place you need to mark when to drill and tap the bottom mount bolt on the stub arm. Centre punch where you are going to drill.
Remove the rotor and caliper with bracket. Drill the hole. Tap says to use 9.9mm drill. Tap is 7/16 20UNF. Tap the thread.
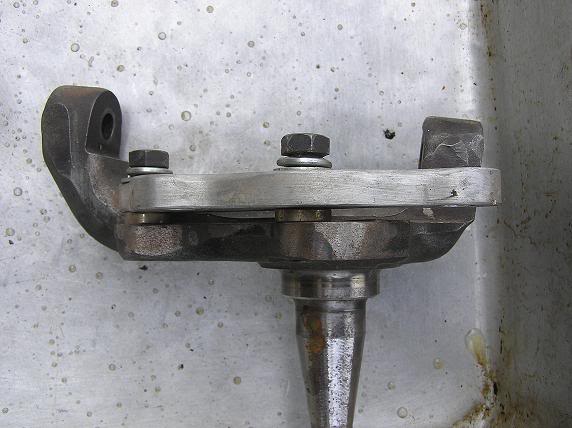
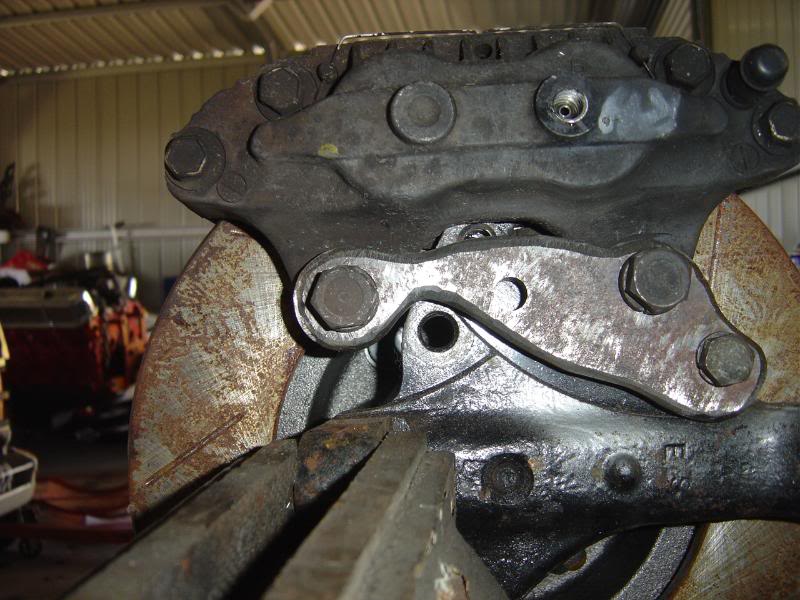
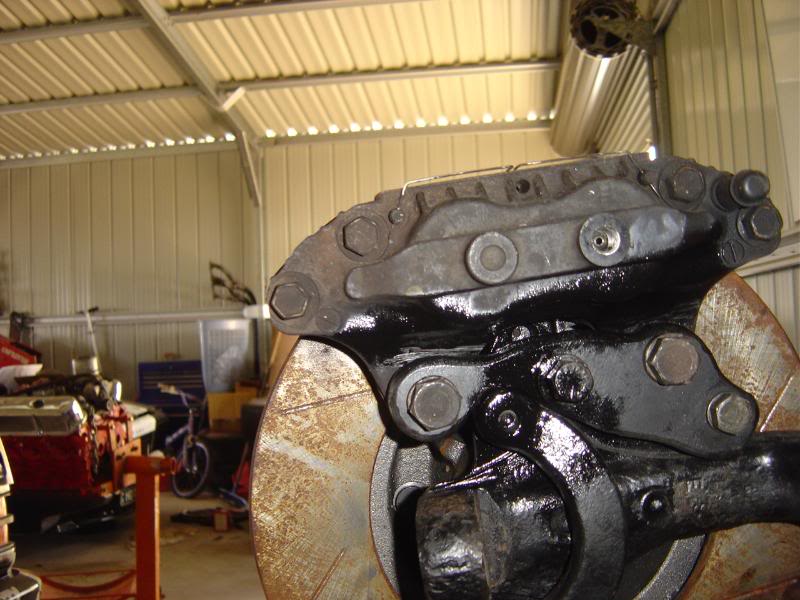
Next trial fit the bracket back on the stub with the steering arm. I usually have to grind a bit off the back of the arm and a bit more out of the bracket to get the arm to sit in nicely.
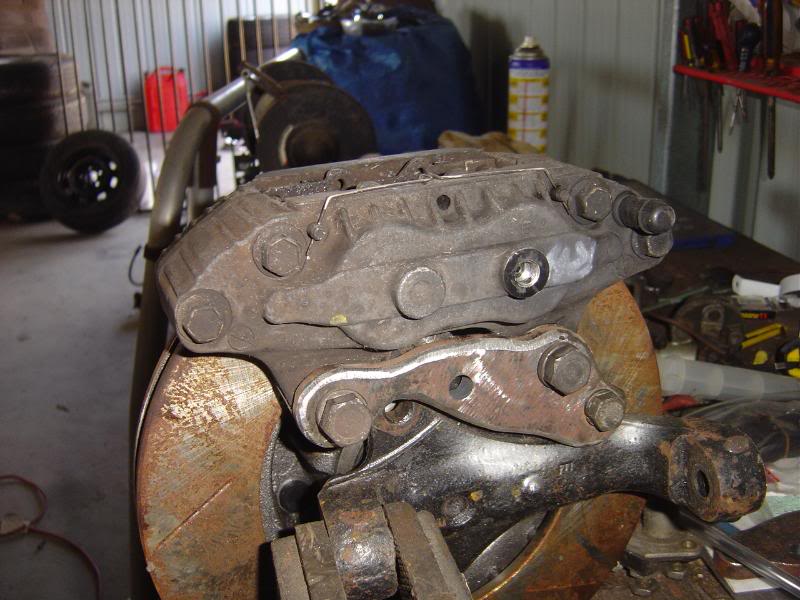
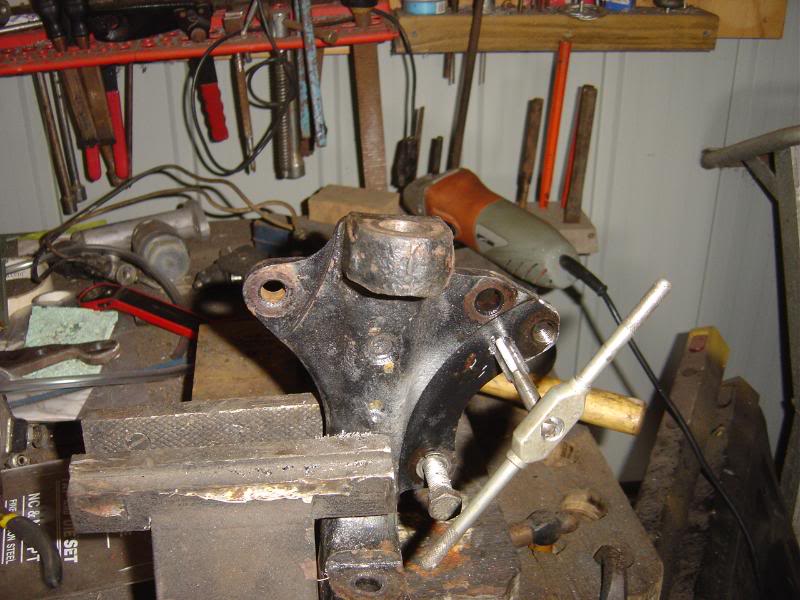
Re-fit the caliper. Now you see why we bevelled the inside edge of the bracket, it needs to clear the curve mount of the caliper so it can sit flat and hard up on the mount, you can also grind a small amount off the caliper to make sure it sits flat.
Tighten everything up, if you have done it right the pads will be sitting as they were in your trial run at the beginning.
Do the other side. Finished.
R


VIEW ARTICLE
Nissan 4-spot Calipers On Lh/x/uc


