Hope the fitting on the end of the master cylinder doesnt become an annoying vibration.
Brilliant work however.


Lotsa Posts!


Posted 24 December 2018 - 06:34 AM
Hope the fitting on the end of the master cylinder doesnt become an annoying vibration.
Brilliant work however.
Forum Fan

Posted 24 December 2018 - 07:30 AM
Nice work! Some day they will invent brake fluid that doesn't ruin paint.  I have the Mal Wood clutch set up. It also places the pedal further left than the original. The reservoir is mounted next to the brake master.
 DSC_0393.jpg 76.35K
18 downloads
DSC_0393.jpg 76.35K
18 downloads
Posted 24 December 2018 - 08:54 AM
Hope the fitting on the end of the master cylinder doesnt become an annoying vibration.
Against the firewall you mean? It doesn't move, everything is rigidly mounted.
Nice work! Some day they will invent brake fluid that doesn't ruin paint.
Thanks, Silicon based brake fluid is somewhat paint safe but it has other problems.
Posted 04 February 2019 - 06:10 AM
Well the clutch has been really good so far, you have to be aware of the engagement point but otherwise you'd think it was just a standard unit. It definitely has a lot better holding power, it doesn't slip unless you want it to.
Did an 800km day trip last weekend with four people in the car, performed flawlessly and got somewhere around 12.5-13L/100km fuel economy.
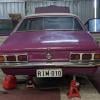
Had a run on the drag strip a few weeks ago, couldn't seem to get a good launch and was just spinning the tyres all through first gear with 2.0+ second 60 foot times for low 13 second passes. Tried again Saturday just gone and got more adventurous with lower tyre pressure, longer burnouts and trying to be a bit less aggressive on the launches (it will still spin them if you get carried away). That along with a really good track dropped the 60 foot into the 1.7s for the first time, ran a few 12.9s at 105-107mph. Yeah it could be faster if I set it up but pretty happy with that for a stiff suspension manual street car, daily driver.

(Photo credit - Prawnographic Media)
Lotsa Posts!

Posted 04 February 2019 - 07:24 AM
I like cars.

 View Garage
Posted 04 February 2019 - 01:26 PM
DON'T PANIC
 View Garage
Posted 13 February 2019 - 04:56 PM
Posted 16 February 2019 - 11:26 AM
So the car never had a radio antenna and like many I'm not too keen on cutting holes in the roof or guards to install one. I got one of those shark-fin-type powered ones and put it inside, but it never really worked too well when moving, which kind of defeats the point.
Then I had a thought, with the XA side mirrors there is a fair bit of empty space in there. So I pulled the antenna apart and threw away the bulky parts, soldered on an earth wire and covered the lot in hot glue. It now resides in the driver side mirror housing.

Reception probably still isn't quite as good as a proper aerial but it works in most areas.
Forum Member

Posted 26 February 2019 - 05:04 PM
Great idea! But did you fit some sort of a warning, like...."songs in the mirror are louder than they appear"? 
I read just recently on one of the Facebook Torana pages that a couple of blokes had fitted the aerial lengthways up under the dash pad. It was extended behind, up, under and over stuff and was cable tied but the consensus was it worked well! Just a thought if you get sick of the sound of static!!
Lotsa Posts!
Posted 27 February 2019 - 10:16 AM
I used to use a single strand of phone wire tucked away in the windscreen rubber for an aerial.
Worked brilliantly.
Pretty much invisible.
Only a small length could be seen from the top of the dash to the rubber.
20mm or so.
Had to be really looking to see that small piece.
Posted 12 March 2019 - 04:25 PM
Oops.


Looks like I will be changing to dual valve springs sooner than anticipated.
Forum Fixture

Posted 12 March 2019 - 09:20 PM
That's not nice!!!
After have some trouble with run-o-the-mill valve springs and later building an engine with a solid roller and having a good friend want to use Isky springs on it, after getting over the price shock at the time, I've used them ever since. The lesser spec Green Stripe springs put up a hell of a fight and I've never had a spot of trouble and they are still in the engine many years later.
At the very least go with a top shelf spring manufacturer, they are cheap compared to a dropped valve.
Have a friend that has not long done a major rebuild on a 496BBC that had a failed Comp Cams spring and dropped a valve, even managed to bend a H beam rod in the process, and it was barely above idle when it let go.
Isky or Pac would be where I'd start looking.
Forum Fixture
 View Garage
Posted 12 March 2019 - 09:43 PM
Posted 13 March 2019 - 05:22 AM
Damage was limited to the spring and valve stem seal so not too bad in that respect. I checked everything properly when assembled, exhaust valve lift is only just within the limits of the spring spec (0.550" with 1.65 rocker) but there's nearly 0.100" before bind. They've done around 7,000km with plenty of abuse, I think I just need something a little better which is the next step.
Its all part of the fun, isn't it?
Forum Fixture
Posted 13 March 2019 - 09:55 PM
Raised retainer set? If you need some more room.
Posted 14 March 2019 - 07:00 AM
No issues with installed height as it sits, everything is right for seat and open pressure as well as clearance. Admittedly they weren't particularly expensive springs and I originally had a less aggressive hydraulic cam but that was underwhelming and got swapped out. I've also been thinking about raising the 6300 rev limit a little as I keep hitting it accidentally, even on the street... :-D
New springs and retainers on the way, will need to remove the heads (yay) for machining and start again with the geometry, will use some seat locators.
Posted 15 July 2019 - 02:55 PM
OK small update but at least its moving forward again.
Some of the valve tips were looking a bit ordinary especially where someone appears to have got carried away bevelling the edges. I bought the heads with the valves many years ago and haven't really touched them. So I figured I may as well replace the valves while I was at it and bought some new ones.. only to discover the old ones had 5 thou oversize stems, apparently an old Yella Terra trick to avoid replacing guides. Which meant k-lining the guides, which meant re-cutting the valve seats. Finally some very cautious tidying up of the chambers around the freshly cut seats and I was eventually back to square one!
Cut the spring seats to 1.550" and the guides to 0.500":

Used an internal locator seat 0.060" thick and some nice small diameter stem seals:

Locks are -0.050" to give me 1.750" installed height so I have the option to change to 1.800" easily in future and can run a reasonable diameter spring with these seats too.
Heavy-duty cycle in the kitchen-based parts washer (CRC immediately afterwards to prevent rust) to get rid of the last of the swarf and ready for assembly.

Forum Fixture
View Garage
Posted 15 July 2019 - 05:57 PM
Posted 15 July 2019 - 06:24 PM
Yeah calling them a seal is a bit of a misnomer, they are supposed to let a certain amount of oil past into the guide and they appear to do so from my observations, although perhaps not quite as much as the standard o-ring. A snug fitting guide helps reduce oil consumption so hopefully they are better than ever. Having said that most of my engines tend not to do a huge number of miles before rebuild anyway, I get itchy feet and have to keep making changes!
Valve seats are not as nice as I'd hoped but still better than the old ones, three angles and I've blended them both sides. Chambers have been tidied up a little, mainly in an attempt to un-shroud the valves, but minimal to avoid dropping compression. Have done a fair amount of porting work too but all that was done previously. Nothing is polished, all just rough finish from the die grinder.
No doubt there would be much better gains from simply swapping to VN heads but I'm a bit stubborn about that, doesn't look right...!
Forum Fixture
Posted 15 July 2019 - 07:20 PM
Dash 3's!
Posted 15 July 2019 - 08:28 PM
^ Yeah probably should have gone that way to begin with, maybe one day
Posted 02 August 2019 - 03:10 PM
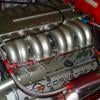
OK so its finally running again, here is one of the contributors to the delay - changing to a single serpentine belt.
First we needed some pulleys in the correct diameter and offset. Alternator was easy as it came with one, for the rest I just starting looking on Trademe for likely candidates.
Power steering pulley is from a Toyota Estima, removed the studs and bored out the centre hole to a suitable diameter for press-fit onto the Saginaw pump:

Crank pulley is from a 302 Ford, I cut and shut it to significantly reduce the offset, bored the centre hole a little larger and changed the bolt circle:

Water pump pulley is a combination of standard (long pump) pulley and VZ Commodore V6 machined down and welded together:

(I also had to add some lightening holes because it weighed more than the original, actually quite handy for aligning the bolts)
Added two 70mm flat idler pulleys (04-13 Statesman V6), which are mounted to/through the timing cover. Each has a three-bolt mount for strength and to allow shimming in every direction for alignment:

The main bolt for each idler also doubles as the retainer:

When you put it all together and spend many hours adjusting pulley alignment, you get this:

(Belt is a 6PK1600)
Tension adjustment is fixed, via the alternator using a custom turnbuckle:

Had it out for a quick drive this afternoon for the first time in around four months, feels good!
Forum R&D Officer
Posted 02 August 2019 - 04:34 PM
Forum Member

Posted 03 August 2019 - 08:07 AM
Nice setup, well done.
Posted 03 August 2019 - 09:31 AM
Thanks guys, will be interesting to see how the fixed tensioner goes, should be OK with short runs. If not I might have to start looking at how to mount a spring-loaded one - probably to the alternator bracket on top of the belt (hopefully not as that will make it a bit ugly).


0 members, 0 guests, 0 anonymous users

