Edited by A9XOSS, 07 November 2010 - 07:32 PM.
UCANG is back after 2 years
#26 _A9XOSS_
Posted 07 November 2010 - 07:31 PM
#27
Posted 07 November 2010 - 08:00 PM
i'm just happy its sorta straight now!
#28
Posted 08 November 2010 - 09:57 PM
Good to see you bought a house in the better part of town!!
Will be keeping an eye on your project as well.
Cheers
Damo
#29 _mick74lh_
Posted 09 November 2010 - 02:28 PM
#30 _jameslx_
Posted 09 November 2010 - 03:58 PM
#31
Posted 29 March 2011 - 09:25 AM
Tribute to my first car
#32
Posted 29 March 2011 - 11:23 AM
Seems hard to find whole cars here in S.A.
Gotta grab them when you see them.
#33
Posted 29 March 2011 - 11:31 AM
If you do, they usually ask for alot too.
Not bad for $650
#34
Posted 29 March 2011 - 11:49 AM
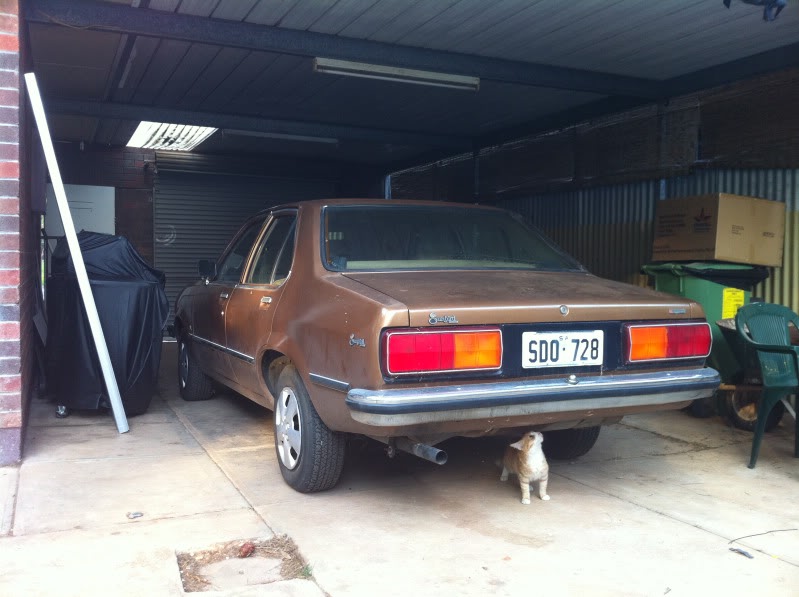
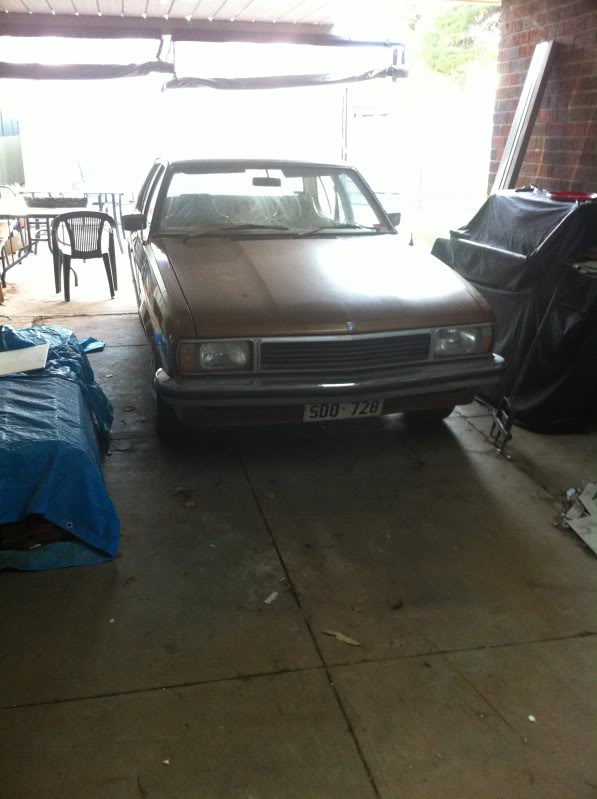
Thought i'd post up my new addition:
Tribute to my first car
My mate had a 79 UC SL like your old one back in 1998/2000 very tidy and shiny but just had standard wheels. Sadly while in the wet and not watching where he was going smashed it into a parked trailer got airborne and landed in the back of a parked station wagon. I was a passenger and while it was a hard hit we were ok. Used to have some great road trips in it however it was not fixable and was written off.
#35
Posted 29 March 2011 - 12:04 PM
Everyone has stories whether they are good or bad about their old or current Toranas. Definitely become part of our lives.
#36
Posted 29 March 2011 - 12:14 PM
Hows the hatch going? are you going to fit a LX front to it?
#37
Posted 29 March 2011 - 12:19 PM
It was a great old car 150000 genuine klms payed $2000 and after written off he got $700 for it. It musta left a impression on me how good torries are thou as i went out and bought the one i have now.
Hows the hatch going? are you going to fit a LX front to it?
The hatch is going okay. Still working on the positioning of the LHS chassis rail, I need to get that perfect, otherwise the rear bumper bar will be sitting crooked. I'll get there eventually. I need to somehow fabricate the boot floor (but the section that curves up to the back of the taillights - where the holes from the bumper bar bolts are)
ATM, i'm not going for the LX front. Mainly because I am a fan of UC's (obviously) and I don't want the car to be a mockup. Just 'improved' at the back. That and I don't want a LX hatch with a UC interior haha.
#38
Posted 29 March 2011 - 08:08 PM
The LX back end improves the UC 100%
I have had 3 UC and they have all looked crap from the back but apart from that the have all been good cars.
Current one has 253 and tri-matic but is only a roughie for the dirt roads out where i live.
#39
Posted 10 April 2011 - 05:29 PM
After months of pondering, trial fitting, removing the bumper bar off and on about 30 times I have found the correct position for the LHS chassis rail. It's welded on now, and with the bumper bar on it looks nice and straight and in line. Now the ball can start rolling. I haven't taken a pic as it looks near to no difference to the last pic of the back of the car.
Next stage is cleaning up any cancer behind the beaver panel skin, fix the RHS chassis rail rust, re fabricating a new boot floor (and the curvature that sits under the inside of the taillight, and put on the beaver panel I have just recently purchased.
Cheers
#40
Posted 12 June 2011 - 06:45 PM
Chassis rail welded into position! After many a adjustments, etc... But it still moves a little bit because its not spot welded to the boot floor! So I decided to make one
ive spend 2 days of this 3 day weekend working on the boot floor
This is the main flat part, drilling holes for the plug welding
after plug welding it into place (man I hate plug welding!)
My sikaflex went off! so I smeared it in rust converter and tomorrow hopefully get some sikaflex and wipe the joins etc
I will use this side of the boot floor to mount my battery later on.
this was the most trickiest part. Unfortunately I dont have the right machinery (no swages, rollers, english wheels, hydrilic hammer thing etc) so I made the back curvature part in 3 sections, and it was a welding marathon. Came out pretty cool I reckon!
I started making the lower hatch corner, (once again I only have my hand made pan brake!)
but im going to buy a replacement panel off ebay instead haha!
#41
Posted 16 July 2011 - 05:26 PM
after a bit of cleaning and welding in a small patch
cut out the rusty bit of the rail - also this is the other side of the patch I did.
Looking a bit tired
filling in some gaps
rail all welded in
removing some paint and assessing rust damage
cut out - new piece from donor to go in later on
removed black paint from the new panel, cleaned it up and etched.
drivers side rail repairs rust converted
KBS'ed backside of new beaver panel
welded up and grinded down all plug welds
That's all for today. Waiting for paint and rust converter to dry sucks
#42 _berro59_
Posted 17 July 2011 - 10:47 AM
kill that rust!
#43
Posted 17 July 2011 - 06:03 PM
done some more today
KBSed the whole inner beaver panel
trimmed and tacked on the beaver panel
filled in some gaps (that came from removing holes when I got the rear panel)
Now for some advice:
I want to weld the skin that connects the bottom of the beaver panel to the underside of the boot floor, but I was unsure as to what way I should install it.
should I
1. cut the lip off the beaver panel, plug weld the skin to the bottom of the boot floor and run a weld across where the beaver and the other panel meet (so it's like 1 piece)
2. drill holes at the top and bottom of the skin and plug weld it to the boot floor and beaver panel lip
3. same as above but also run a weld after plug welding it to the beaver so it can be ground down and look like 1 piece
2 & 3 will have a bit of an overlap if i'm plug welding it to the beaver panel lip.
Just so you know what I mean
underneath bottom of the beaver panel (notice the lip)
the original skin to be welded back to the underside of the boot floor
Cheers!
#44
Posted 23 July 2011 - 02:45 PM
cut out the part that connected the tail light bucket to the quarter panel
and made a new peice and rewelded it (before it was in 2 pieces)
#45
Posted 08 August 2011 - 05:12 PM
Looks like it rusted due to the overlap from a previous repair?
another view of what I mean. There is a big flap just sitting there.. talk about trap much?
Drilling holes to plug weld the wheel arch to the inner panel
grounded down plug welds
grinding away at that flap
this is welding the quarter panel to the body (where the vent sits)
starting removing seats and carpet.. this is how my passenger floor pan looks - not bad
after close inspection, its some sort of plastic thing that was stuck to it, with the underlay over that. I checked underneath the car and there wasnt any rust. I wonder if it was an option in factory?
bit rusty on the inside where they made a half a mile overlap - ive pretty much cut it all out
I'll do more tomorrow. I have got 2 weeks off work, finally get stuck into her more
#46
Posted 09 August 2011 - 05:05 PM
Chopped the old and made some new (skin number one)
from inside the car, skin number 2 is welded in, and grounded down
view from outside the car, inside the sill panel
I made my new sill panels up, they are rust converted as well as all that above ^ - just waiting for it to dry
(excuse the burryness)
was unhappy with the tail light bucket and how little steel was left in there due to removing the rust and bog. so I cut the passenger bucket out, and attached some new metal
the bucket tacked back in, and then welded around the guard
much happier with the tail light in its position now. Not sticking too far in, or out.
It's all welded in and grounded down. Looking good, i did take a pic of it, but the pic was too blurry - ah well
That's all for today - I got a ball of spatter land on my thumb - looks a little eye ball in my flesh!haha
#47
Posted 10 August 2011 - 04:43 PM
Bent up the top part of the sill and welded it in
bit of primer after rust converter
remade this part, the old one was rusted + mangled
and a view of the quarter wrap around part.
Edited by UCANG, 10 August 2011 - 04:44 PM.
#48
Posted 16 August 2011 - 05:02 PM
I did it so the end of the hatch lined up better with the top of the rear panel
Something I avoided doing for as long as I could, and that was removing the old paint. Oh well, now is as good as time as any
3/4 through the other rear quarter panel
In the little fiddly areas
rewelded the lower quarter in on the passenger side
started welding in my hand made sill panel, but welding gas ran out!
As you can see, all the metal looks grey/ dark grey - that's because I drench it in rust converter until I get to the stage where I can just sand it all smooth and shoot some 2k etch over it. It preserves the metal pretty good I reckon
Edited by UCANG, 16 August 2011 - 05:05 PM.
#49 _mick74lh_
Posted 16 August 2011 - 07:12 PM
#50
Posted 08 January 2012 - 07:43 PM
removing pitting
connecting this area to the rear quarter (btw i've got a die grinder now! I can do tight corners and crevices now!)
bit of a grind down
sill pretty much done in regards to metal work
another view of this side
rust behind the front wheel
cut it out, i cleaned it up and put some R/C down (after pic)
bashed a replacement panel up
coming back to the rear, I made this part again, because the previous left too much of a gap
I forgot to take pic of grinding down etc - will come later on
Edited by UCANG, 08 January 2012 - 07:46 PM.
0 user(s) are reading this topic
0 members, 0 guests, 0 anonymous users