Jump to content


Photo

How i installed my after market front seats in LX.


  • Please log in to reply
11 replies to this topic

#1 Evan

Evan

    Forum Fixture

  • Members
  • PipPipPipPipPip
  • 1,287 posts
  • Location:Perth Western Australia
  • Joined: 14-January 06
Garage View Garage

Posted 19 June 2010 - 12:53 AM

Hey Guys.

I noticed that there are not a lot of threads on fitting after market seats into our torry's.
When i was researching this topic there was only a little info on putting seats in using the standard torana bolt holes.

Recently I put some SAAS Kombat seats into my LX hatch.
These seats are a rather aggressive seat, compared to the GT and the Vortek. Good for a person about 75 - 85 kg's. Perfect for my weight and driving conditions. All of these seats fold forward for hatch backs and are ADR Approved.
I would imagine most seats of any brand would be able to be fitted the way I have done.

I stared by getting some old Torana seat rails as I did not want to cut up my old ones as I am putting my old seats into storage for when I want to convert it back to a Sunday cruiser.
First step is to drill out the rear mounts on both seats. There are 2 pins that connect them to the rails. Once done , ditch the old rails.

The standard Torana rails are no good for the conversion. They are bowed and are hard to work with. I got some Autotechnica rails from Repco as recommended from other posts on this topic. 639F is the part number.

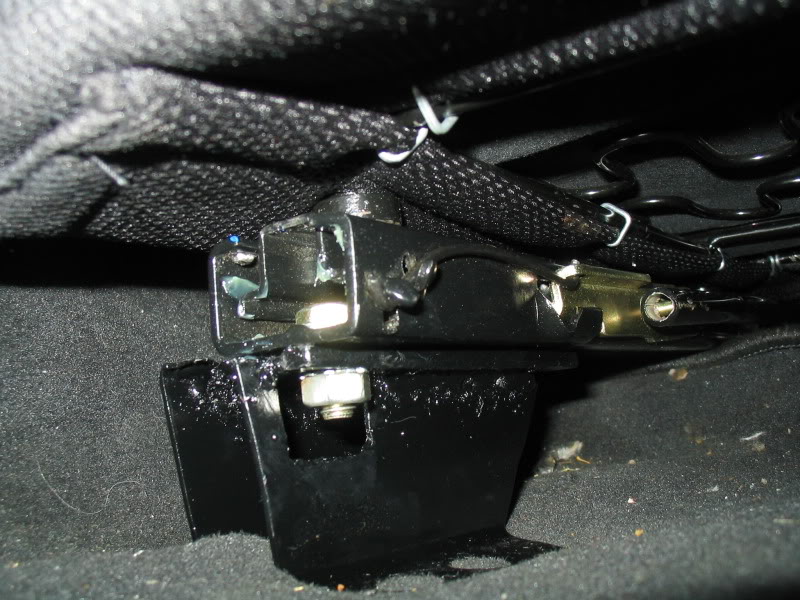
Attach the new after market rails to the seats.
I did not get how the bolts provided worked, so I used some high tensile Allan key bolts.
The kit also came with some spacer things. The instructions are very poor and I could not figure out how to use them.
The bolt holes on these were about 3mm too short, so I had to drill them slightly bigger.

See Pic.

Posted Image


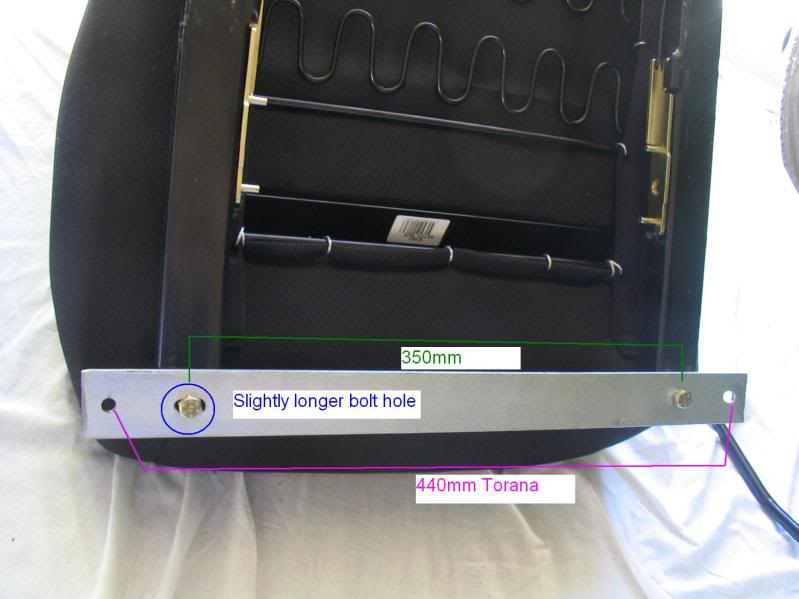
The standard front Torana bolt holes are 440 mm apart from centre to centre and the SAAS seats are 350mm.

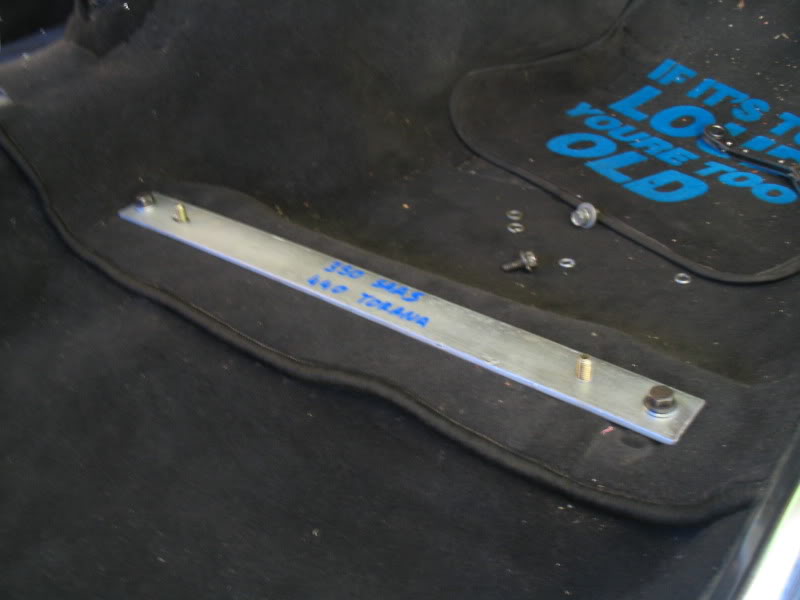
Get some flat bar. I used 50mm by 5mm and chop it just over 440mm in length. Centre it and drill holes at 440mm apart so it can bolt into the Torana bolt holes. Do the same with the 350mm SAAS width.
You have to drill one side 2 bolt holes wide for movement as you are mounting these things to carpet and it’s really hard to get them lined up perfectly.
I’m sure if you are super accurate with all your measurements you can avoid this , but im not that accurate. Make sure when you are bolting it all together you are using washers and nylock nuts or spring washers on your nuts.

See pics

Posted Image
Posted Image

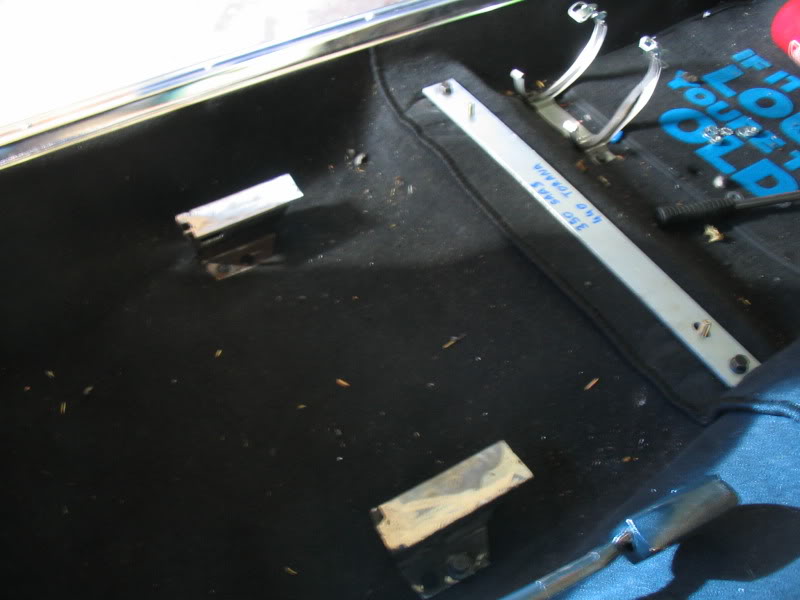
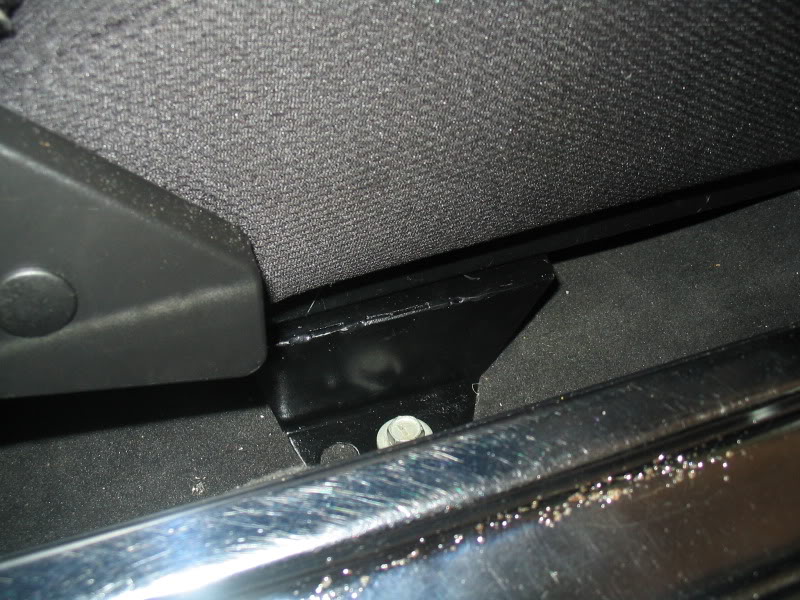
Now that the front is sorted put the old rear Torana mounts on the rear position of the floor where it used to originally sit with the old seats. Take a bolt out of the new flat bar adapter and swing it 90deg so it is level and resting against the old mount
.

See Pic.

Posted Image


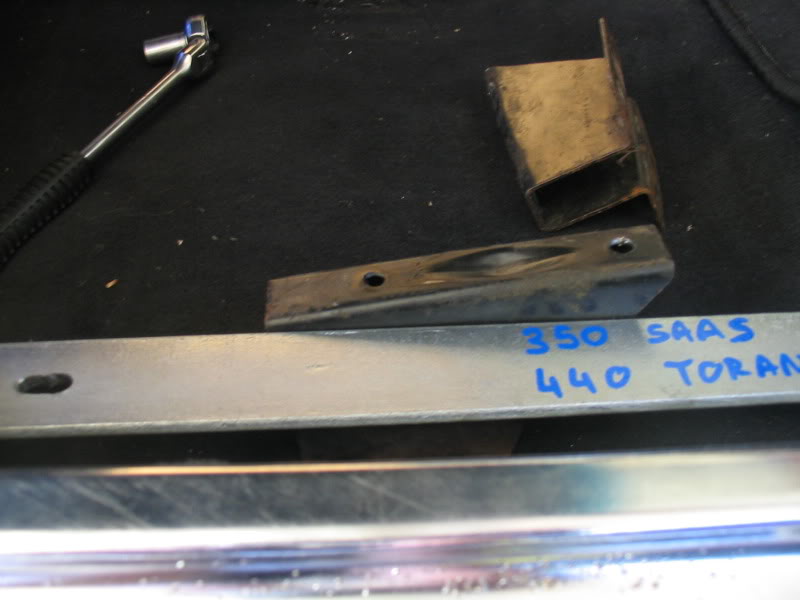
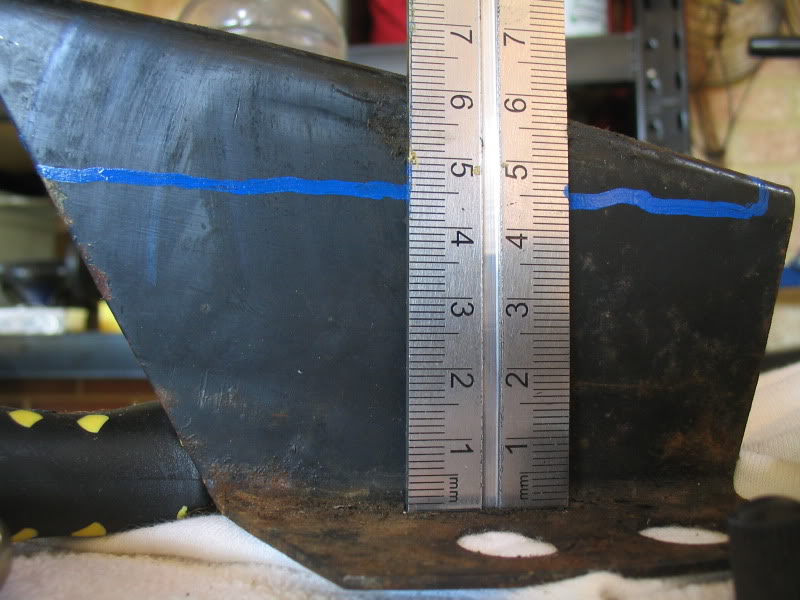
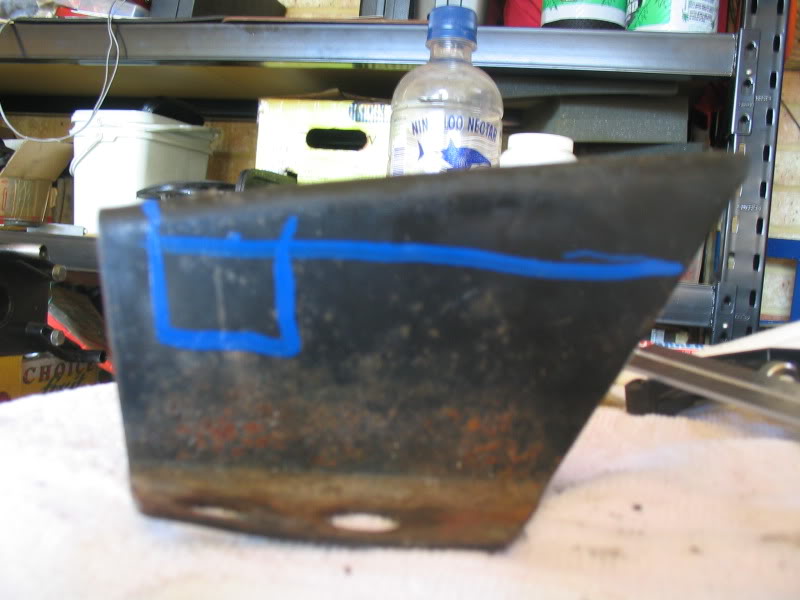
This is where you have to cut to make it level with the front mounts on the raised floor.
It is approx 45mm from the floor of the car (with carpet) Draw this line in and cut with a grinder.
See pics

Posted Image


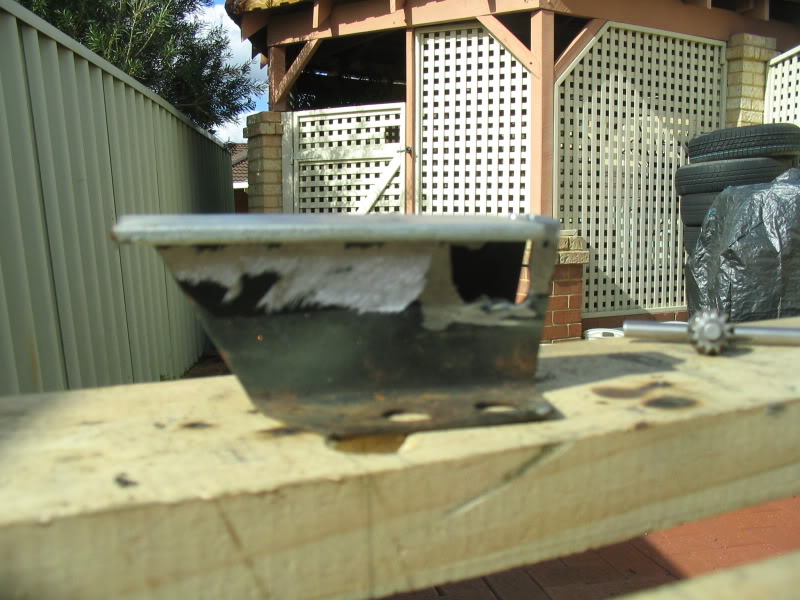
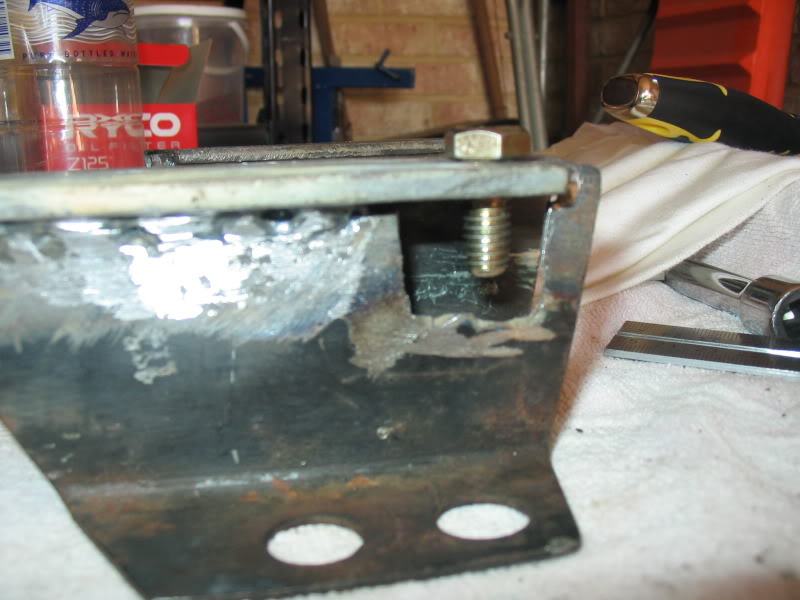
You will need to make a little box on the inside edge of both mounts so you can get a spanner in there to tighten up the bolts to the rails. You should have something like this.

See pic
Posted Image


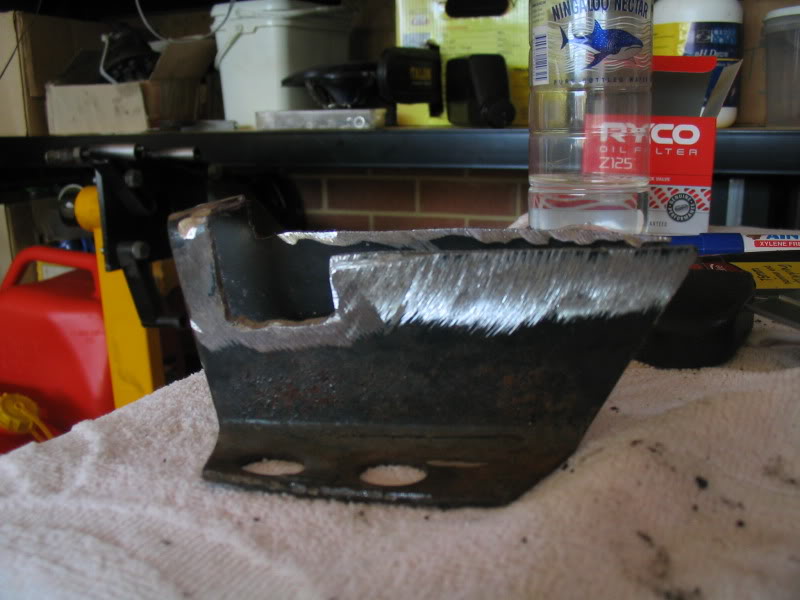
Cut it out. Make sure you clean the surfaces with the grinder that you are going to weld on as it is vital to get a good clean surface to weld on.
You will have something like this.

Posted Image

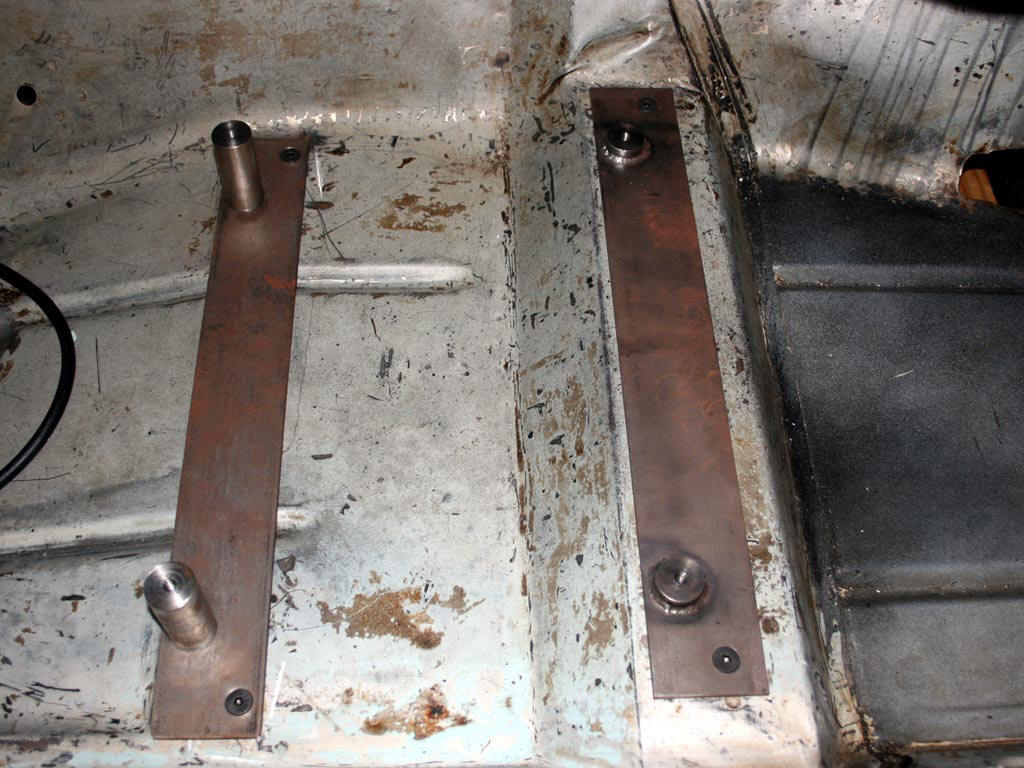
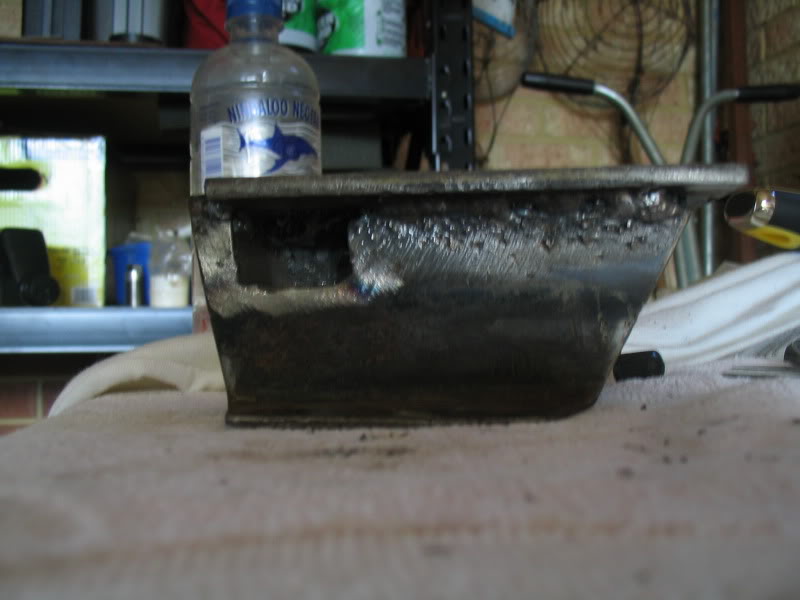
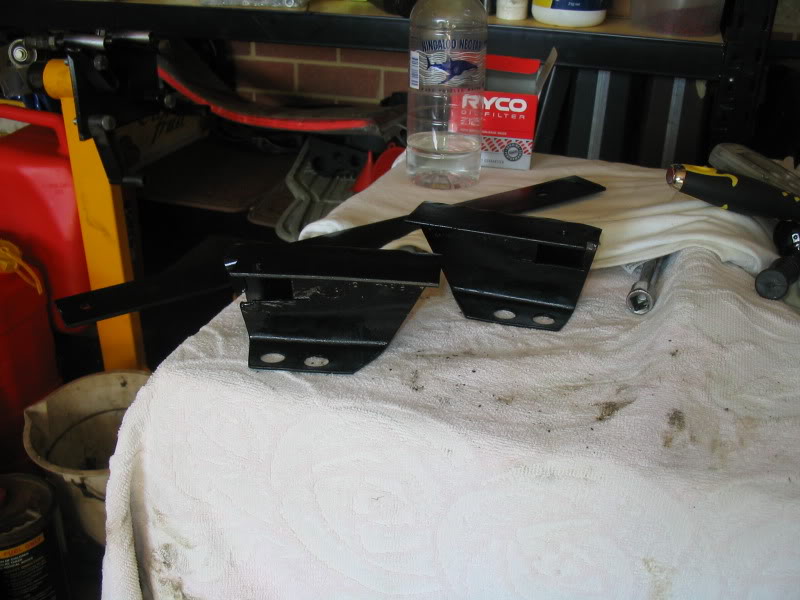
Cut some of the left over plate you used for the front mounts to the length of the mount and put it on top of the cut off area to make a flat surface to mount your new rails too. As the plate is wider than the original mount, make sure it hangs over to the inside of the seat as the SAAS bolt holes are narrower than the Torana ones.
IE: The outside edge should be flush with the vertical side of the mount and the overhang on the inside.
Make sure you are using a spirit level through this process. Tack it either side first so it doesn’t warp.

Posted Image


Weld the top plate on and you should have something like this. Clean the whole job up with a file and wire brush. (please excuse my more than average stick welding.) TIG machine on the xmas list.

Posted Image

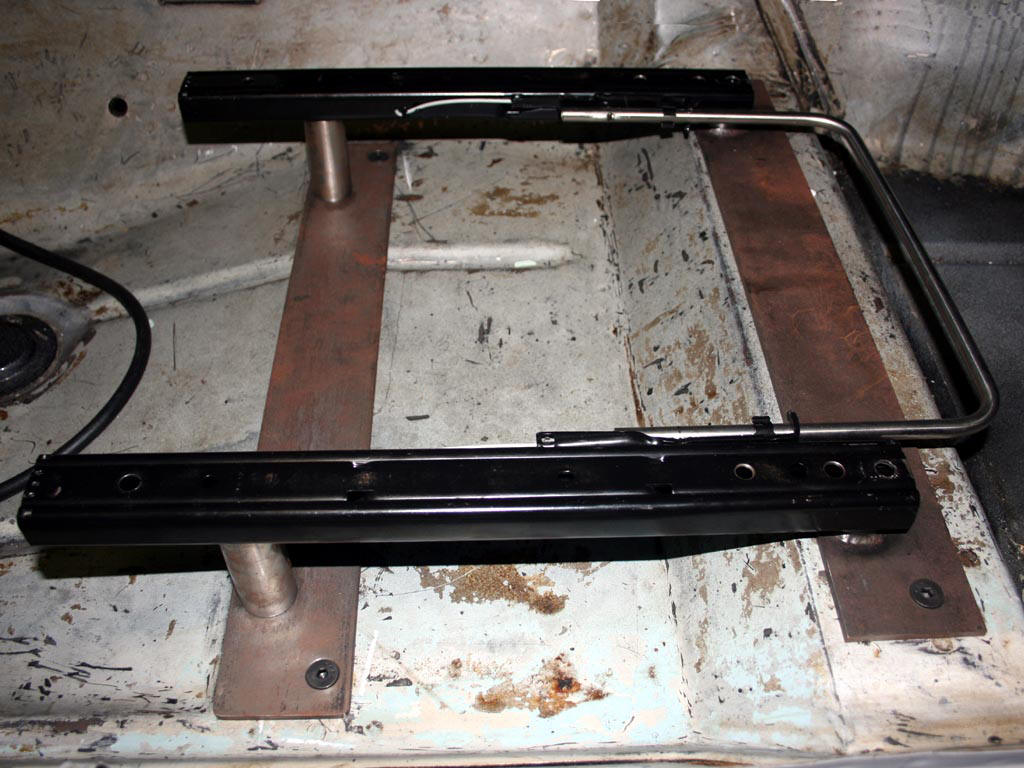
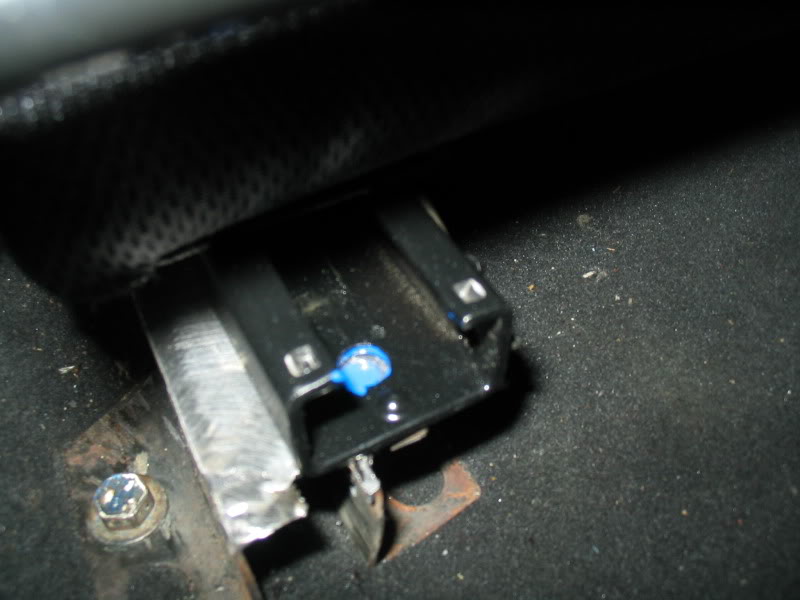
Dummy fit them into the car.

Posted Image

Put the seat in aligning it with the front bolts first and resting it on the rear mounts.
Mark and drill the holes in the rear.
See pic.

Posted Image
Posted Image

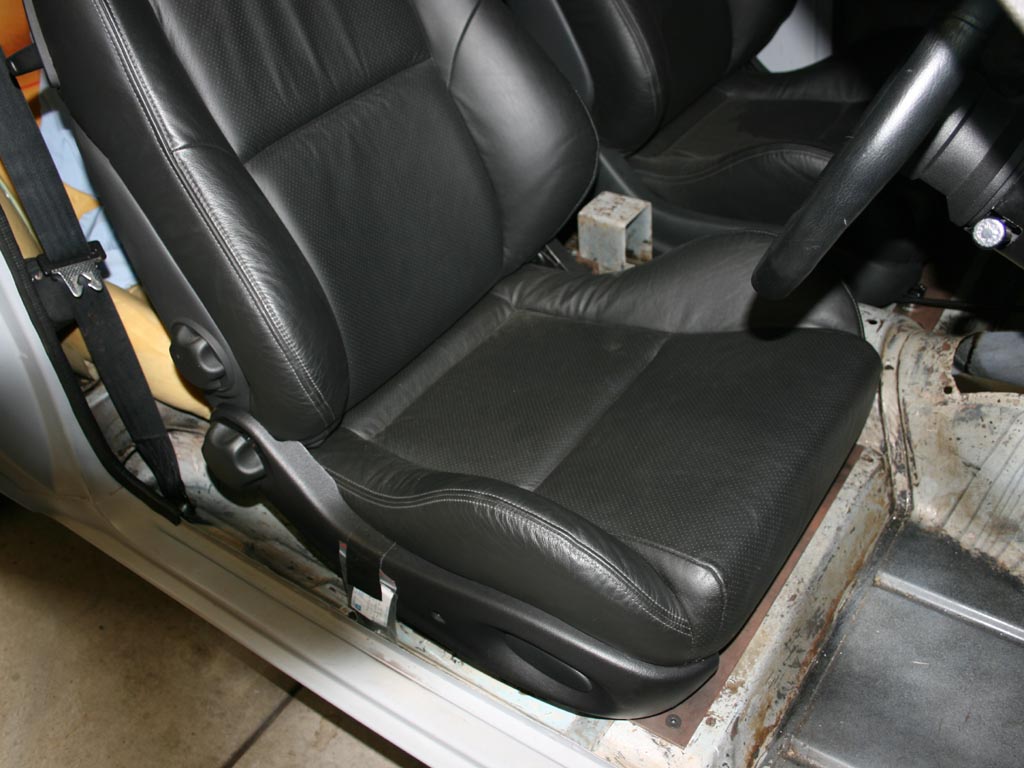
Once fitted all up , Paint the brackets.

Posted Image


Install the seats
Posted Image
Posted Image
Posted Image
Posted Image
Posted Image


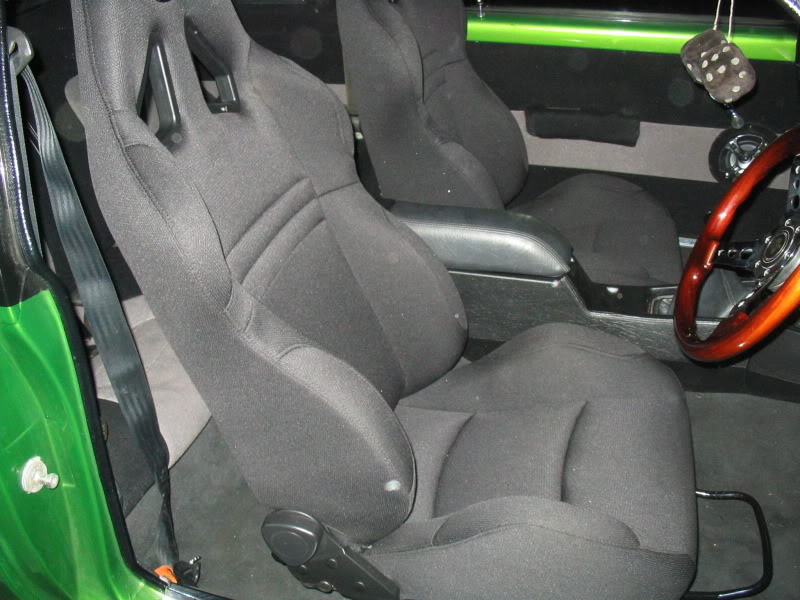
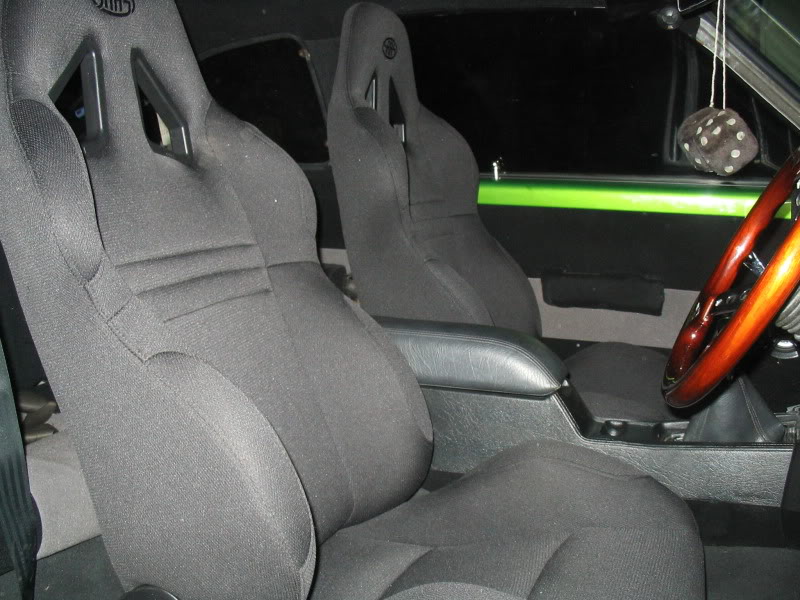
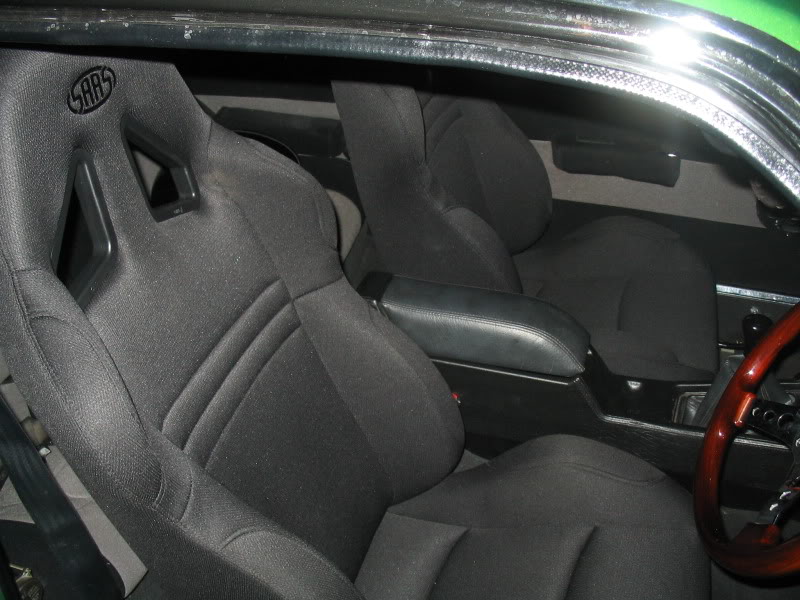
I am pretty happy with the job and the seats are very supportive in a performance environment.

If anyone has any other tips or ideas , or a way to improve this way, Please post.

I hope this helps.

Evan.

Edited by Evan, 19 June 2010 - 12:56 AM.


#2 _Viper_

_Viper_
  • Guests

Posted 19 June 2010 - 07:31 AM

Cheers Evman! I was yet to go out and trail fit to sus this out for myself but seems you have done that for me :D awesome will be doing it shortly

Edited by Viper, 19 June 2010 - 07:31 AM.


#3 _YTsLH_

_YTsLH_
  • Guests

Posted 19 June 2010 - 03:13 PM

Thanks Evan. Great Info!

Cheers,
YT

#4 lxsstorana

lxsstorana

    Forum Fixture

  • Members
  • PipPipPipPipPip
  • 2,499 posts
  • Name:Mick
  • Location:Eastwood, Sydney
  • Car:SS Hatchback
  • Joined: 23-March 06

Posted 19 June 2010 - 03:21 PM

Nice work and thanks for sharing the info. :spoton:

Mick.

#5 Heath

Heath

    I like cars.

  • Administrators
  • PipPipPipPipPipPipPip
  • 18,307 posts
  • Name:Heath
  • Location:Eastern Suburbs, Melbourne
  • Car:Heavily Modified UC Sunbird Hatchback
  • Joined: 07-November 05
Garage View Garage

Posted 21 June 2010 - 02:30 PM

Thanks for sharing Evan. I should be doing something quite similar shortly!

#6 _nial8r_

_nial8r_
  • Guests

Posted 21 June 2010 - 06:19 PM

thx mate, im along way of playing with the inside bits but the info has made it a lot easyer now Posted Image Posted Image

#7 ls2lxhatch

ls2lxhatch

  • Members
  • PipPipPipPipPipPipPip
  • 5,329 posts
  • Location:Perth
  • Car:LX Hatch
  • Joined: 29-May 06

Posted 21 June 2010 - 09:10 PM

I did something similar. I decided to use Recaro rails because they have a bit more travel and smoother runners.

The rear pillars are bolted to the plate using countersunk high tensile bolts. The front pillars are welded to the plate and then tapped. The plates were designed so holes can be cut in the carpet and the carpet fitted over the pillars before the rails are bolted on. I plan to use Dynamatt on the floor which is about the same thickness as the plate so the carpet will be flat.

Posted Image


Recaro 0.70.9NT rails mounted on adaptor plates with new seat adjuster hoop

Posted Image


The factory mount bolts on the Monaro seats at the rear are further apart than the front bolts. I have removed the factory mount bolts. The rear bolts have been replaced with countersunk bolts. The front bolt screws into the adaptor plate and will attach to the Recaro rails. The rear bolt for the Recaro rails is tapped into the adaptor plate. Nylock nuts are used to attach the seat to the Recaro rails.

Posted Image


When the seats are in my driving position the rails and adjuster hoop are hidden by the seat.

Posted Image


There are some pictures and dimesions of the other types of seat rails I looked at using to mount the seats on this page of my website.

Edited by ls2lxhatch, 21 June 2010 - 09:17 PM.


#8 76lxhatch

76lxhatch

    That was easy!

  • Members
  • PipPipPipPipPipPipPip
  • 7,150 posts
  • Location:Unzud
  • Car:SS
  • Joined: 04-August 08
Garage View Garage

Posted 22 June 2010 - 07:29 AM

You guys have really done a flash job, I just cut up some some old ute bumper bar brackets! The rails are bolted and welded to them.
Posted Image
Posted Image

#9 _nial8r_

_nial8r_
  • Guests

Posted 22 June 2010 - 11:04 AM

i like the way you have done your's moot, as i would like the carpet to hide the bolts too. IMO bolts showing on top on nice new carpet in a well dressed car makes the job look only 3/4 done Posted Image

#10 christolx

christolx

    Forum Member

  • Members
  • PipPipPip
  • 184 posts
  • Name:Chris
  • Location:Perth WA
  • Car:1976 LX SL Coupe
  • Joined: 05-December 14

Posted 15 April 2022 - 08:32 PM

I've made a very similar setup with the Autotecnica Rails for my Recaro LX seats. However I'm having a bit of an issue with the travel of the rails. Seems like I have a fair bit of movement forwards (which I don't need) and bugger all movement backwards. I can't seem to get any more distance as the rollers inside the runner, hit the head of the bolt. Has anyone encountered this problem?


Attached File  PXL_20220415_075816738.jpg   234.37K   9 downloads


I'm not overly tall, but I feel the seat needs to come back toward the pillar a fair bit more...


Attached File  PXL_20220415_075827157.jpg   148.83K   8 downloads


#11 LJ RB30

LJ RB30

    Forum Fixture

  • Members
  • PipPipPipPipPip
  • 974 posts
  • Name:Trevor
  • Location:Perth
  • Joined: 12-March 09

Posted 15 April 2022 - 10:20 PM

Yeah they definitely look way too far forward.

When i made the brackets for my non standard seats, i'm 6"2',  i started by making sure both of the rails on the seat were positioned in the middle of their travel, then positioned the seat in the car with temporary packing underneath.

I then sat in the seat to get a comfortable driving position by shuffling the seat to a position i was happy with.

Then carefully exited the seat & measured the seat mount position in relation to the car mounting position.

I then moved the seat fully forward & backwards ( as best i could) to make sure it did not foul or obstruct anything.

Then fabricated these mounts.

Attached File  IMG_5326.JPG   281.59K   7 downloads

Though mine is an LJ you can still see the seat mount point are nowhere near the Torana ones.

LOL mine were made out of 50 x 6mm stainless angle, hence the speed holes.


#12 76lxhatch

76lxhatch

    That was easy!

  • Members
  • PipPipPipPipPipPipPip
  • 7,150 posts
  • Location:Unzud
  • Car:SS
  • Joined: 04-August 08
Garage View Garage

Posted 16 April 2022 - 06:37 AM

Unfortunately the position of the mounting holes does mean you generally need to have the seat hanging off the back a bit to get a reasonable position, but works OK as long as you build everything solid enough. If you look at ls2lxhatch's photos above you can see the front floor bolts just out in front of the seat itself.


0 user(s) are reading this topic

0 members, 0 guests, 0 anonymous users