Jump to content


Photo

SINGLE CAB KOMBI UTE V8 BUILDUP


  • Please log in to reply
225 replies to this topic

#1 dirtbag

dirtbag

    Street Machines current Biatch!

  • Members
  • PipPipPipPipPip
  • 1,927 posts
  • Name:Tim
  • Location:Sunshine Coast
  • Car:1995 V8 2wd hilux, LH torana ute, 1970 Volksrod, MK1 2 door escort, CJ6 Jeep, VX commodore wagon.
  • Joined: 29-December 09

Posted 02 February 2011 - 10:00 AM

OK, well I have some time off so am passing the time here with you guys : )

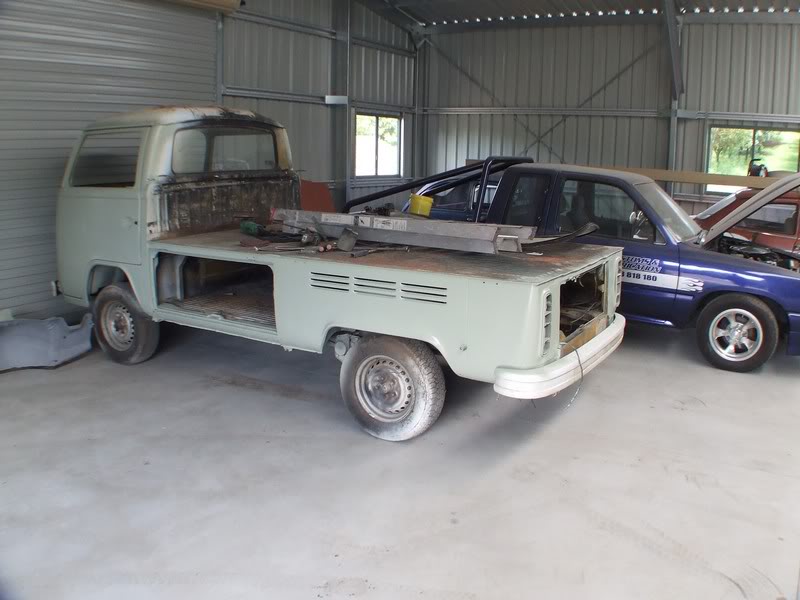
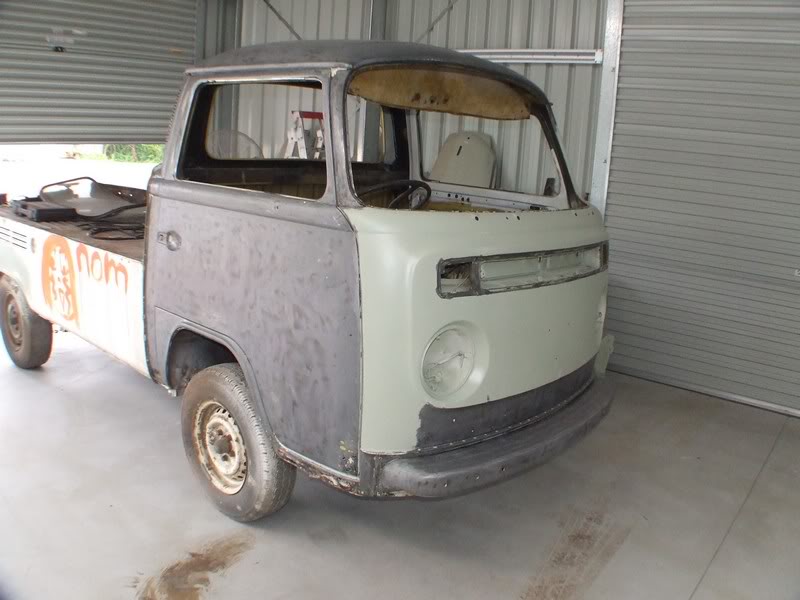
I've been mucking around with this 1976 Kombi single cab ute for a couple of months now. It's the 3rd VW I've built for this guy and it's going to be the best one.

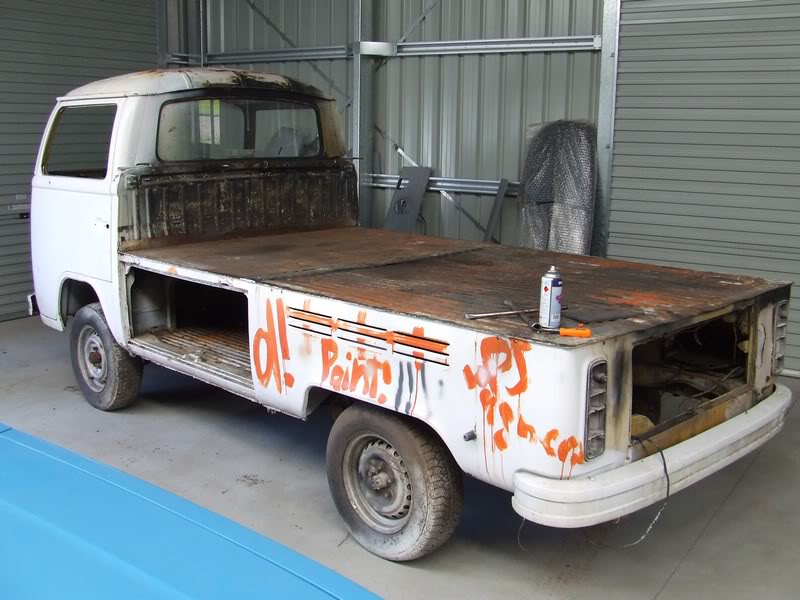
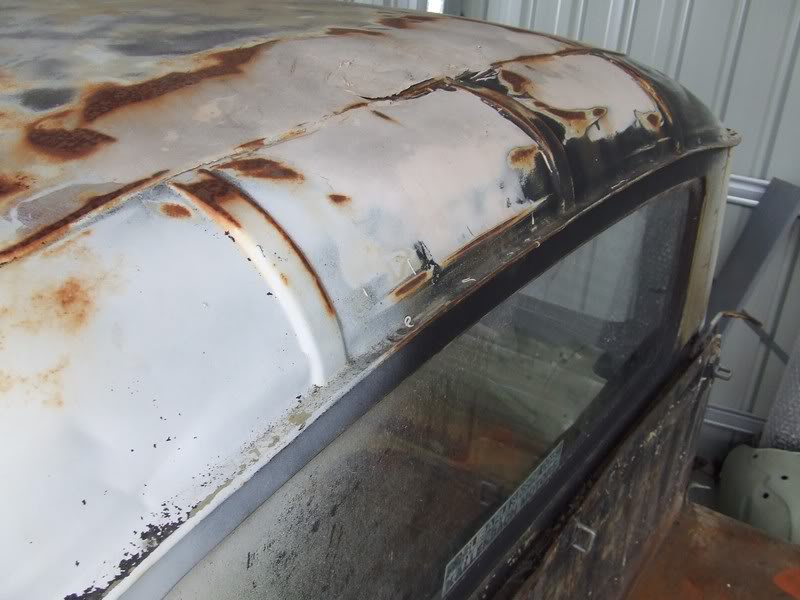
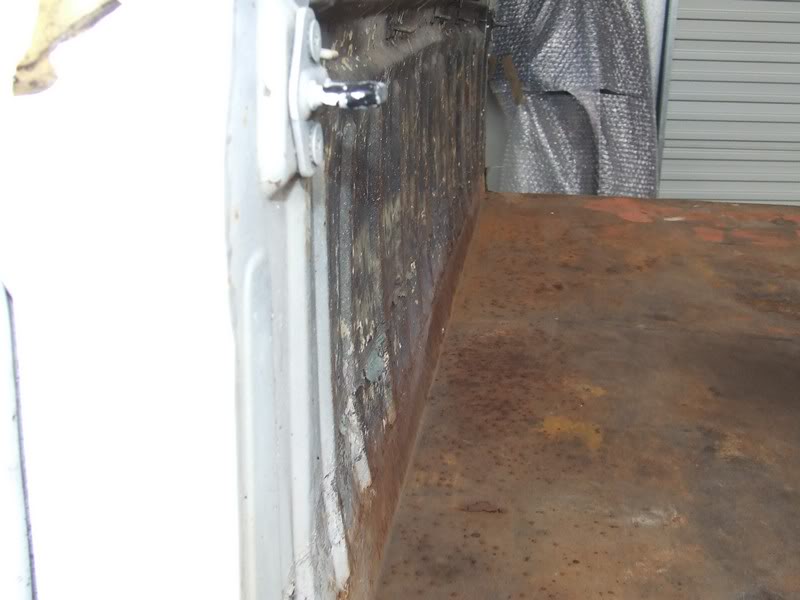
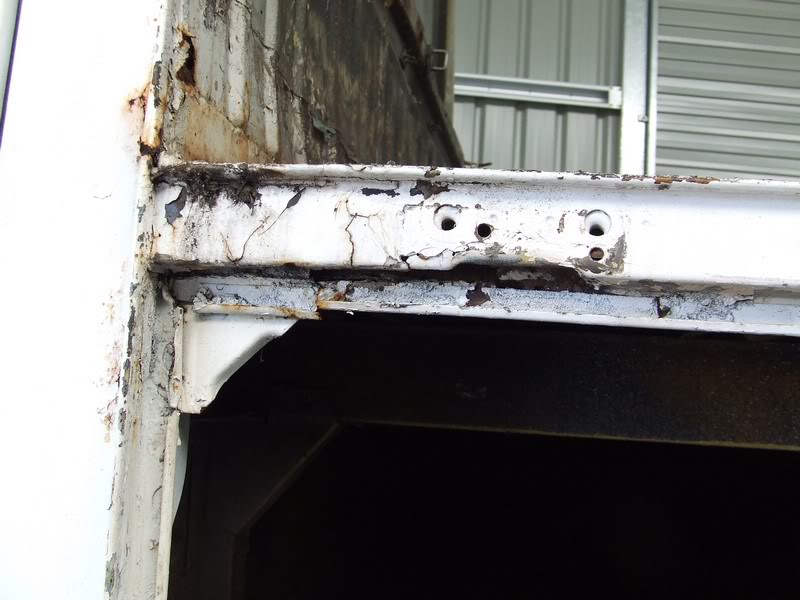
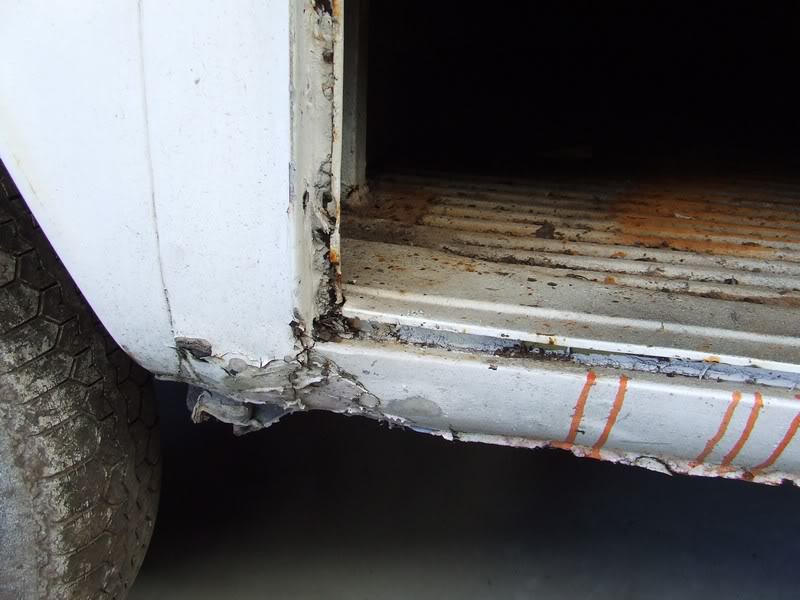
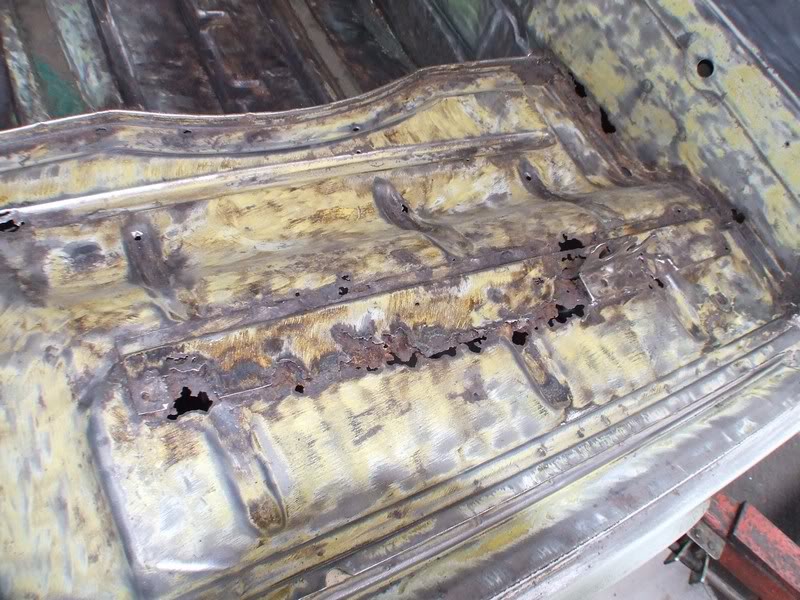
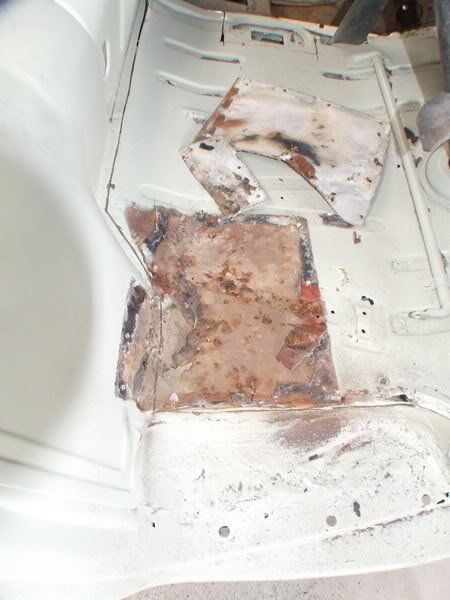
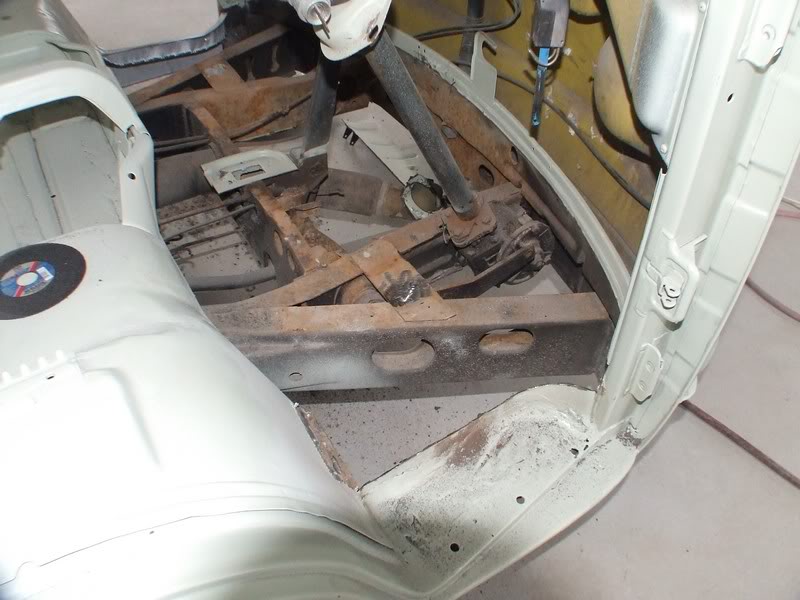
The body on this thing is pretty bad. Every panel is rusty, as is the chassis, so I don't feel bad about how much I'm going to chop this thing up : )

Posted Image


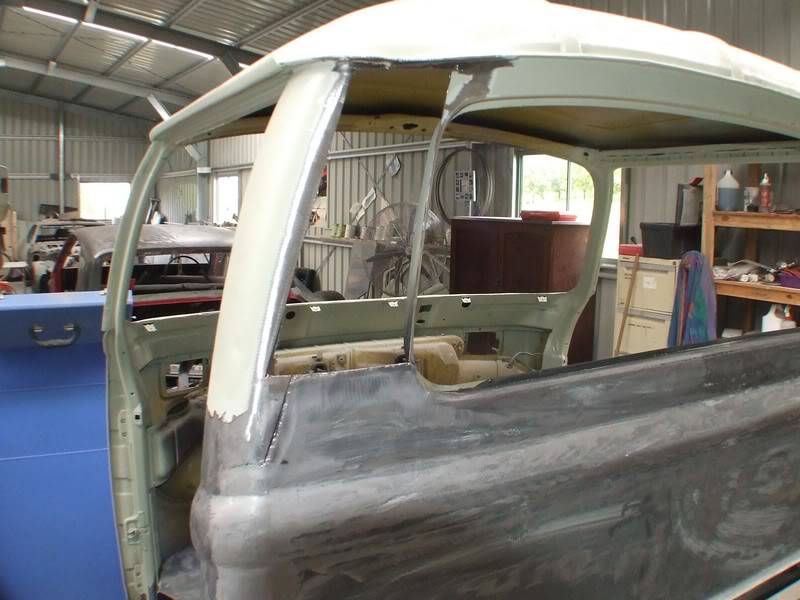
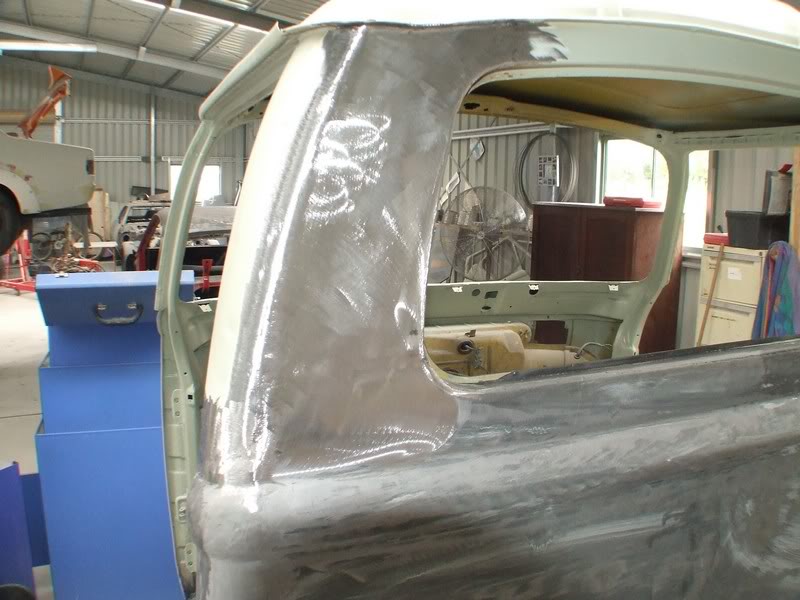
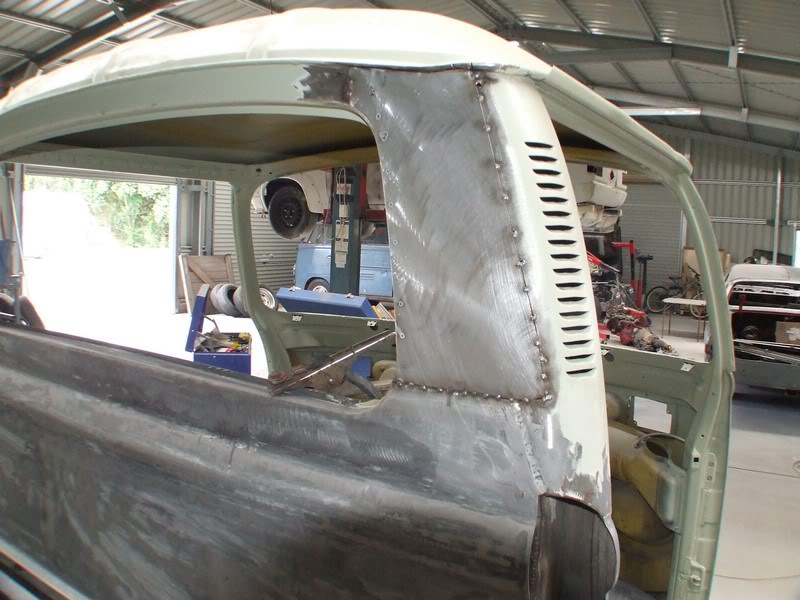
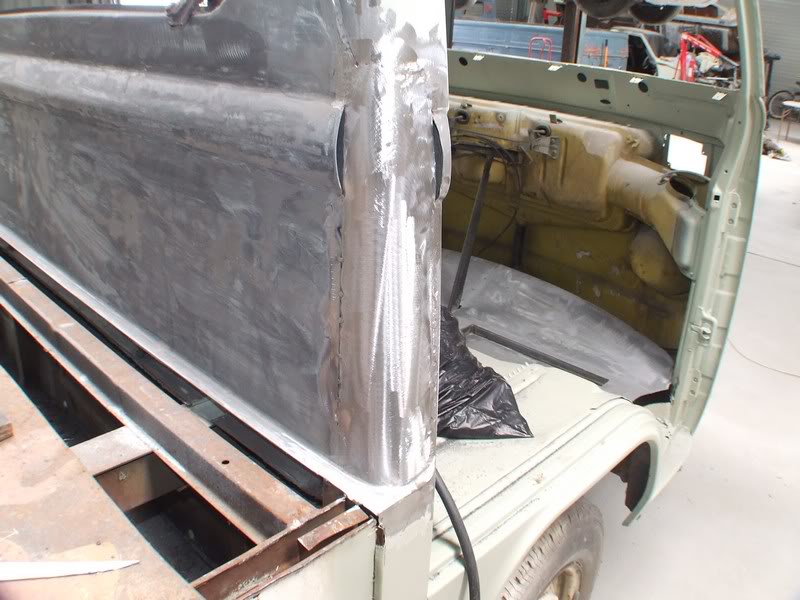
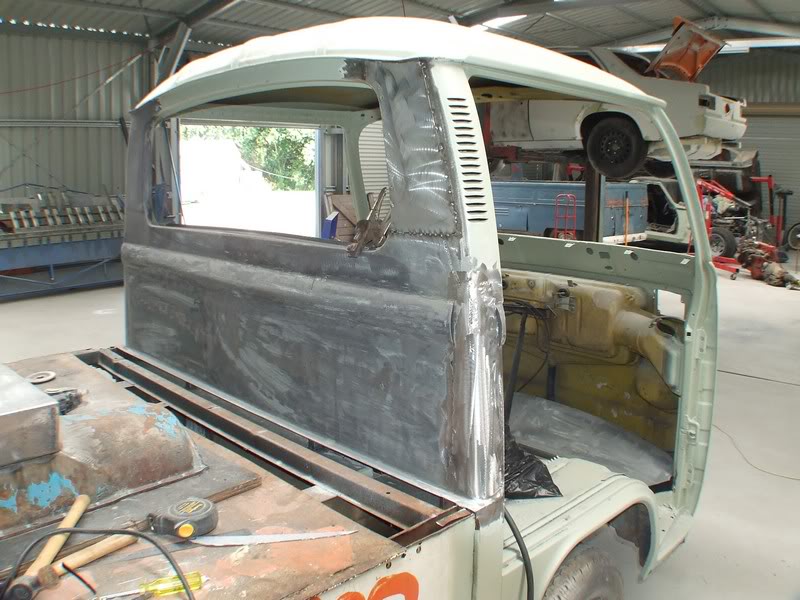
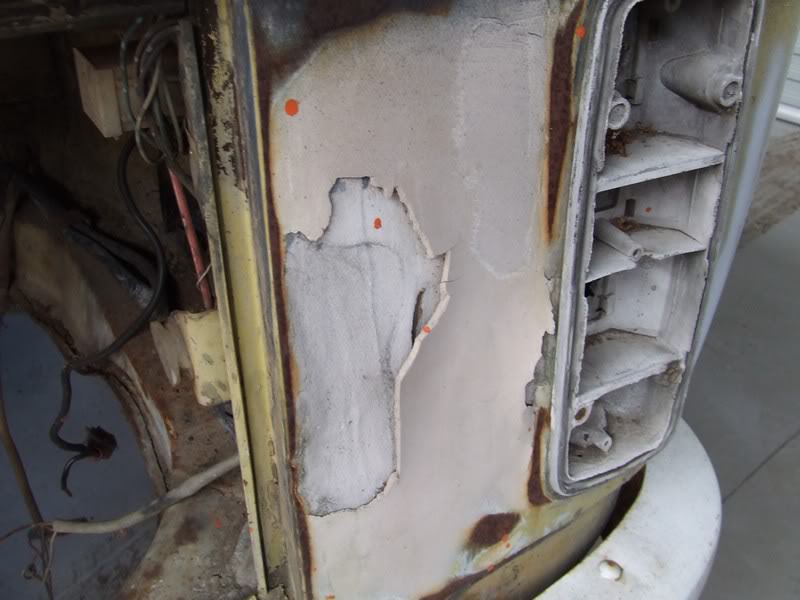
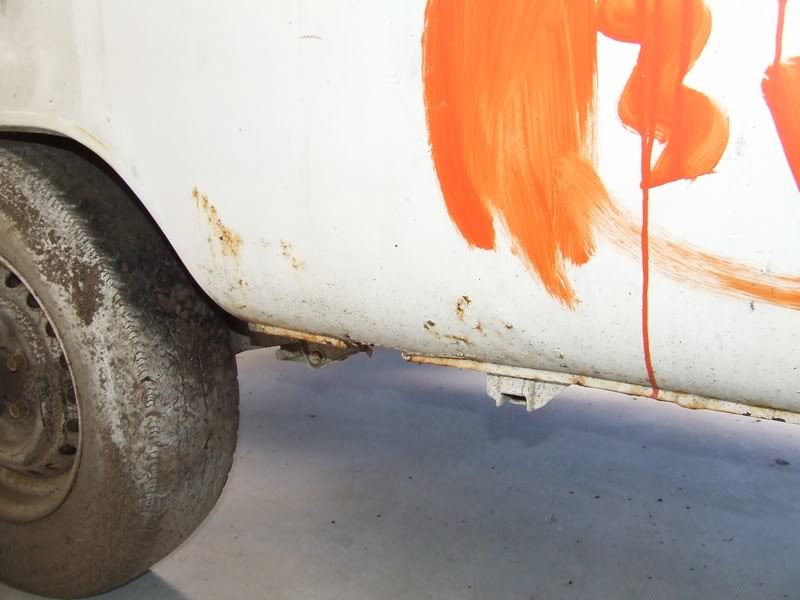
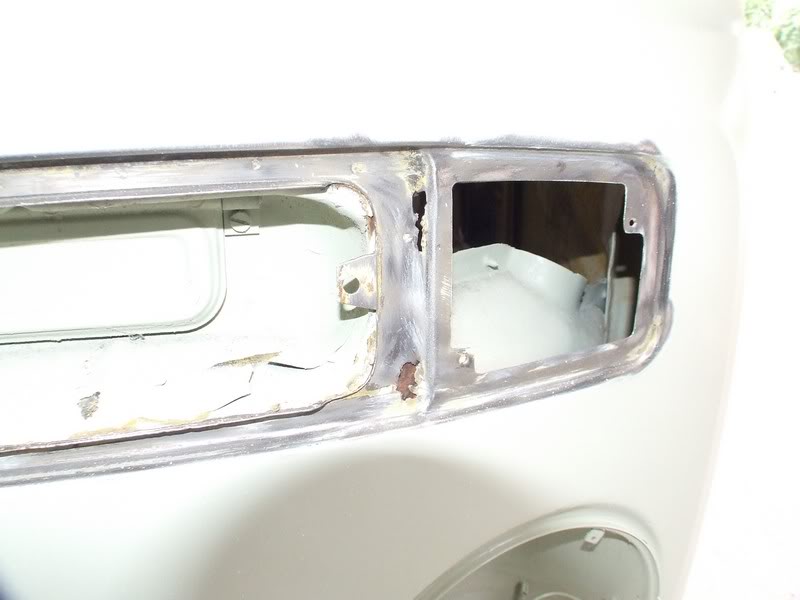
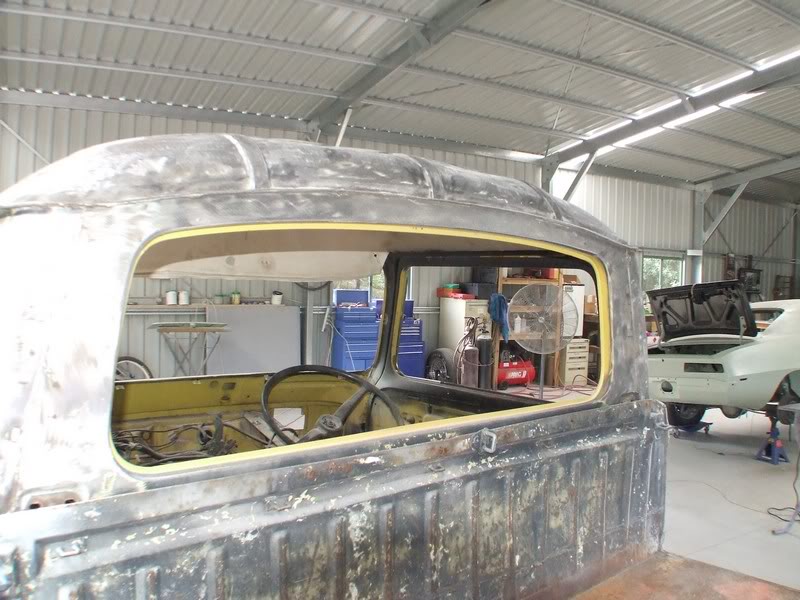
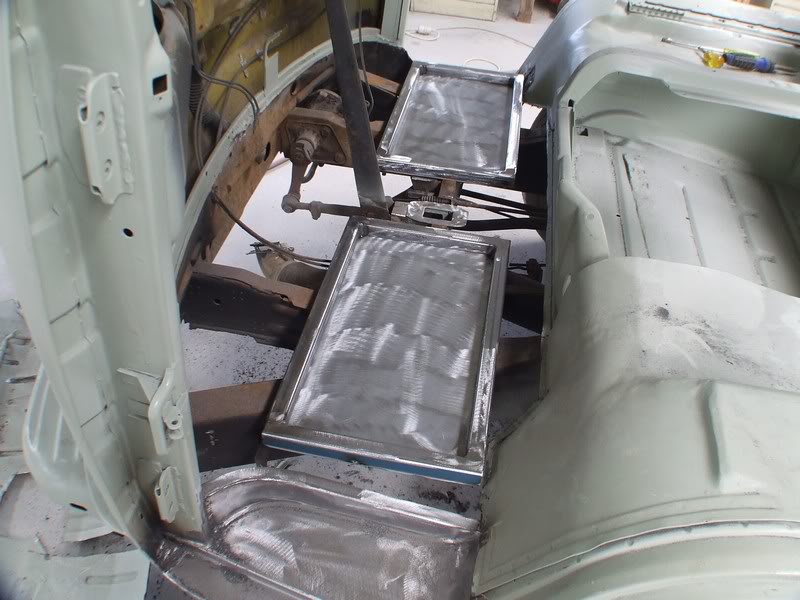
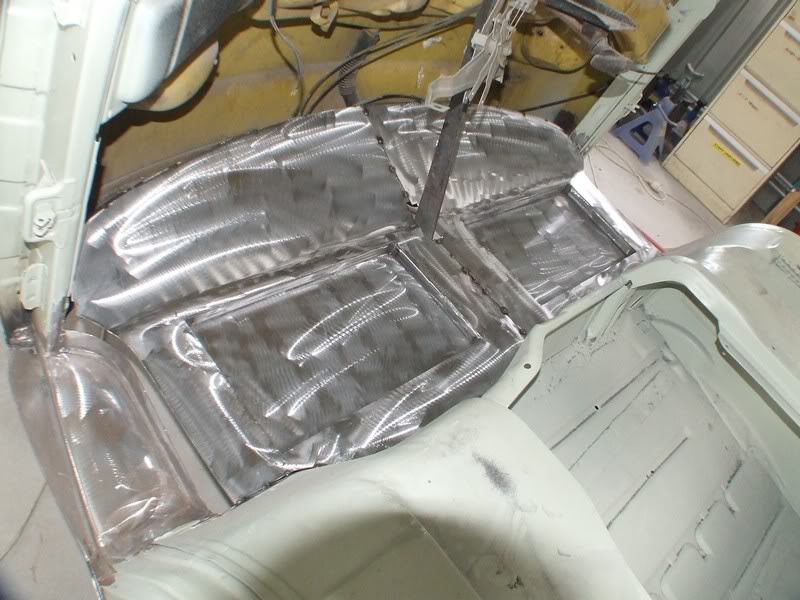
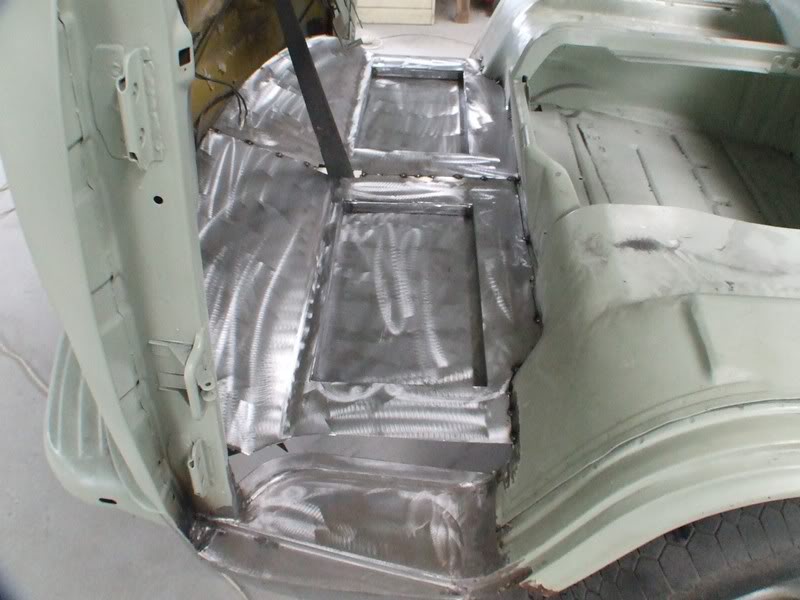
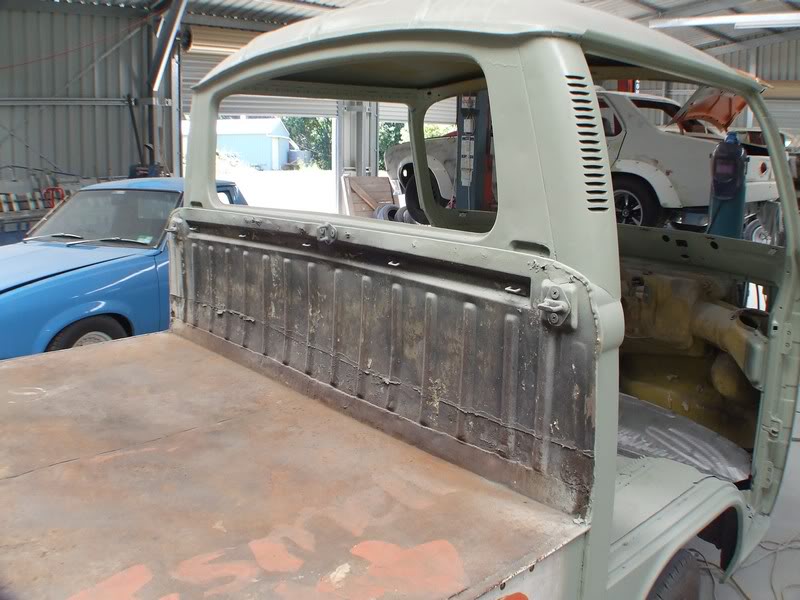
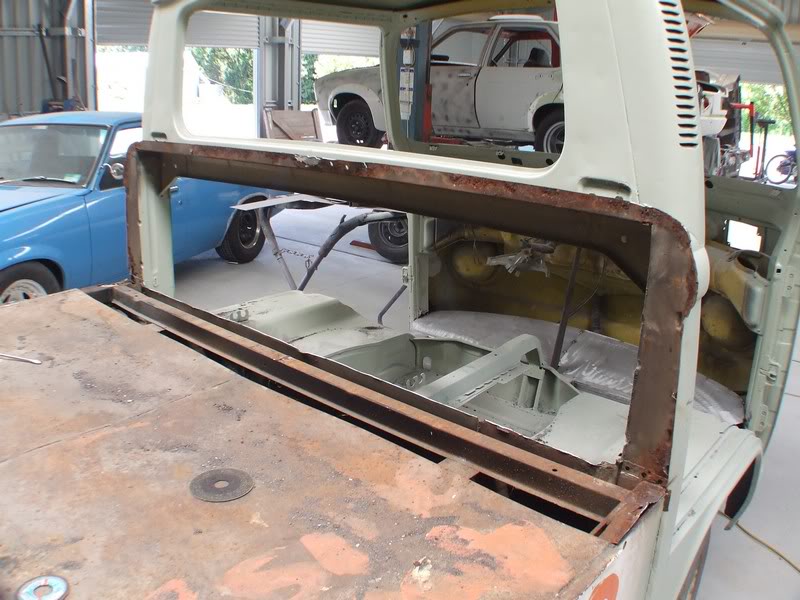
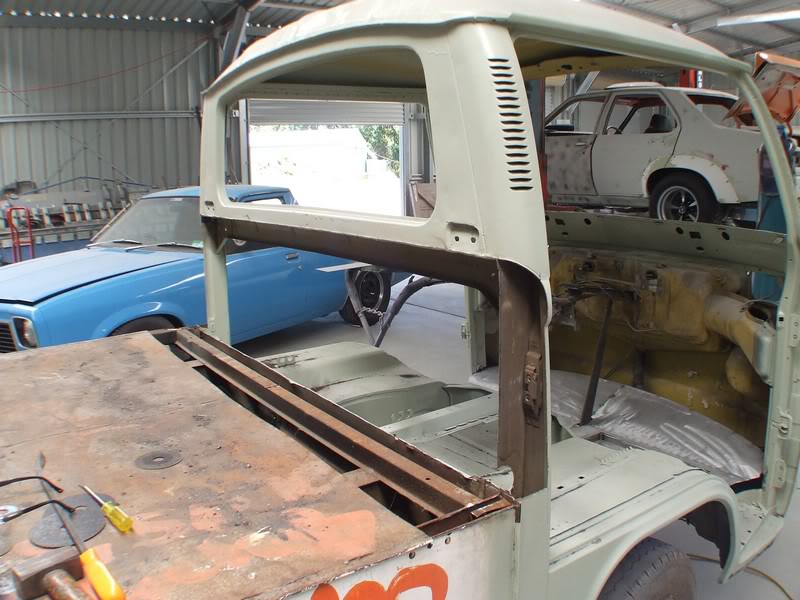
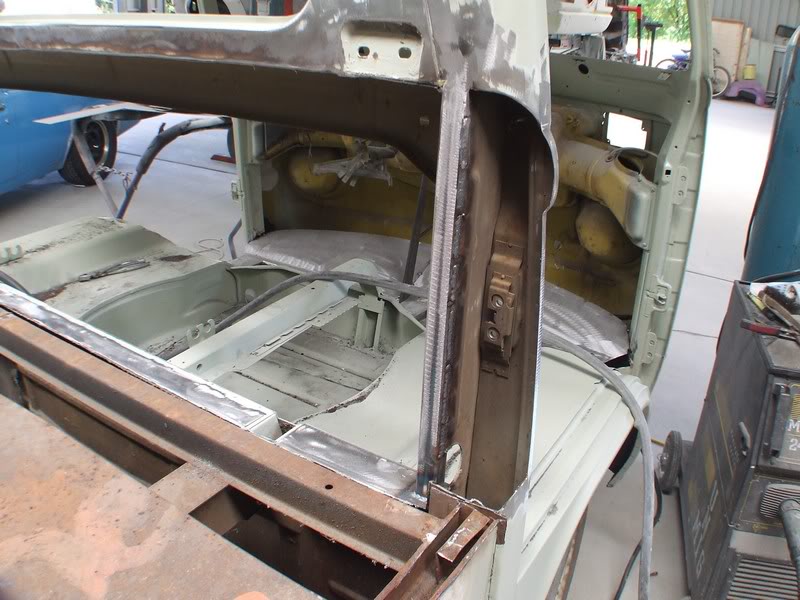
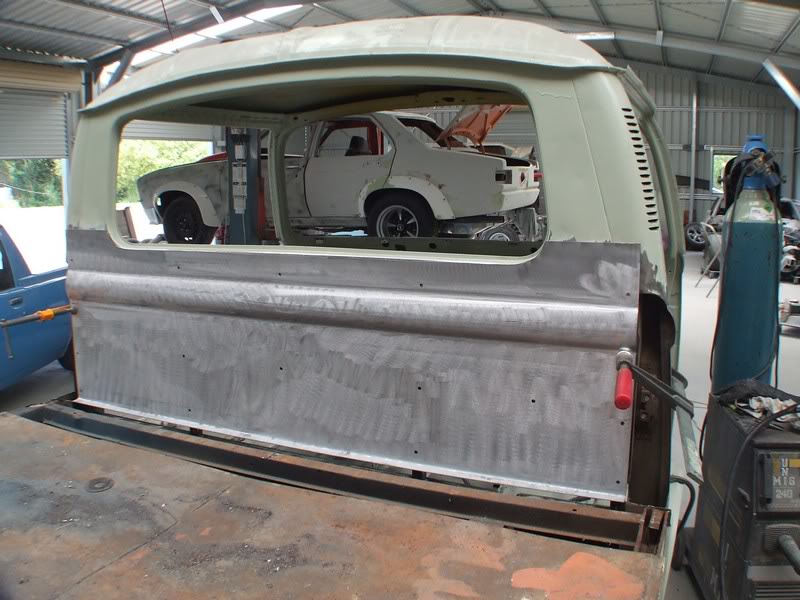
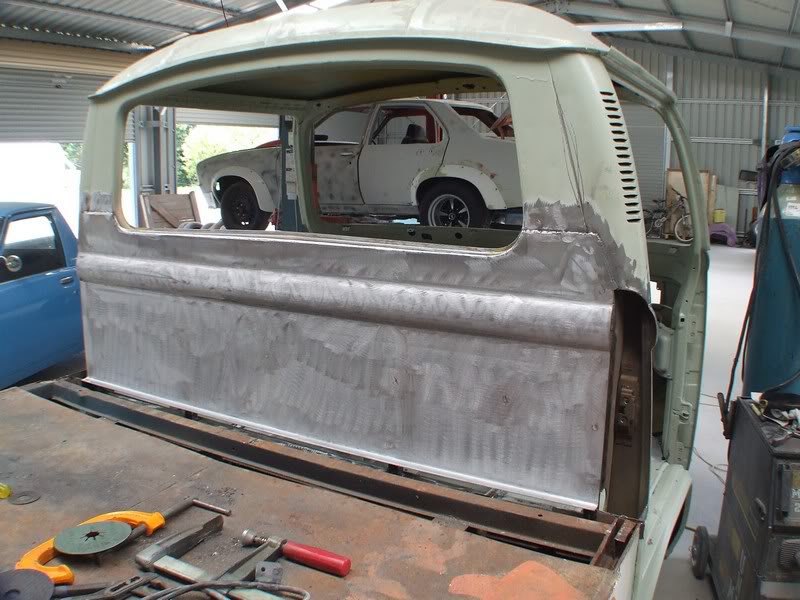
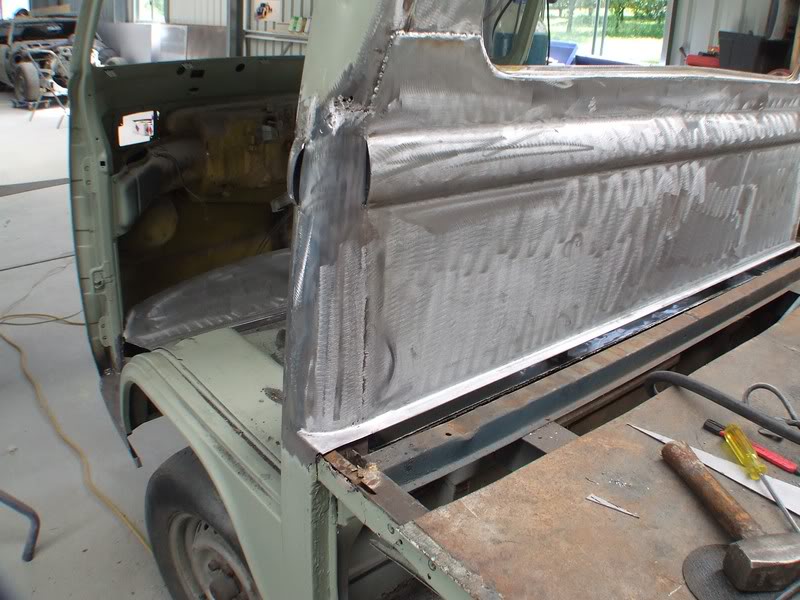
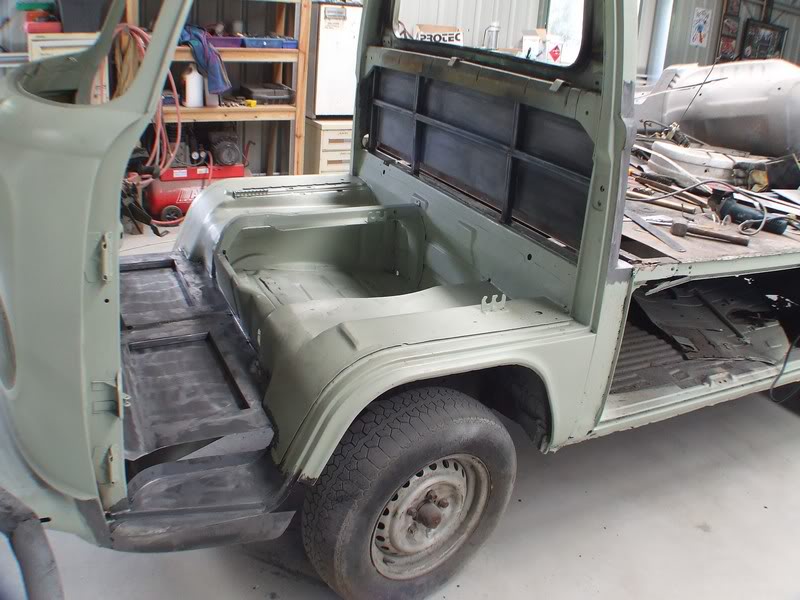
Body mods are going to extensive, but very subtle. The whole rear quarter panels will be made from scratch and will have 3 inch deeper sills giving a lower stance, and will also delete the side vents and side cargo door. The majority of the interior will be steel. The whole tray will be replaced too. I'll also be fabricating a new rear wall for the cab with a nicer shape. The tail lights will be replaced with smaller earlier model ones. The mods will be hard to spot unless you know kombis well.

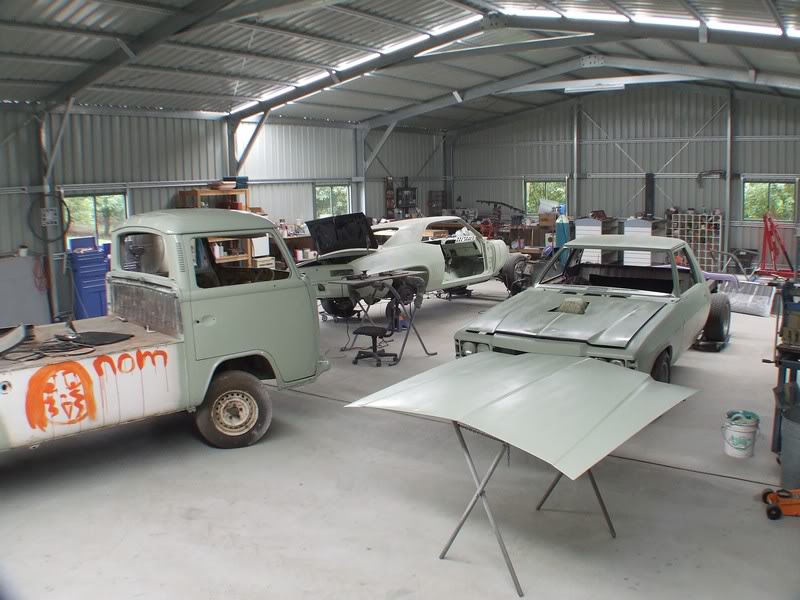
The motor is going to be a 350 chev and I've already sorted the engineering out with my mod plate guy so it will be 100% street legal. I'm going to enjoy this one : )

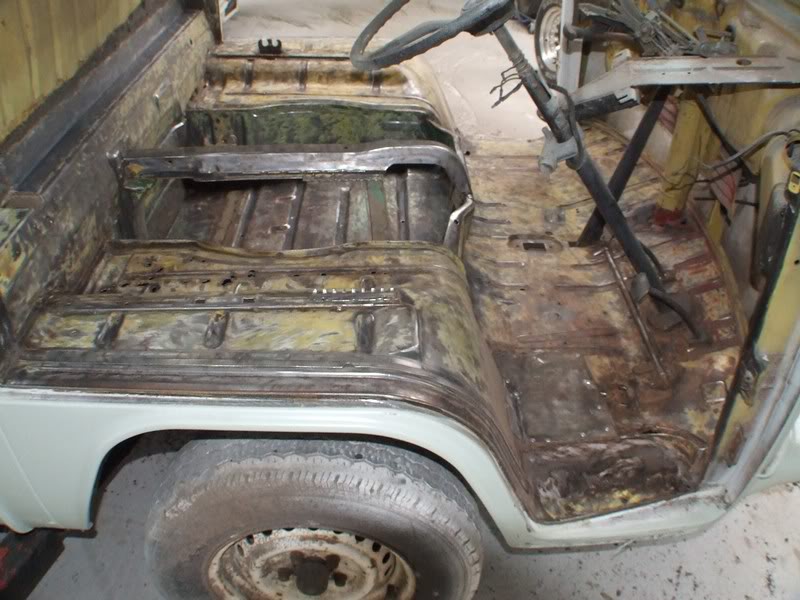
Here's a few pics showing it's best features

Posted Image

Posted Image

Posted Image

Posted Image

Posted Image

Posted Image

Posted Image


Pretty nice huh? hahaha.

Here's more : )

Posted Image

Posted Image

Posted Image

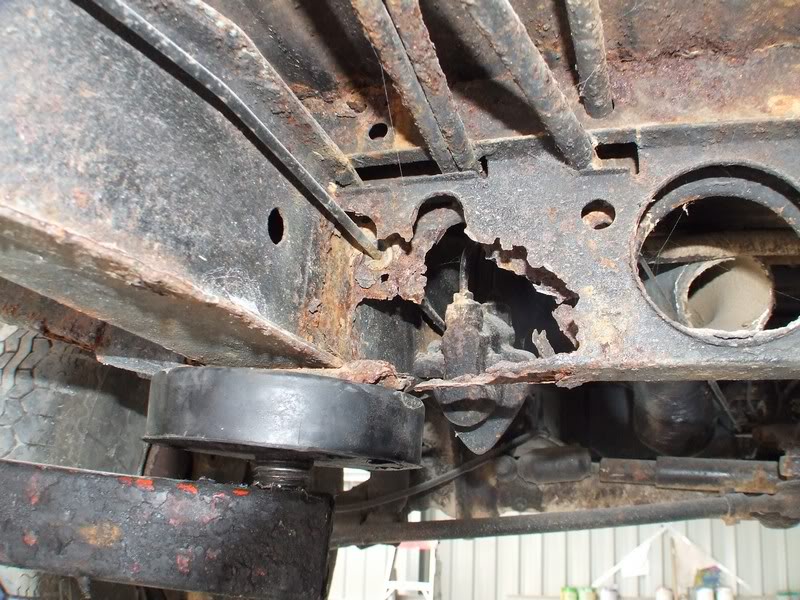
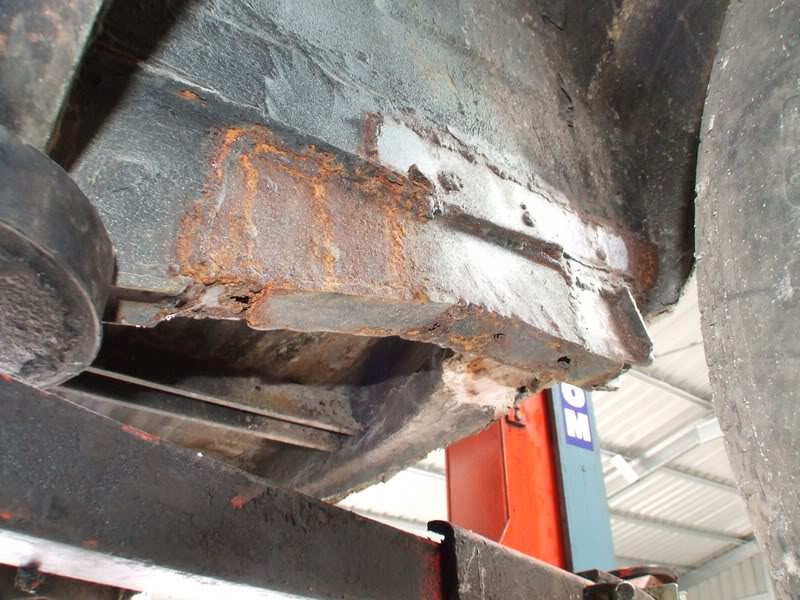
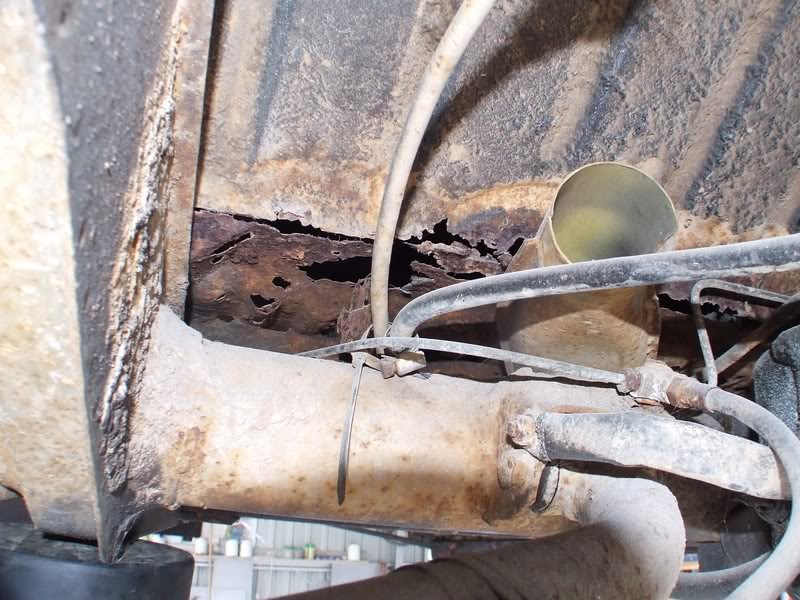
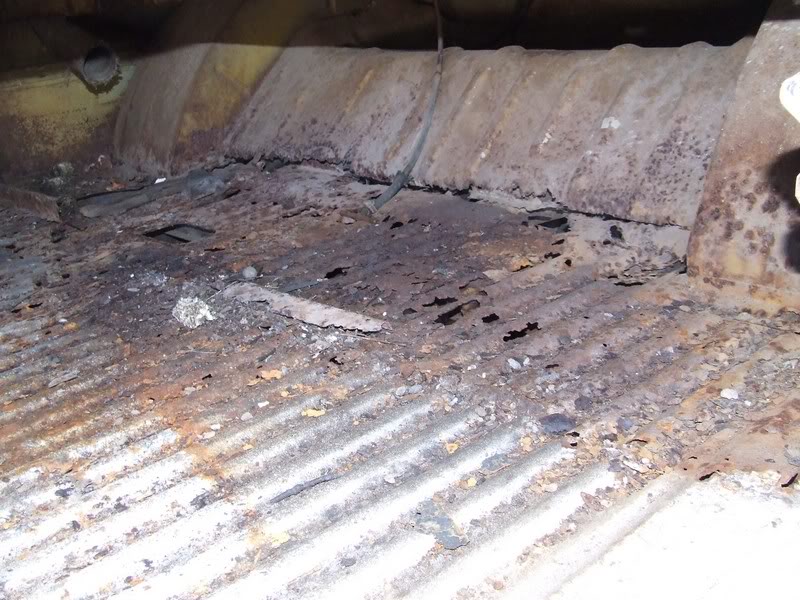
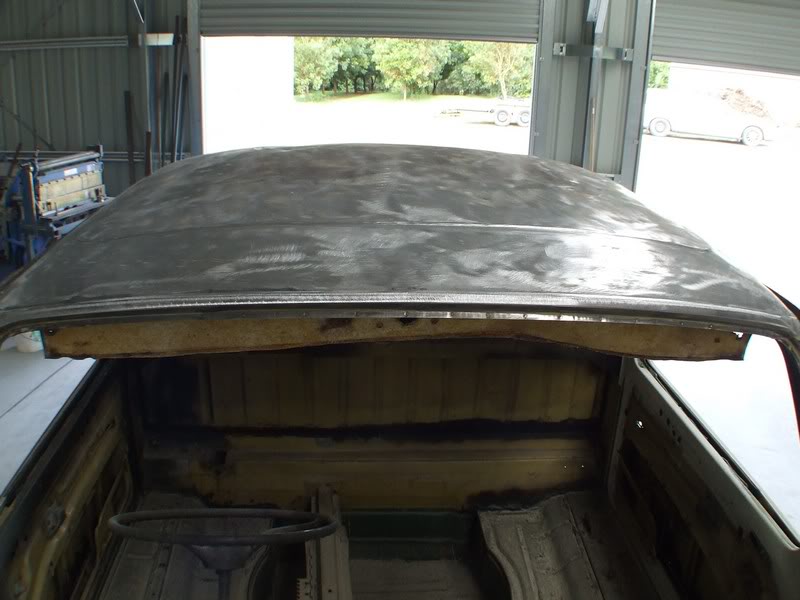
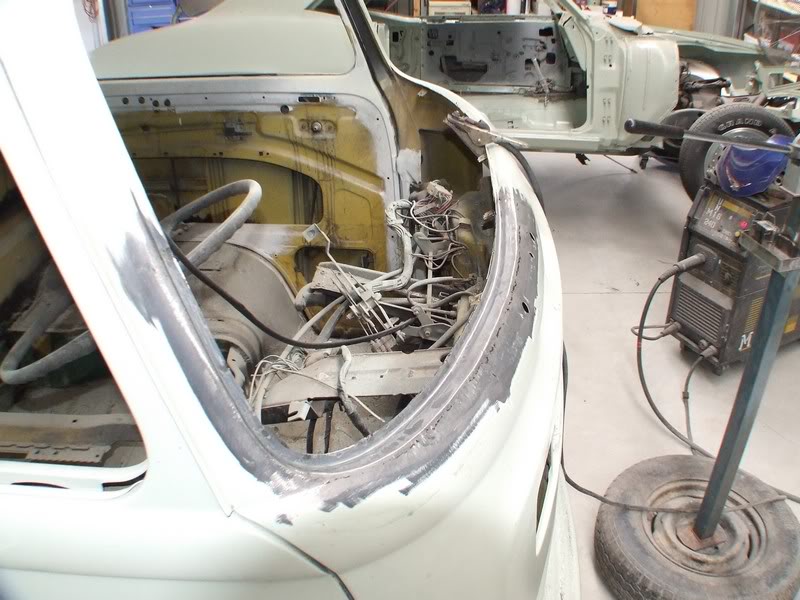
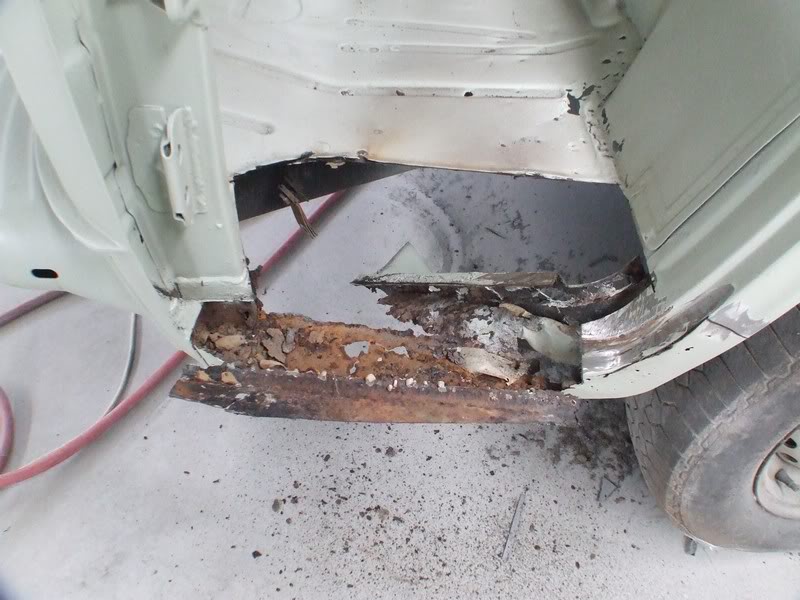
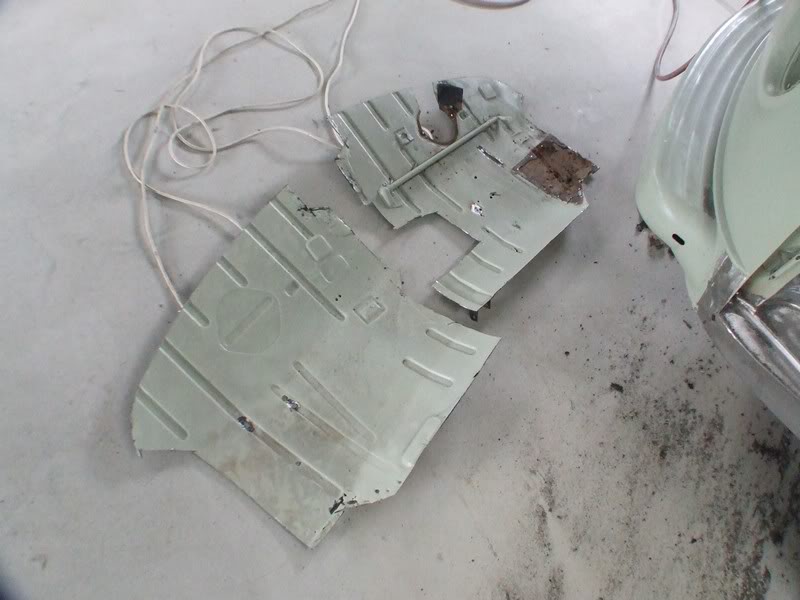
OK, I think you get the picture. It's stuffed : )

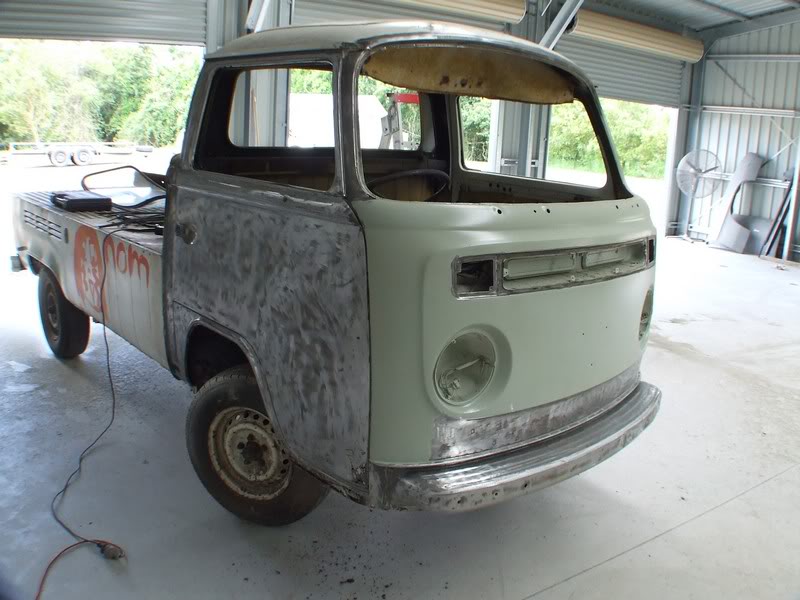
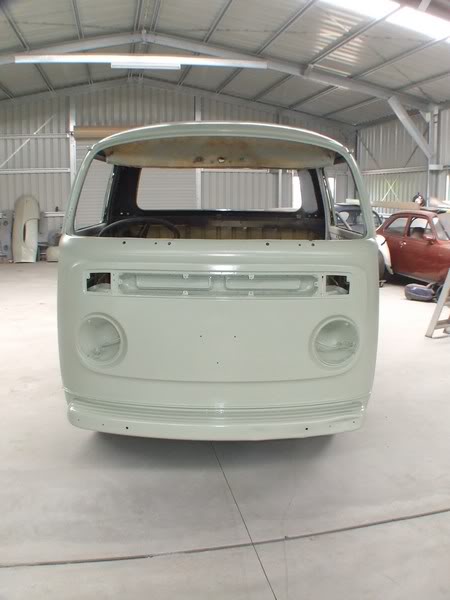
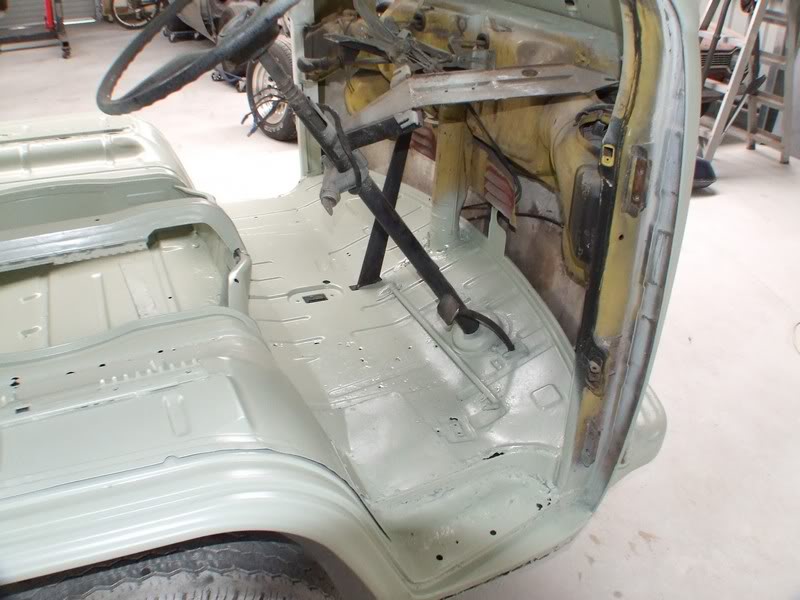
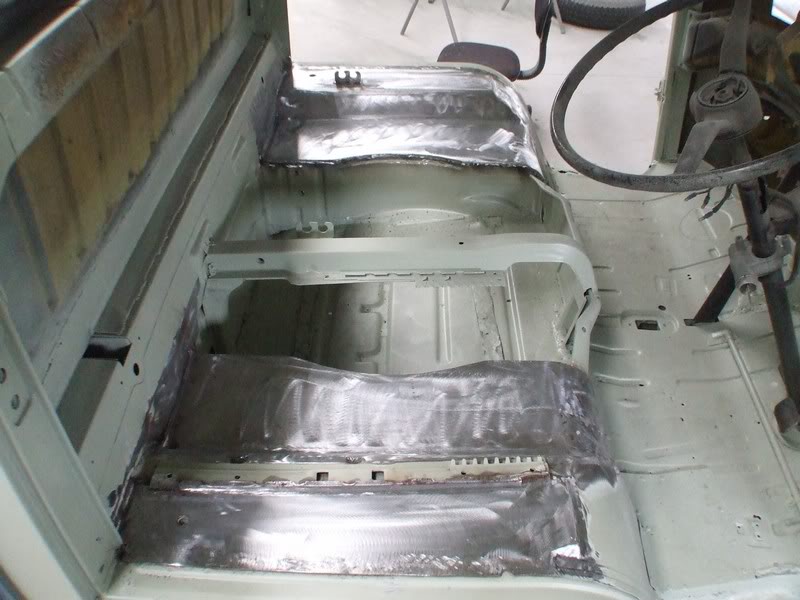
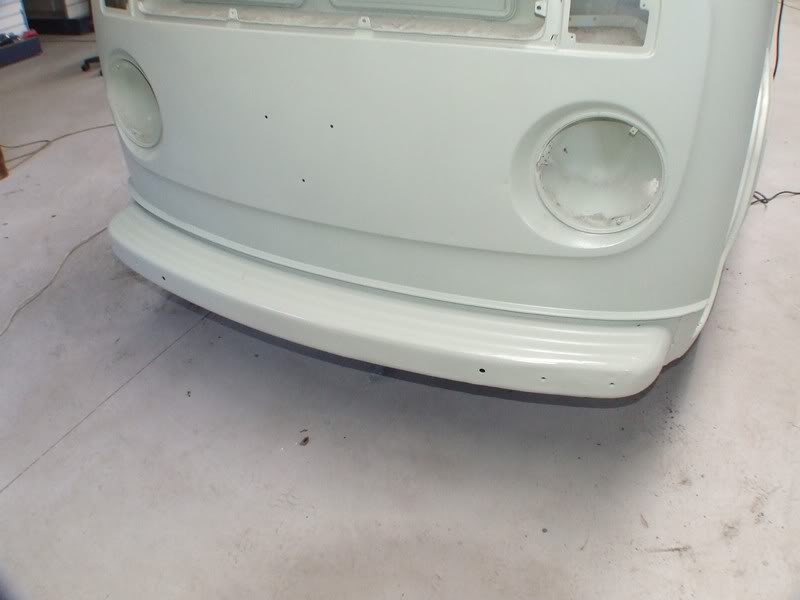
First thing to do with any project is get it naked.

Posted Image

Posted Image

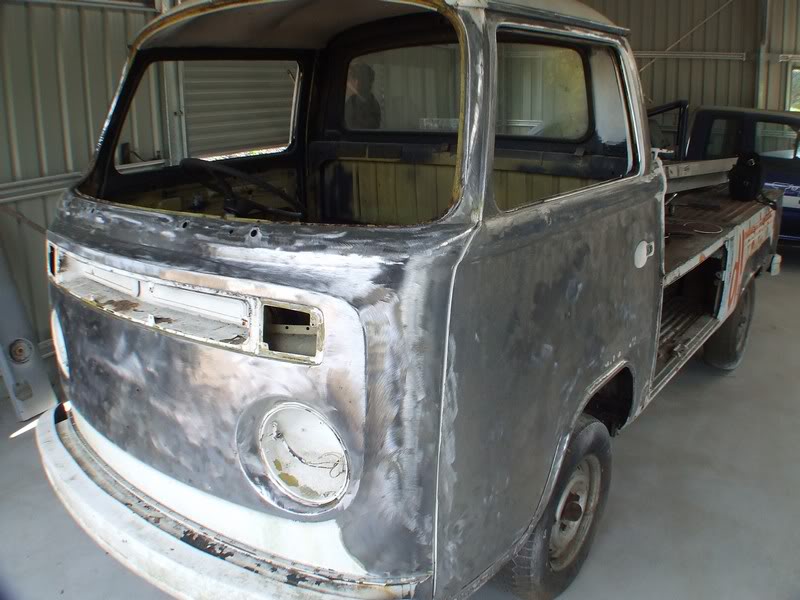
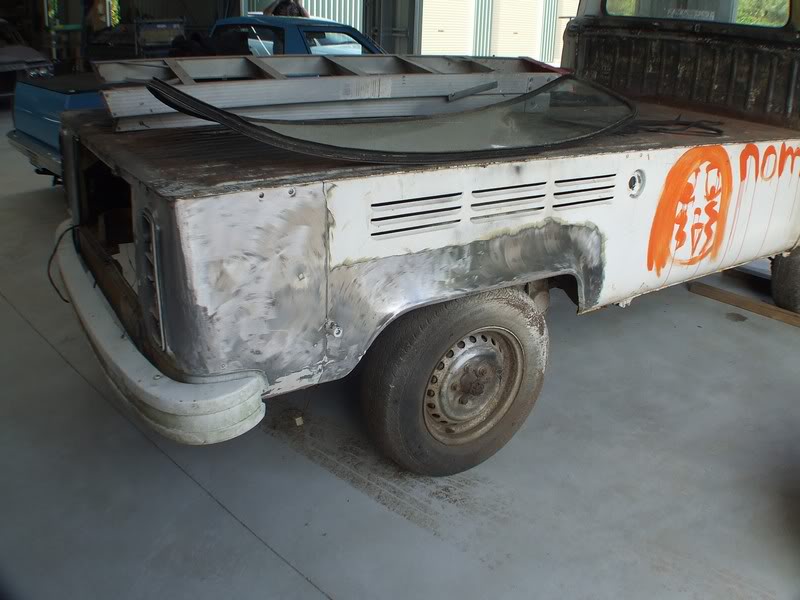
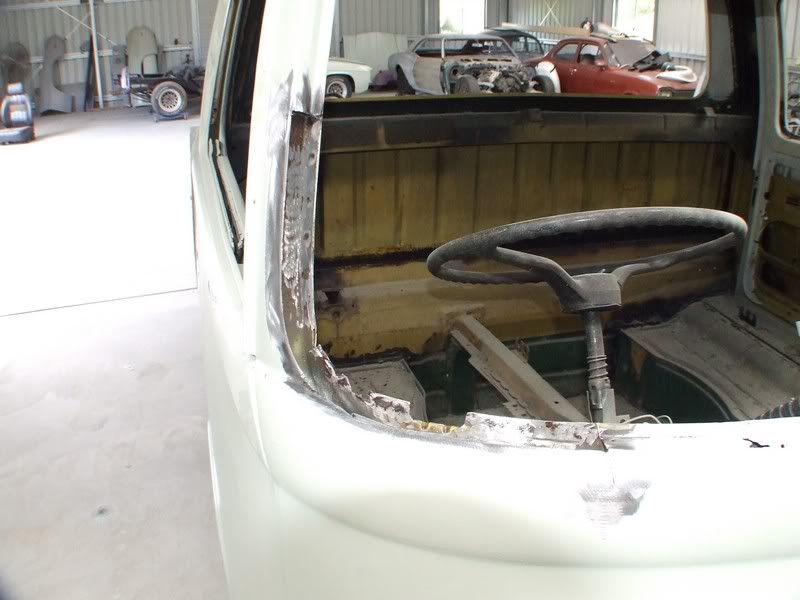
Because I'm going to replace the whole sides I didn't bother stripping them back.

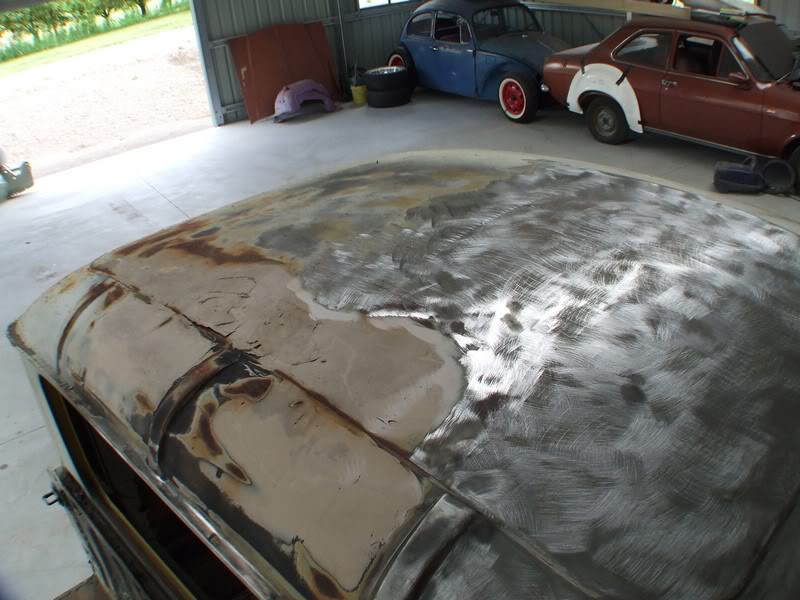
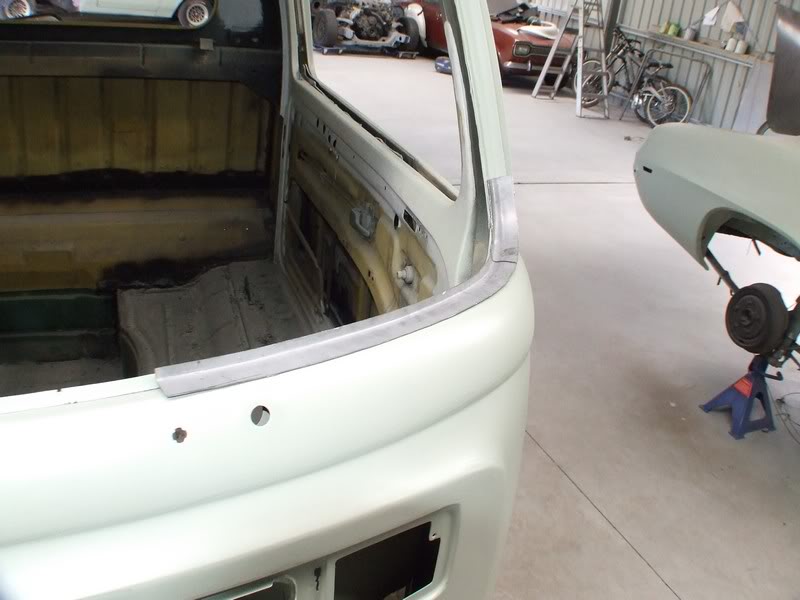
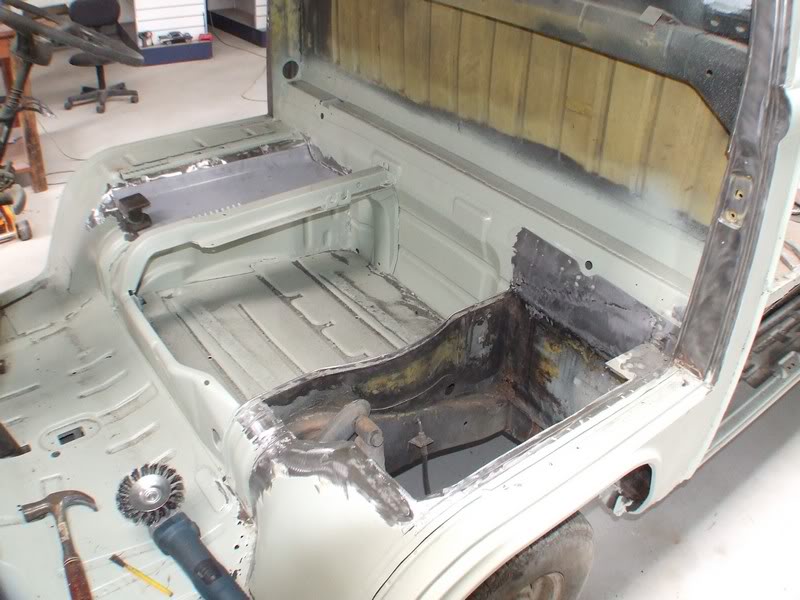
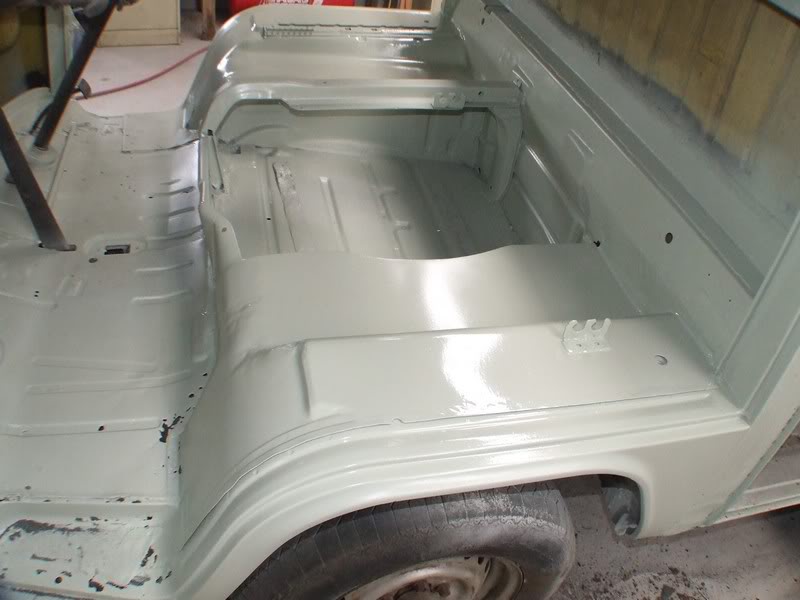
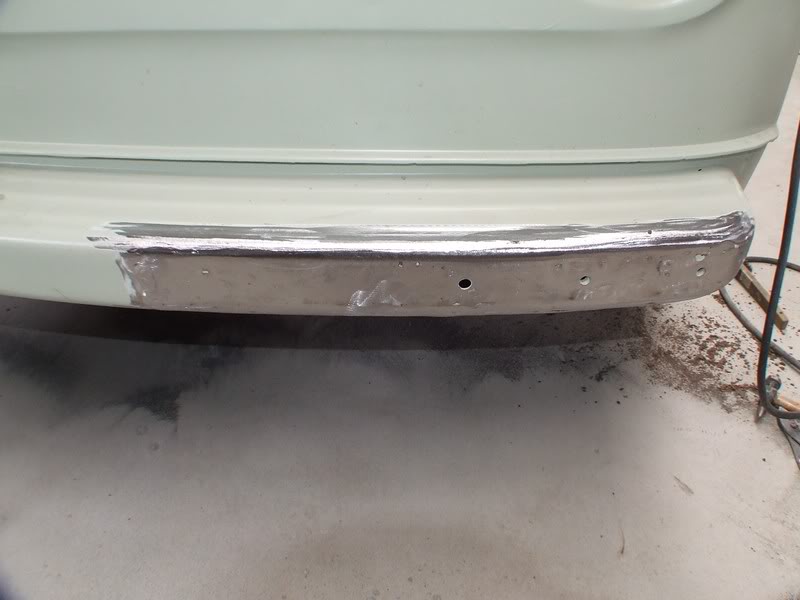
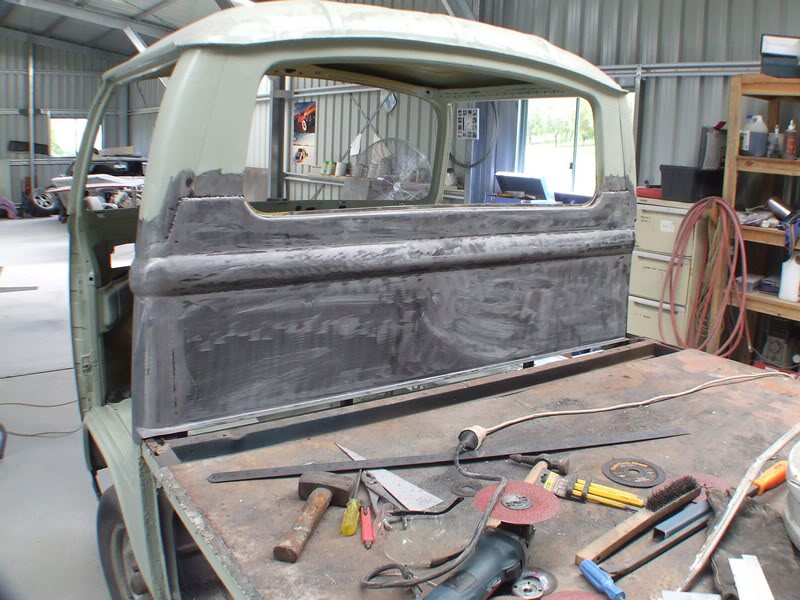
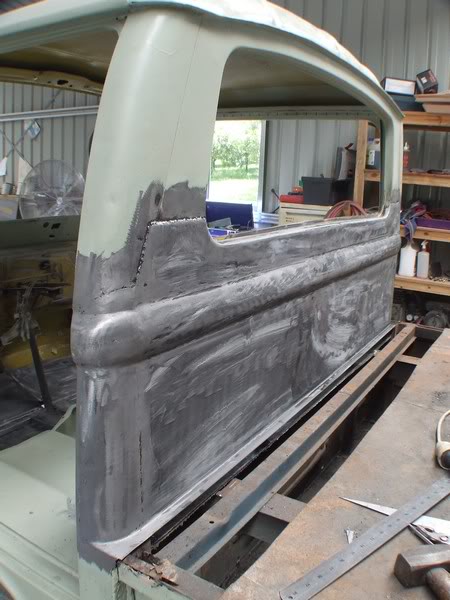
I did the paint removal in two sections, so I etch primed the first batch of bare steel straight away. I've only been working on this car one day a week so don't want it sitting around in bare steel for a week. Not with this humidity.

Posted Image

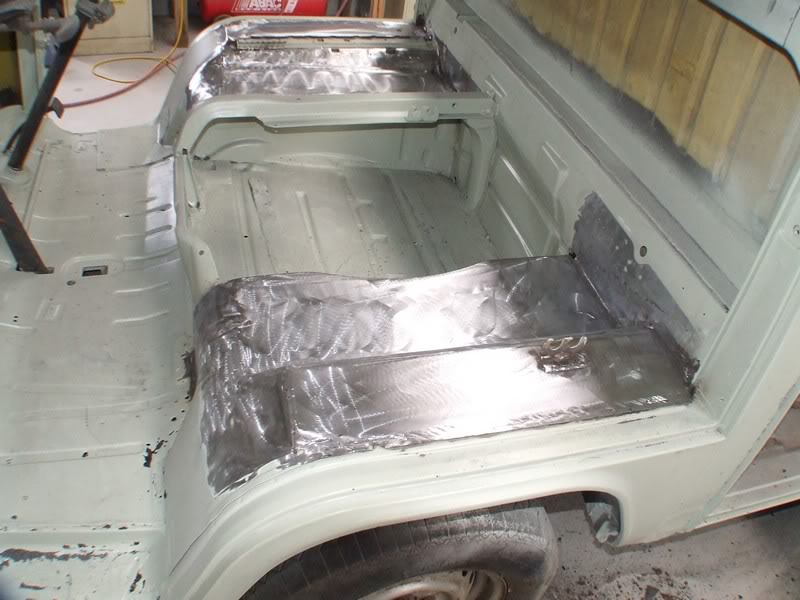
Then I got to strip the rest of the paint.

Posted Image

Posted Image

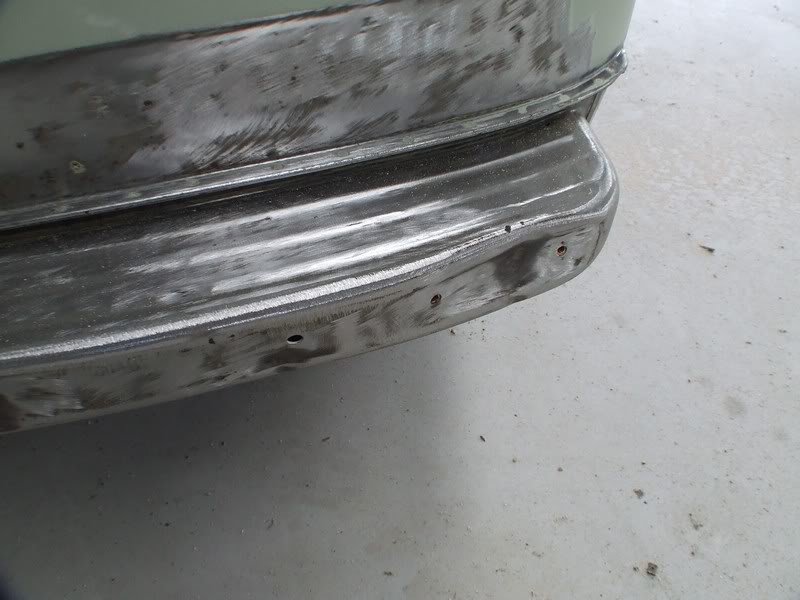
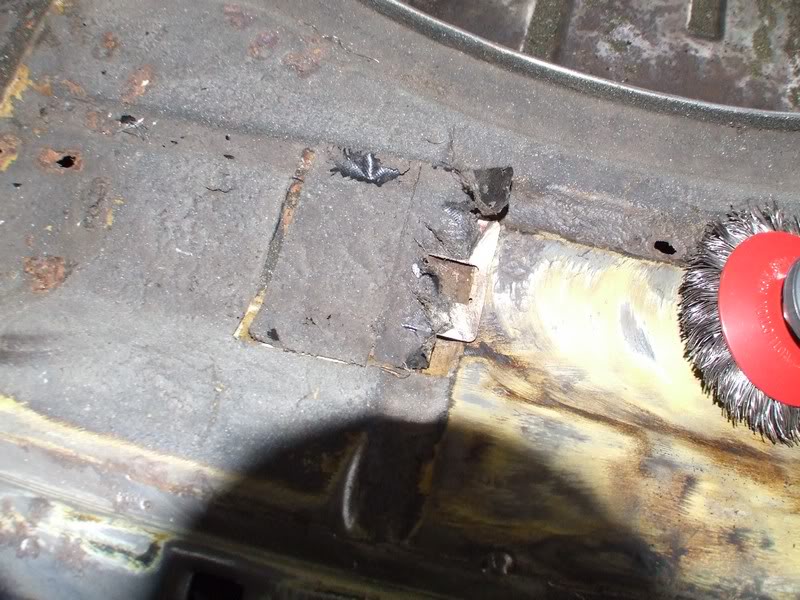
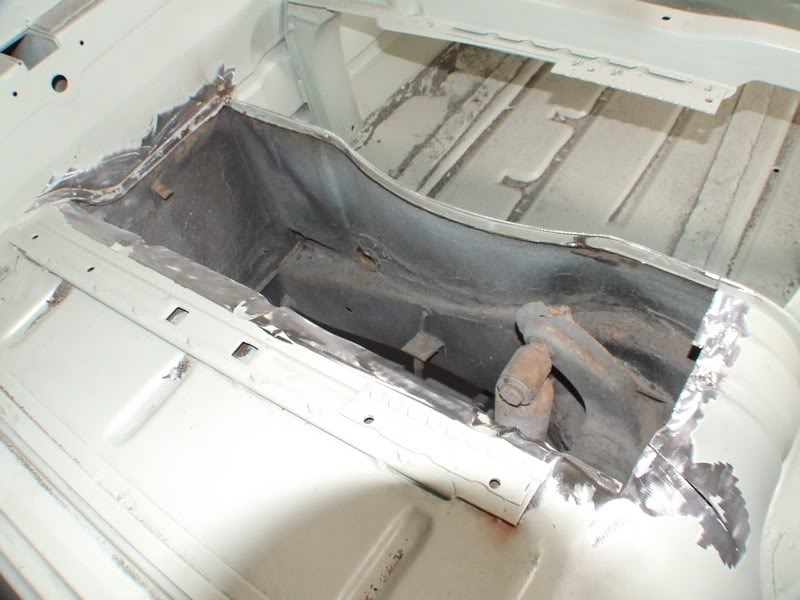
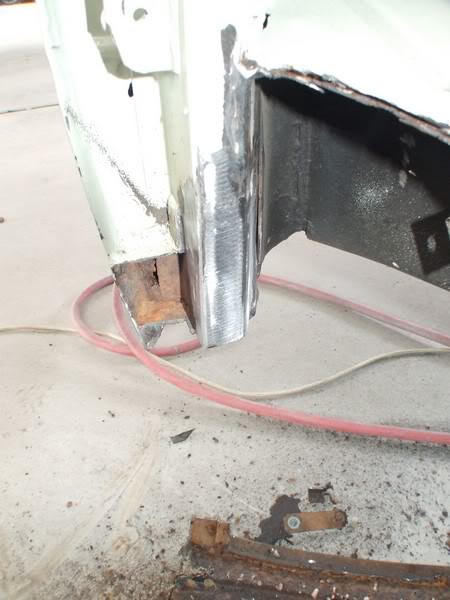
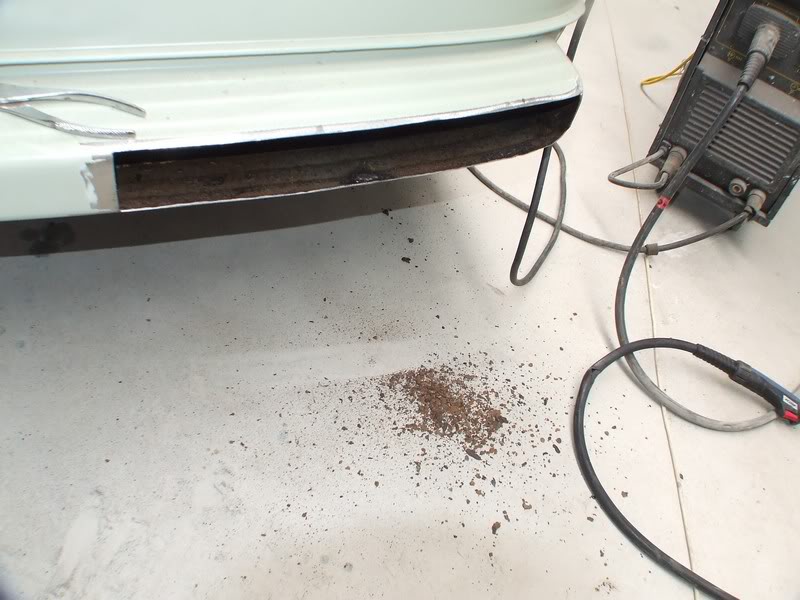
The front bumper mount was pushed in a fair bit. This is a very strong panel so I wont be able to pull it out from the outside. I'll have to cut it to repair it.

Posted Image

Posted Image

Posted Image

Posted Image

Posted Image

Posted Image

Posted Image

Posted Image

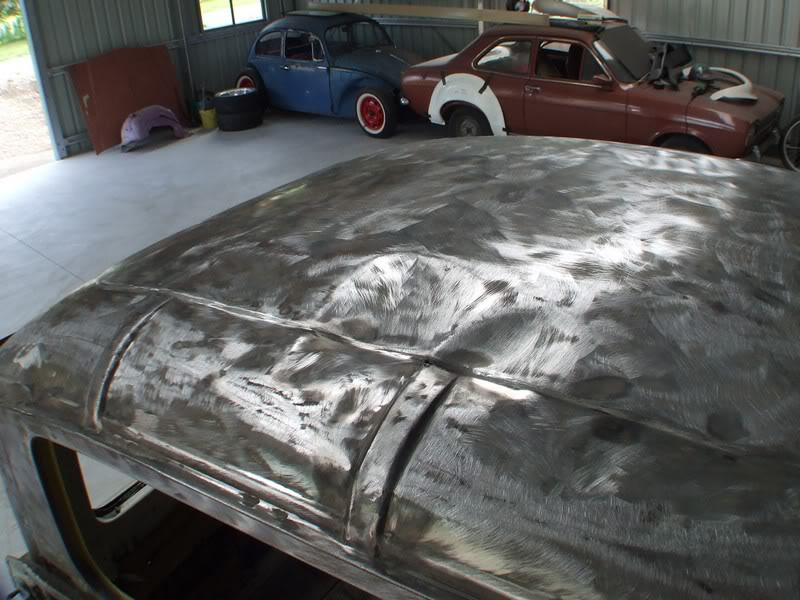
Having an etch priming party : )

Posted Image

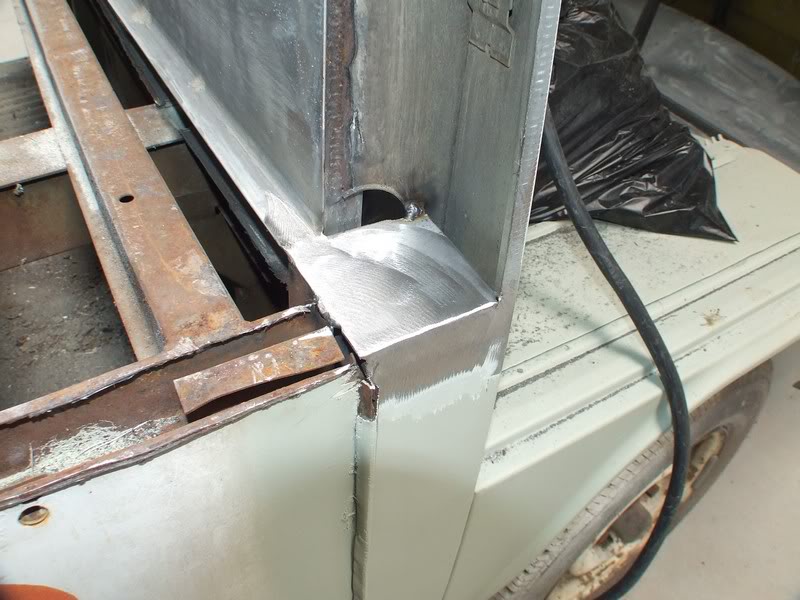
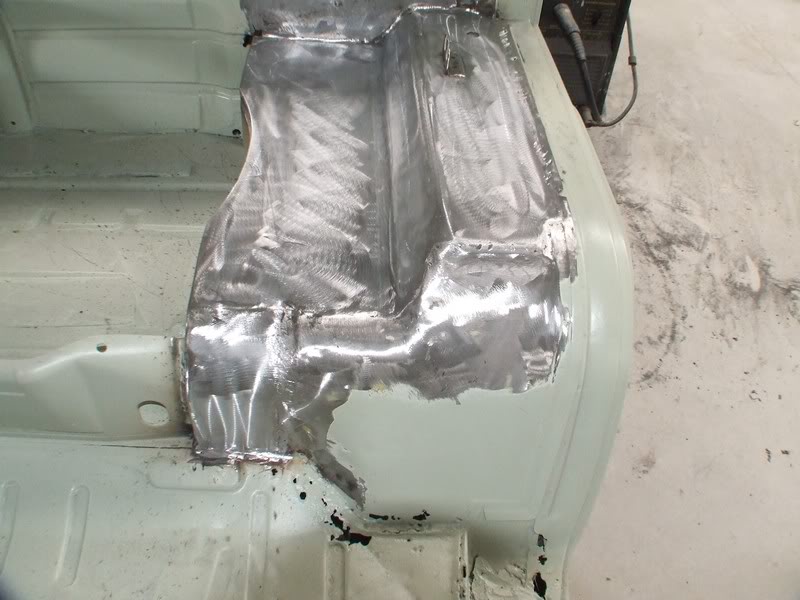
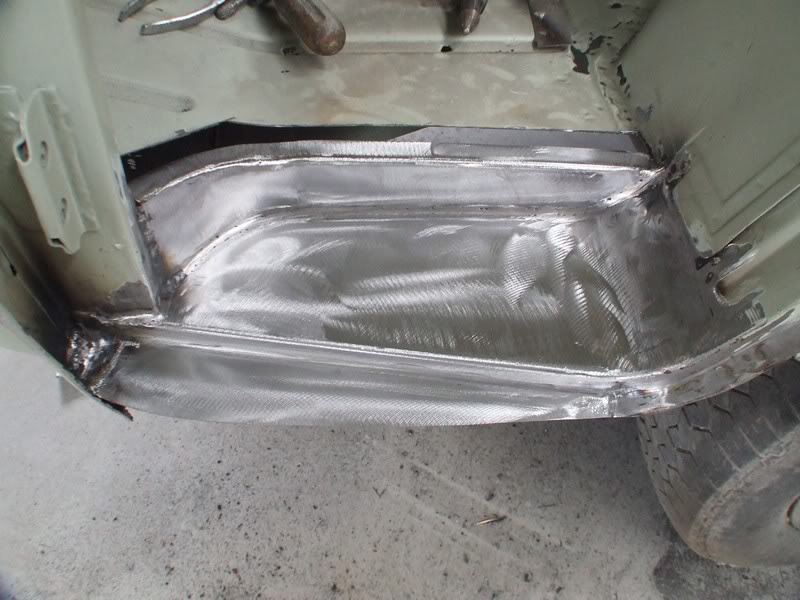
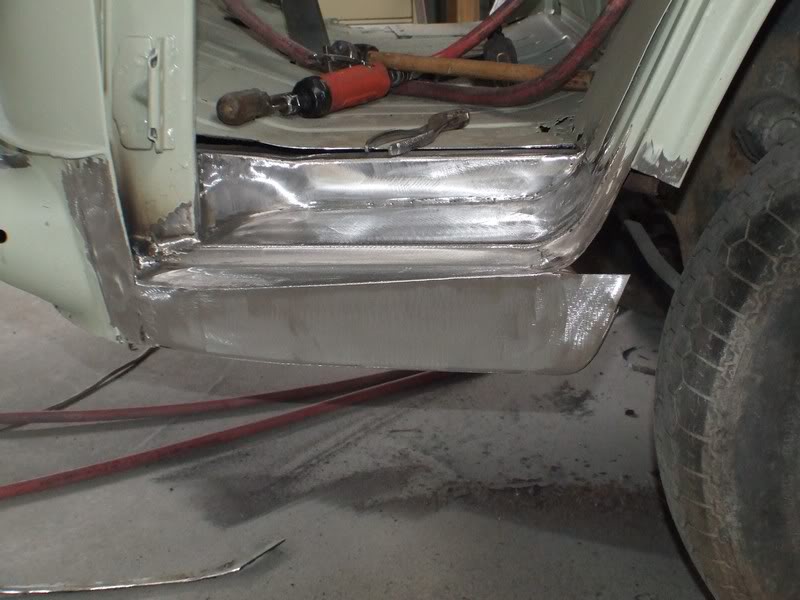
Well that's the start. I'll go over a few of the repairs I've done so far in the next post.

#2 dirtbag

dirtbag

    Street Machines current Biatch!

  • Members
  • PipPipPipPipPip
  • 1,927 posts
  • Name:Tim
  • Location:Sunshine Coast
  • Car:1995 V8 2wd hilux, LH torana ute, 1970 Volksrod, MK1 2 door escort, CJ6 Jeep, VX commodore wagon.
  • Joined: 29-December 09

Posted 02 February 2011 - 12:09 PM

The first thing I fixed was the small amount of rust around the bottom of the windscreen.

Posted Image

Posted Image

Here's the piece I made for the other side

Posted Image

With the screen finished the next job was to wire wheel the inside of the cab.

Here's a nice repair.

Posted Image

Yes, they fixed rust with a mobile phone SIM card holder : )

Posted Image

After lots of fun it looked like this.

Posted Image

Posted Image

Even though most of the inside will get cut away I etch primed it just to seal everything up.

Posted Image


I'm going to cut the seat bases out as they're rusty and full of swages. I'm going to replace them with thicker steel with no swages as they'll get painted in body colour.

In this next pic I've already repaired a bit of rust in the back wall.

Posted Image

Here's the other side. I'm keeping a bit of this side in place for the seat mount.

Posted Image

Posted Image

Posted Image

Posted Image

With some etch primer applied you can see how much smoother it looks now.

Posted Image

The front step was the next to go.

Posted Image

Posted Image

Posted Image

Because I'm going to extend the sills down 3 inches, I've made the lower part of the step a little different. It's the same depth at the front but is 35mm lower at the back so it will help line up with the new sills once they're done.

Posted Image

The front bumper mount also got some attention.

Posted Image

I cut the dent out which meant I could bash it into shape on an anvil, and also meant I could clean and rust convert inside the bumper mount.

Posted Image

Posted Image

Posted Image


Next bit out is the floor. I'll be replacing the whole thing.

Posted Image

Posted Image

Nice! hahaha.

Posted Image

Edited by dirtbag, 02 February 2011 - 12:12 PM.


#3 _Quagmire_

_Quagmire_
  • Guests

Posted 02 February 2011 - 12:21 PM

350 chev in a kombi!!!!
ferk yeah
rember to buy some wheelie bars for the rear!

#4 Neils LX

Neils LX

    Forum Fixture

  • Members
  • PipPipPipPipPip
  • 2,074 posts
  • Name:a
  • Location:North west NSW
  • Joined: 18-March 07

Posted 02 February 2011 - 12:26 PM

Love the old kombi, am using one atm for a shed for 5 red holden motors and 2 253s.

#5 dirtbag

dirtbag

    Street Machines current Biatch!

  • Members
  • PipPipPipPipPip
  • 1,927 posts
  • Name:Tim
  • Location:Sunshine Coast
  • Car:1995 V8 2wd hilux, LH torana ute, 1970 Volksrod, MK1 2 door escort, CJ6 Jeep, VX commodore wagon.
  • Joined: 29-December 09

Posted 02 February 2011 - 12:38 PM

So the floors are going to be done a little differently too.

I made two 25mm RHS rectangles and lines one side with 2mm zinc. These will be the foot rests.

Posted Image

I then folded up the new floor in 2 pieces also from 2mm zinc. I use thicker steel so I can keep it smooth but still firm.

Posted Image

The entire interior will be painted in 2 pac body colour, including the floor. There will be removable trimmed pieces in the floor recesses for your feet. Just for something different.

Posted Image

The next thing I wanted to sort out was the back wall of the cab. Not only does it have dodgy rust repairs, it's totally stoved in and sticks out like dogs nasties.

Posted Image

The back wall sticks straight out as it used to line up with the drop down side gates, but this one isn't going to have them, so this squared off rear wall looks silly.

Posted Image

I folded up a test piece to see if I could duplicate the thick swage properly.

Posted Image

Happy with the test piece I then started chopping.

Posted Image

It took a while but I finally got the whole lot trimmed off, including the corners. I really need a plasma cutter : )

Posted Image

I used some thick wall 25mm RHS to frame up the rear wall. The first pieces were welded into the sides.

Posted Image

Here's the rest of the frame I built. It doesn't really need this for strength as far as roll over is concerned, it's more for support for the new rear wall which will get plug welded to it.

Posted Image

Here's the new rear wall I made. You can see the look I'm going for by continuing the thick swage around the whole cab. I used 1.6mm zinc to make this piece so was a bit of a battle bending the swage into it as it's 1500mm wide but it is very strong.

Posted Image

Here you can see I've trimmed out the rear window and drilled the holes for plug welding.

Posted Image

Posted Image

Here's one of the corners getting filled in.

Posted Image

I made the swage as a separate piece to make it easier as it's a fairly curvy piece.

Posted Image

With all the welding done it scored some rust converter, just for something different : ) I still have to do the other side corner though.

Posted Image

The rear pillars where the vertical seam is will be getting cut out too, and smooth pieces welded in. They will be joined to the top of this new rear wall. The big step in the panel that is there now wont be there once the pillars are replaced.

I think the new rear wall suits the shape better, but isn't an obvious modification.

Posted Image

The new floor and step also got some rust converter.

Posted Image

Well that's where it's at for now, but if anyone is interested I'll keep updating as the work gets done.

#6 MRLXSS

MRLXSS

    The Render Garage

  • Members
  • PipPipPipPipPipPipPip
  • 12,396 posts
  • Name:Matt
  • Location:Upwey, Melbourne
  • Car:355 LX Hatchback, DeLorean DMC-12, LX SS Hatch, VY Cross8 Crewman
  • Joined: 09-November 05

Posted 02 February 2011 - 12:45 PM

Very Cool! Can't wait to see this progress! I love watching your threads Mr Dirtbag!

#7 dirtbag

dirtbag

    Street Machines current Biatch!

  • Members
  • PipPipPipPipPip
  • 1,927 posts
  • Name:Tim
  • Location:Sunshine Coast
  • Car:1995 V8 2wd hilux, LH torana ute, 1970 Volksrod, MK1 2 door escort, CJ6 Jeep, VX commodore wagon.
  • Joined: 29-December 09

Posted 02 February 2011 - 12:52 PM

Thanks Matt. It should be a fun build. Crap loads of fabrication to keep me happy : )

Also, anything that gets a V8 when it shouldn't is always good :buttrock:

#8 _jabba_

_jabba_
  • Guests

Posted 02 February 2011 - 01:34 PM

Keep the updates coming, your doing some amazing fab work.

#9 wot179

wot179

    Green Eggs and Spam

  • Members
  • PipPipPipPipPipPipPip
  • 6,784 posts
  • Name:Jesus Bloody Christ
  • Location:Sunny Santa Maria
  • Car:Goon
  • Joined: 06-February 09

Posted 02 February 2011 - 01:39 PM

You are a glutten for punishment,mate.

But its looking sweet and is going to be a very stylish custom.

....with a small block :buttrock:

Keep us updated.


#10 _Skapinad_

_Skapinad_
  • Guests

Posted 02 February 2011 - 01:56 PM

awesome work... the thing that amazes me the most in those photos is despite all the projects you have going on your shed is soooooo bloody clean you can see the concrete !

#11 _DomDom_

_DomDom_
  • Guests

Posted 02 February 2011 - 02:06 PM

Awesome work Tim.

Keep it up. i was having withdrawals for a while there.Posted Image

Dom


#12 Stinga

Stinga

    .

  • Members
  • PipPipPipPipPip
  • 2,114 posts
  • Name:Stinga
  • Location:Wollongong, NSW
  • Car:HD Holden ute, and sedan, UC torana
  • Joined: 05-December 05

Posted 02 February 2011 - 04:18 PM

this is going to be cooooool! i like the idea of the painted interior... and anything chev powered.

#13 _Squarepants_

_Squarepants_
  • Guests

Posted 02 February 2011 - 07:15 PM

Tim, you are an inspiration to us all!

Keep the updates coming mate, it's fascinating to see what is actually possible, as well as what you manage to dream up, with rust repairs and customisation on cars that most people would just send to the wreckers. I'm hooked on your threads.

Love ya work man!

#14 _niterida_

_niterida_
  • Guests

Posted 02 February 2011 - 07:15 PM

Awesome work as always :-)

Posted Image


That photo looks super cool to me - who needs bumpers ??

#15 Peter UC

Peter UC

    Forum Fixture

  • Members
  • PipPipPipPipPip
  • 765 posts
  • Location:Emerald Vic
  • Joined: 08-November 05

Posted 03 February 2011 - 12:06 PM

Awesome I'm glad you put up this build. I'm suprised you didn't tub the front guards, generally this is done to get Kombis belly scaping low.

#16 dirtbag

dirtbag

    Street Machines current Biatch!

  • Members
  • PipPipPipPipPip
  • 1,927 posts
  • Name:Tim
  • Location:Sunshine Coast
  • Car:1995 V8 2wd hilux, LH torana ute, 1970 Volksrod, MK1 2 door escort, CJ6 Jeep, VX commodore wagon.
  • Joined: 29-December 09

Posted 03 February 2011 - 02:49 PM

Hey Peter. Yes we did think about tubbing the front, but it's not going to be THAT low. It will get lowered so the top of the front tyre is level with the guard. Plus the owner is about 6 foot 4 and his head just touches the roof as it is so raising the seats wasn't an option.

Also the sills are going to be 3 inches deeper (lower) so it will appear lower than it is.

#17 _2wild4u_

_2wild4u_
  • Guests

Posted 04 February 2011 - 12:30 AM

you are amazing with what you do, and quick aswell, makes me want to build another car

#18 Heath

Heath

    I like cars.

  • Administrators
  • PipPipPipPipPipPipPip
  • 18,307 posts
  • Name:Heath
  • Location:Eastern Suburbs, Melbourne
  • Car:Heavily Modified UC Sunbird Hatchback
  • Joined: 07-November 05
Garage View Garage

Posted 04 February 2011 - 11:14 AM

Very cool project, I rate it and I love the work that's going into it. You must be inspiring a lot of people Tim hahaha

#19 _kombidamo_

_kombidamo_
  • Guests

Posted 04 February 2011 - 10:32 PM

This is going to be a Great looking Ute when its done. Keep going, your work is inspirational.

#20 _niterida_

_niterida_
  • Guests

Posted 04 February 2011 - 10:36 PM

This is going to be a Great looking Ute when its done. Keep going, your work is inspirational.


let me guess - this is your kombi ??

#21 dirtbag

dirtbag

    Street Machines current Biatch!

  • Members
  • PipPipPipPipPip
  • 1,927 posts
  • Name:Tim
  • Location:Sunshine Coast
  • Car:1995 V8 2wd hilux, LH torana ute, 1970 Volksrod, MK1 2 door escort, CJ6 Jeep, VX commodore wagon.
  • Joined: 29-December 09

Posted 05 February 2011 - 07:24 AM

Thanks guys for the kind words.

Niterida, that's a fair guess, but no. The owner doesn't go on this site.

On another note, I got a 1955 split window single cab ute in last week for some work and I think his friend and I have talked him into going with a porsche 2.7litre flat 6 and 5 speed. That would be cool : ) It's keeping it's original paint and patina too so will scare the hell out of a lot of traffic light bandits hahaha.

#22 _Viper_

_Viper_
  • Guests

Posted 05 February 2011 - 10:08 AM

Thats unreal Tim, im still blown away by your efforts

#23 Heath

Heath

    I like cars.

  • Administrators
  • PipPipPipPipPipPipPip
  • 18,307 posts
  • Name:Heath
  • Location:Eastern Suburbs, Melbourne
  • Car:Heavily Modified UC Sunbird Hatchback
  • Joined: 07-November 05
Garage View Garage

Posted 06 February 2011 - 10:06 AM

I probably have more interest in that next one Tim!

#24 dirtbag

dirtbag

    Street Machines current Biatch!

  • Members
  • PipPipPipPipPip
  • 1,927 posts
  • Name:Tim
  • Location:Sunshine Coast
  • Car:1995 V8 2wd hilux, LH torana ute, 1970 Volksrod, MK1 2 door escort, CJ6 Jeep, VX commodore wagon.
  • Joined: 29-December 09

Posted 17 February 2011 - 07:02 PM

Well unfortunately the '55 split window single cab kombi is getting a worked flat 4. Pity, I thought the porsche motor would have been awesome.

Anyway, I've done a little bit more to the proper (V8) kombi : )

I am in the process of removing the seams from beside the rear window.

This will also get rid of the big step that was in the panel. I wasn't worried about the step as it was always a temporary arrangement.

Posted Image

Posted Image

This shows the new piece compared to the old piece with the big seam in it.

Posted Image

I also made a start on the other side but still have to fully weld it in.

Posted Image

I didn't weld it in as I wanted to make the new corner. Wasn't really in a welding mood today.

I started by welding some 2mm plate into the base of the rear wall for the new corner to mount to.

Posted Image

Then I made the new corner. It isn't fully welded in yet either. I'm getting slack in my old age : )

Posted Image

I still have to make the swage piece to go around the corner and replace the area where the vents are. Then I might feel like welding it all in properly : )

Posted Image

There's not much of the original rear panel left now.

Posted Image

That's all for now.

#25 _2wild4u_

_2wild4u_
  • Guests

Posted 18 February 2011 - 12:19 AM

loving it


0 user(s) are reading this topic

0 members, 0 guests, 0 anonymous users