Jump to content


Photo
- - - - -

Tyre Biter's Hatchback - ETA unknown...


  • Please log in to reply
505 replies to this topic

#376 Tyre biter

Tyre biter

    Forum Fixture

  • Members
  • PipPipPipPipPip
  • 982 posts
  • Name:Craig
  • Location:Canberra
  • Car:Should have gone with Palais...
  • Joined: 08-December 10

Posted 23 January 2014 - 03:24 PM

Thanks to Michael at Seat Belt Solutions I got it sorted today :)

Who would have thought the sliding retainer could bend so much as to pass the tongue through without snapping it!

In any case - after pushing and shoving, grunting and turning red in the face, it is done and dusted.

Now to finish off the fitting of carpet and then maybe the seats can go in - I wonder how many goes that will take me to get it right...

Cheers, TB


#377 Redslur

Redslur

    Has been Torana owner

  • Members
  • PipPipPipPipPipPip
  • 3,535 posts
  • Name:Gerry
  • Location:Canberra
  • Car:HQ GTS Replica 350.
  • Joined: 08-November 05

Posted 23 January 2014 - 07:18 PM

Last time i saw your face go red mate was when some boofhead was perched over you wrestling you in bed at Toranafest....Wonder who that was :-)


Glad you got is sorted anyway!


#378 Tyre biter

Tyre biter

    Forum Fixture

  • Members
  • PipPipPipPipPip
  • 982 posts
  • Name:Craig
  • Location:Canberra
  • Car:Should have gone with Palais...
  • Joined: 08-December 10

Posted 23 January 2014 - 07:29 PM

Yes, I recall - being harangued and harassed by an absolute tool - I remember it well - to ever scrub it from my memory will prove difficult - a a night not to remember.

Pity it is also burned upon the minds Messers Wilson and Russell - collateral damage sorry to report.

Wonder how the 'boofhead' explained the sore ribs to his bride...

Mate, I am hanging out for your help with a few things - when you can - as always, your guiding hand is very much appreciated.

Cheers, TB


#379 Redslur

Redslur

    Has been Torana owner

  • Members
  • PipPipPipPipPipPip
  • 3,535 posts
  • Name:Gerry
  • Location:Canberra
  • Car:HQ GTS Replica 350.
  • Joined: 08-November 05

Posted 23 January 2014 - 07:35 PM

At this stage next weekend will be most likely.  Or maybe even Monday as it is a holiday?  Will touch base with you mate.


#380 Tyre biter

Tyre biter

    Forum Fixture

  • Members
  • PipPipPipPipPip
  • 982 posts
  • Name:Craig
  • Location:Canberra
  • Car:Should have gone with Palais...
  • Joined: 08-December 10

Posted 23 March 2014 - 08:44 PM

What a day;

Redslur (Gerry) kindly came by and gave me the better part of his Sunday to get this gearbox right.

Turns out my rants regarding Peter Zitis and his 'Aussie 4 Speed Specialists' operation were even more deserved: http://www.gmh-toran...-200kw-m21-box/

All manner of things were at issue - I'll have more of a spray over there.

The good news is that Gerry remedied it all for me and (fingers crossed) we are onwards and upwards!

Gez did bring by his four door and wanted a shot of the green machines side by side;

IMG_5472_zps7d7fae04.jpg


A big thanks to Gez for his help - I'd be lost without you mate - ta.

Cheers, TB


#381 Tyre biter

Tyre biter

    Forum Fixture

  • Members
  • PipPipPipPipPip
  • 982 posts
  • Name:Craig
  • Location:Canberra
  • Car:Should have gone with Palais...
  • Joined: 08-December 10

Posted 14 July 2014 - 04:37 PM

Been a while - four months or thereabouts I think.


Got the carpet and seats in a since my last.


I visited LX6LTR (CB) at the weekend and 'liberated' a number of items from him including all manner of little finishing things - not that my car is anywhere near finished mind you!

Interior grab handles, an alternator and assembly, a UC rear sway-bar, some heater control tabs, the wiring loom for the gearbox's reverse switch - that sort of thing.


Spent yesterday cleaning (wire wheel) and then re-painting the UC sway bar and then today Redslur (Gerry) kindly came over to help me tackle my list; the list was long and involved but we knocked it over.


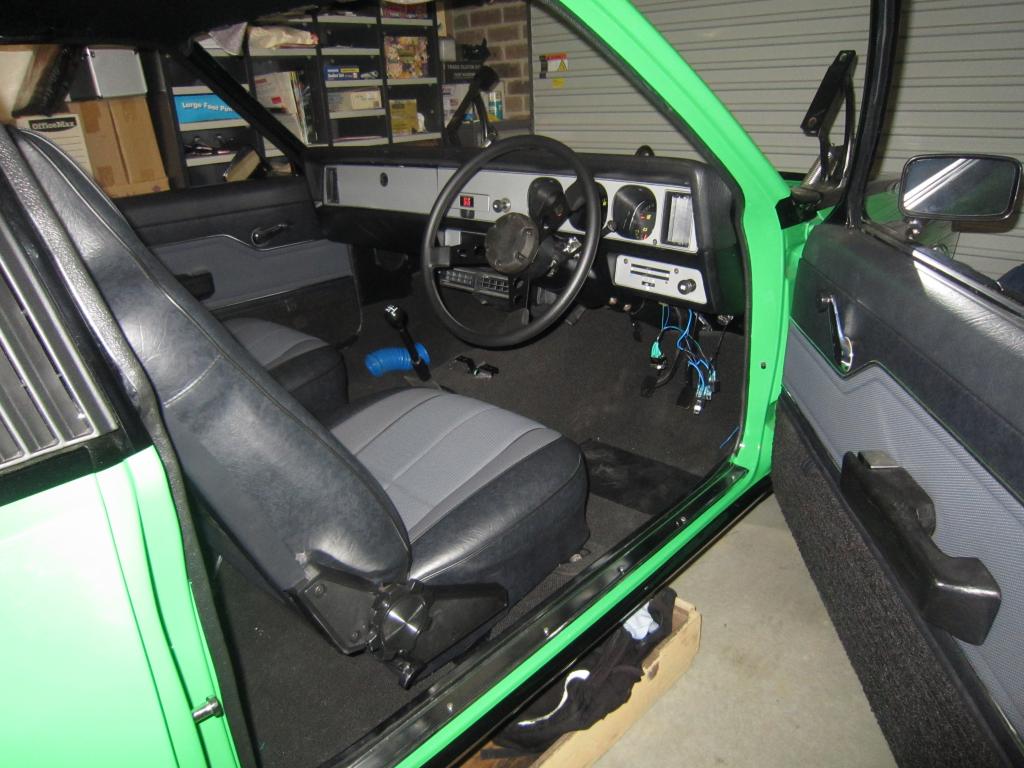
The door opening scuff-plates went in - wasn't this a job much bigger than I thought it would be! 

The previously perfectly gaped and adjusted doors didn't do so well once the carpet was trimmed and the scuff-plate installed.  This required some massaging of a few different items, even moving the door cards a little - who would have thought?

This is where Gerry came into his own, his knowledge and experience got a job done which I would still be throwing spanners and my toys out of the cot over!

Also go the dash in - lower, facia and crash-pad.

Scuffplatesfitted_zpsb9df5cc1.jpg


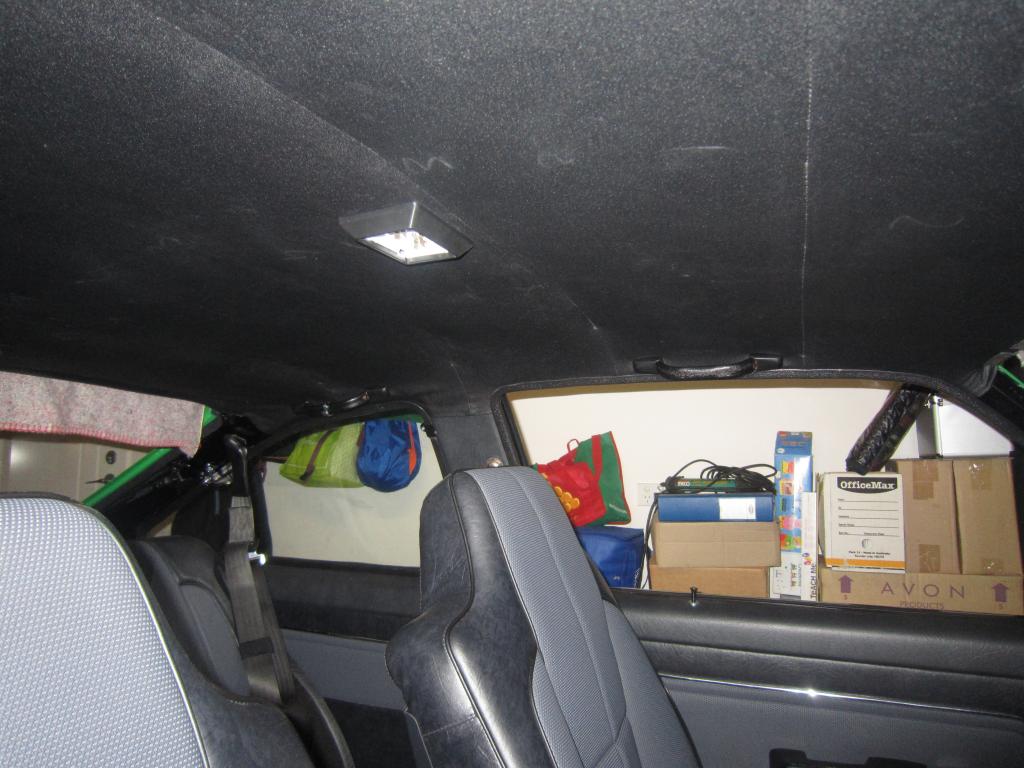
Next up, the interior grab handles.

Again, I had spent yesterday cleaning them and painting them with vinyl die - came up a treat.

I think I have installed the chromed hanging hooks the wrong way around - I have the hook outwards.

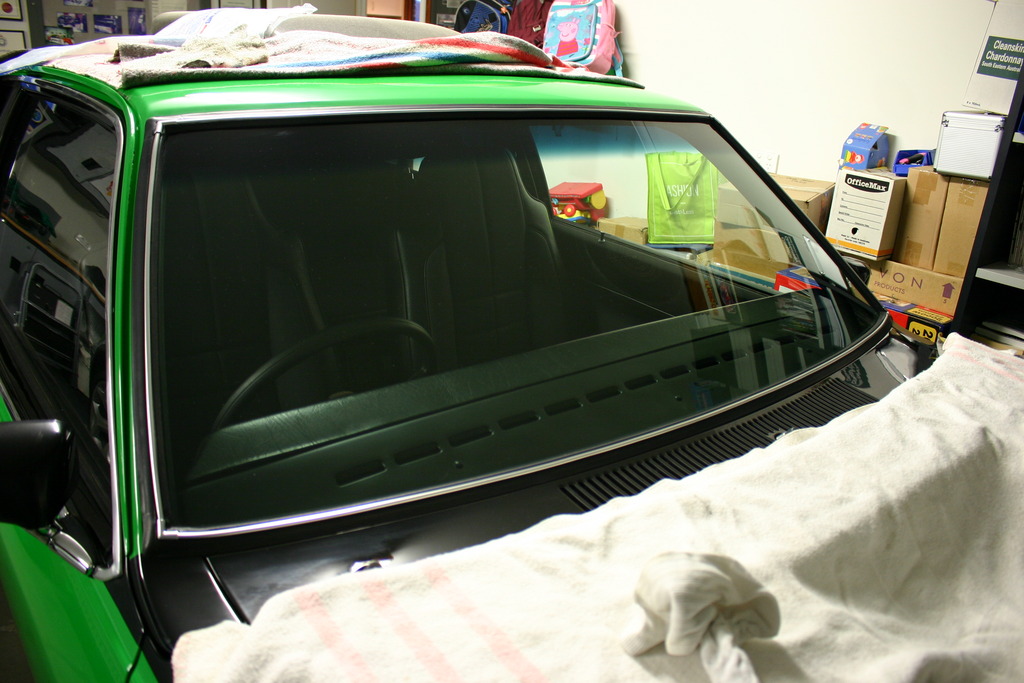
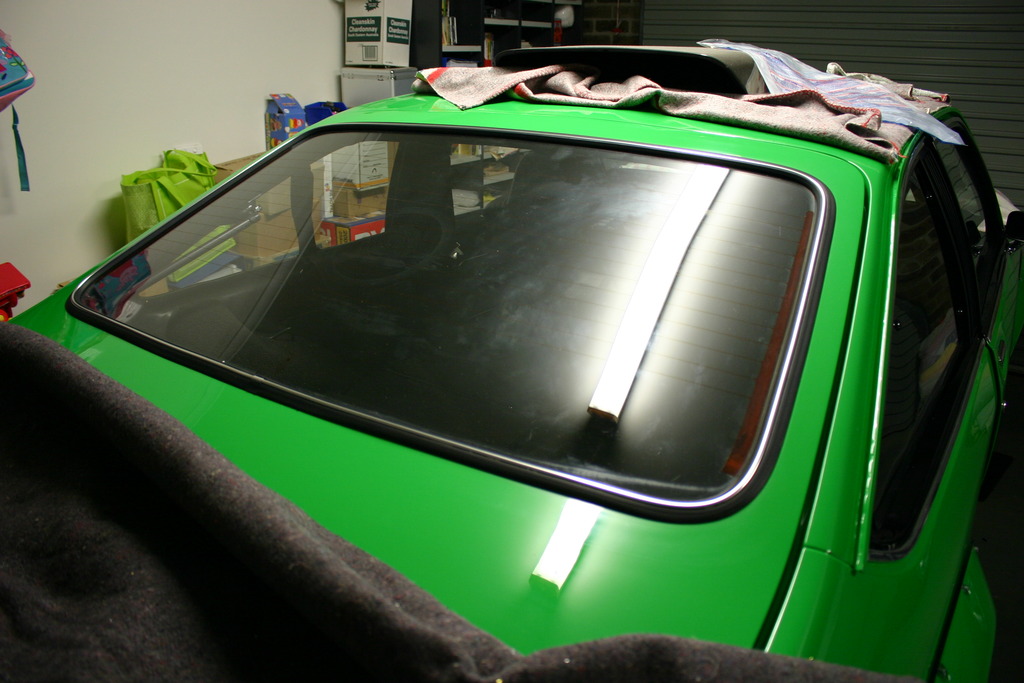
Funny how the flash photo reveals the chalk marks from the motor trimmer in the headlining - you can't see them with the naked eye...

Grabhandlesfitted_zpsd8fb647d.jpg


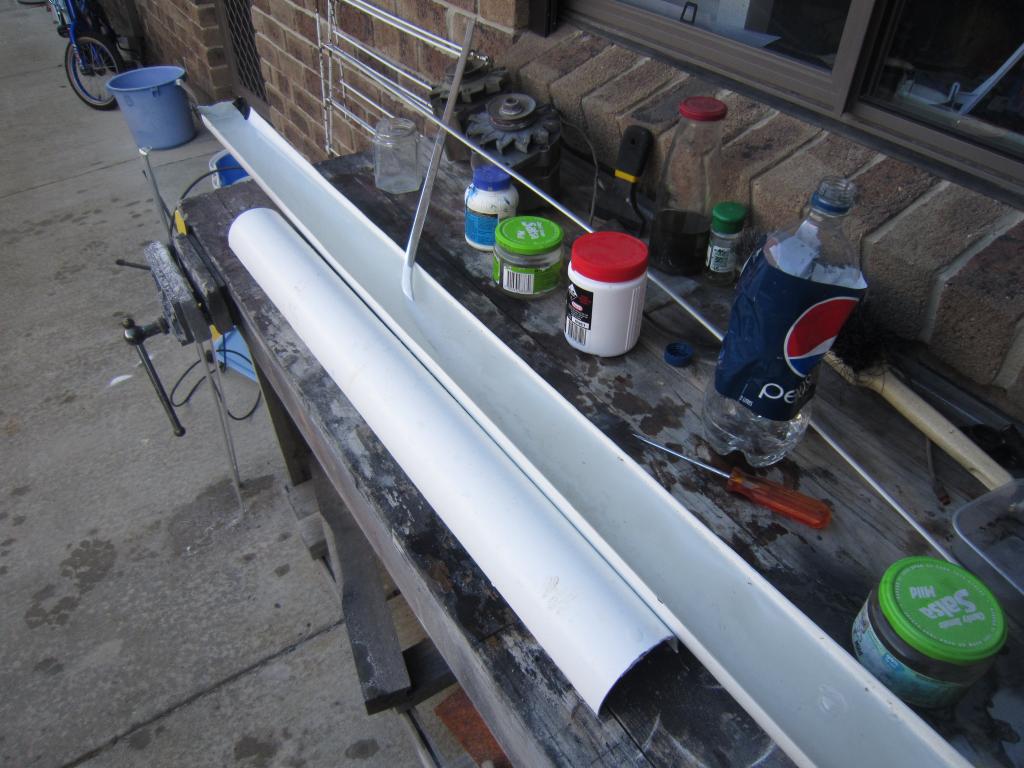
After lunch we turned our attention to the rear sway bar and things didn't go too well.

LX6LTR had kindly loaned me a Whiteline 'UC style' bar to trial fit - he had doubts the OEM UC one he gave me would fit - I should have listened.

Seems I have mixed up the terms 'UC style' bar and OEM UC bar when being given advice previously on this from a few members and deciphered this as the two being interchangeable - seems they are not.

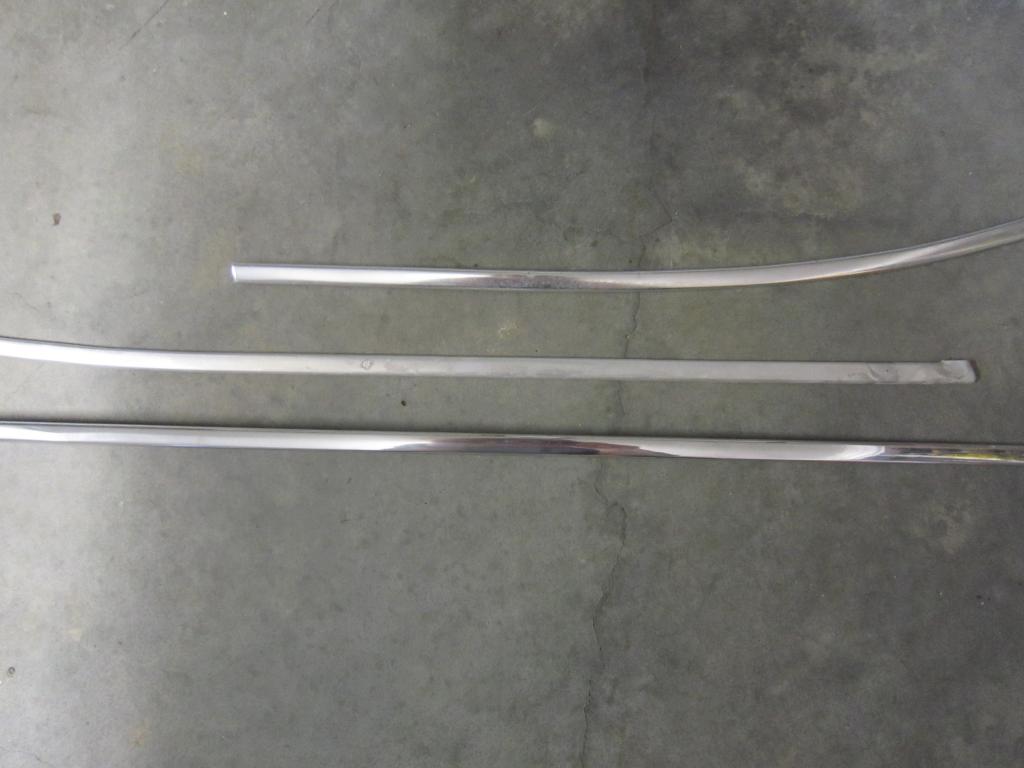
In the end, the OEM UC bar won't fit around the 9" diff and this is where the Whiteline 'UC style' bar differs to the OEM UC bar.

You can see there is about 40mm extra length in the Whiteline bar referencing the eyelet mounts.

SwayBar-WhitelinevUC_zpse1fd14a2.jpg


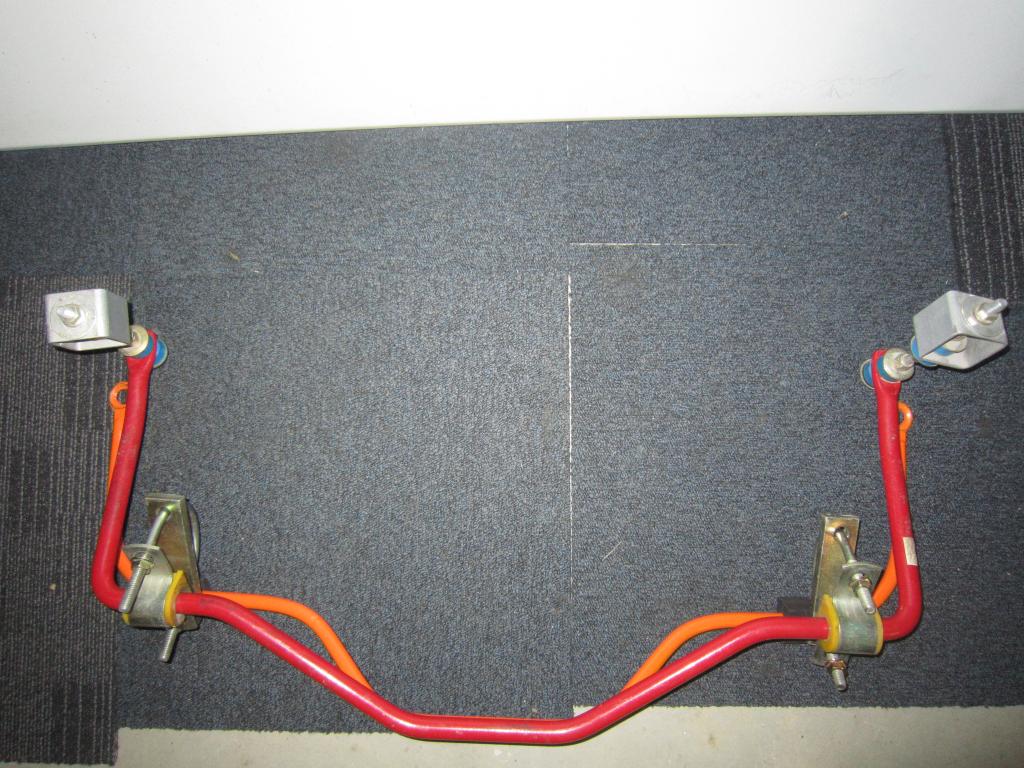
I have a K-MAC 'Bathurst' rear facing sway bar if anyone has a Whiteline 'UC style' forward facing unit they would like to swap??? :)

I can only ask... You know the old saying; 'don't ask, don't get' :)


I was having kittens about a leak from the gearbox and frankly not looking forward to yet again having to remove it.

Turns out the weeping was a result of two issues;

1. the side cover bolts not being nipped up enough (I was afraid to turn the bolts too much and bugger the threads), and

2. the dummy yoke I had installed to measure the required tail-shaft length had a poor seal/plug.

Fingers crossed this has now all been resolved...


Also fitted the gearbox switch loom, the cotter pins in the steering knuckle, and worked out exactly what length cable I will need for the clutch set-up I am using (UC pedal arrangement).

All-in-all, a productive day.

A but disheartened about the rear sway bar but hey, I had some other wins along the way and so that is the way things go I guess.


A big thanks again to CB and Gerry - I would be lost without your help and generosity.

Cheers, TB


#382 Tyre biter

Tyre biter

    Forum Fixture

  • Members
  • PipPipPipPipPip
  • 982 posts
  • Name:Craig
  • Location:Canberra
  • Car:Should have gone with Palais...
  • Joined: 08-December 10

Posted 17 July 2014 - 07:22 PM

I had a go at the whole de-anodising of the aluminium (US - aluminum) window trim today.

Found these YouTube posts helpful;

https://www.youtube....h?v=PenOoZDMFew

https://www.youtube....h?v=4BxFn0111Bk

https://www.youtube....h?v=6__RekE1dCo


Together with this web-page;

http://www.secondcha.../public/665.cfm


A visit to the local supermarket to get the drain cleaner - caustic soda - about $4.50 for 500gm.

A length of PVC pipe cut in half using an angle grinder with an end cap also sawn in half fitted to each end - five minute job.

Then fill the through with some warm water and voila!


IMG_6827_zpsd40d4a59.jpg


Wait several minutes and watch it fizz-away, followed by some clean water to clean up the trim - God the caustic soda hurts small cuts in your fingers - wear gloves is my (belated) advice.  I should have heeded the threads I cited above I guess...

The two metre length of PVC pipe held about 3-4 litres of water and so required three tablespoons of caustic soda to be mixed up.

I mixed the caustic soda in a small glass jar with some more warm water, and jeepers it became hot - so hot that shattered one of the jars I used.


Anyways, this is the result;

1. Top - a 'normal ' piece of old anodised trim,

2. Centre - a de-anodised piece of trim, and

3. Bottom - a polished piece of de-anosided trim after just an initial buff on the rag wheel.

IMG_6831_zpsbd04846c.jpg


All the driver's side trims are de-anodised.

Just need to polish all of them and then have a go at fitting them up.

The good news is I have enough trim pieces for two whole sets and so I can (to some degree) pick and choose the better ones.

The better one's aren't perfect but neither is my car and in the end, the result should be pretty good.

Still thinking about painting the finished trims with clear-coat to seal so that oxidation and rust doesn't become an issue, but also worried to do this because I have heard the clear-coat can cause the trims to appear 'milky'.

Might give it a go on a spare piece and see the result.


Hope this is of some help to those also considering doing de-anodising their trim using this method.

Cheers, TB


#383 Redslur

Redslur

    Has been Torana owner

  • Members
  • PipPipPipPipPipPip
  • 3,535 posts
  • Name:Gerry
  • Location:Canberra
  • Car:HQ GTS Replica 350.
  • Joined: 08-November 05

Posted 17 July 2014 - 07:39 PM

Did you have a go at refitting the LH scuff plate mate?


#384 76lxhatch

76lxhatch

    That was easy!

  • Members
  • PipPipPipPipPipPipPip
  • 7,156 posts
  • Location:Unzud
  • Car:SS
  • Joined: 04-August 08
Garage View Garage

Posted 17 July 2014 - 07:41 PM

Interesting, did it work better than a can of oven cleaner?

#385 _Bomber Watson_

_Bomber Watson_
  • Guests

Posted 17 July 2014 - 07:50 PM

Yeah i use oven cleaner to, but interested in this method. 


Some clears will make it go milky, stay away from pressure pack enamels or acrylics, really the only way is to get a proper 2k product thats designed to go over polished metals.


I think KBS makes a product thats suitable to actually. 


Edit, this product:


http://www.kbs-coati...nish-clearcoat/


With some of this:


http://www.kbs-coati...esion-promoter/


Would probably be the goods. 


Cheers. 


Edited by Bomber Watson, 17 July 2014 - 07:56 PM.


#386 ls2lxhatch

ls2lxhatch

  • Members
  • PipPipPipPipPipPipPip
  • 5,332 posts
  • Location:Perth
  • Car:LX Hatch
  • Joined: 29-May 06

Posted 17 July 2014 - 08:32 PM

I think it would be better to leave the trims uncoated and just polish them as needed when you wash the car.


I would consider clear coating a larger or difficult to access item but the trims are easy to get to and would only take a couple of minutes to repolish.


Edited by ls2lxhatch, 17 July 2014 - 08:34 PM.


#387 TempesT

TempesT

    Forum Fan

  • Members
  • PipPipPipPip
  • 493 posts
  • Name:James - JImmy or Jim
  • Location:Snowy Mountains
  • Car:LX hatch
  • Joined: 08-November 05

Posted 17 July 2014 - 08:32 PM

the hatch is looking saaaweet, trim came up good. Has any one used the ksb clear successfully? 


#388 _Bomber Watson_

_Bomber Watson_
  • Guests

Posted 17 July 2014 - 08:33 PM

I havnt, im just throwing it out there. 


Protec and PPG both make a product (probably the same one) that is designed to go over polished metals. But its a 2k product. 


Cheers. 


#389 Tyre biter

Tyre biter

    Forum Fixture

  • Members
  • PipPipPipPipPip
  • 982 posts
  • Name:Craig
  • Location:Canberra
  • Car:Should have gone with Palais...
  • Joined: 08-December 10

Posted 17 July 2014 - 09:13 PM

Did you have a go at refitting the LH scuff plate mate?

Not yet brother - still not sure how to work it to keep a profile that appears 'proper'.

Will give it some more thought.


Interesting, did it work better than a can of oven cleaner?

Much better - I tried the oven cleaner route once before - ages ago - result was no effect.

Then I read somewhere that unless you have a specific type of oven cleaner which still uses caustic soda then it won't work.

All the oven cleaners I have looked at since are 'non-caustic' from the Homebrand varieties at the bottom end of the scale right through to the top end including brands like 'Mr Muscle'.

A review of the oven-cleaner de-anodising posts on the www depict them to be US or UK based, or dated in the case of Australian posts.

Explains the non-result I guess...

This way is dead easy and you can see it happening as opposed to being covered by foam and wondering what is happening underneath.

Cheers, TB


Yeah i use oven cleaner to, but interested in this method. 


Some clears will make it go milky, stay away from pressure pack enamels or acrylics, really the only way is to get a proper 2k product thats designed to go over polished metals.


I think KBS makes a product thats suitable to actually. 


Edit, this product:


http://www.kbs-coati...nish-clearcoat/


With some of this:


http://www.kbs-coati...esion-promoter/


Would probably be the goods. 


Cheers. 

Thanks Bomber - will look into it and as usual with your advice it will no doubt be spot on the money - appreciate it.

Cheers, TB


Edited by Tyre biter, 17 July 2014 - 09:12 PM.


#390 Tyre biter

Tyre biter

    Forum Fixture

  • Members
  • PipPipPipPipPip
  • 982 posts
  • Name:Craig
  • Location:Canberra
  • Car:Should have gone with Palais...
  • Joined: 08-December 10

Posted 17 July 2014 - 09:21 PM

I think it would be better to leave the trims uncoated and just polish them as needed when you wash the car.


I would consider clear coating a larger or difficult to access item but the trims are easy to get to and would only take a couple of minutes to repolish.

I thought about that - just polishing them as needed.

Indeed many I have spoken to have done just that - I recall a beautifully restored concourse type 4.2L SS in Papyaya at TF last year whose owner said just that - polish them only.

I have since left an old piece on the dash of my ute these past few months (inside the cabin) - not as a scientific test to be honest - just too lazy to put it away - but nevertheless my lethargy has created as much.

I found the ends of the alloy formed a rust like appearance and so whilst I am not sure what is going on, this outcome suggested some level of sealing is needed at least to the ends and underside.

And so yes, I will at least coat those sections just as you suggest - thanks for the affirmation together with yet again another degree of proof that I am yet to have an original idea in my life :)

One day, just maybe one day...

All the best and cheers, TB


#391 Tyre biter

Tyre biter

    Forum Fixture

  • Members
  • PipPipPipPipPip
  • 982 posts
  • Name:Craig
  • Location:Canberra
  • Car:Should have gone with Palais...
  • Joined: 08-December 10

Posted 03 August 2014 - 08:10 PM

Bit of an update on the de-anodising of the side window trims.


Went pretty well - sometimes it was hard to see if the anodising had completely been stripped or not, and so once back on the rag wheel I found the pieces needed to be re-dipped - a few times in some cases.

Still a bit hit and miss - some pieces or sections thereof came up brilliantly, others not so much.

On one piece it just didn't seem to be stripping the anodising and  so I cranked up the ratio of caustic soda only to pay the price, the solution eating through the edges of a door upper piece in a couple of places...


Then I found out that fitting the bloody things isn't easy either; the rivets from KWC are good but many don't work and so my tip is to buy 50 per cent more than you need.

Getting the trim to snap home over the plastic tabs was bloody hard but after a bit of a think and some dry lube on the under-side of the trims I found things went much easier.


Anyways, here are the trims on the rear driver's side window;

IMG_6845_zps44d07698.jpg


I still have the driver's door and to fit and then the whole de-anodising shebang starts all over again on the passenger side trims - good times...


Almost done; I (finally) collected my bonnet and reverse cowl scoop this week, and only today the bonnet on - job is far from finished yet in terms of adjustment but it is good to get installed - looks more like a car now :)

IMG_6847_zpsc1805566.jpg


Cheers, TB


#392 N/A-PWR

N/A-PWR

    CABIN ENGINE CONTROLS GALORE

  • Members
  • PipPipPipPipPipPipPip
  • 9,595 posts
  • Name:Dave I
  • Location:Wooroloo, 65km's East of Perth
  • Car:'1969' LC RAT TORANA
  • Joined: 08-December 12

Posted 03 August 2014 - 08:27 PM

Hello Craig,


You have certainly put yourself out there,


doing the difficult jobs yourself.


Your Torana is Cool as.


#393 _berro59_

_berro59_
  • Guests

Posted 04 August 2014 - 04:58 PM

Nice one Craig,


I also had a hard time fitting the trim. 

Its scary as you need to apply pressure to get them and you dont want to scratch the car!

I only just found the little time trim sections that are near the mirror.


Car is looking good!


#394 Tyre biter

Tyre biter

    Forum Fixture

  • Members
  • PipPipPipPipPip
  • 982 posts
  • Name:Craig
  • Location:Canberra
  • Car:Should have gone with Palais...
  • Joined: 08-December 10

Posted 22 April 2015 - 05:47 PM

Thanks Berro - sorry for the delay - been a while since I checked this build thread of mine.


Update: Front and rear glass is in - car is now at 'lock-up stage'.

IMG_2369_zpsxnkyyvzz.jpg


IMG_2370_zpsdwiqqy22.jpg


I used the RSP rubbbers inc. their mylar locking strips and corner pieces referencing my thread and the help provided therein:

http://www.gmh-toran...-sought-please/


Good news, they have been re-profiled and the pieces match their mylar.

The RSP mylar is not OEM in profile - it is more rounded but nevertheless, it all goes together now - seems it was easier for RSP to amend the corner pieces rather than the mylar.

RSP on left and OEM on right.

Profile%20RSP%20L%20OEM%20R_zpstpmp8vog.


RSP%20L%20OEM%20R_zpsrnapod78.jpg


It was suggested to me the RSP mylar profile matches that of the big Holdens of the period and so makes sense, they can make one mylar for all as opposed to two...


I have just about everything now assembled to finish the car.

Just need to get the exhaust done and waiting for the shop which has my tail-shaft to find it (sent to shorten for the 9") and then I am but a few steps away from making TF this year!

Fingers crossed...


Cheers, TB


#395 hanra

hanra

    Oh My, Don't you post alot

  • Members
  • PipPipPipPipPipPipPip
  • 10,836 posts
  • Name:Brad
  • Location:Farrrrrr North Qld
  • Car:1975 LH SL/R 5000, 1967 Morris Cooper S, E36 BMW, Toyota Corolla, Isuzu DMax
  • Joined: 24-March 11

Posted 22 April 2015 - 06:18 PM

Nice

#396 _Bomber Watson_

_Bomber Watson_
  • Guests

Posted 22 April 2015 - 08:40 PM

Awesome progress on a very cool build. 


I'd love to have a beer and a chat with you TB, so your attendance might even shape my annual september holiday away from the always conflicting six banger nats and towards TF......


Cheers. 


#397 Redslur

Redslur

    Has been Torana owner

  • Members
  • PipPipPipPipPipPip
  • 3,535 posts
  • Name:Gerry
  • Location:Canberra
  • Car:HQ GTS Replica 350.
  • Joined: 08-November 05

Posted 23 April 2015 - 08:47 AM

Careful what you wish for Bomber, he's bringing a tazer up with him to Toranafest so you wouldn't want to put a foot out of place :-). God knows what he expects to do with it....


Good work on the windows Craig. What did he charge you? He does a nice job.  Wish I could have come over yesterday...but it was not meant to be. And Mel's appointment was cancelled at the last minute too.....Next time mate...or get it over to my place so I can finish it off :-)


#398 bullitA9X

bullitA9X

    Oh My, Don't you post alot

  • Members
  • PipPipPipPipPipPipPip
  • 4,160 posts
  • Location:south australia
  • Joined: 08-November 05
Garage View Garage

Posted 23 April 2015 - 10:33 AM

Love your build TB looks fkucing sweeeeeeet you have done an awesome job mate also it's keeping me motivated on my sons hatch lol hope to see this at the fest this year.....

#399 Tyre biter

Tyre biter

    Forum Fixture

  • Members
  • PipPipPipPipPip
  • 982 posts
  • Name:Craig
  • Location:Canberra
  • Car:Should have gone with Palais...
  • Joined: 08-December 10

Posted 23 April 2015 - 08:36 PM

Awesome progress on a very cool build. 


I'd love to have a beer and a chat with you TB, so your attendance might even shape my annual september holiday away from the always conflicting six banger nats and towards TF......


Cheers. 

Very kind of you Bomber but make no mistake, I promise to disappoint in person - guarantee you'd be bored in minutes :)

Yeah, it would be great to put a face to the name, and have a beer and a chat - seems we have a fair bit in common but also come at things from different directions in places - always liked how you and I can have a verbal stoush, say our bit, not get nasty, agree to disagree at times and generally just play on.  Like I said though, I suspect we are very similarly wired buggers in the main.

And so, I'll be there with or without the car but all going well, with it - look forward to meeting you if you get there.

Cheers, TB


Careful what you wish for Bomber, he's bringing a tazer up with him to Toranafest so you wouldn't want to put a foot out of place :-). God knows what he expects to do with it....


Good work on the windows Craig. What did he charge you? He does a nice job.  Wish I could have come over yesterday...but it was not meant to be. And Mel's appointment was cancelled at the last minute too.....Next time mate...or get it over to my place so I can finish it off :-)

Tazer is reserved only for that Wadey character Gez. 

If he makes an appearance, the Tazer makes an appearance and Wadey gets a five second ride, and should that feel good (to me rather than him) I may wish to light him up for another burn or three...

Wadey can't say he wasn't warned :)


Glad you like the glass - yep a great job - it looks really, really good in person.

Price you ask - a very, very reasonable amount is my reply - you know better than to ask me to commit to paper/screen brother :)

No problem on not getting to me - I must say, you don't look too well - seems you might be unable to go to work sometime soon, perhaps this coming Wednesday 29th April...

Cheers


Love your build TB looks fkucing sweeeeeeet you have done an awesome job mate also it's keeping me motivated on my sons hatch lol hope to see this at the fest this year.....

Thanks - appreciate your comment, and yes, motivation can be wanting at times - glad to hear you are keeping your 'mo-jo' on your son's car and pleased to play a part.

Cheers, TB


Nice

Thanks Brad but not a pinch on your car - the camera lies.

Cheers, TB


#400 Ice

Ice

    Cool

  • Members
  • PipPipPipPipPipPipPip
  • 15,126 posts
  • Name:Gene
  • Location:Galaxy's away from Ipswich
  • Car:77 HZ Sandman Van
  • Joined: 03-January 07

Posted 23 April 2015 - 08:40 PM

It will be good to see your Hatch finished Craig at Tfest


0 user(s) are reading this topic

0 members, 0 guests, 0 anonymous users