
Finding the holes was pretty easy Brad , I wouldn't worry to much about that. I used a soldering iron to poke the holes through as it creates a nice neat hole and the material can't tear around it that way. As far as making holes goes the carpet was by far the worst.

Tips on fitting Roof Lining
Started by
hanra
, Nov 02 2011 08:36 PM
40 replies to this topic
#27

hanra
-
- Members
-

- 10,831 posts
Oh My, Don't you post alot
- Name:Brad
- Location:Farrrrrr North Qld
- Car:1975 LH SL/R 5000, 1967 Morris Cooper S, E36 BMW, Toyota Corolla, Isuzu DMax
- Joined: 24-March 11
Posted 18 November 2011 - 12:04 PM
I actually found it quite hard to find the holes for the grab handles, as the headlining was stretched so far away from the steel... very lucky I had my drawings and had some measurements in the GMH workshop manual. If I didnt.. Id be stuffed....
#28
a9x868
-
- Members
-
- 1,417 posts
maurice mead of hatchbacks
- Name:facebook dave
- Location:perth miles n miles from shiney
- Car:valencia holden torana a9x hatch ultimate improvement on the barbados L34
- Joined: 24-July 11
Posted 18 November 2011 - 09:40 PM
pics brad pics!I actually found it quite hard to find the holes for the grab handles, as the headlining was stretched so far away from the steel... very lucky I had my drawings and had some measurements in the GMH workshop manual. If I didnt.. Id be stuffed....
#29
hanra
-
- Members
-
- 10,831 posts
Oh My, Don't you post alot
- Name:Brad
- Location:Farrrrrr North Qld
- Car:1975 LH SL/R 5000, 1967 Morris Cooper S, E36 BMW, Toyota Corolla, Isuzu DMax
- Joined: 24-March 11
Posted 19 November 2011 - 09:29 PM
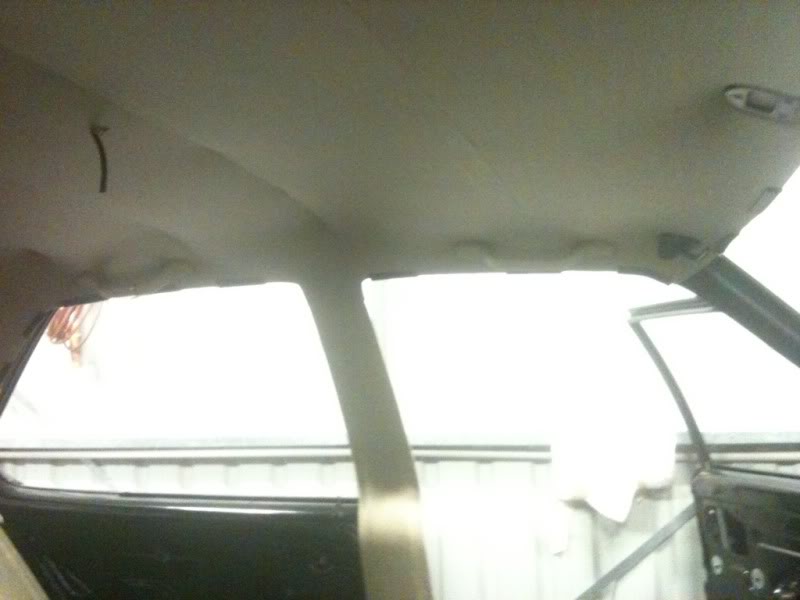
Ask and you shall receive.
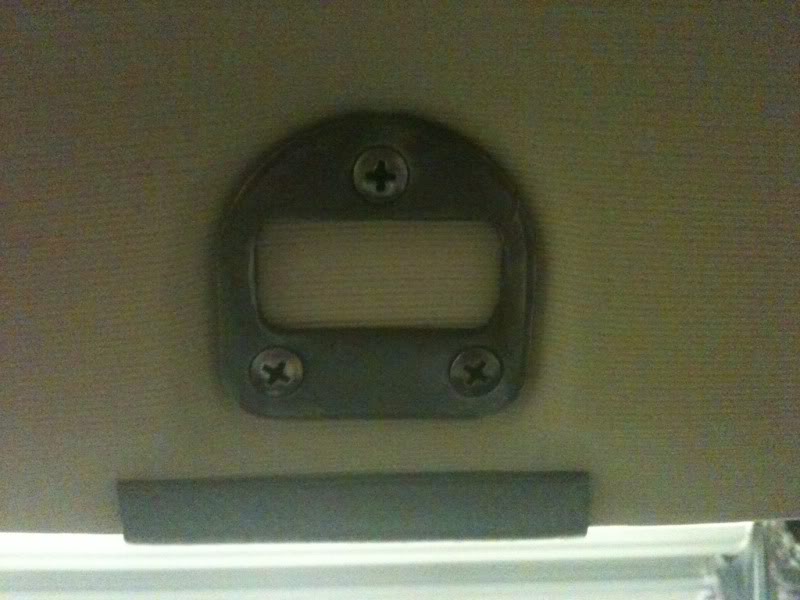
Grab handles:
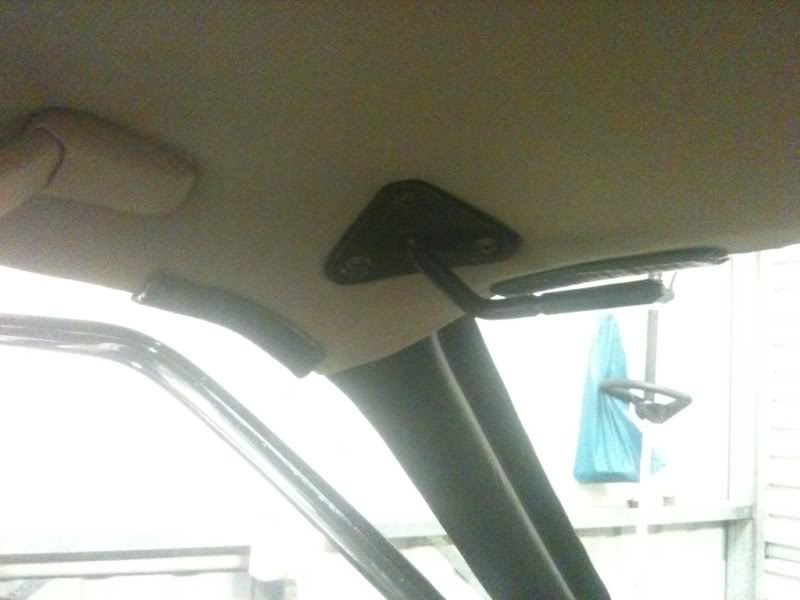
Sunvisor mounts:
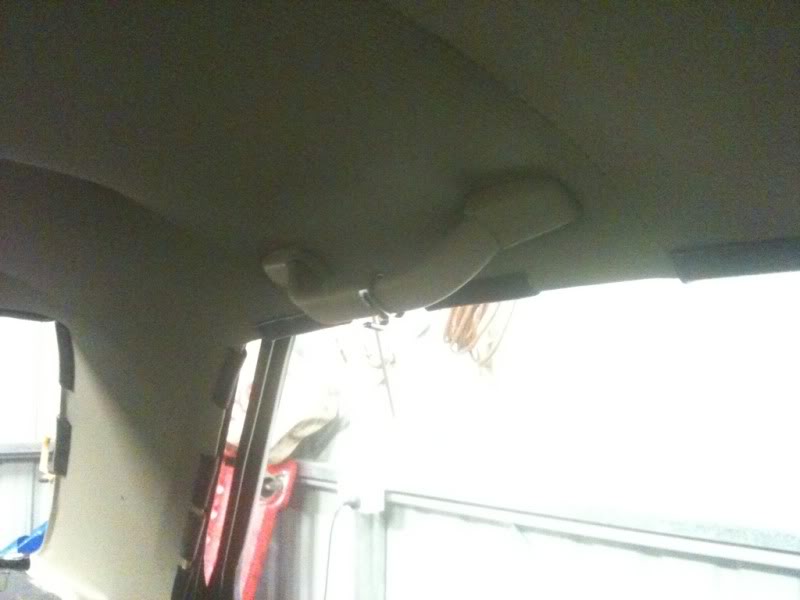
Rear view mount:
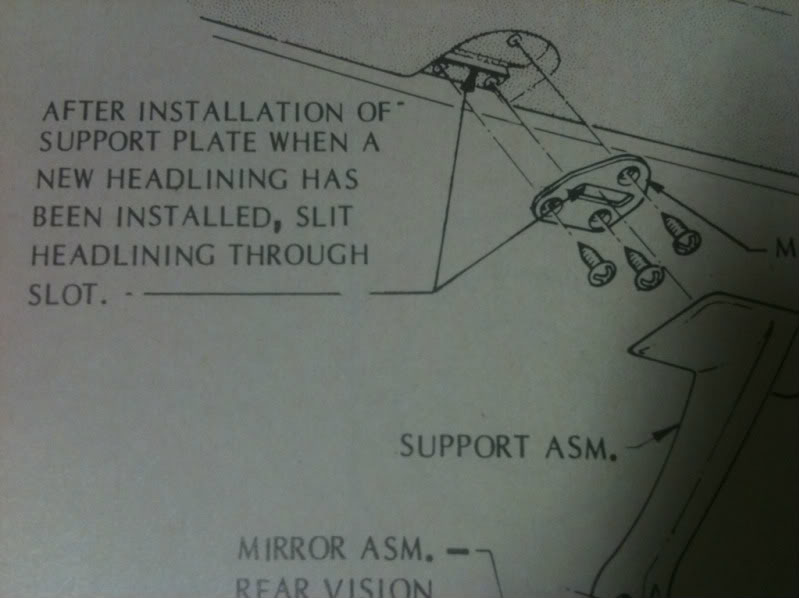
Why is it that the manual says to cut a slit in the lining on the inner section of the rear view mount?
All finished. Bought a new windscreen so now good to go to fit the glass, I want to try and sort out the mylar chrome locking strip though... I simply dont believe that the correct profile stuff is not available....
Grab handles:
Sunvisor mounts:
Rear view mount:
Why is it that the manual says to cut a slit in the lining on the inner section of the rear view mount?
All finished. Bought a new windscreen so now good to go to fit the glass, I want to try and sort out the mylar chrome locking strip though... I simply dont believe that the correct profile stuff is not available....
#30
a9x868
-
- Members
-
- 1,417 posts
maurice mead of hatchbacks
- Name:facebook dave
- Location:perth miles n miles from shiney
- Car:valencia holden torana a9x hatch ultimate improvement on the barbados L34
- Joined: 24-July 11
Posted 20 November 2011 - 03:11 AM
brad turn your rearview mirror
bracket upside down
you should see couple of tapered pins and a small spring
roof lining needs to be sliced so these pins can locate into
the mounting bracket properly
i used nos mylar that my mate gave me
i,m sure the stuff is still available though
lookin great!
cheers
davemc
bracket upside down
you should see couple of tapered pins and a small spring
roof lining needs to be sliced so these pins can locate into
the mounting bracket properly
i used nos mylar that my mate gave me
i,m sure the stuff is still available though
lookin great!
cheers
davemc
#31
_moot_
_moot_
-

- Guests
Posted 20 November 2011 - 06:35 AM
That is a good price!
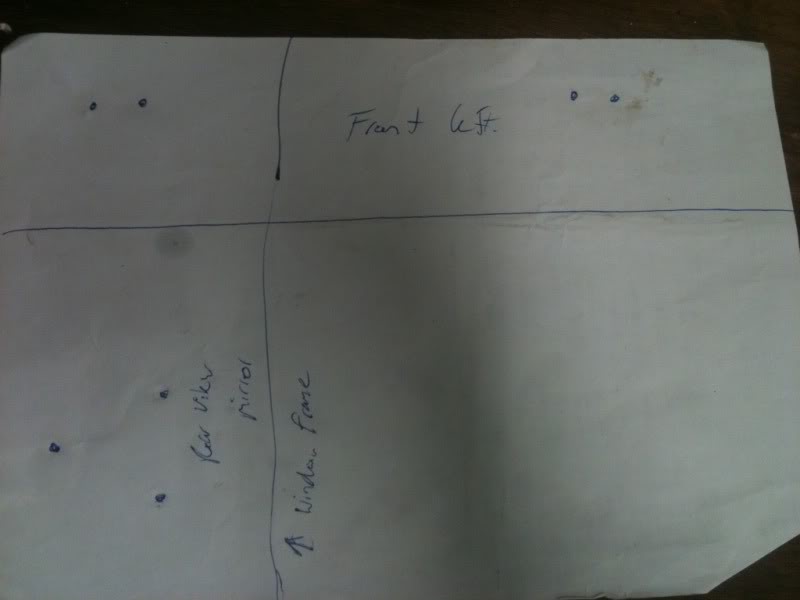
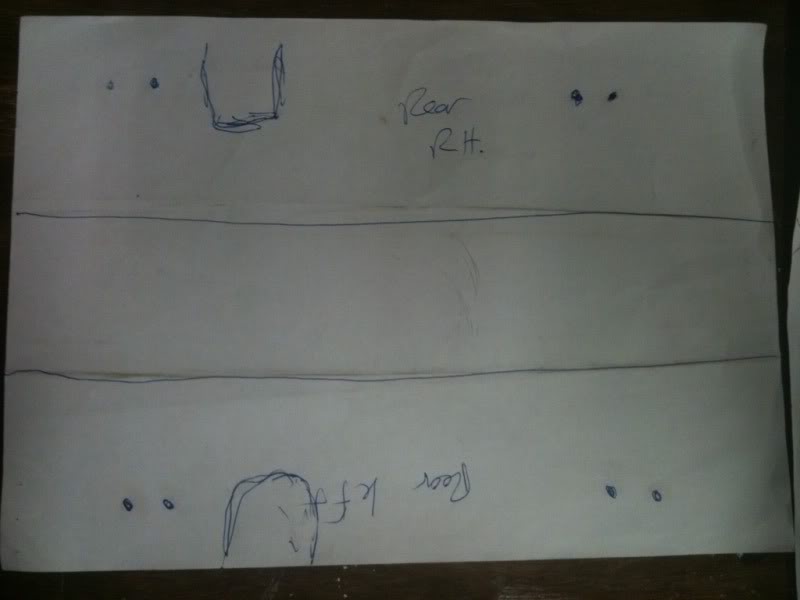
One small thing I did prior to fitting the headlining was to take a few bits of paper and mark out the positions of all the holes for the grab handles, sunvisor mounts and rear view mirror. Hopefully will save me having to poke around endlessly searching for a hole...?
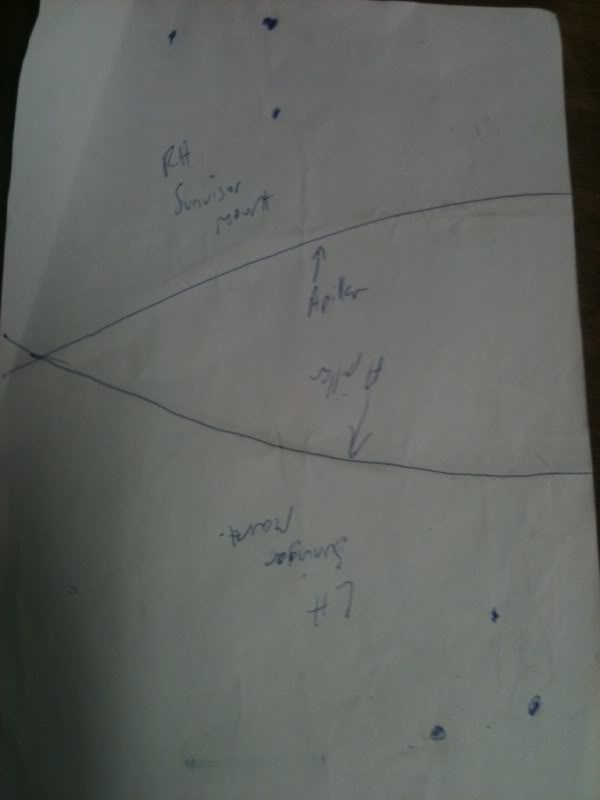
now you've done it i'll tell you the easy way

screw all the screws you need into the roof first,leave a bit of them hanging out,then put the roof lining in.this way you can feel the screws and cut around them.
#32
hanra
-
- Members
-
- 10,831 posts
Oh My, Don't you post alot
- Name:Brad
- Location:Farrrrrr North Qld
- Car:1975 LH SL/R 5000, 1967 Morris Cooper S, E36 BMW, Toyota Corolla, Isuzu DMax
- Joined: 24-March 11
Posted 20 November 2011 - 09:24 AM
brad turn your rearview mirror
bracket upside down
you should see couple of tapered pins and a small spring
roof lining needs to be sliced so these pins can locate into
the mounting bracket properly
i used nos mylar that my mate gave me
i,m sure the stuff is still available though
lookin great!
cheers
davemc
Ahhhhhh Yes Dave very good!!!!! Thank you!
now you've done it i'll tell you the easy way
screw all the screws you need into the roof first,leave a bit of them hanging out,then put the roof lining in.this way you can feel the screws and cut around them.
Yeah your bloody right there to!!! That would of made things heaps easier!!!! You shoulda told me that before!!!!!
#33
EunUCh
-

- Members
-
- 2,761 posts
Lotsa Posts!
- Location:not this planet
- Car:japos
- Joined: 23-November 06
Posted 20 November 2011 - 09:58 AM
The dates right, your just living in the wrong century.lol
#34
a9x868
-
- Members
-
- 1,417 posts
maurice mead of hatchbacks
- Name:facebook dave
- Location:perth miles n miles from shiney
- Car:valencia holden torana a9x hatch ultimate improvement on the barbados L34
- Joined: 24-July 11
Posted 20 November 2011 - 10:38 AM
brad i know for a fact that woodsie,s windscreens
dianella w.a have it
08 92728999
they deal in lots of nos parts, they have allsorts
parts panels all sorts of rubber and glass
just remembered i got some mylar there a short time ago!
good luck
davemc
dianella w.a have it
08 92728999
they deal in lots of nos parts, they have allsorts
parts panels all sorts of rubber and glass
just remembered i got some mylar there a short time ago!
good luck
davemc
#35
hanra
-
- Members
-
- 10,831 posts
Oh My, Don't you post alot
- Name:Brad
- Location:Farrrrrr North Qld
- Car:1975 LH SL/R 5000, 1967 Morris Cooper S, E36 BMW, Toyota Corolla, Isuzu DMax
- Joined: 24-March 11
Posted 20 November 2011 - 10:54 AM
THANK YOU!!!! I will call them first thing monday morning!!!!!
#36
a9x868
-
- Members
-
- 1,417 posts
maurice mead of hatchbacks
- Name:facebook dave
- Location:perth miles n miles from shiney
- Car:valencia holden torana a9x hatch ultimate improvement on the barbados L34
- Joined: 24-July 11
Posted 20 November 2011 - 12:06 PM
not first thing brad!THANK YOU!!!! I will call them first thing monday morning!!!!!
we are 3 hours behind in w.a.
some think more!
wait till midday your time or
if you want me to i,ll give them a call
just let me know how many mtrs plus a bit extra
happy to chase it up for ya!
cheers davemc
#37
hanra
-
- Members
-
- 10,831 posts
Oh My, Don't you post alot
- Name:Brad
- Location:Farrrrrr North Qld
- Car:1975 LH SL/R 5000, 1967 Morris Cooper S, E36 BMW, Toyota Corolla, Isuzu DMax
- Joined: 24-March 11
Posted 20 November 2011 - 03:16 PM
Geez ur a smart man!!! Hahahaha. I'll try n give em a call in my lunch break. I had a looK at some Mini locking strip today. It's narrower but the profile is way different as it has a V bottom. Not flat.
Edited by hanra, 20 November 2011 - 03:16 PM.
#38
torana_nick
-
- Members
-
- 759 posts
Forum Fixture
- Name:Nick
- Location:victoria
- Car:LH Torana Project
- Joined: 11-December 11
Posted 07 October 2014 - 02:52 PM
Sorry to dig up an old thread, I thought it would be better to ask the question here so all the info would be in one place.
I decided to give the headliner a go my self, I followed the write up from c&g but when I pull the headliner to stretch it the front rod keeps sagging and is almost stright with no bend in it or arch.. Just wondering why that happending and if anyone else has been in this suitiation before?
I pretty certain that I installed the rod out of where it came from.
#39
_abtorana_
_abtorana_
-
- Guests
Posted 08 October 2014 - 01:23 PM
bit hard to explain but here goes
when you have pulled it tight at front and clamp it with pinch weld offcuts ,yes the rod tends to roll over (causing it to sag), mine did the same
all you do is get at the rod from the door openings and spin the rod back or
you can even grab the rod thru the headlining (clean hands and pinch it with fingers) and flick it back, and hook it on ,it will roll back trust me
I think I had about a dozen goes at it as the rod would roll back too far and also sag.
hope this helps and I have not confused the issue
also there should be a couple of holes to choose from for each rod and for me it was trial and error, even tho I marked the holes they come
from ,but I still had to use different mounting holes on two of the sides.
#40
torana_nick
-
- Members
-
- 759 posts
Forum Fixture
- Name:Nick
- Location:victoria
- Car:LH Torana Project
- Joined: 11-December 11
Posted 13 October 2014 - 12:56 PM
Thanks for that mate, I'll have to give it an other go.
It's weird because the rod is pretty loose dosent matter which hole I use. Top top or even if I go top and bottom.
Might have to attack it on the weekend.
It's weird because the rod is pretty loose dosent matter which hole I use. Top top or even if I go top and bottom.
Might have to attack it on the weekend.
#41
_uca78t_
_uca78t_
-
- Guests
Posted 13 October 2014 - 05:22 PM
Hi mate I'm a trimmer in SW SYD & did a wright on oldholden about this here http://oldholden.com/node/127005
Most importantly work from the middle out & then front to back & before you start put all your screws back in & when it's comes to finding them just feel with your finger tips & use a stanly knife to do a tiny criss cross slit.
I hope this helps
Cheers Shane
Most importantly work from the middle out & then front to back & before you start put all your screws back in & when it's comes to finding them just feel with your finger tips & use a stanly knife to do a tiny criss cross slit.
I hope this helps
Cheers Shane


0 user(s) are reading this topic
0 members, 0 guests, 0 anonymous users

