Jump to content


Photo
- - - - -

LJ Sedan


  • Please log in to reply
328 replies to this topic

#26 stevemc32

stevemc32

    Forum Fan

  • Members
  • PipPipPipPip
  • 295 posts
  • Name:Steve
  • Location:Sydney
  • Car:LJ 4 Door
  • Joined: 14-September 12

Posted 14 May 2013 - 06:50 PM

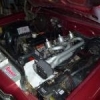
Changing my mind like a little girl at the moment and decided to once again go ahead with the modifications to the original accelerator pedal.  Fitting the Commodore one would probably have been nice and neat but it just needed too much work to get it done properly, when a correctly mounted version was already available.


Anyhow, the Commodore pedal was much easier to modify than the LX pedal I had earlier.  A little bending at the top, some more terrible welding to get it connected to the LJ pedal and it looks to be completed.


Attached File  1dscn1667.jpg   147.9K   16 downloadsAttached File  1dscn1670.jpg   147.75K   17 downloads


The best part about this mod is that I can continue to use the original accelerator linkage system until it comes time to swap over the engines.  This keeps it mobile for the carport construction.


Once the cable system is operational I'll clean up the welds and remove those parts of the pedal used for the linkages.


#27 ribz0

ribz0

    Forum Fixture

  • Members
  • PipPipPipPipPip
  • 512 posts
  • Name:Eric
  • Location:Perth WA
  • Car:LC Torana & 1975 South African Mini
  • Joined: 01-April 09

Posted 21 May 2013 - 08:22 PM

Hi Steve..


Doing some good work there mate... I have looked a few alternatives for cable conversion also but I think I will just go with the rares kit..


Not sure if others have used them so some feedback would be good...


Here is the link... http://www.rarespare...x?product=KH004


Keep up the grest work mate....


Cheers


#28 stevemc32

stevemc32

    Forum Fan

  • Members
  • PipPipPipPip
  • 295 posts
  • Name:Steve
  • Location:Sydney
  • Car:LJ 4 Door
  • Joined: 14-September 12

Posted 22 May 2013 - 03:40 PM

Thanks Eric,


I did consider the Rare Spares cable accelerator pedal kit but the photo on their website didn't look like it would line up with the original linkage firewall hole which was something I really wanted to achieve and I don't think it lines up with the pedal mounting holes either as it's just a generic import part not made specifically for the Torana.  So I thought it better to do it myself and hopefully get it right.


I have seen on the forums quite a few people mention that they are using it but haven't been able to find any photos of it fitted.


hutch had some words on it recently in his post here Hutch's LJ 2 door resto


#29 stevemc32

stevemc32

    Forum Fan

  • Members
  • PipPipPipPip
  • 295 posts
  • Name:Steve
  • Location:Sydney
  • Car:LJ 4 Door
  • Joined: 14-September 12

Posted 19 June 2013 - 07:27 PM

Collecting parts has occupied the last 4 weeks or so and I've got almost everything I need to fit up the W58 box.  Just waiting on a crossmember from CRS and I then should have all parts for a changeover.  It's something I'm happy to do as if it goes well I should still be able to move the car about once it's done and worse case I can always put the Trimatic back into it if I really need to.


The one big modification will be cutting the shifter hole in the trans tunnel but I've had a look and I think I'll just cut it to the original shape using the tunnel reinforcement panel that is already fitted underneath to guide the cutting.  Hopefully this is in the correct position for the Supra shifter but I'll definitely do a trial fit up of the box first just to make sure.


Some progress has been made on the engine management side, all mods have been completed on the Delco computer and a test run on the bench today has confirmed it's working correctly and ready for some real-time tuning.  Really looking forward to that part.


Attached File  1dscn1683.jpg   146.2K   14 downloads


#30 stevemc32

stevemc32

    Forum Fan

  • Members
  • PipPipPipPip
  • 295 posts
  • Name:Steve
  • Location:Sydney
  • Car:LJ 4 Door
  • Joined: 14-September 12

Posted 26 June 2013 - 06:49 PM

So excited today, my crossmember arrived and I thought I now had everything needed for the gearbox conversion.  Unfortunately the W58 import box had another snag for me to stumble upon.  Apparently the gearbox rubber mount from this particular model was different to the earlier standard Supra and Celica gearbox mount that my crossmember was made to accept.  Some serious Googling solved the issue and it seems the earlier mount will fit my gearbox so there's now one of those on the way and I should finally be able to put it all together. 


Apart from the issues with specification, which was entirely my fault, the crossmember looks pretty good.


Attached File  1dscn1694.jpg   146.8K   12 downloads


I also got spooked by the falling dollar a couple of weeks ago and decided it was finally time to make a purchase of the new dash instrumentation.  For six months or so I'd been convinced I was going for a set of white faced instruments to retrofit into a GTR dash and actually liked the look of a few examples I've seen on the forum.  In the end after much deliberation I went for a set of black faced Auto Meters from Summit.  I've got a bunch of dash panels collected from earlier projects to use for the retrofit.


Attached File  1dscn1687.jpg   138.91K   23 downloadsAttached File  1dscn1692.jpg   145.49K   10 downloads


The plan is to use the bottom fascia panel in the pic and I'm thinking I will leave the "Brake" light at the top and fit the bottom light panel with an opaque lens and three different coloured LEDs for Alternator, High Beam, and Check Engine Light duties.


I may have an issue with clearance behind the fascia panel for the lower outside Auto Meter gauges as the 4 small ones are considerably deeper than the orginal GTR units.  I can't remember how much space is in the dash behind that area but will have to check it and hopefully it will work out.


#31 _hutch_

_hutch_
  • Guests

Posted 26 June 2013 - 07:08 PM

I have used a rare spares cable throttle setup,and the actual peddle setup is good but the cable and carbie mounting is total shit basiclt the cable inner is about 100 mm to long i just got it roughly mounted so as I can move it around,i did my clutch similar to yours with the spigot through the firewall the only difference is that I made up a new end to swage onto the shortened cable that hooks up to the clutch pedal as per normal

#32 stevemc32

stevemc32

    Forum Fan

  • Members
  • PipPipPipPip
  • 295 posts
  • Name:Steve
  • Location:Sydney
  • Car:LJ 4 Door
  • Joined: 14-September 12

Posted 11 July 2013 - 07:57 PM

Cheers for the info on the Rares accelerator pedal kit hutch, it should be useful for those considering the kit.


I kicked off the manual conversion over the last couple of days but unfortunately couldn't get it all back together before the light faded this arvo.


Took me half a day yesterday to get the tri-matic out including all the shift linkages and oil cooler lines.  I was feeling pretty happy with the progress at that stage.


Attached File  1dscn1703.jpg   146.56K   13 downloads


Today's effort got the flexplate removed and I then wasted a couple of hours trying to get the torque converter locator out of the 173 crank.  I tried the filling it with grease and hydraulic punching it out but that didn't work.  Finally the slide hammer got it loose but not too sure it was real good on the engine.


I bolted up the gearbox to mark out the shifter hole and got that drilled and cut out.  It's fairly agricultural at the moment but I'll clean it up when the body is being done.


Attached File  1dscn1708.jpg   142.86K   11 downloads

Attached File  1dscn1706.jpg   144.6K   7 downloads


Finally fitted up the flywheel and clutch then tried to get the box bolted back up.  Bloody thing will no longer go together as the starter motor pinion cover of the bellhousing hits the tunnel before I can get the input shaft clear of the clutch diaphragm.  I'll give it another go when I can get a second pair of hands but I might need to lift the front of the engine to get the box mated up.  Very disappointing.


#33 ribz0

ribz0

    Forum Fixture

  • Members
  • PipPipPipPipPip
  • 512 posts
  • Name:Eric
  • Location:Perth WA
  • Car:LC Torana & 1975 South African Mini
  • Joined: 01-April 09

Posted 12 July 2013 - 01:57 AM

Hey Steve


Great progress mate... keep up the good work!! All these little speed bumps along the way makes it taste so sweet at the end when the job is done...


Your gauges might be tight as my VDO ones didn't have much room behind them either... I'm sure you will make them fit...


Cheers


#34 stevemc32

stevemc32

    Forum Fan

  • Members
  • PipPipPipPip
  • 295 posts
  • Name:Steve
  • Location:Sydney
  • Car:LJ 4 Door
  • Joined: 14-September 12

Posted 28 July 2013 - 06:34 PM

Success on the gearbox front, just needed a little twist before mating it up and it now fits well.  The CRS crossmember bolted up no problem and my ebay shortened tailshaft was a perfect match.


Attached File  1dscn1728.jpg   149.33K   10 downloads


The cable clutch conversion was also successful and it's now time to measure up and get the cable shortened.


Attached File  1dscn1724.jpg   145.47K   10 downloads


Much happier with the progress this time and now that the box is in I'll probably concentrate on getting the gauges sorted out.


#35 _05-BROCKY-05_

_05-BROCKY-05_
  • Guests

Posted 30 July 2013 - 10:56 AM

Awesome thread, very interested in your ideas for the gauges, will be watching closely. :clap:


#36 stevemc32

stevemc32

    Forum Fan

  • Members
  • PipPipPipPip
  • 295 posts
  • Name:Steve
  • Location:Sydney
  • Car:LJ 4 Door
  • Joined: 14-September 12

Posted 30 July 2013 - 10:51 PM

Thanks 05-Brocky-05, the Autometer instruments have presented a few challenges that will need a bit more work.  I've got a few ideas though so I'm confident of a good result.


#37 stevemc32

stevemc32

    Forum Fan

  • Members
  • PipPipPipPip
  • 295 posts
  • Name:Steve
  • Location:Sydney
  • Car:LJ 4 Door
  • Joined: 14-September 12

Posted 01 August 2013 - 07:29 PM

Working on the 4 outer gauges for the GTR dash upgrade first up.  I tried fitting the Autometers but really didn't like the way the silver bezel looked for a couple of reasons.  I could have painted the bezel to get rid of the silver ring look but It also meant they were mounted about 9mm behind the original gauge face placement.  To be honest, this set back look was the main reason I didn't like it but with free space being a little hard to come by behind the dash panel an alternative solution was probably required anyway.


Attached File  1dscn1786.jpg   142.1K   10 downloads


The bezels came off very easily but it was a little difficult attacking a brand new pristine looking gauge straight out of the box with a screwdriver to prise them off.  I also cut a spacer off the mounting clamp and used this to bring the gauge face into the correct position with respect to the GTR dash metal clamp.


Attached File  1dscn1764.jpg   135.82K   9 downloadsAttached File  1dscn1761.jpg   128.52K   9 downloadsAttached File  1dscn1758.jpg   135.36K   8 downloads


I ordered some "O"s from a vinyl lettering mob yesterday and was very impressed to have them delivered today.  The extra 4 bucks on express delivery was well worth it.  Century Gothic was the font of choice with the most circular looking "O"s I could find and seems to have come up good.  The "O" was needed to replace the bezel and clean up the look around the edge of the gauge as the glass will now be mounted up against the GTR dash fascia.


Attached File  1dscn1766.jpg   148.66K   9 downloadsAttached File  1dscn1772.jpg   142.33K   8 downloads


The vinyl is supposed to be good for at least 7 years in the sun and weather so it should do a pretty good job on the dash for a while. 


The final part of the story is removing the small bevel on the dash fascia to ensure the gauge face comes right up to the inner edge of the dash fascia.


Attached File  1dscn1756.jpg   141.53K   11 downloads


#38 stevemc32

stevemc32

    Forum Fan

  • Members
  • PipPipPipPip
  • 295 posts
  • Name:Steve
  • Location:Sydney
  • Car:LJ 4 Door
  • Joined: 14-September 12

Posted 01 August 2013 - 07:33 PM

So here's how it turned out, ran out of space in the last post.  The fuel gauge in the photo is a little off centre but final positioning hasn't been completed and will not be a problem to correct.


Attached File  1dscn1775.jpg   139.26K   10 downloads


Pretty happy with the result and can now get onto the speedo and tacho mounting options.


#39 _mick74lh_

_mick74lh_
  • Guests

Posted 01 August 2013 - 09:38 PM

Nice work. They should look pretty neat in the dash.


#40 stevemc32

stevemc32

    Forum Fan

  • Members
  • PipPipPipPip
  • 295 posts
  • Name:Steve
  • Location:Sydney
  • Car:LJ 4 Door
  • Joined: 14-September 12

Posted 15 August 2013 - 04:31 PM

Thanks Mick.


Not a lot of progress lately.   Haven't had a chance to get onto the speedo and tacho mounting in the GTR dash fascia.


I did manage to get the clutch cable shortened and it curves perfectly around the steering shaft just as I had planned, or more accurately hoped, and gotta say is working perfectly.  Very happy with the result on this one.  Still need to cut the Kingswood rubber seal off the cable as it's no longer useful.


Attached File  1dscn1793.jpg   147.8K   6 downloads


I've also fitted up the big brake booster and it's working spot on.  It's a huge difference from the standard one that was fitted however I suspect the standard one wasn't working too well and had a leak as the engine would idle very roughly whenever the brake pedal was held down.


Attached File  1dscn1798.jpg   149.64K   11 downloads


The caliper spacers are ready to go and I'll fit those when the calipers are overhauled during the body work stage as I don't see there should be any major issues with upgrading to the 5/8" discs.


#41 stevemc32

stevemc32

    Forum Fan

  • Members
  • PipPipPipPip
  • 295 posts
  • Name:Steve
  • Location:Sydney
  • Car:LJ 4 Door
  • Joined: 14-September 12

Posted 19 August 2013 - 08:34 PM

So I've procrastinated long enough and with the carport still seeming like just a pipedream it's time to get into sorting out this VK engine.  I've got the VP computer ready to go and an engine loom ready to size up so today I got a chance to sort out the VN throttle body mounting.  One redrilled hole in the throttle body and it's found it's new home.


Attached File  1dscn1809.jpg   142.27K   13 downloads


The new throttle body is just a little bigger than the original VK version so the manifold will need a bit of tweaking to get a nice match.  Shouldn't cause any drama.


Attached File  1dscn1811.jpg   142.31K   11 downloads


Here's where I'm seeing my biggest issue at this stage, with the bonnet clearance.


Attached File  1dscn1821.jpg   144.63K   11 downloads


To be honest, I've no idea whether or not it will fit in this configuration (TPS to the top) but will just have to fit it up and see what happens.  I know many people have successfully fitted the VK engine with the standard throttle body that sits about 20mm above the manifold but looks like I'm another 15-20 on top of that...


I would be willing to raise the rear of the bonnet just slightly to clear it if necessary but I'd rather not have to go there if possible.  I've chosen to fit the TPS on top as I'd like to run the throttle cable from the firewall directly behind the manifold instead of over the top of the engine so needed the cable mount on the bottom of the throttle body.


Attached File  1dscn1825.jpg   139.62K   15 downloads


I think it will look a lot neater like this however if I can't get the clearance then I'll have to revert to the cable over the rocker cover position.  I had originally planned on making a throttle cable mount that hung off the manifold however the last photo above shows the cable will be quite close to the engine so a bracket off the rocker cover bolts might be more suitable.


#42 stevemc32

stevemc32

    Forum Fan

  • Members
  • PipPipPipPip
  • 295 posts
  • Name:Steve
  • Location:Sydney
  • Car:LJ 4 Door
  • Joined: 14-September 12

Posted 22 August 2013 - 08:16 PM

Got some more work done on the gauges this arvo.  Almost done, just need to make up a bracket to bolt the speedo and tacho onto the back panel and all should be sweet.


Still need to work out lighting positions for the alternator and high-beam indicators.  The lower middle blanked off light position will be used for the check-engine light.


Attached File  1dscn1828.jpg   141.43K   28 downloads


Attached File  1dscn1830.jpg   140.52K   17 downloads


#43 gad05

gad05

    Forum Fan

  • Members
  • PipPipPipPip
  • 420 posts
  • Name:Graham
  • Location:Brisbane
  • Car:73 lj 2 door , 74 lj sedan.
  • Joined: 11-January 09

Posted 24 August 2013 - 11:38 PM

Hi Steve,great job on the gauges,they look factory.
What sizes did you use? Did those retaining brackets come with the gauges?
Cheers Graham.

#44 stevemc32

stevemc32

    Forum Fan

  • Members
  • PipPipPipPip
  • 295 posts
  • Name:Steve
  • Location:Sydney
  • Car:LJ 4 Door
  • Joined: 14-September 12

Posted 26 August 2013 - 11:04 AM

Thanks Graham.

I believe the smaller gauges are 2 1/16 and the larger ones are 3 5/8. The black plastic retaining ring is included with the gauges and the metal brackets are part of the GTR dash.

#45 stevemc32

stevemc32

    Forum Fan

  • Members
  • PipPipPipPip
  • 295 posts
  • Name:Steve
  • Location:Sydney
  • Car:LJ 4 Door
  • Joined: 14-September 12

Posted 26 August 2013 - 09:36 PM

A correction to my last post. The speedo and tach are not 3 5/8 they are only 3 3/8 or about 85mm.

#46 Dave6179

Dave6179

    Forum Fixture

  • Members
  • PipPipPipPipPip
  • 577 posts
  • Name:David
  • Location:NZ
  • Car:HJ, VN, VX SS
  • Joined: 23-August 12

Posted 27 August 2013 - 10:03 AM

G'day, nice work so far! Are you goung to use the std VK extractors? If so you need to give them the once over... the flange ports are a lot smaller than the head! I used a piece of duct tape on the head to cut out the port holes, including the bolt holes, then transfered the tape to the manifold, using the bolt holes to align everything, scribed the bigger holes over the little holes and threw the die grinder at it. Also, the main pipe south of the collector is INSIDE the collector! I cut the cone and refit a bigger pipe to it... all flush. Apparently these extractors are a very good design, just not very well made.


#47 stevemc32

stevemc32

    Forum Fan

  • Members
  • PipPipPipPip
  • 295 posts
  • Name:Steve
  • Location:Sydney
  • Car:LJ 4 Door
  • Joined: 14-September 12

Posted 27 August 2013 - 10:54 PM

Thanks for the great info on the extractors Dave. I do have a set but didn't expect to use them as I read that they didn't fit into the LJ. I'll have to look a bit closer at them when I get the engine into the bay to see if they are useable with some easy mods.

#48 orangeLJ

orangeLJ

    Yes, yes I do post alot!

  • Members
  • PipPipPipPipPipPipPip
  • 10,259 posts
  • Joined: 02-May 06

Posted 28 August 2013 - 07:01 AM

The vk efi extractors are actually a great design. Similar to something like hm9s, just much smaller primary/secondary combo.

I usually port my gaskets to match, then use that to mark the extractors, but on a standard head, that's obviously not going to work, so that tape method is a good one!

#49 stevemc32

stevemc32

    Forum Fan

  • Members
  • PipPipPipPip
  • 295 posts
  • Name:Steve
  • Location:Sydney
  • Car:LJ 4 Door
  • Joined: 14-September 12

Posted 04 September 2013 - 08:32 PM

Bent up a bracket from galvanised strap this arvo for the speedo and tacho mounting.  Tacked it onto the backing plate and it does the job nicely.  Just waiting on some LED bits and pieces then I should be able to finish off the dash panel.


Attached File  1dscn1842.jpg   148.76K   12 downloads


#50 stevemc32

stevemc32

    Forum Fan

  • Members
  • PipPipPipPip
  • 295 posts
  • Name:Steve
  • Location:Sydney
  • Car:LJ 4 Door
  • Joined: 14-September 12

Posted 09 September 2013 - 07:50 PM

The dash panel refit is nearing completion.


I managed to fit a small LED lens into the face of the Voltmeter for the Gen light and it's come up ok.  I added a power resistor in parallel with the LED burning about 5W so hopefully that should take care of the altenator excitation.  It looks a lot brighter in the photo as it's catching a lot of light but it virtually disappears once the gauge cover is reinstalled.  I'm still awaiting some blue parts to do the same thing to the speedo for the high beam light.


Attached File  1dscn1846.jpg   142.89K   17 downloads


I fitted a plug and painted up the rear bracket.  The wiring is now complete with the exception of the high beam light.  The Brake light and two indicator lights will be used from the standard loom and not included into the dash plug.  Still need to scrape a bit of paint off for the two indicator light fittings to earth against.  The power resistor can be seen mounted to the side bracket on the left.


Attached File  1dscn1857.jpg   140.78K   20 downloads


Attached File  1dscn1859.jpg   141.45K   12 downloads


Did a test fit today and there's plenty of room behind the dash panel for the new gauges so it's all looking pretty good.  I'll wire up the plug for the loom side next and add a few connections for things like the gearbox VSS and tacho signal.


0 user(s) are reading this topic

0 members, 0 guests, 0 anonymous users