

MY LJ is a March 1972 & didn't have a hole in the trans tunnel.

1095 replies to this topic
#51

warrenm
 View Garage
-

- Members
-

- 2,107 posts
Forum Fixture
- Location:Central West NSW
- Car:1972 LJ Torana
- Joined: 08-November 05
View Garage
Posted 14 February 2013 - 06:37 AM
#52
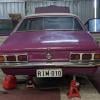
RIM-010
View Garage
-
- Members
-
- 8,075 posts
DON'T PANIC
- Name:Tim
- Location:Cowell, SA
- Car:LJ 2 Door - HQ Premier
- Joined: 01-March 06
View Garage
Posted 14 February 2013 - 08:20 AM
I was under the impression that LC's and LJ's had different shaped shifter holes... Different gearboxes.
#53
Potta
-

- Members
-
- 6,026 posts
Oh My, Don't you post alot
- Name:Craig
- Location:Gozzy, WA
- Car:LC GTR, LC 4 door
- Joined: 01-May 09
Posted 14 February 2013 - 08:33 AM
I heard they stopped putting the holes in and blanking plates in 72?
Sounds about right to me.
Good to see the car getting all shiney

#54
S pack
-

- Members
-
- 15,538 posts
Scrivet Counter
- Name:Dave
- Location:Luggage Point
- Car:73 LJ
- Joined: 25-January 10
Posted 14 February 2013 - 08:57 PM
I was under the impression that LC's and LJ's had different shaped shifter holes... Different gearboxes.
No, the 4spd floor shifter hole size and shape stayed the same from 1969 through to 1974.
The Opel 4spd used what I would describe as a pressed metal adaptor plate that had a round hole for the gearshift lower rubber boot.
#55
RIM-010
View Garage
-
- Members
-
- 8,075 posts
DON'T PANIC
- Name:Tim
- Location:Cowell, SA
- Car:LJ 2 Door - HQ Premier
- Joined: 01-March 06
View Garage
Posted 15 February 2013 - 05:35 AM
I stand corrected. When I cut the hole for the shifter in my LJ, I used the blanking plate off an LC as the template, and I ended up having to cut the hole a bit bigger (I can't remember how much now) to suit the Aussie 4 speed... So I assumed that they might be different.
Learn something every day!
Learn something every day!
#56
sibhs
-
- Members
-
- 2,703 posts
Lotsa Posts!
- Name:Martin
- Location:Perth
- Car:LJ Coupe S
- Joined: 27-July 12
Posted 19 February 2013 - 11:39 PM
Evening all,
Been cutting some more rust out and panel beating some underbody dents.
This was my first effort at the spot weld drill, once you get the hang of it, it's not too hard.
 IMG_2242.jpg 38.95K
42 downloads
IMG_2242.jpg 38.95K
42 downloads
IMG_2244.jpg 38.19K
39 downloads
IMG_2249.jpg 40.87K
42 downloads
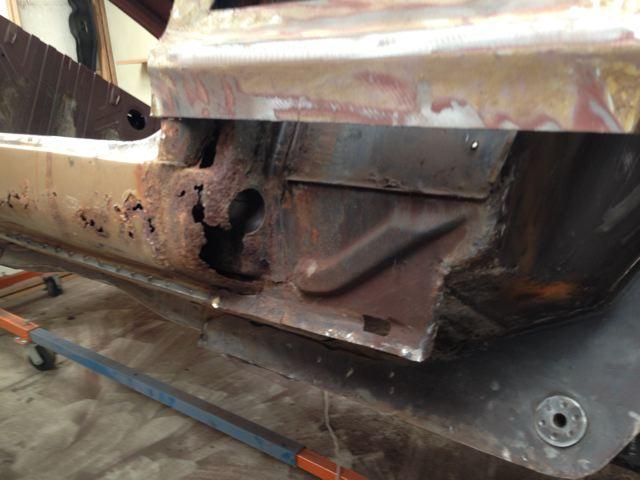
There was a patch-up on the chassis which I removed and found this hidden below, I'll try and make this piece up and weld it back in.
IMG_2264.jpg 46.99K
38 downloads
IMG_2266.jpg 52.55K
39 downloads
IMG_2267.jpg 50.62K
34 downloads
Might get some gas tomorrow and start practicing my welding.
Heres a before and after of damage to rails that I did a bit of dolly work too. Very happy with the result.
IMG_2273.jpg 30.75K
32 downloads
IMG_2274.jpg 33.4K
34 downloads
Marty
#57
Potta
-
- Members
-
- 6,026 posts
Oh My, Don't you post alot
- Name:Craig
- Location:Gozzy, WA
- Car:LC GTR, LC 4 door
- Joined: 01-May 09
Posted 20 February 2013 - 12:01 AM
Beautiful work Marty, its that attention to detail that you were talking about coming through.
I can tell this is going to be an outstanding car.
Is that rust patch where your front end bolts to the chassis?
No wonder it was so hard to get those bolts out 
#58
sibhs
-
- Members
-
- 2,703 posts
Lotsa Posts!
- Name:Martin
- Location:Perth
- Car:LJ Coupe S
- Joined: 27-July 12
Posted 20 February 2013 - 12:10 AM
Thanks Craig,
I'm looking forward to making the bits and want it to look factory, no matter how long it takes.
That was the rusted K-frame that gave me grief, there's a bit of work involved in making that section with crush tube and thick washer inside the chassis.
Might have to see if you have any boot floor metal I can use to repair this drop tank hole. Could be a real patch work job to fix.
Marty
#59
Potta
-
- Members
-
- 6,026 posts
Oh My, Don't you post alot
- Name:Craig
- Location:Gozzy, WA
- Car:LC GTR, LC 4 door
- Joined: 01-May 09
Posted 20 February 2013 - 01:46 AM
I've got a shell there I could probably sell you.
Has good sills, floor etc, not sure about the boot, but I can check.
Probably lots of bits you could use.
Let me know if you're interested.
Has good sills, floor etc, not sure about the boot, but I can check.
Probably lots of bits you could use.
Let me know if you're interested.
#60
Potta
-
- Members
-
- 6,026 posts
Oh My, Don't you post alot
- Name:Craig
- Location:Gozzy, WA
- Car:LC GTR, LC 4 door
- Joined: 01-May 09
Posted 14 March 2013 - 12:54 AM
Any updates mate?
Haven't heard anything for a while.
New boot in yet?
#61
sibhs
-
- Members
-
- 2,703 posts
Lotsa Posts!
- Name:Martin
- Location:Perth
- Car:LJ Coupe S
- Joined: 27-July 12
Posted 14 March 2013 - 10:09 PM
Still spending many hours in the shed, just struggling to actually finish a task. So many little projects on the go and I'd prefer to show all the steps to completion.
Here are a few more pics of my rust repair to chassis.
IMG_2318.jpg 29.04K
44 downloads
IMG_2360.jpg 42.61K
43 downloads
IMG_2463.jpg 46.12K
36 downloads
The inside will also have a crush tube inserted.
IMG_2464.jpg 68.2K
35 downloads
I had no idea how to use the Mig so I got my neighbour who is a full time welder and has his own company. The amazing thing is, this guy is 86 and still works every day. It was great to get some real old-school welding tips. you can't beat experience, pity I have none.
Heres my attempt at pulling out a dent using what I have available to me. Pretty happy with the result and will flatten out the smaller dings with a dollie.
IMG_2431.jpg 40.37K
33 downloads
IMG_2432.jpg 37.72K
33 downloads
IMG_2433.jpg 51.24K
30 downloads
Clutch pedal had worn the shaft and I could see a better way of making it to spread the load
I machined up a piece of tubing to match the bush's and then drilled out the pedal to accept the tube. Now the load is over the full bush not just the edges.
IMG_2326.jpg 43.19K
33 downloads
IMG_2327.jpg 50.79K
30 downloads
IMG_2383.jpg 42.39K
31 downloads
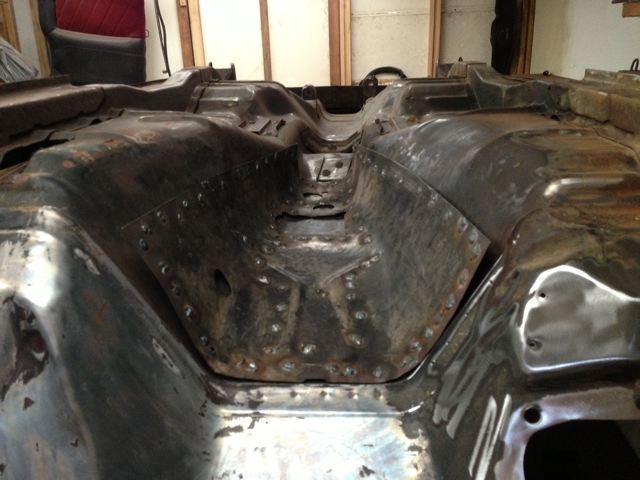
Didn't realise how many differences there are between a 72 and 73 GTR, one of them is the extra strengthening in the tunnel and beside the chassis. This was a real mission to drill out and remove the second skin from the gearbox tunnel, thanks to Mark for the donation. 97 spot welds were drilled out then the holes welded up (cause they were too big and all over the shot) and redrilled. I've spent 6 hours on this but keep telling myself it's just a welding, grinding and drilling excercise.
IMG_2451.jpg 43.23K
33 downloads
IMG_2458.jpg 49.13K
33 downloads
IMG_2501.jpg 51.24K
30 downloads
A trial fitting, I've since ground all these welds flat and want to KBS both sides before welding in.
IMG_2502.jpg 45.33K
32 downloads
Cheers
Marty
Edited by sibhs, 14 March 2013 - 10:10 PM.
#62
_Lamo_
_Lamo_
-

- Guests
Posted 14 March 2013 - 10:21 PM
Fantastic job your are doing, Marty. I bet you've gone through a few spot weld drill bits by now.
#63
sibhs
-
- Members
-
- 2,703 posts
Lotsa Posts!
- Name:Martin
- Location:Perth
- Car:LJ Coupe S
- Joined: 27-July 12
Posted 14 March 2013 - 10:28 PM
Hi Lamo, thanks. Great to have you on board.
Actually still on the first drill bit, it's the mini hole saw type with the spring loaded centre pin. I have also tried the other type but found my one quicker and easier but the hole it leaves is bigger.
Marty
#64
Potta
-
- Members
-
- 6,026 posts
Oh My, Don't you post alot
- Name:Craig
- Location:Gozzy, WA
- Car:LC GTR, LC 4 door
- Joined: 01-May 09
Posted 14 March 2013 - 11:23 PM
Looking good mate, you'll be a master welder by the time you finish.
Is that second skin from the white car?
#65
sibhs
-
- Members
-
- 2,703 posts
Lotsa Posts!
- Name:Martin
- Location:Perth
- Car:LJ Coupe S
- Joined: 27-July 12
Posted 15 March 2013 - 10:31 PM
Looking good mate, you'll be a master welder by the time you finish.
Is that second skin from the white car?
Sure is Craig, I'll be using the skin, chassis supports and boot floor from your old girl.
Had a bit of a scare when I went to buy the new sill. The problem was I had cut the old one off weld to weld and the sill from Sare Rpares only went from the lower weld to under the scuff plate, this was no good to me and their reply is what you see is what you get (not very helpful). Luckily in Welshpool there is a real helpfull spare parts shop that made the correct sill for me, enough for my two sides for $160. Having a go at fabricating the ends.
IMG_2489.jpg 46.11K
32 downloads
IMG_2494.jpg 35.3K
30 downloads
IMG_2496.jpg 43.28K
31 downloads
Marty
#66
_LONA-CK_
_LONA-CK_
-
- Guests
Posted 16 March 2013 - 08:14 AM
marty you are doing a really great job there mate, question for ya,,, why did you not just fill the holes when welding support tunnel back to your floor???
keep up the great work anyways mate.
cheers gong
Edited by LONA-CK, 16 March 2013 - 08:16 AM.
#67
S pack
-
- Members
-
- 15,538 posts
Scrivet Counter
- Name:Dave
- Location:Luggage Point
- Car:73 LJ
- Joined: 25-January 10
Posted 16 March 2013 - 05:21 PM
Marty
If you're going to put the rail to floor pan braces from a 73 into your 72 then you'll need to remove the washers off the sides of the rails. 73's don't have them.
Keep up the good work
Cheers
Dave.
#69
sibhs
-
- Members
-
- 2,703 posts
Lotsa Posts!
- Name:Martin
- Location:Perth
- Car:LJ Coupe S
- Joined: 27-July 12
Posted 16 March 2013 - 08:21 PM
marty you are doing a really great job there mate, question for ya,,, why did you not just fill the holes when welding support tunnel back to your floor???
keep up the great work anyways mate.
cheers gong
Hey Gong, the holes were too big for my liking (10mm) thought if I welded them on the car I would burn through or not leave an original looking finish, plus they weren't uniform in spacing and closeness to edge. I realise now it's a heap of work for something that's very hard to see.
Hi Dave, I noticed that when I started removing the braceing off the donor, if that washer is removed there might be strength lost at that point. The braceing is very thin metal at that point. I wonder if the 73 has two internal washers eitherside of the crush tube????
Thanks Grant.... I'm going
Cheers
Marty
#70
Ice
-

- Members
-
- 15,122 posts
Cool
- Name:Gene
- Location:Galaxy's away from Ipswich
- Car:77 HZ Sandman Van
- Joined: 03-January 07
Posted 16 March 2013 - 08:34 PM
Thats what a call anal doing a great job marty keep up the good work mate
#71
S pack
-
- Members
-
- 15,538 posts
Scrivet Counter
- Name:Dave
- Location:Luggage Point
- Car:73 LJ
- Joined: 25-January 10
Posted 16 March 2013 - 08:37 PM
Marty
No, the 73's don't have any extra internal washers. What you will do though is purchase 2 suitable size zinc plated flat washers approx 1.2mm thick and install one onto each bolt between the nut and brace metal.
Cheers
Dave.
Edited by S pack, 16 March 2013 - 08:39 PM.
#72
sibhs
-
- Members
-
- 2,703 posts
Lotsa Posts!
- Name:Martin
- Location:Perth
- Car:LJ Coupe S
- Joined: 27-July 12
Posted 16 March 2013 - 08:40 PM
Thats what I call anal, doing a great job marty keep up the good work mate
That's exactly what I was thinking.. It's like a compulsive disorder, I shouldn't do it, but can't help myself. My doctor says there's no cure.
#73
warrenm
View Garage
-
- Members
-
- 2,107 posts
Forum Fixture
- Location:Central West NSW
- Car:1972 LJ Torana
- Joined: 08-November 05
View Garage
Posted 19 March 2013 - 06:44 AM
Marty
No, the 73's don't have any extra internal washers. What you will do though is purchase 2 suitable size zinc plated flat washers approx 1.2mm thick and install one onto each bolt between the nut and brace metal.
Cheers
Dave.
Do you have any pics of the 73 arrangement that you can put up?
#74
Potta
-
- Members
-
- 6,026 posts
Oh My, Don't you post alot
- Name:Craig
- Location:Gozzy, WA
- Car:LC GTR, LC 4 door
- Joined: 01-May 09
Posted 19 March 2013 - 11:30 PM
That's exactly what I was thinking.. It's like a compulsive disorder, I shouldn't do it, but can't help myself. My doctor says there's no cure.
Maybe but I tell you what this is going to be a beautiful car when its done.
Keep it up mate.
#75
S pack
-
- Members
-
- 15,538 posts
Scrivet Counter
- Name:Dave
- Location:Luggage Point
- Car:73 LJ
- Joined: 25-January 10
Posted 29 March 2013 - 01:12 AM
Warrenm, some pics for you.
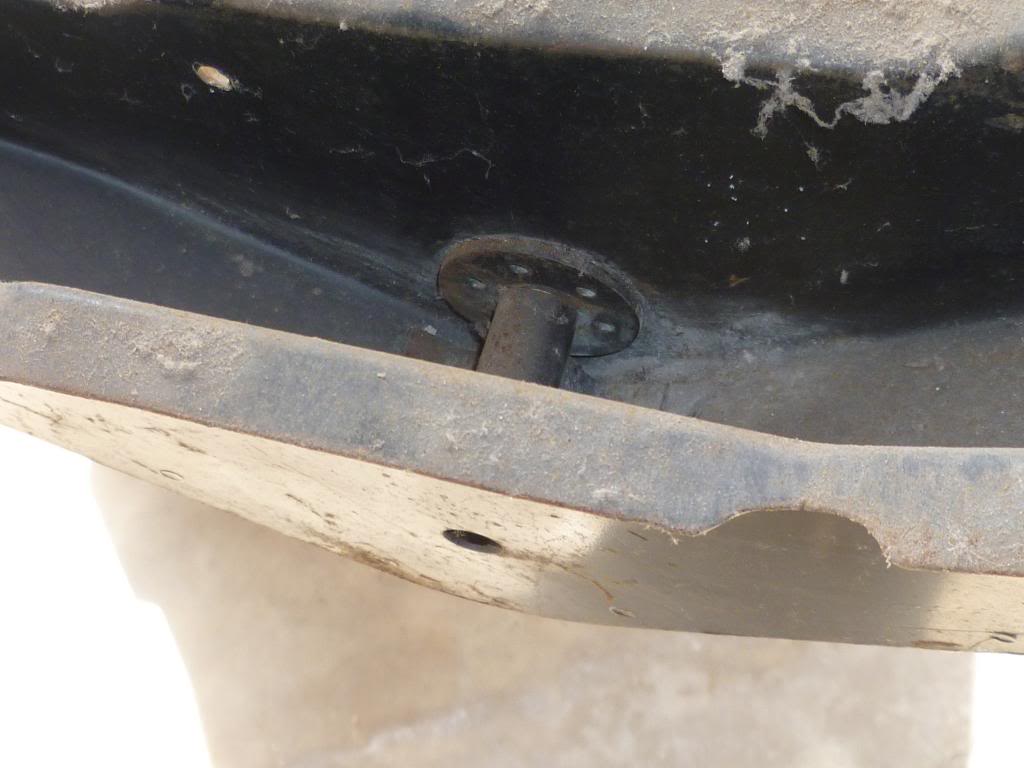
NOS right side LJ chassis rail. Note it is a 1973 type (ADR 10B compliant)
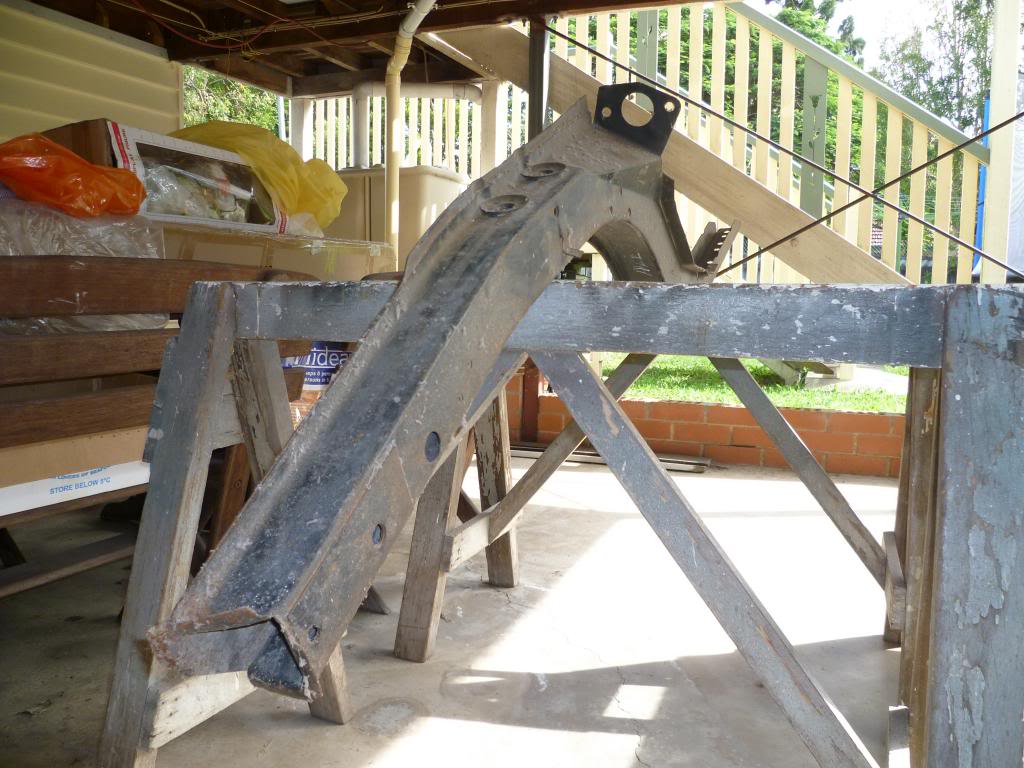
Note the absence of the washer spot welded to the outside face of the rail. You can also see the washer spot welded to the inside of the engine side of the rail, same as an LC & LJ pre ADR 10B rail.
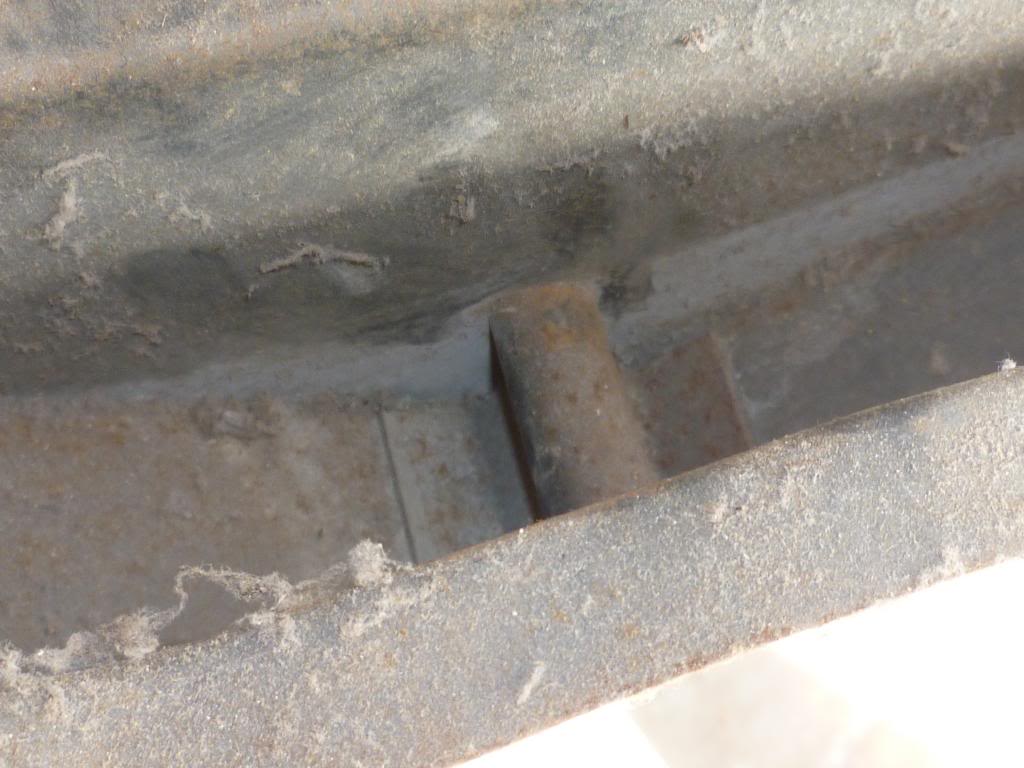
As you can see here there is no washer on the backside of the outer face of the rail. Just constructed the same as an LC & LJ pre ADR 10B rail.
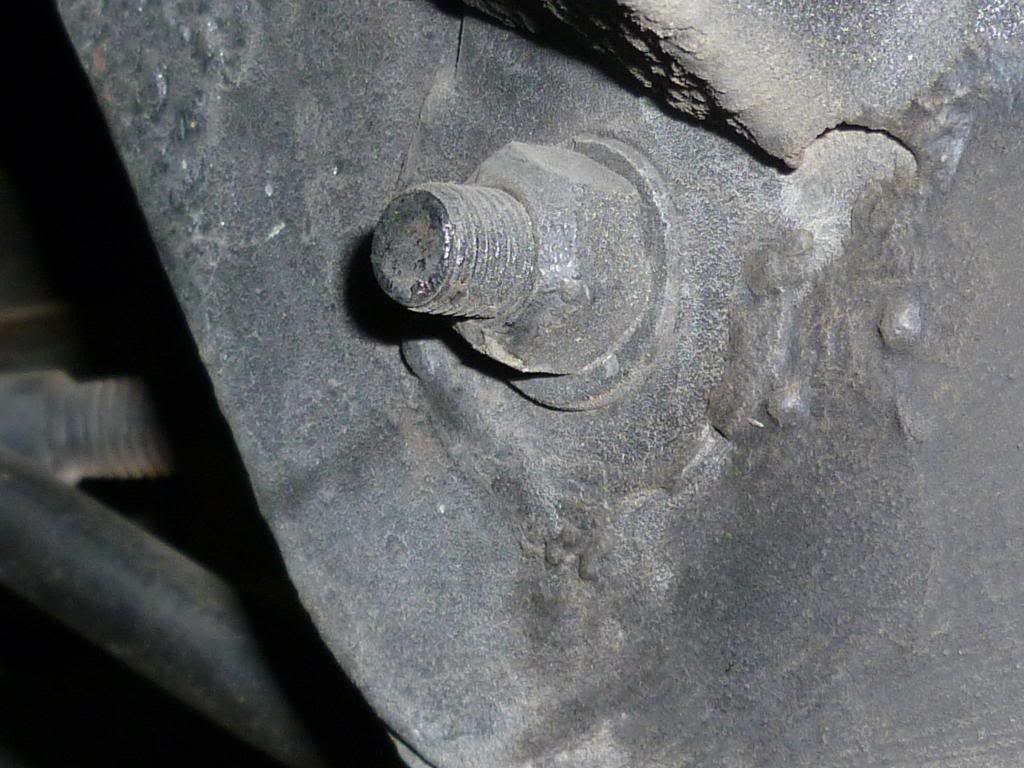
Last but not least, the left side floor brace on a 1973 LJ. The metal tab on the brace is welded flush against the side of the rail and a flat washer installed under the nut.


0 user(s) are reading this topic
0 members, 0 guests, 0 anonymous users

