
my "new skool fancy pants 2k knifing filler" still says "apply to bare metal" lol
the rule of thumb is a golfball of filler to 2-3 mm hardner....
but you can add more or less hardner depending on the weather
HZ Premier wannabe
Started by
SHEEL
, Apr 10 2013 09:43 AM
102 replies to this topic
#27

SHEEL
-
- Members
-

- 313 posts
Forum Fan
- Name:Daniel
- Location:Melbourne
- Joined: 09-October 09
Posted 30 April 2013 - 04:25 PM
Yeh I've been adding a bit more.... unfortunately it's getting colder here in melbourne!
#28
_Bomber Watson_
_Bomber Watson_
-

- Guests
Posted 30 April 2013 - 05:33 PM
5-10 second bursts with the welder is far far to much.
Do the tack trick.
I would have no worries at all personally with the thickness of your bog, but one tip, instead of putting spots everywhere like a mad woman shitting, just coat the whole section. LIke for that lower guard i'd go from the wheel arch to the tail light, and from the mold line to the bottom of the guard, one layer, coat the lot, way easyer to sand out smooth.
Cheers.
#29
SHEEL
-
- Members
-
- 313 posts
Forum Fan
- Name:Daniel
- Location:Melbourne
- Joined: 09-October 09
Posted 01 May 2013 - 10:26 AM
Yeh I was thinking of doing it that way, still might end up doing it!
#30
orangeLJ
-

- Members
-
- 10,259 posts
Yes, yes I do post alot!
- Joined: 02-May 06
Posted 01 May 2013 - 01:41 PM
I was always under the impression the best way to do a "warpable" panel, was to just do a shitload of little tacks and have them all join up (like what yiou've watched on youtube)
its always worked for me
#31
SHEEL
-
- Members
-
- 313 posts
Forum Fan
- Name:Daniel
- Location:Melbourne
- Joined: 09-October 09
Posted 01 May 2013 - 03:23 PM
That's basically what I did, when I say 5-10 second bursts I mean that I tack, then pause, then tack then pause, for 5-10 seconds... so I do maybe one tack per second for 5-10 seconds, then cool the area wet a damp rag and wait a minute or so before repeating.
I think the error I made was tacking 5-10 tacks in a string... rather than staggering the tacks then going back between them..
eg 11111 (wait a few minutes) 22222 (wait a few minutes) 33333 - represents 3 strings of welds made up of individual tacks...
versus 1 3 2 3 1 3 2 3 1 3 2 3 1 where 1 represents 1 pass, working left to right, 2 represents the second pass and so on... eventually after the 5 or 6 passes all the tacks would join together. waiting a few minutes between passes also.
I hope that makes sense....
Edited by SHEEL, 01 May 2013 - 03:24 PM.
#32
Dave6179
-
- Members
-
- 577 posts
Forum Fixture
- Name:David
- Location:NZ
- Car:HJ, VN, VX SS
- Joined: 23-August 12
Posted 06 May 2013 - 09:46 AM
Still good work. And, we all have to start somewhere, I'm 46 and still learning! Even after doing these types of jobs since my early 20's.
#33
SHEEL
-
- Members
-
- 313 posts
Forum Fan
- Name:Daniel
- Location:Melbourne
- Joined: 09-October 09
Posted 06 May 2013 - 02:56 PM
Thanks Dave,
I did a little more yesterday. I injured (not too badly) my wrist at basketball through the week so I wasn't feeling like sanding. So I started attacking the prem front. The car has the Kingswood front on it, but came with a spare Prem front and radiator support.
I pulled the nose cone from the rad support to find the rad support is cactus... lots of rust!
So it looks like I'll be cutting the headlight cup area from the rusted rad support and grafting it into the kingswood rad support. more work!
Anyway the Nosecone was also pretty ordinary, There was damage on the bottom passenger side up into the headlight and indicator area. So I cut up the Kingswood nose cone and re-used the lower half with the join line behind the bumper I don't really need to go too crazy hiding the join where I've welded it, also gives me a good chance to practice more welding without getting too much heat into the panel...
I did end up having to cut into the indicator area to repair where the twin headlight one was damaged.
So far I've just done the welding and I'm starting to grind down and clean up the welds. pics tell the story:


#34
yel327
-

- Members
-
- 13,079 posts
Oh My, Don't you post alot
- Joined: 10-February 08
Posted 06 May 2013 - 04:18 PM
Brings back memories! I used to get hold of Prem/Statesman/GTS/Sandman/Ambulance quad headlight fronts off smashed cars in the mid 80's and make up good fronts out of them. Basically what you've done. It is a fair bit of work to put the quad headlight openings into the twin headlight support but on the plus side it is pretty well hidden so doesn't have to be pretty. What I ended up finding was it is easier to cut the support panel up and join together like you've done with the nose panel, rather than fiddling around with the headlight piece. So basically chop straight across under the lights from the end right through to the radiator opening, do it on both sides and just join the whole twin headlight bottom half to it. Use the measurement between the radiator mounting holes or the opening itself as your guide. Steel is thicker on these so doesn't warp as bad either, I used to weld them with oxy and filler rod.
PS, don't bother welding the little pieces under the lights back on. Best bet it to finish it all, paint etc and simply put them back on with rivets from behind. Less chance of rust afterwards. I've often left them off altogether!
#35
Dave6179
-
- Members
-
- 577 posts
Forum Fixture
- Name:David
- Location:NZ
- Car:HJ, VN, VX SS
- Joined: 23-August 12
Posted 07 May 2013 - 08:05 AM
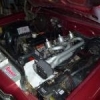
By the way... this is mine. 089.JPG 155.32K
0 downloads Only had it since 1985, yes '85. And still not finished... if they ever are finished.
DSC03044 (640x480).jpg 148.43K
1 downloads
089.JPG 155.32K
0 downloads Only had it since 1985, yes '85. And still not finished... if they ever are finished.
DSC03044 (640x480).jpg 148.43K
1 downloads
#36
lcgtr1970
-

- Members
-
- 1,702 posts
Forum Fixture
- Name:Jordan
- Location:having a beer, looking at the torana
- Joined: 13-March 06
Posted 07 May 2013 - 02:14 PM
That's an interesting set up...never seen one like that. Is it custom made?
#37
Dave6179
-
- Members
-
- 577 posts
Forum Fixture
- Name:David
- Location:NZ
- Car:HJ, VN, VX SS
- Joined: 23-August 12
Posted 08 May 2013 - 07:21 AM
Yep, I made it a little while ago, performs better than the ramtubes I had on.
#38
SHEEL
-
- Members
-
- 313 posts
Forum Fan
- Name:Daniel
- Location:Melbourne
- Joined: 09-October 09
Posted 20 May 2013 - 12:57 PM
Did some more on the nose cone. It's almost done, just gotta rub back the hi fill and rivet the bit under the passenger headlight.


#39
SHEEL
-
- Members
-
- 313 posts
Forum Fan
- Name:Daniel
- Location:Melbourne
- Joined: 09-October 09
Posted 27 May 2013 - 03:48 PM
Did a few hours over the weekend, Sanded the drivers side rear qtr and front guard. Threw a light coat of etch over them just to have a lok and see how clase they are... not too bad.. still a few slight gentle highs and lows but I think I'll get the rest with high fill primer. That will be next weekends job.
I also Stripped the spare pass side Front guard I had. This time I hit it with paint stripper then the paint stripping disc to get rid of the last traces... found a few trolley dings in it which I easily removed using the slapstick and dolly. Removing small dings with the slapstick was awesome, literally 2 minutes of hitting and you can see the ding rise in front of your eyes. There were 4 spots on the guard with bog, 3 of them I beat out completely perfect. The other is on the lip of the wheel arch which I think I'll bog again just because its a bit of a tricky shape. I don't want to make it worse and it's only a tiny ding anyway.
just 2 pics today of the etched repairs. I'll take pics of the other guard tonight maybe...


#40
_mick74lh_
_mick74lh_
-
- Guests
Posted 27 May 2013 - 09:51 PM
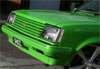
Awesome mate. Hey do you live around knox somewhere? I'm pretty sure I've seen the green Gemini from time to time.
#41
SHEEL
-
- Members
-
- 313 posts
Forum Fan
- Name:Daniel
- Location:Melbourne
- Joined: 09-October 09
Posted 28 May 2013 - 09:57 AM
Used to live in Knox many years ago, Dad still lived there up until last year, and I lived in Mount Waverley. So I was in the area all the time.
Still got friends in Bayswater and I go to the Knox car show in summer so I still get around there occasionally.
#42
TerrA LX
-

- Members
-
- 14,241 posts
Fulcrum Fixture
- Location:Sid 'n' knee
- Joined: 31-May 06
Posted 28 May 2013 - 10:28 AM
I would imagine that dash colour is covert?
My SLR is -60Y which is similar but due to being SLR it uses a black dashpad/dash etc.
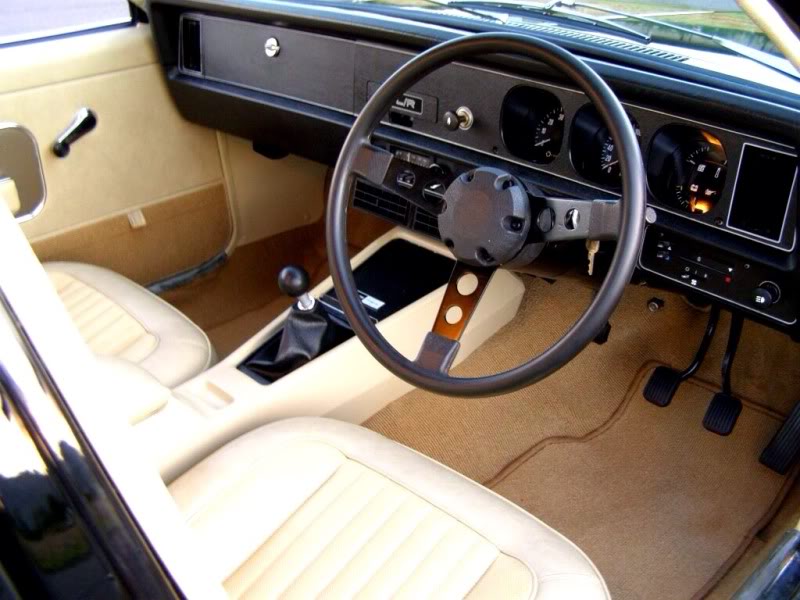
This interior looks like buckskin to me next to chamois.
#43
_mick74lh_
_mick74lh_
-
- Guests
Posted 28 May 2013 - 10:41 AM
Used to live in Knox many years ago, Dad still lived there up until last year, and I lived in Mount Waverley. So I was in the area all the time.
Still got friends in Bayswater and I go to the Knox car show in summer so I still get around there occasionally.
Yeah righto. Well hopefully I'll get to see this car at some local car shows soon.
#44
SHEEL
-
- Members
-
- 313 posts
Forum Fan
- Name:Daniel
- Location:Melbourne
- Joined: 09-October 09
Posted 03 June 2013 - 11:47 AM
More progress... spent a few hours on Saturday tinkering away...
I stripped the front Quarter last week back to bare metal. there were a few spots where the paint had been chipped away to bare metal previously that I sprayed with rust converter, the rust was just surface rust so it wasn't too bad. anyway I wiped the convertor with a damp rag and it sort of smeared over the whole guard and made it all go black, I guess it doesn't matter, just looked funny. I ended up snading most of it off except for the problem areas.
Anyway the Quarter was pretty sraight, as I mentioned in a previous post I dollied out a few trolley dings and I also welded up the antenna hole as the next few pics will show...


I put KBS on the inside edges of the guard, there was some extremely light surface rust in this area, but it was almost perfect really. The KBS is just a preventative measure.

This is it after 3 coats of high build primer, still needs to be blocked back for final primer

I had some paint left in the pot so one coat of high build on the rear quarter, looks fantastic compared to what I started with:


So far I'm really liking this high build primer, goes on really thick and heavy and I'm guessing it'll be really easy to sand. It is very orange-peely but I'm guessing that's because I'm mixing it thick for the high build effect. I'm hoping when I mix it thinner it will spray on smoother then after the wet sand it will be mirror flat hopefully!
#45
_Macca97_
_Macca97_
-
- Guests
Posted 03 June 2013 - 12:05 PM
I better get stuck in to the Ute so I finish before you ahahahah, It will end up a nice car especially with the prem front
#46
hanra
-

- Members
-
- 10,832 posts
Oh My, Don't you post alot
- Name:Brad
- Location:Farrrrrr North Qld
- Car:1975 LH SL/R 5000, 1967 Morris Cooper S, E36 BMW, Toyota Corolla, Isuzu DMax
- Joined: 24-March 11
Posted 03 June 2013 - 12:42 PM
This interior looks like buckskin to me next to chamois.
The carpet is buckskin. Seats/vinyl are chamois. Covert carpet is NLA.
#47
SHEEL
-
- Members
-
- 313 posts
Forum Fan
- Name:Daniel
- Location:Melbourne
- Joined: 09-October 09
Posted 11 June 2013 - 03:34 PM
Heaps of progress over the long weekend...Had my Cousin helping me on monday which was great. Ran out of gas on the MIG tho so that's slowed me down a bit!
paint stripping the passenger rear guard


This shows an area that was filled with bog. There was a large-ish dent that was just bogged straight over, maybe 5mm deep. Can't have that!

All stripped!

We Massaged the dent out, got it almost perfect but it wasn't easy as the hole cut for the old LPG filler was making the panel behave a bit weird... I think it creates a loose point maybe... hard to explain, it's like the metal isn't as tightly stretched as it needs to be...
Anyway we got it prety close, I tacked a fill in panel where the filler hole was, when I weld it in fully then I'll do a bit more work on the dent, if I can't get it perfect I might need to put 1-2mm of filler in there, I'd rather have a 1mm low spot than risk going too far and causing a high area.


Got a different front quarter instead of the one I butchered, My old one wasn't too bad so it'll make a good spare to hang in the garage.
The new one is taiwanese though so it'll be interesting to see how it fits.
It was sprayed in some sort of primer, with baby blue underneath, black primer under that! Paint stripping revealed all the layers!


gave it a light coat of etch then ran out of daylight.

took a pic of the car outside with no front, its weird to drive it in and out of the garage with nothing in front but the engine!

Between stripping and paint drying on the guards I was cutting and unpicking spot welds on the rad support. The Prem one was rusted pretty bad as the pics show:

So I carefully cut a section from the single headlight Kingswood support panel and grafted it to the premier support panel.


That's about all for the moment. Next on the list is more bodywork on the passenger rear guard, finish welding the rad support and trial fit all the front panels.
I also scored a new passenger front door, the old door had rust in the skin, this one has a tiny hole on the inside bottom edge. easy fix. much easier than dealing with the doorskin.
Edited by SHEEL, 11 June 2013 - 03:36 PM.
#48
Dave6179
-
- Members
-
- 577 posts
Forum Fixture
- Name:David
- Location:NZ
- Car:HJ, VN, VX SS
- Joined: 23-August 12
Posted 12 June 2013 - 08:58 AM
My r/f guard is a pirate job. Never fit right. The body line above the wheel arch is in the wrong place, and the lower bolt holes needed to be adjusted to bolt on... after the rearmost corner, at the sill, had to be 'encouraged' to fit. I have a genuine HX GTS guard in the garage roof that needs a couple minor repairs and paint before I put it on.
#49
SHEEL
-
- Members
-
- 313 posts
Forum Fan
- Name:Daniel
- Location:Melbourne
- Joined: 09-October 09
Posted 12 June 2013 - 09:58 AM
Yeh I found a few bolt holes had been kind of bent... one of the bonnet hinge holes too... Not sure if they have been damaged accidentally or deliberatly manipulated to get the guard to sit
better... So I left them as they are until I trial fit it... then I guess further manipulation may be required to line everything up
better... So I left them as they are until I trial fit it... then I guess further manipulation may be required to line everything up
#50
_mick74lh_
_mick74lh_
-
- Guests
Posted 12 June 2013 - 10:06 AM
Nice work on the rear quarter. What are the sills and the plenum like?


0 user(s) are reading this topic
0 members, 0 guests, 0 anonymous users

