Jump to content


- - - - -

Matvex's LX Hatch


  • Please log in to reply
57 replies to this topic

#1 _Matvex_

_Matvex_
  • Guests

Posted 09 August 2013 - 09:50 AM

Hey All, 


I bought a LX hatch unfinished project late last year. It's a LX SL Contessa Gold 202 4 Speed with Chamois Trim.


I haven't had an opportunity to get started on it due to Time and Budget constraints. but i though I'd start my thread as I have started tinkering lately.


I've never properly built/restored a car before, This will be the first.  


I've kept my plans as simple as possible. I just want to get the car back together, all one colour inside and outside and driving again with a 202 M20. I've got most of the parts i need i just might need a few bits on the way.


Here's a pick on the way home.  


Attached File  photo 1.JPG   475.84K   14 downloads

Attached File  photo 2.JPG   470.43K   12 downloads


#2 _LS1 Hatch_

_LS1 Hatch_
  • Guests

Posted 09 August 2013 - 10:40 AM

Very colorful at the moment :)


What color will you be going with for it ?


#3 Toranamat69

Toranamat69

    Forum R&D Officer

  • Members
  • PipPipPipPipPip
  • 2,117 posts
  • Location:Brisbane
  • Joined: 07-November 05

Posted 09 August 2013 - 10:41 AM

Looks to be a really good clean solid shell from those pics - good pickup, not many of them round anymore.


#4 BIG KEV

BIG KEV

    Forum Fixture

  • Members
  • PipPipPipPipPip
  • 1,202 posts
  • Name:Kevin
  • Location:SYDNEY
  • Car:LHSLR5000 and The 6LT Project
  • Joined: 02-January 12

Posted 09 August 2013 - 11:01 AM

where do you guys find clean shells .....?????

all I find is rust buckets ....lol

good luck with the rebuild


#5 _Matvex_

_Matvex_
  • Guests

Posted 09 August 2013 - 11:24 AM

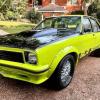
yes its very colourful! the shell and doors were painted ford blood orange. the front clip are still its original contessa. he sprayed a bit of hothouse on one quarter too.

Im still in two minds with colour. im thinkin leave it orange for now and get it driving again. hasnt been driven since 2002.

the car is completey rust free all usual repairs were completed 10 years ago with no signs of coming back yet. the orange paint is actually 10 years old. it was stored in a dark dry shed for that time

i actually gave up on my dream of owning one of these cars last year until this opportunity came up..

i bought and imported an opel monza only 6 weeks before i found this car.

you might have seen it on an old for sale thread of mine.
Attached File  image.jpg   328.93K   12 downloads

#6 _LS2 Hatch_

_LS2 Hatch_
  • Guests

Posted 09 August 2013 - 11:54 AM

Hi Mat, looks to be a great start. I must agree, keep it orange (I am a bit bias though :)  )

Good luck with the build. I look forward to your udates and PHOTOS!!!!!


Quite funny actually, mine was Contessa Gold 6 cylinder once too. Now BRIGHT orange.

Gotta love the colour


#7 _Matvex_

_Matvex_
  • Guests

Posted 09 August 2013 - 02:09 PM

Being an unfinished car that i didn't pull down I've decided to first put it all back together, work out whats missing and chase bits to complete the car. i bought a complete  202 4 speed UC torrie in original cond to use as a donor and also to show me actually where the stuff goes. I drove it from Adelaide to Melbourne it was a fun trip. 


Attached File  photo 2.JPG   339.06K   12 downloads

Attached File  photo 6.JPG   132.73K   10 downloads

Attached File  photo 1.JPG   113.67K   11 downloads


From there I want to do a proper strip down bagging/tagging all the bits, paint and rebuild.


#8 _Matvex_

_Matvex_
  • Guests

Posted 09 August 2013 - 02:15 PM

This week i've been looking at the interior trim, seats in particular.  I thought he replaced the rear chamois seats with black/slate but after looking closer they had been painted. I took Hanra's advice to try a bit of acetone to remove the paint and its working really well so far.   

 
Before Rear top and after a few goes wiping acetone over the rear bottom.
 
I now need to scrub the stitching with aceone and a toothbrush and they will be good enough for me. As you can see the rear seats are in really good cond.
 
Attached File  photo 1.JPG   112.58K   12 downloads


#9 _Matvex_

_Matvex_
  • Guests

Posted 09 August 2013 - 02:23 PM

As for the front seat only the drivers seat was worn. and unfortunately the prev owners dog also tore one side of it to shreds. 


So i've decided to use the front seats out of the UC. They are 63v buckskin so i'm going to switch the brackets so they recline and get some color matched chamois vinyl paint to suit. there isn't too much difference from the originals as you can see there's less stitching down the middle and there isn't the plastic board on the back that brake all the time.


The UC has only travelled 58,000 kms so the wear on the interior is quite minimal. im really pleased that ive been able to use original trims. 


Attached File  FR Seat 2.JPG   110.17K   10 downloads


#10 _Matvex_

_Matvex_
  • Guests

Posted 26 August 2013 - 01:33 PM

motor and box out the donor came out this weekend. rear main has gone so that will be tended to plus the following. Is there anything that i haven't listed below that i should do before the engine goes in?


has anyone used a "sneaky pete" rear main seal removal/install tool? apparently you can remove and install the rear main without removing the crank shaft?


All gaskets exept head gasket including rear main. 

Water pump

Thermostat and housing

Clutch kit.

Plugs, oil and fuel filter.

clean and coat of paint. 


Attached File  photo 3_1.JPG   127.6K   10 downloads


#11 _LS1 Taxi_

_LS1 Taxi_
  • Guests

Posted 26 August 2013 - 07:37 PM

Why not change the head gaskets?
Never heard of or used a sneaky pete. Seems a huge risk considering its engine out if the sneaky pete butchers it. I'd pull the crank and do it properly.

#12 _Matvex_

_Matvex_
  • Guests

Posted 05 September 2013 - 12:30 PM

The head gaskets still good. i'll only change if needed.  And the old man is going to show me how to do the rear main properly.


But i have decided to have a change in direction...


I've decided to put a mild 308 in instead of the 202. I've got a VK black 308 tri pattern and a M21 box.


The car looked to be running a red 253 previously and the loom looks to still be all there. 


I'll use the 202 for my EH while I arrange for its original 179 to be rebuilt down the track. Here's a pic my great grandpa bought it new in 63. Dad handed it down to me a few years back. 

Attached File  EH.JPG   96.17K   9 downloads


#13 _LS2 Hatch_

_LS2 Hatch_
  • Guests

Posted 05 September 2013 - 12:42 PM

That's one great looking EH!
Good idea going the 308, makes cruzing with LS engined Toranas so much easier ;)
I have a set of cast VS Clubsport heads sitting there with new big valves and springs in them if you want to wam it up a tad, just let me know if this starts a thought process :)

#14 _Matvex_

_Matvex_
  • Guests

Posted 05 November 2013 - 12:28 AM

Super slow progress. Wife is due with our 3rd. But had a little time with the hatch this weekend.

Had a trimmer complete my door card set. Just need to colour match kick panels
Attached File  image.jpg   289.21K   8 downloads

Prepped the engine bay for some paint. I prefer black engine bays. Previous owner covered the firewall with liquid nails and stuck plastic checker plate to it. It was an absolute nightmare to clean it all off. He checker plated a lot of bits, but I've removed it all now

Before
Attached File  image.jpg   92.69K   7 downloads
Cleaned up and prepped
Attached File  image.jpg   149.01K   6 downloads
First coat of undercoat
Attached File  image.jpg   140.67K   6 downloads

I've never put paint on a car. So far so good. I'm hoping to get some black on it tomorrow.

Edited by Matvex, 05 November 2013 - 12:29 AM.


#15 _LS2 Hatch_

_LS2 Hatch_
  • Guests

Posted 05 November 2013 - 07:54 AM

That's good progress for one weekend.
Looks much better with the checker plate gone.

Good luck with number 3!!

#16 _Matvex_

_Matvex_
  • Guests

Posted 06 November 2013 - 08:58 AM

Thanks Grant, just playing the waiting game. 


I'm more into the stock factoryish appearance where as the prev owner was on the opposite path but luckily for me his path was all completely reversable.


Put some paint on the bay. Results were better then I expected. Hottish day for Melbourne so it had a good bake in the sun.


Attached File  Engine bay paint 017.JPG   101.26K   6 downloads


Attached File  Engine bay paint 015.JPG   96.67K   6 downloads


Edited by Matvex, 06 November 2013 - 09:01 AM.


#17 hainzy

hainzy

    Forum Fixture

  • Members
  • PipPipPipPipPip
  • 502 posts
  • Location:BALLARAT
  • Joined: 16-April 07

Posted 06 November 2013 - 09:40 AM

Lookin good!


#18 Heath

Heath

    I like cars.

  • Administrators
  • PipPipPipPipPipPipPip
  • 18,309 posts
  • Name:Heath
  • Location:Eastern Suburbs, Melbourne
  • Car:Heavily Modified UC Sunbird Hatchback
  • Joined: 07-November 05
Garage View Garage

Posted 09 November 2013 - 10:35 AM

Good stuff mate.


#19 _sloffador_

_sloffador_
  • Guests

Posted 09 November 2013 - 10:47 AM

Looks good im doin mine gloss 2 pak  what did you do that in


#20 _LHSL308_

_LHSL308_
  • Guests

Posted 09 November 2013 - 10:58 AM

Yep looking good mate. Bay looks much better than that crappy checker plate, fair dinkum it makes you wonder what some people are thinking. Keep the updates coming and good luck with the birth.


#21 _Matvex_

_Matvex_
  • Guests

Posted 09 November 2013 - 07:28 PM

Thanks Guys

Looks good im doin mine gloss 2 pak what did you do that in

Is Black is good :-) I know LX came out with colour coded bays. IMO black is a nice back drop for a nicely detailed engine.

Mines painted in Gmh chassis black in acrylic it has a satin finish.

Next jobs are modifying and fitting my UC wiring loom and fitting the brake system. Once again never done either tasks before. Learning heaps though.

Edited by Matvex, 09 November 2013 - 07:28 PM.


#22 _Matvex_

_Matvex_
  • Guests

Posted 20 December 2013 - 08:52 AM

Well the safe arrival of my third child was a healthy one. ive now got 2 girls and a boy all under 4! I haven't had much time for the car obviously. but here is a few pics of the little progress i've made since my last update.


bits starting to go back into the bay. 


Attached File  photo 1.JPG   133.09K   6 downloads


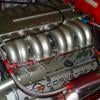
Engine rebuilt and reassembly has begun. 


Attached File  photo 2.JPG   117.52K   7 downloads


I don't think this car has been started since the 90's so next step is to drop the motor in plug it up and turn the key!


#23 SmacT

SmacT

    Forum Fixture

  • Members
  • PipPipPipPipPip
  • 907 posts
  • Name:Sam
  • Location:Sydney
  • Car:LX 4dr 383, TKX, BW
  • Joined: 24-December 08

Posted 20 December 2013 - 09:25 AM

Nice work, especially given your family commitments. I have a similar brood, so know that your effort so far is super human! Be nice when she starts.


#24 _LHSL308_

_LHSL308_
  • Guests

Posted 20 December 2013 - 10:19 AM

Congrats Matt on your new arrival. Be good to see some progress on your machine and see it finished as your going to need some sort of stress relief.

Sent from my GT-I8730 using Tapatalk

#25 _LS2 Hatch_

_LS2 Hatch_
  • Guests

Posted 20 December 2013 - 04:01 PM

Congrats to you on the new arrival
Under the bonnet looks to be coming along well


0 user(s) are reading this topic

0 members, 0 guests, 0 anonymous users