Jump to content


Photo
- - - - -

Greg's LH SLR Resuscitation


  • Please log in to reply
56 replies to this topic

#26 mugginz

mugginz

    Forum Fan

  • Members
  • PipPipPipPip
  • 325 posts
  • Name:Greg
  • Location:Geelong
  • Car:LH Torana
  • Joined: 27-November 13

Posted 08 June 2014 - 12:44 PM

21-4-13-BareDrvrsRearQtr2-800.jpg


Looking under the car on the other side of this rear quarter you can see techniques of the true lame ripoff panel beater in place.


The approach is basically as follows.


RustyDiagram-800.jpg


Sort of a turd sandwich as below.


RustyDiagram2-800.jpg


No rust treatment or prevention.  Basically the rust that was there was left to fester between the patches.


2-9-13-DvrSideLwrQtrUndrSide2-800.jpg


2-9-13-DvrSideLwrQtrUndrSide-800.jpg


I'll post the pix of this area pulled apart later loday.


#27 mugginz

mugginz

    Forum Fan

  • Members
  • PipPipPipPip
  • 325 posts
  • Name:Greg
  • Location:Geelong
  • Car:LH Torana
  • Joined: 27-November 13

Posted 09 June 2014 - 11:45 AM

28-9-13-DvrSideLwrQtrOpn2-800.jpg


28-9-13-DvrSideLwrQtrOpn-800.jpg


28-9-13-DvrSideLwrQtrUndrSideOpn-800.jpg


#28 308 Sunbird

308 Sunbird

    Forum Fixture

  • Members
  • PipPipPipPipPip
  • 966 posts
  • Name:Stuart
  • Location:Melbourne
  • Car:SS Hatch, 308 Sunbird sedan-Improved Prod racer (sold), HZ Kingy wagon
  • Joined: 20-November 10

Posted 09 June 2014 - 12:20 PM

Good luck- looks like the old girl is in good hands now.


#29 mugginz

mugginz

    Forum Fan

  • Members
  • PipPipPipPip
  • 325 posts
  • Name:Greg
  • Location:Geelong
  • Car:LH Torana
  • Joined: 27-November 13

Posted 09 June 2014 - 12:30 PM

Good luck- looks like the old girl is in good hands now.


Thanks Sunbird.  If it didn't have the attachment that being my first car brings, I dunno if this would've become a project for me, but having gotten my feet wet (really wet) I think I'd take on just about anything now :)


#30 mugginz

mugginz

    Forum Fan

  • Members
  • PipPipPipPip
  • 325 posts
  • Name:Greg
  • Location:Geelong
  • Car:LH Torana
  • Joined: 27-November 13

Posted 10 June 2014 - 12:03 AM

28-9-13-DSideLwrQtrBk-800.jpg


Thank got that at least one side of the car had the internal bits of the rear quarter panel that were factory steel.  They were rusty though and needed attention, but made for good reference for the other side where some of it was cut out and replaced with debauchery by Simon.


18-11-13-DSideLwrQtrInternal4-800.jpg


Off with this part....


18-11-13-DSideLwrQtrInternal2-800.jpg


I made up a replacement for this part as it was a little too rusty for my liking and I also made its opposite for the passenger side of the car.


18-11-13-DSideLwrQtrInternal-800.jpg


18-11-13-DSideLwrQtrInternal3-800.jpg


#31 mugginz

mugginz

    Forum Fan

  • Members
  • PipPipPipPip
  • 325 posts
  • Name:Greg
  • Location:Geelong
  • Car:LH Torana
  • Joined: 27-November 13

Posted 21 June 2014 - 01:10 PM

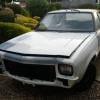
At this stage the drivers side quarters pretty much done.  I didn't take progress pix though.  I guess I got too into it to take any but the passengers' side is pretty much a carbon copy of the drivers side as far as Simons' approach to "repairs" goes.


So first up was to see what kind of horror story was hiding behind this patch.


21-4-13-BareDrvrsRearQtr3-800.jpg


Both the rail and boot floor extension were rusty.  Both sections were cut out, sandblasted and weld through primed before repair sections were welded in.


25-5-14-PSideLwrQtrCnr-800.jpg


Here's the rail section all ready for weldage.


25-5-14-PSideRearRailPatch-800.jpg


Fit like a finger in a ... glove.


26-5-14-PSideRearRailPatched-800.jpg


The difference between sanded and unsanded metal really show up with the weld through primer.  When it's all done in chassis coat it should look pretty uniform, not that you'll be able to see in here without pulling the car apart :).


27-5-14-PSideLwrQtrCnrPatched-800.jpg


27-5-14-PSideLwrQtrCnrPatched2-800.jpg


Now onto the rest of the quarter.


#32 mugginz

mugginz

    Forum Fan

  • Members
  • PipPipPipPip
  • 325 posts
  • Name:Greg
  • Location:Geelong
  • Car:LH Torana
  • Joined: 27-November 13

Posted 23 June 2014 - 02:27 AM

While I was reading through 76lxhatch's build log I noticed there was something I missed on the drivers side inner wheel well patch I made.


When my car went from this...


11-10-13-DvrSideWWellInrDePatched-800.jp


to this...


8-7-14-DvrSideWWellInrPatched-800.jpg


I didn't include the hole that's shown in 76lxhatch's pix


RearInnerWell.jpg


RearInnerWell2.jpg


I'm wondering if anyone can help me with some info.  Location measurements would be great if I can get em as well as clear pix.  I'm not sure what diameter the hole is though I'm guessing it could be the same as the 4 other ones where the screw on covers are in the floor.  I'd like to get all these repairs back to as close to factory as I can get em where possible so any help would be gratefully received.


Thanks,

mugginz.


#33 _hatch76_

_hatch76_
  • Guests

Posted 23 June 2014 - 08:18 PM

Nice work so far mate, should look good when done

#34 mugginz

mugginz

    Forum Fan

  • Members
  • PipPipPipPip
  • 325 posts
  • Name:Greg
  • Location:Geelong
  • Car:LH Torana
  • Joined: 27-November 13

Posted 23 June 2014 - 08:35 PM

Nice work so far mate, should look good when done


Thanks man, I'm taking my time to try and get everything as close to as new as I can get it including the internal panel sections that no one sees.  Hopefully I'll be able to get a good crack at the passenger side rear quarter this weekend.


#35 _hatch76_

_hatch76_
  • Guests

Posted 24 June 2014 - 05:51 PM

Times the key. I tried the same approach and think I have turned out with a half decent looking car

#36 mugginz

mugginz

    Forum Fan

  • Members
  • PipPipPipPip
  • 325 posts
  • Name:Greg
  • Location:Geelong
  • Car:LH Torana
  • Joined: 27-November 13

Posted 25 June 2014 - 10:23 PM

On the subject of hole locations as per this....


RearInnerWell.jpg


while I was repairing the other side there was this hole that I didn't know what it was for hiding behind Simons patch.


7-6-14-PassSideRWWellInr2-800.jpg


From what I can tell it'll be the hole for the top screw of the bung cover.


Lucky when I welding my patch in I didn't fill it in yet so I have a factory reference for the rest.


The patch went in pretty well...


7-6-14-PassSideRWWellInr-800.jpg


Just some slight tidying up and what not, or so I thought until I fit up the replacement quarter.


7-6-14-PassSideRWWellInr3-800.jpg


That's what happens when you rush making up a patch I guess.  Take two patch is almost ready to go in.


#37 308 Sunbird

308 Sunbird

    Forum Fixture

  • Members
  • PipPipPipPipPip
  • 966 posts
  • Name:Stuart
  • Location:Melbourne
  • Car:SS Hatch, 308 Sunbird sedan-Improved Prod racer (sold), HZ Kingy wagon
  • Joined: 20-November 10

Posted 26 June 2014 - 09:30 AM

Keep at it Greg, good detective work on the drain hole placement. I'm pretty sure your last repair guy wouldn't have

bothered to re-do that patch, the old girl wont know herself. :)


#38 mugginz

mugginz

    Forum Fan

  • Members
  • PipPipPipPip
  • 325 posts
  • Name:Greg
  • Location:Geelong
  • Car:LH Torana
  • Joined: 27-November 13

Posted 25 July 2014 - 10:14 PM

So finally got some time on the car.


First I'd like to thank arrimar for the heads up on the right hose for here --->


WigglyHeaterHose-800.jpg


Mackay CH942 is the right part.  I did take off 1 cm from each end for a perfect fit with no static stress in the hose.  It's not a common hose so for those running the old intake manifolds it might pay to have one on the shelf for a rainy day.


Remade the inner wheel well section but this time correctly.


PassRearInnerWheelWell-800.jpg


PassRearInnerWheelWell2-800.jpg


Should get it welded in tomorrow so I can adjust the Rare Spares replacement quarter section and get it fitted.  They need a decent amount of correction in order to fit properly but it beats starting from scratch.


#39 mugginz

mugginz

    Forum Fan

  • Members
  • PipPipPipPip
  • 325 posts
  • Name:Greg
  • Location:Geelong
  • Car:LH Torana
  • Joined: 27-November 13

Posted 27 August 2019 - 10:30 AM

The concept known as the law of the instrument, otherwise known as the law of the hammer...


From wikipedia:

"I suppose it is tempting, if the only tool you have is a hammer, to treat everything as if it were a nail."


if the only tool you have is a hammer,


Welder.jpg


to treat everything as if it were a nail.


Console.jpg


Once the countersunk screws go in and the whole thing is wrapped in leather it'll hopefully look fine.


#40 _imj411_

_imj411_
  • Guests

Posted 27 August 2019 - 09:39 PM

Hey Mugginz, what's go with the console? It looks like a HQ Monaro one to me not a LH SL/R one so probably won't fit perfectly as they are different shapes along the bottom where they sit on the floor due to different floor shape as well as other differences, cheers Aaron.

#41 mugginz

mugginz

    Forum Fan

  • Members
  • PipPipPipPip
  • 325 posts
  • Name:Greg
  • Location:Geelong
  • Car:LH Torana
  • Joined: 27-November 13

Posted 27 August 2019 - 09:44 PM

Was wondering how to go about making a new LSD diff tag when I came across these
 
tag1.jpg
 
Not exactly the same fonts as the factory tag but  close enough and saves a lot of work.

tag2.jpg

tag3.jpg


#42 mugginz

mugginz

    Forum Fan

  • Members
  • PipPipPipPip
  • 325 posts
  • Name:Greg
  • Location:Geelong
  • Car:LH Torana
  • Joined: 27-November 13

Posted 27 August 2019 - 09:50 PM

It looks like a HQ Monaro one to me not a LH SL/R one so probably won't fit perfectly as they are different shapes along the bottom where they sit on the floor due to different floor shape as well as other differences, cheers Aaron.


Yeh, my car was one of the earlier ones that came with a HQ console.  Made the rear so that it maps to the Torana hump.


Also modded the shifter so that reverse doesn't require so much left hand travel which works better with this console.


I picked up this console pretty cheap cause the rear was so badly smashed.  The prices for good second hand ones are a bit much and Rares repro ones don't have the recess so went this way.  I might pick up the leather this week to get a start on that.


#43 76lxhatch

76lxhatch

    That was easy!

  • Members
  • PipPipPipPipPipPipPip
  • 7,152 posts
  • Location:Unzud
  • Car:SS
  • Joined: 04-August 08
Garage View Garage

Posted 28 August 2019 - 06:44 AM

Nice work on the console end piece, nothing wrong with that!


#44 mugginz

mugginz

    Forum Fan

  • Members
  • PipPipPipPip
  • 325 posts
  • Name:Greg
  • Location:Geelong
  • Car:LH Torana
  • Joined: 27-November 13

Posted 28 August 2019 - 07:59 PM

Thanks 76lxhatch.


Test fitted today with the modded auto shifter surround that I made into a manual one with a Momo leather boot.  MMMmmmmm.  Love the smell of leather.


Console%20test%20fit%201.jpg


#45 Shiney005

Shiney005

    Oh My, Don't you post alot

  • Members
  • PipPipPipPipPipPipPip
  • 9,034 posts
  • Name:Laurie
  • Location:Dubya Hay
  • Car:Toyota Mirai
  • Joined: 19-January 12
Garage View Garage

Posted 29 August 2019 - 03:08 PM

It's good to see this one still progressing Greg. Console repair looks mint.

Can you tell me what month the car is? I would like to get a handle on how long those consoles were around for.


Attached File  1974_Holden_Torana_LH_03small.jpg   180.63K   3 downloads


#46 mugginz

mugginz

    Forum Fan

  • Members
  • PipPipPipPip
  • 325 posts
  • Name:Greg
  • Location:Geelong
  • Car:LH Torana
  • Joined: 27-November 13

Posted 29 August 2019 - 07:45 PM

It's good to see this one still progressing Greg. Console repair looks mint.

Can you tell me what month the car is? I would like to get a handle on how long those consoles were around for.


I'm not sure of which month in '74 at the moment.  Got some info chasing to do.  This thread is the one where I was told that the car would've had a HQ console not a Torana one. -> http://www.gmh-toran...s-this-bracket/


#47 Indy Orange

Indy Orange

    Lotsa Posts!

  • Members
  • PipPipPipPipPipPip
  • 2,848 posts
  • Name:Paul
  • Location:Australia
  • Joined: 03-July 09

Posted 29 August 2019 - 10:30 PM

That console looks the same that was in my HJGTS only black.

#48 _LH8VD69_

_LH8VD69_
  • Guests

Posted 30 August 2019 - 12:03 AM

I’m pretty sure the half consoles ended April 74, probably around the same time as the mph/kph speedos.

On a side note how do we post pics now without photo bucket? Sorry I didn’t want start a new thread asking...

#49 mugginz

mugginz

    Forum Fan

  • Members
  • PipPipPipPip
  • 325 posts
  • Name:Greg
  • Location:Geelong
  • Car:LH Torana
  • Joined: 27-November 13

Posted 30 August 2019 - 12:22 AM

As far as my photos go, I'm hosting them on my own website as I never really trusted photobucket cause it didn't have a viable business model when everything was free and when it hit the fan i was pretty glad not to have photos with them.

I think you can upload photos to this forum somehow though. Not really sure.

#50 mugginz

mugginz

    Forum Fan

  • Members
  • PipPipPipPip
  • 325 posts
  • Name:Greg
  • Location:Geelong
  • Car:LH Torana
  • Joined: 27-November 13

Posted 30 August 2019 - 12:39 AM

I’m pretty sure the half consoles ended April 74, probably around the same time as the mph/kph speedos.


Did these speedos move to a KPH only dial before they went with the yellow ones?


Speedo%20MPH+KPH.jpg


0 user(s) are reading this topic

0 members, 0 guests, 0 anonymous users