Jump to content


Photo

Axistr's new project (SANDY)


  • Please log in to reply
138 replies to this topic

#1 axistr

axistr

    Forum Fixture

  • Members
  • PipPipPipPipPip
  • 1,169 posts
  • Location:North west sydney
  • Joined: 19-November 05
Garage View Garage

Posted 07 June 2017 - 06:14 PM

Ok picked up the new project yesterday. Its a WB panno that I purchased form a mate of mine.

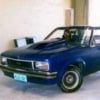
He decided to buy a finished car Holden WB one tonner. He purchased the panno and sent it to a panel shop to get rust removed and resprayed in a different colour (originally white). The car was going no where after six years in the panel shop which was originally said to take six months.

He also didn't like the WB front and purchased  Hz front panels.  Its a bit like a UC no one really took to the looks of the WB fronts.


 I drove it onto the car trailer so the driveline works and I will retain the current engine and driveline which is all original.

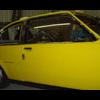
Even though the car is stripped down all the parts have come with it ready to reassemble.  The body was straight before going into the panel shop and is now in primer.

I am going to do the body prep and paint myself but its been about 25 years since I last resprayed a car and have only used acrylic so I hope I can get some hints from the painters on the forum.


Looking at the original tags this panel van is as close as you can get to the HZ sandman spec.

I hope Byron and Terry can shed some light on this panel van. I reckon that this build spec wouldn't have been very common.


tags read:  2 seat, 253 m20 4 speed, 10 bolt LSD.

Car also has yellow needle GTS instrument  and GTS steering wheel.  Four speed centre console and full length interior hood lining. Factory power steering.


Attached Files


#2 Ice

Ice

    Cool

  • Members
  • PipPipPipPipPipPipPip
  • 15,117 posts
  • Name:Gene
  • Location:Galaxy's away from Ipswich
  • Car:77 HZ Sandman Van
  • Joined: 03-January 07

Posted 07 June 2017 - 07:22 PM

Nice pick up ticks all the boxes for a nice van
heres a tip ditch the tail lights to there ugly like UC as well

#3 axistr

axistr

    Forum Fixture

  • Members
  • PipPipPipPipPip
  • 1,169 posts
  • Location:North west sydney
  • Joined: 19-November 05
Garage View Garage

Posted 07 June 2017 - 07:44 PM

Yep got a set of HZ lights with all the spares. Its a bugger the WB doesn't have the rear side clearance lights. I can see it now when some sandman expert walks around it picking on it saying its not a HZ because it hasn't got the side lights. .


#4 Bigfella237

Bigfella237

    Socially Distant

  • Members
  • PipPipPipPipPipPipPip
  • 4,368 posts
  • Name:Andrew
  • Location:Far South Coast of NSW
  • Car:(s) not as many as I'd like but more than I've got space for!
  • Joined: 31-October 14

Posted 07 June 2017 - 10:00 PM

Probably not hard to graft a pair of those repeater lights in, in fact I reckon it'd take longer to measure-up where they go than actually weld 'em in!


So the big question, what colour will she be?


#5 axistr

axistr

    Forum Fixture

  • Members
  • PipPipPipPipPip
  • 1,169 posts
  • Location:North west sydney
  • Joined: 19-November 05
Garage View Garage

Posted 08 June 2017 - 09:44 AM

Yep your properly right. I will have to find a wreck and attack it with a cutting disc. The van is in primer so it wouldn't be to hard to do the job now. I have plenty of time to decide on a colour but I do like them in Jasmine yellow or Atlantis blue. I also like Deville blue but my last sandman was Deville blue so properly won't go this colour again. I would like to stick to original HZ colours.


Question for the experts, What trim colours were available in HZ sandman's, the data plate on this one is 1991-67V I have seen HZs with 63V but not sure what the difference is between the HZ & WB.


#6 boomfunk

boomfunk

    Forum Trimmer

  • Members
  • PipPipPipPipPip
  • 2,065 posts
  • Location:QLD
  • Joined: 07-December 05

Posted 08 June 2017 - 10:02 AM

Very nice - i like the old panno's  - i had 1 myself back in the day! :buttrock:


#7 Bigfella237

Bigfella237

    Socially Distant

  • Members
  • PipPipPipPipPipPipPip
  • 4,368 posts
  • Name:Andrew
  • Location:Far South Coast of NSW
  • Car:(s) not as many as I'd like but more than I've got space for!
  • Joined: 31-October 14

Posted 08 June 2017 - 11:23 AM

i had 1 myself back in the day! :buttrock:


Yep, me too, mine was a HQ Belmont with a very 70's chocolate-brown vinyl padded/studded interior, including the obligatory "love heart" cutout in the partition behind the seats and this disgusting brown velour head-lining (not my own doing I swear).


Cruising around with the tailgate up (as you do), sucking in exhaust fumes, ah, the good ole days!


#8 Ice

Ice

    Cool

  • Members
  • PipPipPipPipPipPipPip
  • 15,117 posts
  • Name:Gene
  • Location:Galaxy's away from Ipswich
  • Car:77 HZ Sandman Van
  • Joined: 03-January 07

Posted 08 June 2017 - 01:26 PM

Yep, me too, mine was a HQ Belmont with a very 70's chocolate-brown vinyl padded/studded interior, including the obligatory "love heart" cutout in the partition behind the seats and this disgusting brown velour head-lining (not my own doing I swear).
 
Cruising around with the tailgate up (as you do), sucking in exhaust fumes, ah, the good ole days!

Jesus that sounds like my old van but mine was a HZ kingswood 253 4speed Alantis blue
yep had the love heart in crused velvet
gee i had some fun in that pano
sniggers

#9 axistr

axistr

    Forum Fixture

  • Members
  • PipPipPipPipPip
  • 1,169 posts
  • Location:North west sydney
  • Joined: 19-November 05
Garage View Garage

Posted 08 June 2017 - 02:09 PM

​I​ had an original HJ sandman in antelope, but L20  m20 driveline, quickly ditched the driveline and fitted a 327 Chev 360hp, Muncie tranny and painted it Deville blue. It Pulled  13.2 sec down the quarter at Castlereagh in 1978 with the mattress still in the back. Not bad in the day considering they weighed in around the 1550kg with not many aero features. Never had the arch way tho. That was one vehicle I really regret selling. I hope the new owner never sprayed the back with that luminal spray that shows up certain fluids.  It was the first car I modified and after 32 years I still haven't woken up and come to my senses.   


#10 _Lazarus_

_Lazarus_
  • Guests

Posted 08 June 2017 - 08:45 PM

You could go a custom front. Cut the HZ nosecone in half and graft the headlight section onto the WB guards and use a HZ bumper. You get to keep the WB radiator / support and no need for a front spoiler. I saw it done on a ute years ago and it looked pretty good.


#11 UCgazman

UCgazman

    UC's FTW!

  • Members
  • PipPipPipPipPip
  • 1,342 posts
  • Name:Garth
  • Location:Perth
  • Car:UC S̶u̶n̶b̶i̶r̶d̶ 5000!
  • Joined: 04-August 11

Posted 08 June 2017 - 09:32 PM

Pfft I'll see your love-hearts and raise you an ace of spades in black velour, bubble windows and a f-glass trans-am nose!

digital%20pics%20234_zpsx9odil4y.jpg

digital%20pics%20225_zpsv97ojnlz.jpg


#12 Ice

Ice

    Cool

  • Members
  • PipPipPipPipPipPipPip
  • 15,117 posts
  • Name:Gene
  • Location:Galaxy's away from Ipswich
  • Car:77 HZ Sandman Van
  • Joined: 03-January 07

Posted 08 June 2017 - 09:40 PM

I rember that on the road fugly then fugly now

#13 UCgazman

UCgazman

    UC's FTW!

  • Members
  • PipPipPipPipPip
  • 1,342 posts
  • Name:Garth
  • Location:Perth
  • Car:UC S̶u̶n̶b̶i̶r̶d̶ 5000!
  • Joined: 04-August 11

Posted 08 June 2017 - 10:05 PM

lol jealous...

Was my mates car, I helped him paint it - had a gutless 305 sbc & t700, and yes, that nose was fugly...


#14 axistr

axistr

    Forum Fixture

  • Members
  • PipPipPipPipPip
  • 1,169 posts
  • Location:North west sydney
  • Joined: 19-November 05
Garage View Garage

Posted 10 June 2017 - 03:15 PM

Its a bit like a UC Torana, not overly impressed with the WB styling and would prefer the HZ look. The WB radiator support that is currently on the van is rusty and the HZ panels are reasonable good, only one guard need a small rust spot repaired in the lower rear, and the HZ radiator support and front apron are rust free. If I was going to go back to a WB front I would go for the statesman front.

In the mean time I will get some of the mechanicals done first and think about the front panels. I had it up on the hoist today and had a better look underneath. It needs one lower control arm bush, idler arm, sway bar bushes, rear suspension spring bushes and two uni joints so there isn't any big surprises under the van. I have been running the engine from a 5 lt fuel container because the fuel in the tanks is six years old, so today I decided to pull out the tank and clean it out. The old fuel had about the same smell and consistency as wood varnish.

The engine was running on seven cylinders so I decided to give it a compression test first. Bugger number 8 cylinder had 10 psi and the rest has 140-150 psi. I removed the rockers and gave the exhaust valve a hit and the got 60 psi so I will have to pull the heads and reco them. The van also has LPG so I am going to remove the system and run it on petrol only and the Rochester has only just been overhauled. I have a running red 308 in the shed but I think I am better off sticking the original engine. I usually modify the driveline in all my vehicles but this time I am just going to leave it stock for a change. At least the body is in good shape, the doors and body are all in undercoat but I will have to give the roof a good sand pack and re prime as there is a bit of surface rust on the roof. Been sitting to long in storage and the condensation had been working away at the primed surface in my mates shed. On the bright side with all the spares that I got with the car I could build one and a half van.


#15 axistr

axistr

    Forum Fixture

  • Members
  • PipPipPipPipPip
  • 1,169 posts
  • Location:North west sydney
  • Joined: 19-November 05
Garage View Garage

Posted 01 July 2017 - 05:02 PM

Been slowly chipping away at the panno, Decided to tackle the underside first. Cleaned, rubbed down and repainted the underside with GMH black. Replaced the control arm bushes, sway bar bushes and idler arm. Front end is now 100% . Also throw a new set of unis, Just got to replace the rear spring bushes and the underside is complete.


Ok is it just me ore are we having a problem uploading photos. ?

Attached Files


#16 Bigfella237

Bigfella237

    Socially Distant

  • Members
  • PipPipPipPipPipPipPip
  • 4,368 posts
  • Name:Andrew
  • Location:Far South Coast of NSW
  • Car:(s) not as many as I'd like but more than I've got space for!
  • Joined: 31-October 14

Posted 02 July 2017 - 01:48 AM

Ok is it just me ore are we having a problem uploading photos. ?


Yeah, it's been happening for a while, I'm surprised you were able to get it to work at all? There's a thread about it here:


http://www.gmh-toran...er-not-working/


#17 axistr

axistr

    Forum Fixture

  • Members
  • PipPipPipPipPip
  • 1,169 posts
  • Location:North west sydney
  • Joined: 19-November 05
Garage View Garage

Posted 20 July 2017 - 05:30 PM

Got around to removing the heads yesterday thinking all I had to do was service the heads and new gaskets, only to find the inlet manifold has been leaking coolant into number 8 cylinder inlet port. Because its been sitting for a few years the end result is major cylinder baroll pitting. Bugger have to rebore the block. It proberly only need .020" to clean it up but its looking like a full  engine rebuild now. The block only has .004" wear on STD bore size. lucky the crank isn't rusty and measured up ok so I suppose it could have been worse.


Attached Files


#18 Heath

Heath

    I like cars.

  • Administrators
  • PipPipPipPipPipPipPip
  • 18,307 posts
  • Name:Heath
  • Location:Eastern Suburbs, Melbourne
  • Car:Heavily Modified UC Sunbird Hatchback
  • Joined: 07-November 05
Garage View Garage

Posted 21 July 2017 - 10:22 AM

You need to clean that lense/get a new phone, haha.

Cool project! Manual V8 Panno, sick. Not sure about the power steer (can't imagine that's a good thing) but never driven one with it.

Kinda jealous.

#19 76lxhatch

76lxhatch

    That was easy!

  • Members
  • PipPipPipPipPipPipPip
  • 7,150 posts
  • Location:Unzud
  • Car:SS
  • Joined: 04-August 08
Garage View Garage

Posted 21 July 2017 - 11:32 AM

Power steer is a great thing on the full size Holdens, all the wannabe drag racers removed it and now the prices have gone through the roof for those wanting to put it back. Faster (and variable) steering ratio with better geometry due to the shorter steering arms, can pile on way more caster than the manual steer will handle.

#20 axistr

axistr

    Forum Fixture

  • Members
  • PipPipPipPipPip
  • 1,169 posts
  • Location:North west sydney
  • Joined: 19-November 05
Garage View Garage

Posted 21 July 2017 - 06:35 PM

Yep getting soft Heath, but I don't own a car without power steering these days and I am not about to remove the power steer off this one. They are like driving an old Bedford truck without it. Sorry I will try and get better picks. The shed floor is all painted and I tend to get a lot of glair off it which plays havoc with the camera on the phone. 


#21 axistr

axistr

    Forum Fixture

  • Members
  • PipPipPipPipPip
  • 1,169 posts
  • Location:North west sydney
  • Joined: 19-November 05
Garage View Garage

Posted 16 August 2017 - 01:52 PM

Attached File  DSC_0039.JPG   109.33K   10 downloadsWhile waiting for the engine block to be rebored I have been bissy chipping away overhauling all the accessories. I have decided to go with the HZ combo and started by painting the fire wall GMH satin black. I have also serviced the wiper motor, fan motor and heater core. When the block returns its a straight forward job to screw it back together with all the engine parts cleaned, serviced and ready to go, Then into fitting and aligning all the removable panels and see how everything lines up.


And yes I know the photo isn't a good one Heath, to much light coming through the shed sky light and painted floor makes it hard to get good shots on the phone camera. 


#22 axistr

axistr

    Forum Fixture

  • Members
  • PipPipPipPipPip
  • 1,169 posts
  • Location:North west sydney
  • Joined: 19-November 05
Garage View Garage

Posted 25 August 2017 - 08:14 AM

Still waiting for the block to come back, luck I'm not in a hurry. The Hinges had to be cut off the old tailgate, not that there is much in the way of rust repairs to do, its mostly isolated to removable panels, tailgate (upper & lower, apron panel and a bit in the doors. The previous owner fitted a door light switch on the upper tailgate which had allowed water to enter the inner right panel above the tail light, bit of an odd shape to repair but job done and no more rust to repair in the body. 


Attached File  DSC_0057.JPG   49.07K   10 downloads

Attached File  DSC_0058.JPG   55.38K   9 downloads


Not sure if you can buy new hinge repair kits (where is the fun in that anyway) so I bored and made new pins and bushes myself.  


Attached File  DSC_0050.JPG   120.9K   9 downloads

Attached File  DSC_0051.JPG   71.08K   9 downloads

Attached File  DSC_0052.JPG   102.01K   9 downloads

Attached File  DSC_0056.JPG   127.96K   8 downloads

Attached File  DSC_0053.JPG   132.58K   8 downloads


#23 Rockoz

Rockoz

    Lotsa Posts!

  • Members
  • PipPipPipPipPipPip
  • 3,961 posts
  • Name:Rob
  • Location:Cowra NSW
  • Joined: 21-September 08

Posted 25 August 2017 - 11:28 AM

Had a 253 HX pano myself for years as a work vehicle.

Another one I should never have sold at the time.

Had extractors and 2 1/2 system that my brother organised for me.

Sounded nice.

He possibly still has a system for it hanging up in his shop if you want to go that way.


#24 axistr

axistr

    Forum Fixture

  • Members
  • PipPipPipPipPip
  • 1,169 posts
  • Location:North west sydney
  • Joined: 19-November 05
Garage View Garage

Posted 06 September 2017 - 10:14 AM

It seams these upper tailgates are getting hard to find in reasonable condition, so had no choice but try and repair the one I have. I managed to weld up all the holes and straighten it all up. Needs minimal body filler so I am happy the way it come up. I have flooded the inside with rust converter to make sure what's there is treated.

The lower tailgate come with all the car parts, a new Rare Spares unit. I had to cut the corners and weld up the seams. Surprising it come up excellent after three hours of mucking around. I had to twist the tailgate then spot weld it in position. These tailgates have no spot welds on the inner frame to outer skin, just folded and no glue. Without a few tacks it was so flimsy, nice and solid now. Also had to change the hinges from sides to get the body lines to align.


Attached File  DSC_00641001.JPG   126.85K   8 downloads


Attached File  DSC_00651000.JPG   81.04K   8 downloads


#25 axistr

axistr

    Forum Fixture

  • Members
  • PipPipPipPipPip
  • 1,169 posts
  • Location:North west sydney
  • Joined: 19-November 05
Garage View Garage

Posted 16 September 2017 - 04:08 PM

Got a chance today to do a bit more, made new door hinge bushes sandblasted them and epoxy primed. finished repairing the doors fitted and aligned. Should get the block back next week so I can assemble and fit it back in the van before trial fit up of all the front panels.


Attached File  DSC_0002_31060.JPG   105.78K   9 downloads


0 user(s) are reading this topic

0 members, 0 guests, 0 anonymous users