Jump to content


Photo

rust protection on hatchbacks


  • Please log in to reply
23 replies to this topic

#1 torana74

torana74

    Forum Participant

  • Members
  • PipPip
  • 37 posts
  • Location:sydney
  • Joined: 31-January 16

Posted 27 January 2018 - 10:37 AM

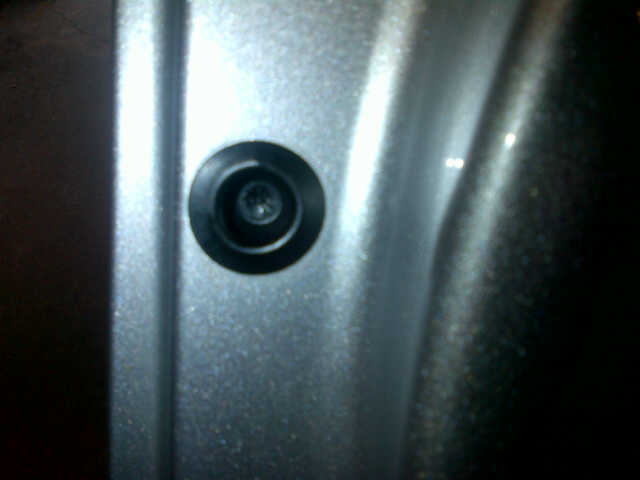
Hi all.  Recently got myself one of these fandangled less doors things to sit beside my more door. For a vehicle that had been sitting in pieces for decades, I'm quite pleased with how good the body is and want to keep it that way.  There's a slight bubble on one of the c  sections and wondering what people have done to prevent it getting any worse.

Are there accessible points to spray something in there (and i welcome suggestions to treat other areas too), and what are opinions about products?  I'm a big fan of good ol fish oil and as the car is semi apart, clean up shouldn't affect too many things. Though also with the myriad of products around these days, might be others that are more effective.

Must say my experiences with cavity waxes have been quite dissapointing though.

Thanks in advance.


Edited by torana74, 27 January 2018 - 10:38 AM.


#2 Cook

Cook

    Forum Fixture

  • Members
  • PipPipPipPipPip
  • 1,502 posts
  • Location:Melbourne
  • Car:LX Hatch
  • Joined: 27-February 15

Posted 27 January 2018 - 11:09 AM

Hi torana74.  I guess it depends on how far you want to go but as you most probably know, the best way is back to bare metal and cut out any problems.  People have had success with KBS & POR but I found mixed results with KBS but I wouldn't necessarily blame the product based on my results.  More knowledgeable people will give you better advice.  The trick is how do you get into a lot of the places you need to, to treat the problem.  I hate to scare you but the c pillar is a nightmare.  Here is a pic of mine and whilst I knew there was some problems on the top layer I didn't expect to see the damage below it.  Good luck with it.  Cheers Ron

Attached Files


#3 torana74

torana74

    Forum Participant

  • Members
  • PipPip
  • 37 posts
  • Location:sydney
  • Joined: 31-January 16

Posted 27 January 2018 - 11:41 AM

Thanks Ron.  Always scary  what  might lurk underneath.  We need to upgrade our xray vision i think. As the  car is so so clean, the last thing i  want right now is to start stripping it back even though that is the best way as you  say. It was painted over 30years ago (what looks a great shell to start with) and hasn't seen water since.  Or sun either for the that matter and the layer of dust(now pile),  I'm hoping minimised any rot.  It would be nice though to try get in there and  slow down what's going on. It's a couple very tiny bumps on the bottom edge of the gutter. Almost looks like a tiny bit of bad paint prep.. but as we know with old metal, a little could be a lot.

Cheers Vas


Edited by torana74, 27 January 2018 - 11:46 AM.


#4 CI 0308

CI 0308

    Forum Fixture

  • Members
  • PipPipPipPipPip
  • 736 posts
  • Name:Brett
  • Location:Perth W.A
  • Car:77 LX SS, VX SS
  • Joined: 19-January 06
Garage View Garage

Posted 27 January 2018 - 12:01 PM

Yes I have got to do the same as I am in the same boat, car sitting around for 20 years and not seen a lot of water but am scared what I will find lurking behind. 

Just to stabilize it for now would be good.

Attached Files


#5 Cook

Cook

    Forum Fixture

  • Members
  • PipPipPipPipPip
  • 1,502 posts
  • Location:Melbourne
  • Car:LX Hatch
  • Joined: 27-February 15

Posted 27 January 2018 - 12:13 PM

To give you an idea of how KBS and POR15 works (as per their web sites) is that it creates a seal over the rust and does prevent air or water to get underneath it.  The trick is you have to ensure you cover both/all sides of the metal so the rust can't penetrate either side.


 If you take the side trim panel off the hatch area you should be able to feel up into the c pillar and spray something up there with a long nozzle but not sure how successful it would be.  Alternatively take the cover plates off the hatch hinges and again, should be able to get something in there with a long nozzle to spray in there. Cheers Ron


Edited by Cook, 27 January 2018 - 09:04 PM.


#6 Bigfella237

Bigfella237

    Socially Distant

  • Members
  • PipPipPipPipPipPipPip
  • 4,368 posts
  • Name:Andrew
  • Location:Far South Coast of NSW
  • Car:(s) not as many as I'd like but more than I've got space for!
  • Joined: 31-October 14

Posted 27 January 2018 - 12:19 PM

Unfortunately places like cant rails (gutters), the hatch hinge area and C-pillars all rust from the inside out, once you start to see evidence of rust on the outside it's usually too late for rust-proofing and you typically find a lot more damage once you get under the outer skin, as Ron said above.


However if it's gonna be some time (like years) before you can repair it, there would still be some advantage to slowing the rust's progress.


To add to the above, access to some of these areas is from the underside of the roof skin with the headlining removed. You'll need some kind of tube applicator or similar to squirt whatever you choose into the narrow gap around the edges, you can't get in there with a brush or a regular spray gun.


If you just want to flood the area (say with fish oil) then one of those underbody deadener guns with a hose clamped to it works well but use very low air pressure... and when I say "flood" I mean it, goop will be dripping out of every orifice for the next few days!


#7 TORLX8

TORLX8

    Forum Fixture

  • Members
  • PipPipPipPipPip
  • 586 posts
  • Name:Campbell
  • Location:Adelaide
  • Joined: 07-November 05

Posted 27 January 2018 - 01:26 PM

I used this Ferguson's "knock out rust" stuff inside my doors. It has a tube you can attach like a WD-40 can, which makes it easier to get into crevices.
1a9b2ba2354fadebedfe7db8d89886e2.jpg

Sent from my Moto G (5) using Tapatalk

#8 mick_in_oz

mick_in_oz

    Forum Fixture

  • Members
  • PipPipPipPipPip
  • 666 posts
  • Name:Mick
  • Location:Western QLD
  • Car:LX Hatchback
  • Joined: 12-June 11

Posted 27 January 2018 - 07:49 PM

Bigfella is onto it.


Have to access it from in the roof area with the hood lining pulled down. If possible, remove the drip check sealer from the C pillar join, and spray the hell out of it, with the drip check removed it will let you see when you have the long hose/nozzle in the right place, and keep spraying and moving the hose till you can see it fully wet for the entire width of the now open join. I had fish oil running out of mine for maybe 3 months, even when we thought it had stopped a small drip would appear as a thick sticky glob and slowly run down the quarter panel.


Personally, the only way to make sure it never rots out again is to keep the join open so that IF (or is that when...) some water gets in there it can get out and easily dry.


Mine has been fish oiled and left open for maybe 25 years now, and still no signs of trouble. The rest of the body was done with Tectyl before I bought it, am sure it helped save the rest of it.


#9 torana74

torana74

    Forum Participant

  • Members
  • PipPip
  • 37 posts
  • Location:sydney
  • Joined: 31-January 16

Posted 28 January 2018 - 09:40 AM

Thanks all. Looks like the headliner is coming out ;)  Glad to hear there is some acces to the area. Was worried there was a gussett or two in the way.

Mick, when you say remove the sealer and leave it open, you wouldn't  have a pic of the exact spot? Are you meaning on the outer?

Is it worth trying to drill a hole  from the inside?

Seems the concensous is fish oil too?

TORLX8, i've used the same in the past aswell. Never had an issue where it was applied.  The smell though ;0


#10 _Darylle_

_Darylle_
  • Guests

Posted 28 January 2018 - 10:17 AM

Hi

I just removed a screw from the strut anchor bracket and with the "straw" spray away whilst rotating the can or straw to get it to spray everywhere inside. No sign of bubbling in 8+ years. 


#11 CI 0308

CI 0308

    Forum Fixture

  • Members
  • PipPipPipPipPip
  • 736 posts
  • Name:Brett
  • Location:Perth W.A
  • Car:77 LX SS, VX SS
  • Joined: 19-January 06
Garage View Garage

Posted 28 January 2018 - 11:40 AM

Mick, when you say remove the sealer and leave it open, you wouldn't  have a pic of the exact spot? Are you meaning on the outer?


Mick is talking about the sealer in this area. they didn't weld this just wiped sealer into the join and painted over it.

Attached Files


#12 mick_in_oz

mick_in_oz

    Forum Fixture

  • Members
  • PipPipPipPipPip
  • 666 posts
  • Name:Mick
  • Location:Western QLD
  • Car:LX Hatchback
  • Joined: 12-June 11

Posted 28 January 2018 - 09:18 PM

As above.


This pic is of an original unmolested C Pillar and the join that we have left open deliberately.


From memory, it takes a few goes to find the right spot to poke the spray nozzle into to gain access to the C Pillar join.


My feeling is the water gets into the cavity from the hatch hinge pockets in the roof, they, or at least mine were, filled with sealer all around the sides, top and bottom, that had dried somewhat and cracked and was no longer offering a proper seal.

Attached Files


#13 Rainman

Rainman

    Pain in the ar$e

  • Members
  • PipPipPipPipPip
  • 799 posts
  • Name:Ray
  • Location:South Australia
  • Car:SS Hatch
  • Joined: 14-March 16

Posted 28 January 2018 - 11:18 PM

Hey Guys, Let me say I have NEVER even tried to do body work to vehicle. I was wondering if drilling a small hole in top of the hard to get sections, fill then with your choice. Seal the hole and repair when ready to do the car. ?


#14 Bigfella237

Bigfella237

    Socially Distant

  • Members
  • PipPipPipPipPipPipPip
  • 4,368 posts
  • Name:Andrew
  • Location:Far South Coast of NSW
  • Car:(s) not as many as I'd like but more than I've got space for!
  • Joined: 31-October 14

Posted 29 January 2018 - 10:55 AM

The early professional rustproofing jobs ("Ziebart" was one, there was another common company which I can't remember right now) used to involve drilling holes in the car everywhere (internal places like door jams, etc.) to apply the goop, which were then plugged with a plastic grommet...


pluggedHole.jpg


But I'd think that's history by now, the newer stuff like Waxoyl is applied with a special thin wand attachment that's designed to get in through existing drain slots and holes...


pistolet-antirouille-pneumatique-rodac-r


You can buy them on ebay for about a hundred and sixty-odd bucks but they won't work with thick stuff like underbody sealer, and you'd want to be doing a awful lot of rustproofing to justify the cost!


EDIT:


BTW, I wouldn't hesitate to recommend Waxoyl if you want to spend the coin, I used to rustproof brand new cars for a dealer using that brand and I reckon it's great stuff, and they give a lifetime warranty (provided the five-yearly inspections are done) where they will pay to have any rust repaired.


I have a bare piece of metal somewhere which I treated half of as a test about 25 years ago and last time I saw it (which was admittedly about 10 years ago now, but it's somewhere in the chaos which is my shed) the half that I treated still looked like the day I did it!


From memory we used to average roughly a litre per car with the proper applicator gun, more on bigger cars, less on smaller cars, but if I was doing my own car I'd probably use twice that just to be pedantic.


Edited by Bigfella237, 29 January 2018 - 11:10 AM.


#15 StephenSLR

StephenSLR

    Oh My, Don't you post alot

  • Members
  • PipPipPipPipPipPipPip
  • 6,707 posts
  • Name:Stephen
  • Location:Sydney
  • Car:1976 LX SL/R
  • Joined: 12-November 05

Posted 30 January 2018 - 12:54 PM

Are there accessible points to spray something in there (and i welcome suggestions to treat other areas too), and what are opinions about products?


26992598_10159892190795173_6227928341771


There are many Toranas, hatchbacks in particular that had holes drilled into their door jambs back in the 70's & 80's when aftermarket rust protection became a thing. The companies would fit a plastic/rubber bung into the bunghole afterward, TP just didn't work as well, lol


For those on the farcebuk.


https://www.facebook...&type=3


It's worth the expense according to this guy but he is advertising his co.


https://www.facebook...510823085748615


s


Edited by StephenSLR, 30 January 2018 - 01:00 PM.


#16 torana74

torana74

    Forum Participant

  • Members
  • PipPip
  • 37 posts
  • Location:sydney
  • Joined: 31-January 16

Posted 01 February 2018 - 04:02 PM

Thanks all.  I always thought that join was brazed. Learn something new everyday. On closer  inspection today, the original owner has  left it unsealed after it's spray aswell.  Looking around at the workshop today, found a spray  nozzle/hose that we use on the carbon clean cans that has outlets in multiple  directions and long hose that  should be perfect to spray some rust convertor and follow up with an oil drenching.

Will hold off washing the dust piled body down untill i can make sure no water sneaks into it all.


#17 StephenSLR

StephenSLR

    Oh My, Don't you post alot

  • Members
  • PipPipPipPipPipPipPip
  • 6,707 posts
  • Name:Stephen
  • Location:Sydney
  • Car:1976 LX SL/R
  • Joined: 12-November 05

Posted 02 February 2018 - 03:37 PM

oil drenching


I believe these days they use cavity wax; you may want to get some feedback on that and the pros & cons against fish oil.


s


#18 tsn007

tsn007

    Forum Fixture

  • Members
  • PipPipPipPipPip
  • 1,010 posts
  • Name:Tony
  • Location:LIVERPOOL, NSW
  • Car:LX hatch, LX sedan
  • Joined: 25-April 07

Posted 02 February 2018 - 07:56 PM

what brand of cavity wax do people recommend 


#19 LHSL

LHSL

    Forum Fixture

  • Members
  • PipPipPipPipPip
  • 995 posts
  • Name:Phillip
  • Location:SYDNEY
  • Car:1974 LH SL; 2 x 1975 LH S Toranas
  • Joined: 30-March 07

Posted 02 February 2018 - 08:32 PM

what brand of cavity wax do people recommend 


Wurth is the best but bloody expensive.

#20 rodomo

rodomo

    To advertise here, call 13TORANA

  • Members
  • PipPipPipPipPipPipPip
  • 17,997 posts
  • Name:R - O - B Dammit!
  • Location:Way out west of Melbourne Awstraylya
  • Joined: 10-December 05

Posted 02 February 2018 - 09:31 PM

B)

Attached Files


#21 torana74

torana74

    Forum Participant

  • Members
  • PipPip
  • 37 posts
  • Location:sydney
  • Joined: 31-January 16

Posted 03 February 2018 - 12:05 AM

I believe these days they use cavity wax; you may want to get some feedback on that and the pros & cons against fish oil.


s

We use a lot of Wurth products and I'm a big fan(will be using the Wurth  rust convertor) but I'm also ol fashioned. Over the years, from what i've seen, nearly all the repaired cars that have come through the shop that had been done with cavity waxes have nearly all broken back out with rust, so my experience puts me off with regards to older cars and wax. Admittedly there's no way of telling if it was just bad  repairs in the first place.

The mechanic i work with used to be a Wurth rep and we had the same discussion today with him telling me how the training video showed how the Wurth wax can actually wick uphill too.

The car itself looks to have been fish oiled when it was painted 32 years ago and the only rust on the whole thing is that speck. The smell will have a bit of time to decrease  it's ummmm tone :)


#22 _walkinshaw_

_walkinshaw_
  • Guests

Posted 12 February 2018 - 11:08 AM

Hi

I just removed a screw from the strut anchor bracket and with the "straw" spray away whilst rotating the can or straw to get it to spray everywhere inside. No sign of bubbling in 8+ years. 


That's a good idea Darylle.


So you feel that, the rust preventer your spraying in from that access point would have to make it to the knowen problem area.


VB


#23 torana74

torana74

    Forum Participant

  • Members
  • PipPip
  • 37 posts
  • Location:sydney
  • Joined: 31-January 16

Posted 18 February 2018 - 07:57 PM

Update time.  I used the right angle drill and put a hole from the underside a few inches up from the join  and got in there.

The seatbelt hole definitely doesnt go into the channel but rather is in the void under it.


I'm really regretting not seeing Darylle's post earlier as that  would be in the channel and with the right hose would also get that area.


#24 _Darylle_

_Darylle_
  • Guests

Posted 27 February 2018 - 03:58 PM

Yep, remove one of those screws (most screws/bolts that lead to body work voids for that matter) and spray away and of course reinstall screws. I am sure there are better products on the market but I just use WD 40, RP 7 or the likes. 


0 user(s) are reading this topic

0 members, 0 guests, 0 anonymous users