Jump to content


Photo
- - - - -

SLR in the making


  • Please log in to reply
653 replies to this topic

#101 Mitchyboy

Mitchyboy

    Forum Fan

  • Members
  • PipPipPipPip
  • 390 posts
  • Name:Mitch
  • Location:Sydney
  • Car:Lh torana
  • Joined: 18-March 18

Posted 31 August 2019 - 06:06 PM

The underside of the bonnet was the worse.
I still haven't finished it.
I even tried washing off the paint stripper with my high pressure water washer. Wasn't very effective.
But then it took me ages to blow out all the water with my air gun.
Any better ideas? I'll have the get the grinder on it again I think.
See in the photos the dodgy welds around the hole in the bonnet.
Terrible. I need to fix these and add spot welds in a few spots to the bracing. I'm scared I might warp the bonnet? Any advice?
I also plan to weld up the holes for the bonnet latches.ec87ea11d953f6953ec18dc10df2c974.jpg5ea202c330834d1a4a8bff6be0456087.jpgdf395961d7053acf244287f319f80c16.jpg2370dc348d482e06916043fe4568be21.jpgc01d3d8e53fc1462f076d40507cee69d.jpg4c81062ba7b9bb2b423d4f3bbd19d20a.jpg38829e41bf54f8c51718c17f3705d160.jpg0cd90afbbdc5d1a84906db4e4b746317.jpg

Sent from my SM-G965F using Tapatalk

#102 Mitchyboy

Mitchyboy

    Forum Fan

  • Members
  • PipPipPipPip
  • 390 posts
  • Name:Mitch
  • Location:Sydney
  • Car:Lh torana
  • Joined: 18-March 18

Posted 31 August 2019 - 06:19 PM

Got stuck back into rust repairs in the plenum chamber and cut of the rusted battery tray.
Still haven't decided if I am going to move the battery to the boot or not. I'm leaning towards no at the moment.
I have rust converted the chassis rail in the photo now.
I have also taken off the bumper brackets and rust converted as well.
I will be painting KBS on all eb39d7ad7dd634ff3f9d8248c1a24add.jpgd7e19b5cf10c1bed06e7d3e747853f45.jpgd77f07588b9f074ce7e77b483605e1ac.jpge1f4a44e6b457d6c98e1fd784cfe5b1c.jpg8d3049bd3721e9148bc96ee61404e66e.jpg2e01dfb733e08ee19dc2cb1ffc16fabb.jpge7a4b1260568024ba88c9f1099994614.jpg8d0a06b91af6cf827173a0fd4ee67b32.jpgcd6b03ddbdc56040d04b11690bec3f4d.jpga219f3d5091c546f163e6892c40d5849.jpg832d74441e795bc93a434cc86b832173.jpg601610dc79b8c173edcccb1fb21743ff.jpg21b4ef897dce7a71bb63415837363237.jpg2bdd103052cc5ea46a45510397755825.jpg

Sent from my SM-G965F using Tapatalk

#103 Mitchyboy

Mitchyboy

    Forum Fan

  • Members
  • PipPipPipPip
  • 390 posts
  • Name:Mitch
  • Location:Sydney
  • Car:Lh torana
  • Joined: 18-March 18

Posted 31 August 2019 - 06:35 PM

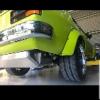
I also sprayed the ranex down in the corners of the plenum etc to take care of any rust that I won't be able to reach when I kbs it all.
I finally sold my 253 package. Pretty happy with all the extra garage space now and some $$$ for more torana parts.
When the guy pulled up in a van I was a bit worried but it went in easy as. Wasn't very high to lift the motor and it worked well.

I started the job of recreating the plenum lid to look like the stock one.
Mine was completely butchered - it was cut flush with the fire wall and all of the lip cut away aswell. All to install the big block when it was a race car apparently.
I installed a smooth panel where the heater box was not only cause it looks good but also so i can re create the drip rail
I just recreated the lid shape from looking at photos of other people's engines bays in primer.
What you guys think? Look similar?
It took a while as the metal was pretty bashed around. I have been trying dial it in by heat shrinking the metal. I been heating it up and then cooling down straight away with a damp rag and plenty of panel beating. Very tricky piece for me lol
Any advice on this process would be much appreciated.
I am pretty happy with end result.
Loving doing the fabricating stuff
II'll take more photos of the drip rail i have created and post them up in the coming days.
2bb96a0a49505a055485bab0aa4b0155.jpgdd84cc6ce370c2336cfcd5e3db7fcb18.jpg216d5511d304b05d63ea2a5dfaf9aba0.jpg2e61669bdf198e47f33383233cc83d0a.jpga989b846ee4e8f6200013600c09bdee5.jpg7d040c3c57ad056c1ab9b315abebc5e2.jpg1c68122075b071ff7833ff46d3d6b91e.jpgdbde074d961cd240a3a74d03482d8d2d.jpg248ef47ebd17892d9702b1d2d044762e.jpg

Sent from my SM-G965F using Tapatalk

#104 Ice

Ice

    Cool

  • Members
  • PipPipPipPipPipPipPip
  • 15,123 posts
  • Name:Gene
  • Location:Galaxy's away from Ipswich
  • Car:77 HZ Sandman Van
  • Joined: 03-January 07

Posted 31 August 2019 - 07:20 PM

Wow at least your havin a crack
love to do metal work but not my skill set

#105 claysummers

claysummers

    Lotsa Posts!

  • Members
  • PipPipPipPipPipPip
  • 3,333 posts
  • Name:Clay
  • Location:Willunga
  • Car:186 FB Ute, 3.3 EK sedan
  • Joined: 13-December 18

Posted 31 August 2019 - 07:48 PM

Good stuff that Ranex for back yarders like us. That paint stripper must be strong. It has eaten a big hole in yer bonnet. Keep up the good work. It’s only steel fcs.
Cheers
Clay


Sent from my iPad using Tapatalk

#106 Rockoz

Rockoz

    Lotsa Posts!

  • Members
  • PipPipPipPipPipPip
  • 3,967 posts
  • Name:Rob
  • Location:Cowra NSW
  • Joined: 21-September 08

Posted 01 September 2019 - 11:02 AM

Wow at least your havin a crack
love to do metal work but not my skill set


Reckon you would have seen enough people join up here with next to no skill then turn out some brilliant work as they learn.

I can remember having a chuckle at some of Heaths early work, and now it is wow.


Give it a go.


All that can happen is you need to start a section again.


Cheers


Rob


#107 Covert

Covert

    Forum Fixture

  • Members
  • PipPipPipPipPip
  • 1,987 posts
  • Location:In my LH
  • Car:LH
  • Joined: 08-November 13

Posted 01 September 2019 - 11:56 PM

Nice work Mitch, enjoying watching your repairs  :spoton:

I also found the purple strip discs to be very good


#108 Mitchyboy

Mitchyboy

    Forum Fan

  • Members
  • PipPipPipPip
  • 390 posts
  • Name:Mitch
  • Location:Sydney
  • Car:Lh torana
  • Joined: 18-March 18

Posted 02 September 2019 - 10:30 AM

Nice work Mitch, enjoying watching your repairs :spoton:
I also found the purple strip discs to be very good

Cheers bud.
I plan to have the plenum all KBS and ready to weld up on the weekend.


Sent from my SM-G965F using Tapatalk

#109 Mitchyboy

Mitchyboy

    Forum Fan

  • Members
  • PipPipPipPip
  • 390 posts
  • Name:Mitch
  • Location:Sydney
  • Car:Lh torana
  • Joined: 18-March 18

Posted 06 September 2019 - 06:29 PM

Got some more work done.
It's awesome It's lighter for longer now so I been coming home and doing the arvo shift.
Got a couple of patched in on the windscreen that needed to happen.
Paint stripped plenum chamber and lid.
KBS 3 step process
Worked a treat
Very happy boy4dea5c0908e0b69c7707f4fcb52f6bf0.jpg9ba6f50f1d38aac92cf1f8db84212bd0.jpg4f30a92b6c439c5b718179821afb827e.jpgd184645ecde929d3eca26796696d5075.jpg5e68abe43ba69e9a8c0f6453d3dbe41a.jpgbcd355f05bbff9c3d1c0058a8a6a6fc9.jpge6e155064751ab4797eb3ffb1b2637f4.jpg

Sent from my SM-G965F using Tapatalk

#110 Mitchyboy

Mitchyboy

    Forum Fan

  • Members
  • PipPipPipPip
  • 390 posts
  • Name:Mitch
  • Location:Sydney
  • Car:Lh torana
  • Joined: 18-March 18

Posted 06 September 2019 - 06:41 PM

More photos
Got the chassis rail under the battery tray KBS aswell since it was off.
Couldn't get all the way up there.
I'm planning on spraying the knock out rust up the rails where I can't reach at a later date after I KBS the underside.
Also plan to spray the knock out rust in the rocker panels
Also KBS 3 step treatment on the bumber brackets.
I have decided to keep the battery in the engine bay and have ordered the part.
I weld through primered the lips of the lid and plenum and finally welded it all into place!
After test fitting the scuttle panel of course.
Found out quickly that you can't weld through the primer! What a mission.
So happy that is All over- feel like I been working on that for so long. Milestone reached!!!
b0fac23c65b46075036eb7027bbe4024.jpg6fa85ef77176bec3f7c5fec357c50523.jpgd235f42f5903ef4ce30b7b40456fcefd.jpg7c0d29c1297b0bf3e3a46be37ea031c4.jpg828309171279fb73e77067e58ad3739f.jpga300c928dbbf0c5fbb354f1145942bfc.jpgced4566e65e49ee119e6d7b7883d3c4d.jpgc438ffbfcd8dae28ec9701b27bb5f86c.jpgb3e52ebc387d35b57308e4891bf361f7.jpg0ae917f6ef77e3d8f382da602130cc20.jpg709df8b211d9155f58e7abcce41a13d1.jpg12f75b0cc3665ba65ea7884033f72a97.jpg283382a5059edf876b72597f20461e1a.jpg52c1f02c2fb64e2b293e58b0697df083.jpg507642cb8cfdc67dc85481a7440acf7e.jpgaf87214e92548f2c5c03cebd47af384a.jpg

Sent from my SM-G965F using Tapatalk

#111 Mitchyboy

Mitchyboy

    Forum Fan

  • Members
  • PipPipPipPip
  • 390 posts
  • Name:Mitch
  • Location:Sydney
  • Car:Lh torana
  • Joined: 18-March 18

Posted 06 September 2019 - 06:50 PM

Started back on the rear windshield rust repairs.
I still have to weld in the repair panel across the boot lid. Working up the courage for that one Hahaa.
I cut away sections of the rusted windshield and welded in new fresh sheet metal patches.
More photos to come.
Starting to take shape.
I plan on spraying the knock out rust up in that chamber under the parcel shelf before I weld the repair section in. Not really any visible surface rust in there and i can't get a paint brush in there to apply KBS any ideas?
What have other people used here?
I could cut out a big section but i think I am just causing unessecary work when it is in needed.
Any advice would be great!
Also brought a white board for the garage and filled it already shoukd have brought a few more hahaaa82cc229ec0af1a73b554bd413bdad301.jpg99537f5862973227826b484304c48173.jpg4bb2970d110e465b3420ef5ffb7e49fd.jpgf09cff0b7d2352e6a1f8ad7aebe6f45d.jpgdab57638627dab594d5307c88d977ae3.jpg5bb3ed2b8f88b338384c97c0f47dd27f.jpg

Sent from my SM-G965F using Tapatalk

#112 mugginz

mugginz

    Forum Fan

  • Members
  • PipPipPipPip
  • 325 posts
  • Name:Greg
  • Location:Geelong
  • Car:LH Torana
  • Joined: 27-November 13

Posted 06 September 2019 - 11:10 PM

Before I welded the top top of the plenum back on after doing the rust repairs I put blobs of KBS paint over the vent screws to prevent the rust coming back again, but seeing as you've already welded the roof back on you could still get to them with a long fine paint brush though.


Plenum%20Chamber.jpg


#113 Mitchyboy

Mitchyboy

    Forum Fan

  • Members
  • PipPipPipPip
  • 390 posts
  • Name:Mitch
  • Location:Sydney
  • Car:Lh torana
  • Joined: 18-March 18

Posted 06 September 2019 - 11:20 PM

Before I welded the top top of the plenum back on after doing the rust repairs I put blobs of KBS paint over the vent screws to prevent the rust coming back again, but seeing as you've already welded the roof back on you could still get to them with a long fine paint brush though.

Plenum%20Chamber.jpg

I welded them up mate before I applied the KBS


Sent from my SM-G965F using Tapatalk

#114 mugginz

mugginz

    Forum Fan

  • Members
  • PipPipPipPip
  • 325 posts
  • Name:Greg
  • Location:Geelong
  • Car:LH Torana
  • Joined: 27-November 13

Posted 06 September 2019 - 11:27 PM

You can still get to them through the various holes though, just need a nice slender brush.

#115 mugginz

mugginz

    Forum Fan

  • Members
  • PipPipPipPip
  • 325 posts
  • Name:Greg
  • Location:Geelong
  • Car:LH Torana
  • Joined: 27-November 13

Posted 06 September 2019 - 11:33 PM

Renoir Nylon Flat Craft Paint Brush - Size 14


Brushish.png


https://www.bunnings...ize-14_p1660224


Bunnings have got brushes for really fiddly jobs.


#116 _LONA-CK_

_LONA-CK_
  • Guests

Posted 07 September 2019 - 09:32 AM

Whit the paint stripper hardening mate just put fresh stripper over it and then scrap off,


Cheers gong


#117 mugginz

mugginz

    Forum Fan

  • Members
  • PipPipPipPip
  • 325 posts
  • Name:Greg
  • Location:Geelong
  • Car:LH Torana
  • Joined: 27-November 13

Posted 07 September 2019 - 10:07 AM

I welded them up mate before I applied the KBS


Are you using double sided tape to attach the air shoot?

#118 Shiney005

Shiney005

    Oh My, Don't you post alot

  • Members
  • PipPipPipPipPipPipPip
  • 9,034 posts
  • Name:Laurie
  • Location:Dubya Hay
  • Car:Toyota Mirai
  • Joined: 19-January 12
Garage View Garage

Posted 07 September 2019 - 05:07 PM

Bloody nice work on that plenum Mitch.


#119 Mitchyboy

Mitchyboy

    Forum Fan

  • Members
  • PipPipPipPip
  • 390 posts
  • Name:Mitch
  • Location:Sydney
  • Car:Lh torana
  • Joined: 18-March 18

Posted 07 September 2019 - 09:18 PM

Are you using double sided tape to attach the air shoot?

I see what you mean now. I'm not using the stock heater. Plan on using an aftermarket model but unsure what yet though as I haven't researched it enough figured I would weld up the old holes now and when the time Comes drill new ones and use the KBS method you have suggested. Cheers bud

Sent from my SM-G965F using Tapatalk

#120 Mitchyboy

Mitchyboy

    Forum Fan

  • Members
  • PipPipPipPip
  • 390 posts
  • Name:Mitch
  • Location:Sydney
  • Car:Lh torana
  • Joined: 18-March 18

Posted 07 September 2019 - 09:31 PM

Had a play again today.
Started the dredded rear windshield/boot replacement panel.
I fabbed up the corners of missing metal that i had cut away.
Then went to work on making the panel fit nicely.
Just kept test fitting the boot lid and packing it up to where it will sit and trimming the repair piece until It was all uniform across the back.
Gave up inside the parcel cavity a good clean out and blow out and sprayed the knock out rust all up in there accessing inside through some holes in the bottom and the boot light holes.
Weld through primered the repair panel and lip.
Tacked it all into place checking the boot lid as we went.
I ran out of gas on the MIG welder can't believe my luck Hahaa. Oh well. At least it's tacked into place and all lining up.
Pretty chuffed with myself so far Hahaa.
Dad was helping me today and we started paint stripping the fenders.
So many layers of paint and bog on this car. Looks like both fenders off of different cars as different paint underneath.
46874b03d55eec9380c5b3f796c82719.jpg2a51d7e293179d5997bb6fa66aeae536.jpga4318c2bd9ab997ea638da187e50aae2.jpg3f9d923711b61f8338a846f2dd34cf84.jpge4aa56ccd438d73197f1ea86e86ceab1.jpg90778a2716a7aa96df64cec72b7984b6.jpg63a46f6dfaebaa5ba7d46a154230718d.jpgcd0d4052bccecc3bdf76dc783582bb4a.jpg

Sent from my SM-G965F using Tapatalk

#121 Mitchyboy

Mitchyboy

    Forum Fan

  • Members
  • PipPipPipPip
  • 390 posts
  • Name:Mitch
  • Location:Sydney
  • Car:Lh torana
  • Joined: 18-March 18

Posted 09 September 2019 - 04:25 PM

I took some photos of the dash frame that is left in my car.
As you can see there are 2 big cut outs that have been hacked away.
You Can see they have cut the ashtray support away and then next to the steering wheel they have cut out the heater controls support.
I think the heater controls one will be easy to fabricate from photos etc. Doesn't have to be spot on as I am not using a stock heater.
Is it that important to have it exact?
Or is close enough good enough.
I want to install a stock dash and have the ashtray but i am worried about replicating the ash tray surround. Does it need to be spot on for the ash tray to work?
Would I be better off finding a wrecking torrie at a wreckers and cutting away the patch panels I need or do you think I would be able to fab up myself at home from photos?
I want to do the KBS all on the inside but I need this fixed first.
Cheers fellas let me know 50ac7042a6ab2e8210fc1e42ab769202.jpg75a6b20d8a37eaa3b688f2a31dd4d924.jpge0b51cb1ed0391a9d331c46f13108c62.jpg5176794138d5ff40cbf329091d681210.jpg

Sent from my SM-G965F using Tapatalk

#122 Bigfella237

Bigfella237

    Socially Distant

  • Members
  • PipPipPipPipPipPipPip
  • 4,373 posts
  • Name:Andrew
  • Location:Far South Coast of NSW
  • Car:(s) not as many as I'd like but more than I've got space for!
  • Joined: 31-October 14

Posted 09 September 2019 - 09:23 PM

I'd say the ashtray mounting would need to be spot on, otherwise the gap around the ashtray to the dash panel will be wonky, even a couple of millimetres would stick out like the dog's proverbials, and more than that would mean the ashtray wouldn't close flush.


P.S. What's with the 'big Holden' brake pedal?


#123 Shiney005

Shiney005

    Oh My, Don't you post alot

  • Members
  • PipPipPipPipPipPipPip
  • 9,034 posts
  • Name:Laurie
  • Location:Dubya Hay
  • Car:Toyota Mirai
  • Joined: 19-January 12
Garage View Garage

Posted 09 September 2019 - 10:06 PM

There are plenty of basket case bodys around where you can get a dash cut from. Put the word out on the Whisper Facebook page and someone will bite.


#124 Mitchyboy

Mitchyboy

    Forum Fan

  • Members
  • PipPipPipPip
  • 390 posts
  • Name:Mitch
  • Location:Sydney
  • Car:Lh torana
  • Joined: 18-March 18

Posted 10 September 2019 - 03:34 PM

I'd say the ashtray mounting would need to be spot on, otherwise the gap around the ashtray to the dash panel will be wonky, even a couple of millimetres would stick out like the dog's proverbials, and more than that would mean the ashtray wouldn't close flush.

P.S. What's with the 'big Holden' brake pedal?

Cheers big fella.
Do you think I could fabricate if I got correct measurements?
I may have to see of I can get a cut piece some how.
I got no idea about the brake pedal haha that's how it came

Sent from my SM-G965F using Tapatalk

There are plenty of basket case bodys around where you can get a dash cut from. Put the word out on the Whisper Facebook page and someone will bite.

Thanks Shiney
I will put the feelers out


Sent from my SM-G965F using Tapatalk

#125 Heath

Heath

    I like cars.

  • Administrators
  • PipPipPipPipPipPipPip
  • 18,314 posts
  • Name:Heath
  • Location:Eastern Suburbs, Melbourne
  • Car:Heavily Modified UC Sunbird Hatchback
  • Joined: 07-November 05
Garage View Garage

Posted 10 September 2019 - 04:06 PM

Shouldn't be too difficult or expensive to get those cuts. 


BUT maybe if you just want to glue an ashtray fascia into the dash, it's no big deal? I personally don't see any value in having an actual ashtray assembly in a Torana.


I also personally wouldn't leave the dash metal looking that shithouse, though. Haha.


0 user(s) are reading this topic

0 members, 0 guests, 0 anonymous users