
 This topic is locked
 View Garage
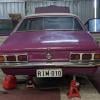
Obviously, I needed to address the issue of the damaged front panels. I found another shell to take the panels' off, to swap them over.
I started off by taking off the grille, headlights, radiator, bumper (and bumper support panel) and the sump guard.
To take the sump guard off, make sure all of the bolts are undone, and jack the car up from under the front crossmember. With a bit of a jiggle, the sump guard should come out.
To take the bumper off, undo the bolts between the chassis and the bracket, not the ones between the bracket and the bumper.
The grille and headlights are pretty simple, just undo the screws. When removing the radiator, make sure you don't let it fall backwards onto the fan.
To get to the welds along the 'A' pillar, you'll have to remove the door(s).To do this, I first removed the little pin in the middle of the door, using a flat bladed screwdriver. For the two big pins at the top and bottom, I used a pair of multigrips and a hammer, like so -

Give the inner rails of the guards a quick wire brush, then go nuts with the paint stripper. Now it should look like this, but with less paint. -

You should be able to see most of the spot welds. I used a drill bit specifically designed for drilling out spot welds. You could do it with a normal 9mm drill bit, but if possible, use the proper bit.
The amount and spacing of spot welds is directly proportional to how the workers were feeling on that particular day in the 70's, I think. This is what my drip rail looked like by the time all of the welds were drilled out. I ran a chisel between the inner and outer guard, to properly pop out the welds.

Along the back edge of the guard, where it is welded to the 'A' pillar, there is a mix of both spot welds and seam welds along the edge. Rather than try to drill out all of the welds, we just cut the guard about 1cm in from the back edge. This cut the guard off pretty cleanly and easily.
The front is where the fun really starts. Around the headlight, you can see that the two panels are crimped and spot welded. Do the same here as you did to the drip rails, drill the welds out and pry the panels apart with a chisel or screwdriver.
This is what the finished product should look like!

I only had to take the passenger guard and the top half of the nosecone off. If you need to do any more, its just a case of finiding the spot welds and drilling them out, really.
I'll elaborate a bit on this tomorrow, I've got another one to do...
RIM


