
I dunno how i missed this thread. I had an 808 as my first car. Mine was the same colour as this one too. You would have been better off with mine, it had less rust, but it did need the rear passenger guard replaced.
Has it got the Round or square headlights? And the flat or seperated taillights?
Steve
Poo rocket
Started by
_torana_umunga74_
, Jan 01 2009 11:28 AM
43 replies to this topic
#27
 _torana_umunga74_
_torana_umunga74_
-

- Guests
Posted 11 July 2009 - 02:20 PM
square headlights and as posted earlier same as UC torana!  this was grandads so im just happy to put it back on the road. an im really happy with the way its turning out. just need to learn how to paint.... the taillights im not sure wat u mean? jus standard 808 i thought. pretty sure 808's and rx3s all came standard with rediculous colours. there is one on ebay thats snot green and orange interiour. lol
this was grandads so im just happy to put it back on the road. an im really happy with the way its turning out. just need to learn how to paint.... the taillights im not sure wat u mean? jus standard 808 i thought. pretty sure 808's and rx3s all came standard with rediculous colours. there is one on ebay thats snot green and orange interiour. lol
#28
_73LJWhiteSL_
_73LJWhiteSL_
-
- Guests
Posted 11 July 2009 - 02:31 PM
I just looked through your thread again. they have the seperated taillights. I think the later ones had like a single orange and red lense.
I had one with the round headlights and same taillights as yours. Heres a couple of snaps of mine.


I had one with the round headlights and same taillights as yours. Heres a couple of snaps of mine.
#29
_torana_umunga74_
_torana_umunga74_
-
- Guests
Posted 11 July 2009 - 02:45 PM
nice. like those wheels 70's side strips are a fail though. sweet runners hey. my favourite bit is the 35cm gear shift lol
70's side strips are a fail though. sweet runners hey. my favourite bit is the 35cm gear shift lol
#30
_73LJWhiteSL_
_73LJWhiteSL_
-
- Guests
Posted 11 July 2009 - 04:23 PM
Yep thoes 808s do have a huge gear shift. The wheels i borrowed off a mate who used to have them on his 808. I still miss this thing sometimes... that and the SL since the Coupe is so far off.
Steve
Steve
#31
_torana_umunga74_
_torana_umunga74_
-
- Guests
Posted 21 August 2009 - 03:05 PM
well not alot has been done on the madaz just bogging the crap out of the guard i fixed. i think my bit is straighter than the rest of it lol. i saw a bubble under the rear bumper on the corner so i gave it a kick and my foot went through  bog held with paint. its gonna be so shit.
bog held with paint. its gonna be so shit.
#32
_torana_umunga74_
_torana_umunga74_
-
- Guests
Posted 17 January 2010 - 03:49 PM
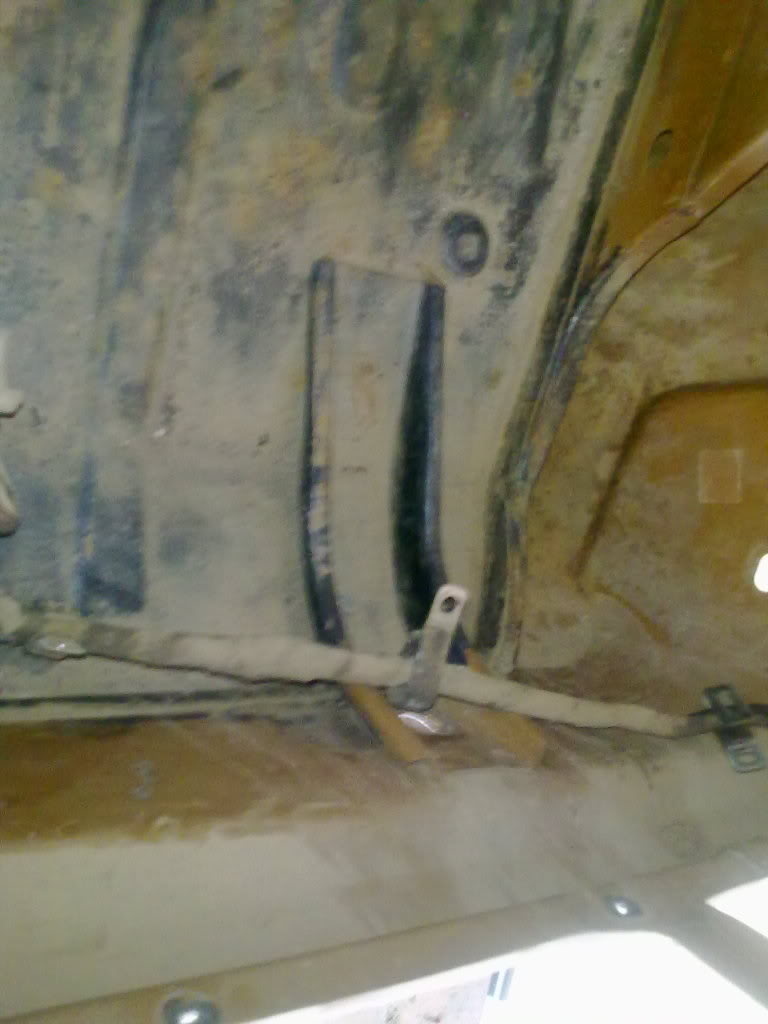
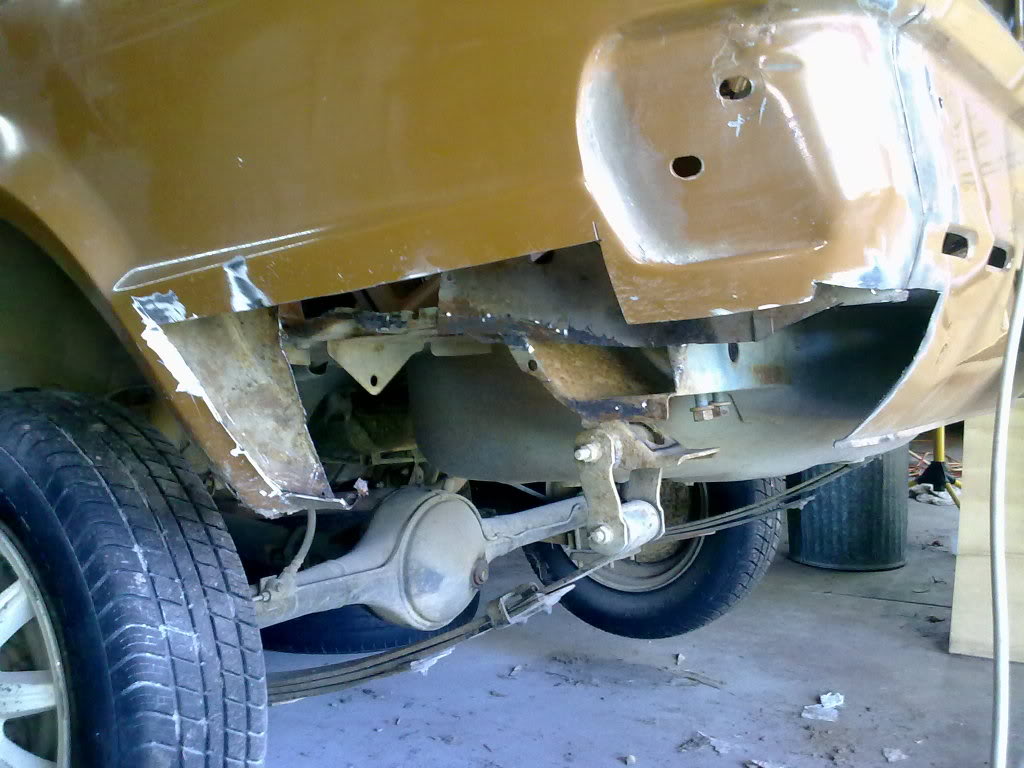
well been savin my money for my trip to nz so ive just been messin with the grinder instead. this is the quarte that had a "bubble" on it.
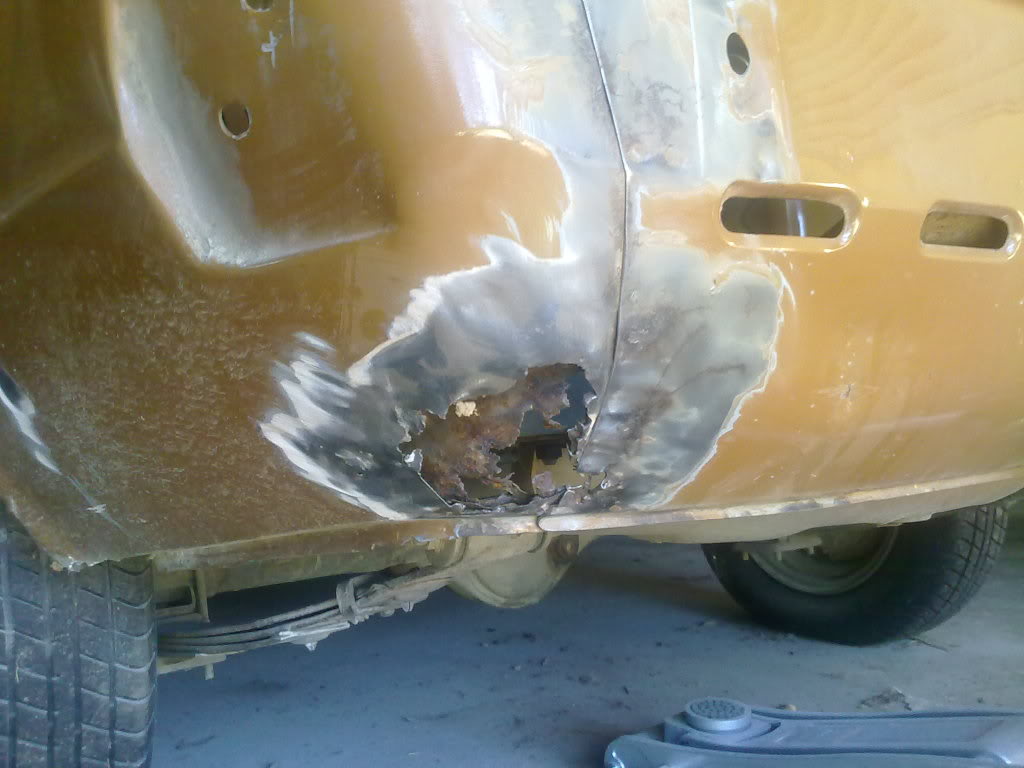
all crappy inside
underneath behind the quarter looks really dodgy
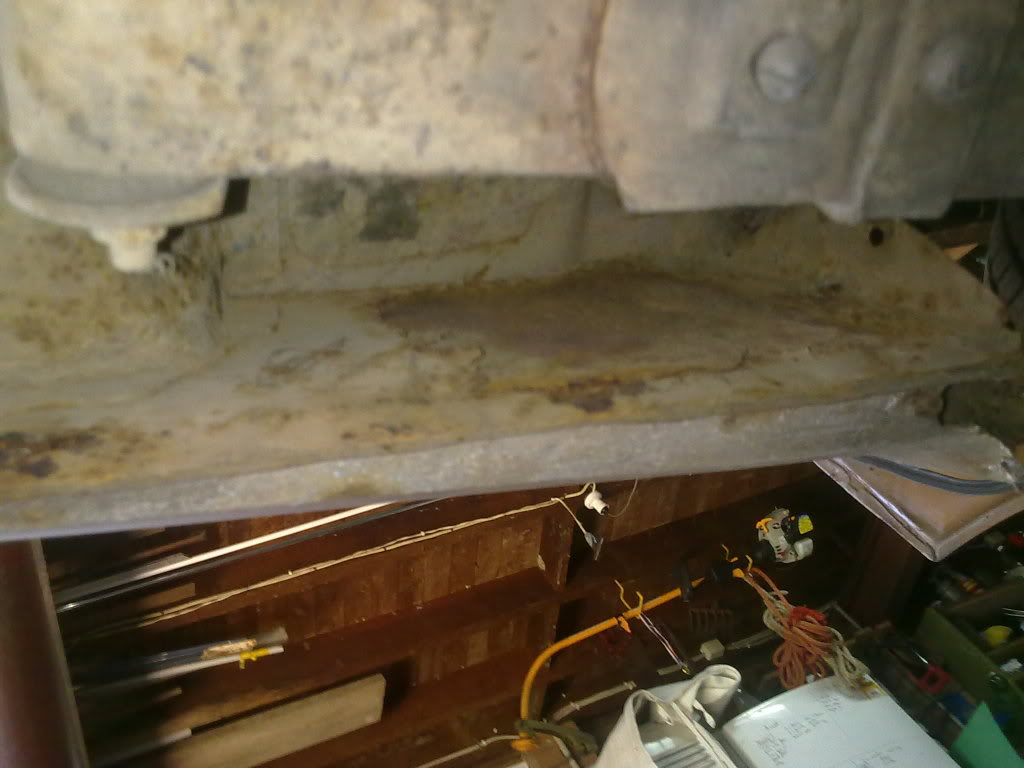
this is under a bumper bracket spot welded to the boot floor, so a little work needs doin there.
other side looks good, thats the bracket.
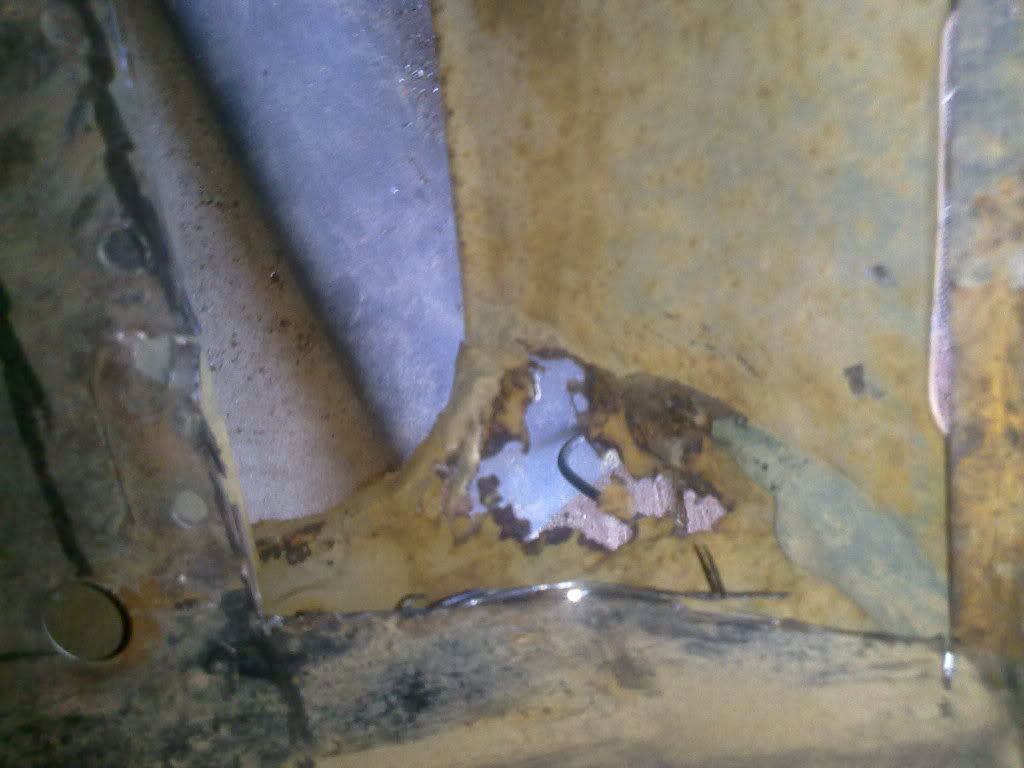
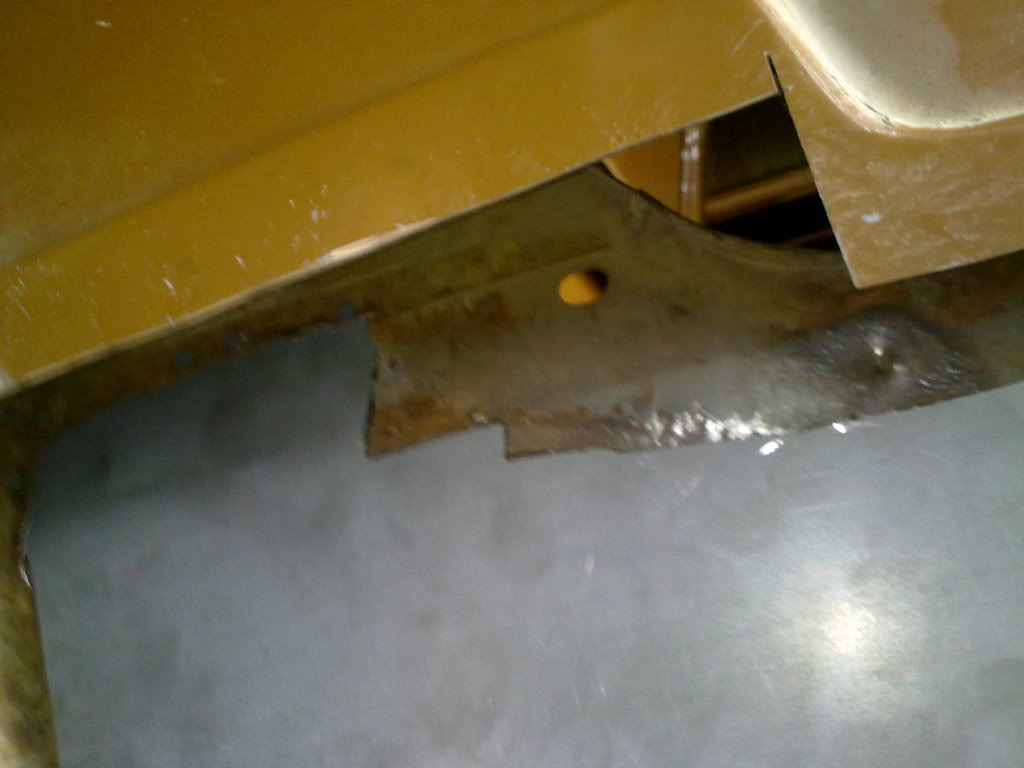
i had to cut the quarter where it looked ok, so i could see the patch job done on the inside. looks terrible
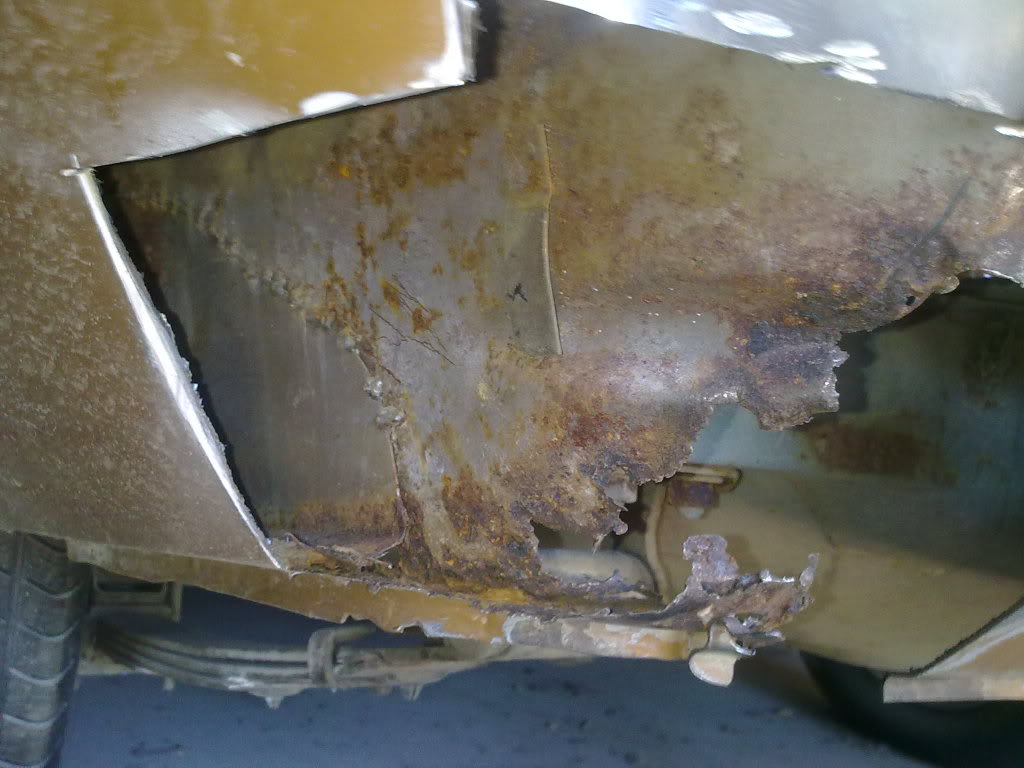
this patch inside the quarter was crudely tacked on over a gaping rust hole, the edges on the other side are just jagged ruty bits. really poor job.
this is the outer quarter which had its own patch job but it was better.. ill still rip it out and do it again.
under the patch looks worse an worse as i go.
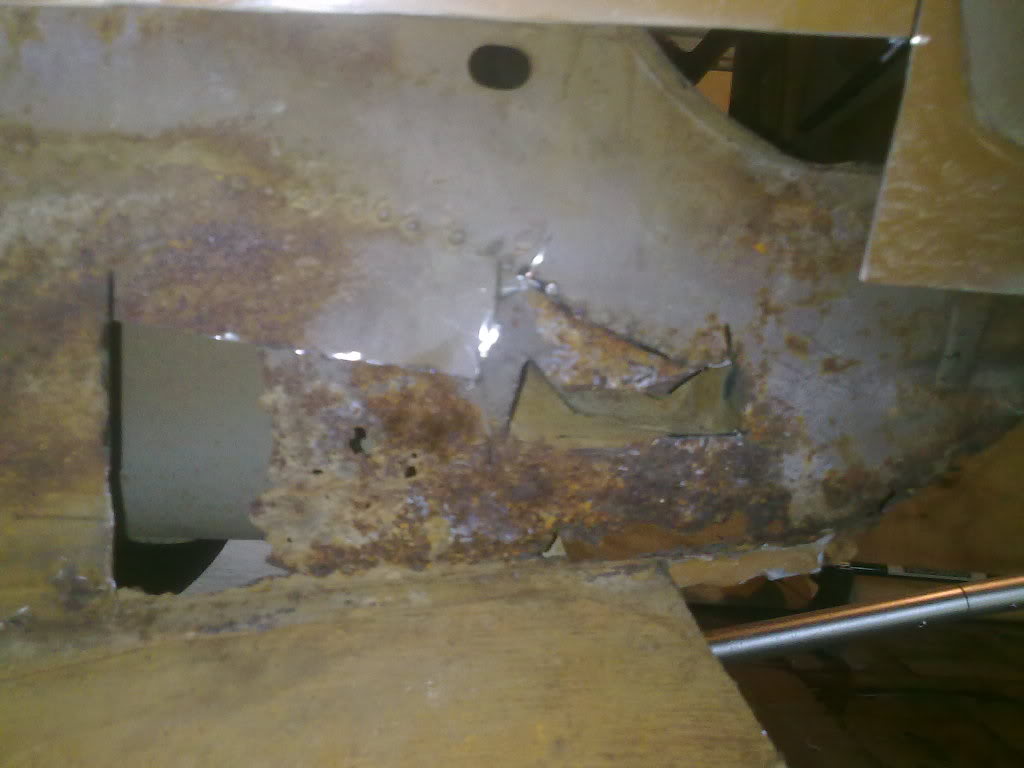
unfortunately i cant jus hack it out because the panel its covering is the support for the leaf springs and it'll jus buckle. im also tryin to keep the shape of the bottom edge so i dont have to fudge it but its like working with tissue paper.
all crappy inside
underneath behind the quarter looks really dodgy
this is under a bumper bracket spot welded to the boot floor, so a little work needs doin there.
other side looks good, thats the bracket.
i had to cut the quarter where it looked ok, so i could see the patch job done on the inside. looks terrible
this patch inside the quarter was crudely tacked on over a gaping rust hole, the edges on the other side are just jagged ruty bits. really poor job.
this is the outer quarter which had its own patch job but it was better.. ill still rip it out and do it again.
under the patch looks worse an worse as i go.
unfortunately i cant jus hack it out because the panel its covering is the support for the leaf springs and it'll jus buckle. im also tryin to keep the shape of the bottom edge so i dont have to fudge it but its like working with tissue paper.
#33
_73LJWhiteSL_
_73LJWhiteSL_
-
- Guests
Posted 18 January 2010 - 10:30 AM
Whoa man, looks like you have a fair bit of work to do. Would it be worthy removing the leaf spring and unloading the pannel so you could have a really good go at fixing that pannel?
Keep us updated. Love to see an 808 being returned to pristine condition
Steve
Keep us updated. Love to see an 808 being returned to pristine condition
Steve
#34
_torana_umunga74_
_torana_umunga74_
-
- Guests
Posted 18 January 2010 - 09:20 PM
yeah i think that will have to be the go.. ill have to stick it up on the blocks. its jus too risky to keep cuttin round it. im gonna get it all properly this ones for the family. gonna buy some por15 i think. and cavity wax. ill be buying a compressor when i get home from nz so i can do some putty and undercoat stuff.
#35
_torana_umunga74_
_torana_umunga74_
-
- Guests
Posted 19 January 2010 - 06:29 PM
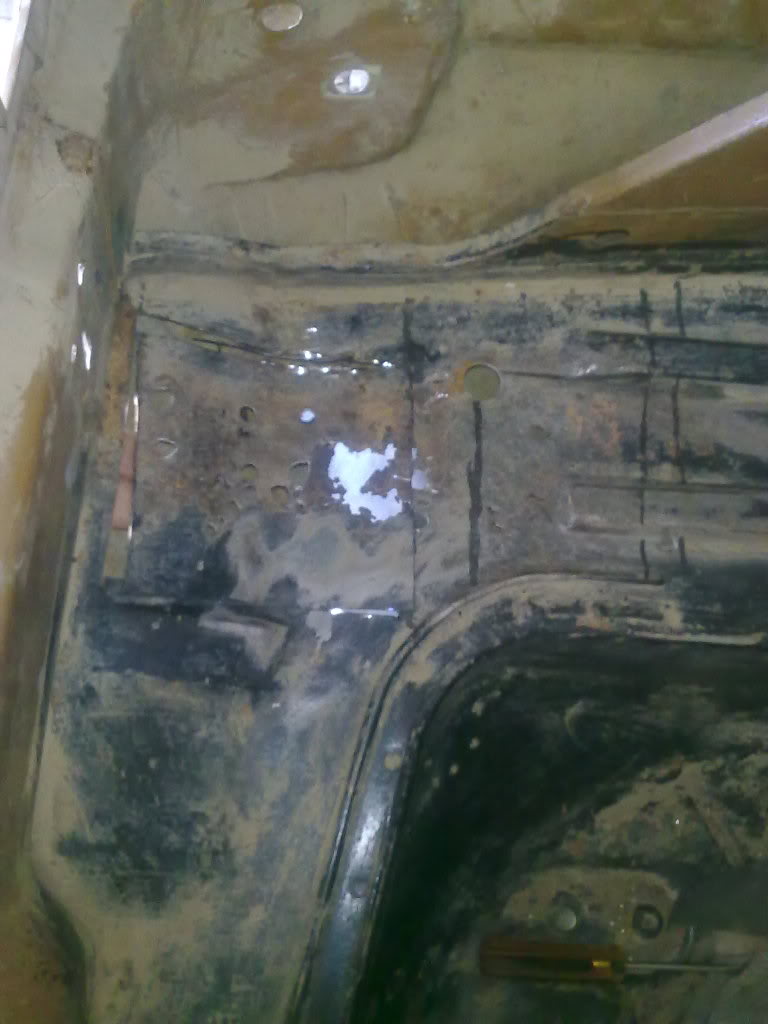
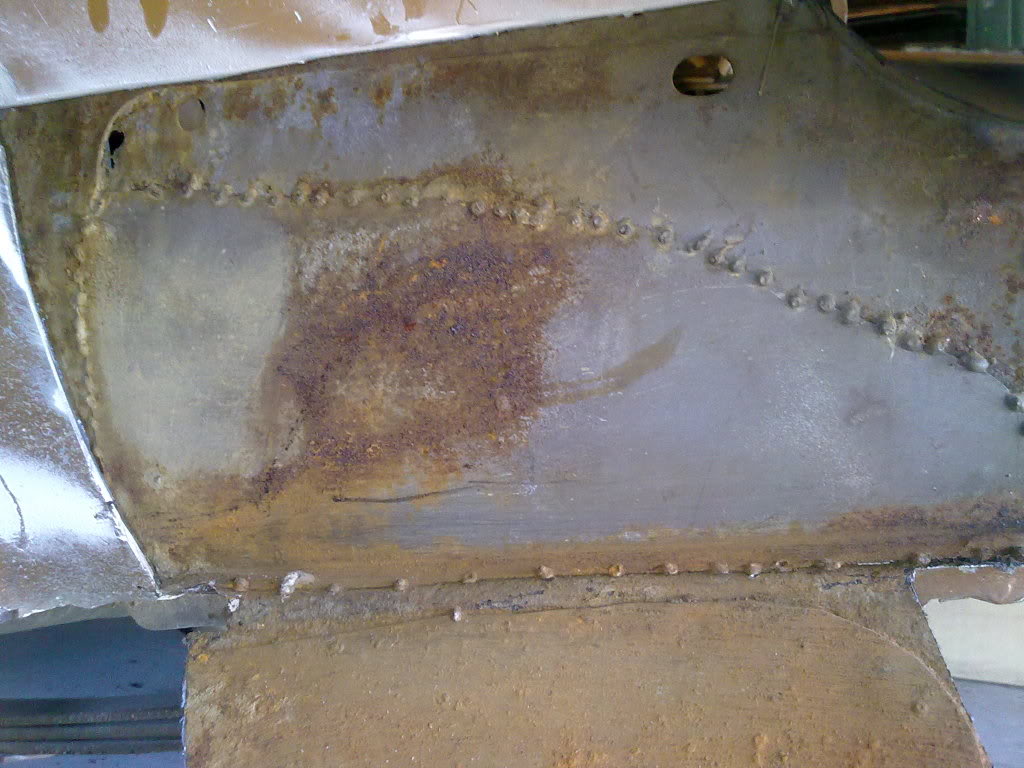
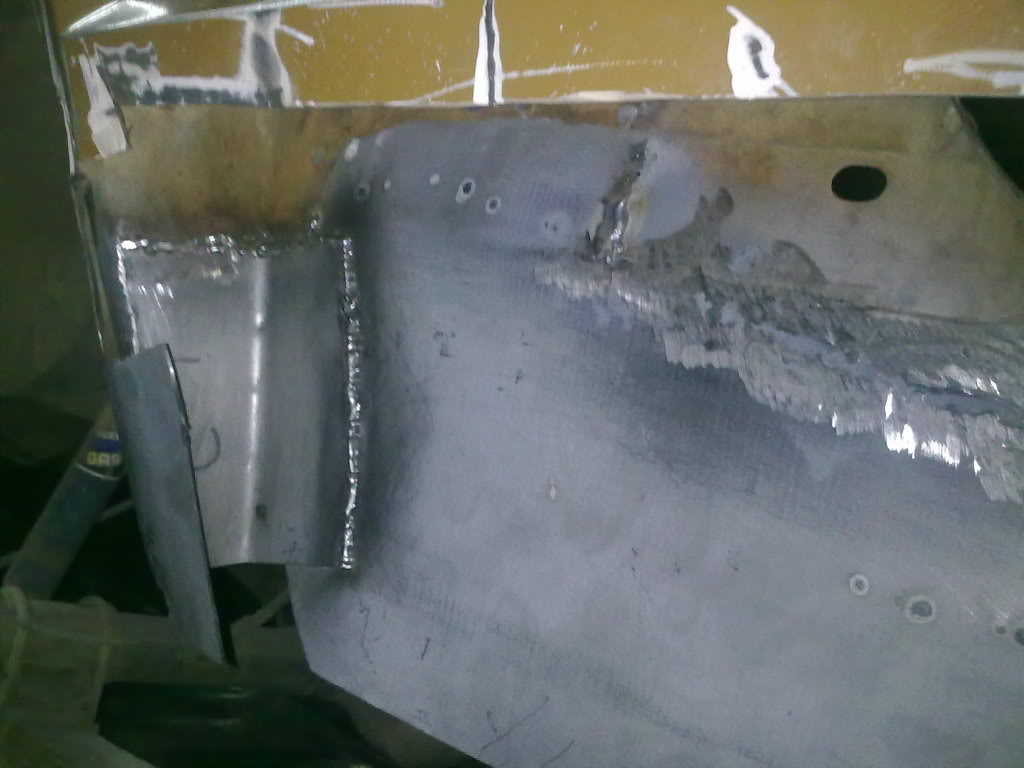
so i undid the spring it was relatively straightforward, and it means i can cut around the bracket

this is how i started today
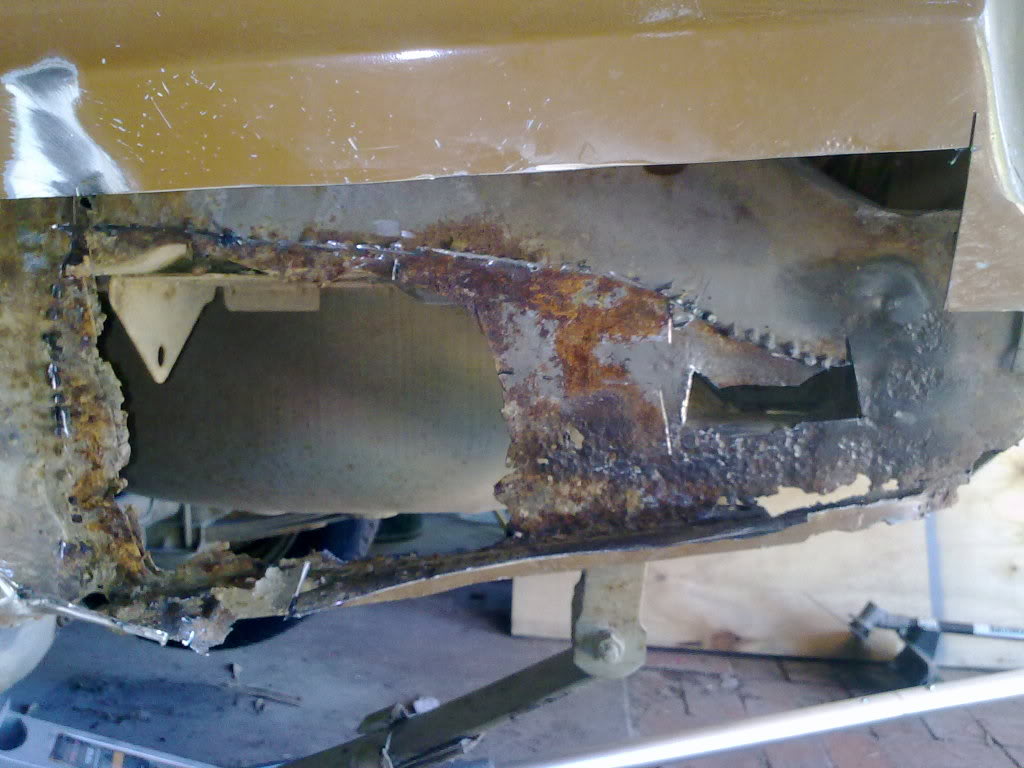
thats the spring base there. i was also trying to keep the bottom of the quarter so i knew the shape but it was all bog and jus fell off

thats a wierd bracket under the boot an i have no idea wat its for.
thats cutting right up into the boot supports inside which sorta overlaps to the inner quarter. it was a prick but its all umpicked an clean ready to weld a new plate in.
this is it all cleaned up ready for fabricating. need steel tho.. and mig wire that lower part just under the wheel well is rusty bog too but i need the shape to start then ill come back to it. the whole panel is covered in like 3mm of bog
this is how i started today
thats the spring base there. i was also trying to keep the bottom of the quarter so i knew the shape but it was all bog and jus fell off
thats a wierd bracket under the boot an i have no idea wat its for.
thats cutting right up into the boot supports inside which sorta overlaps to the inner quarter. it was a prick but its all umpicked an clean ready to weld a new plate in.
this is it all cleaned up ready for fabricating. need steel tho.. and mig wire
that lower part just under the wheel well is rusty bog too but i need the shape to start then ill come back to it. the whole panel is covered in like 3mm of bog
#36
_73LJWhiteSL_
_73LJWhiteSL_
-
- Guests
Posted 19 January 2010 - 09:23 PM
Ouch mate, fair bit of work there. Looks like you've got all the rust tho, so with new metal it should be as good as new
Steve
Steve
#37
_torana_umunga74_
_torana_umunga74_
-
- Guests
Posted 20 January 2010 - 07:21 AM
ill make it better than new cos ill be seam welding and sealing it with stuff rather than spotwelds. also gonna drill holes for drainage in the quarter and under the springbase. i just hope i can get the shape right cos its impossible to find cuts for these things.
#38
_torana_umunga74_
_torana_umunga74_
-
- Guests
Posted 27 April 2010 - 04:58 PM
ok well i sold the torana but now im cashed up so i went and lashed out on some gas, steel and mig wire, among other things. also got myself a BIG homebrew keg set up with a fridge an taps and half a dozen 20 litre kegs  hopefully i find enough time not drunk to do some car work lol.
today i cut out a chunk and welded it in the inner quarterit looks pretty good, it was an odd shape, pushing up into the inner boot and along the floor, it also flexes in. ill get some pics later.
hopefully i find enough time not drunk to do some car work lol.today i cut out a chunk and welded it in the inner quarterit looks pretty good, it was an odd shape, pushing up into the inner boot and along the floor, it also flexes in. ill get some pics later.
#39
_torana_umunga74_
_torana_umunga74_
-
- Guests
Posted 28 April 2010 - 08:55 PM
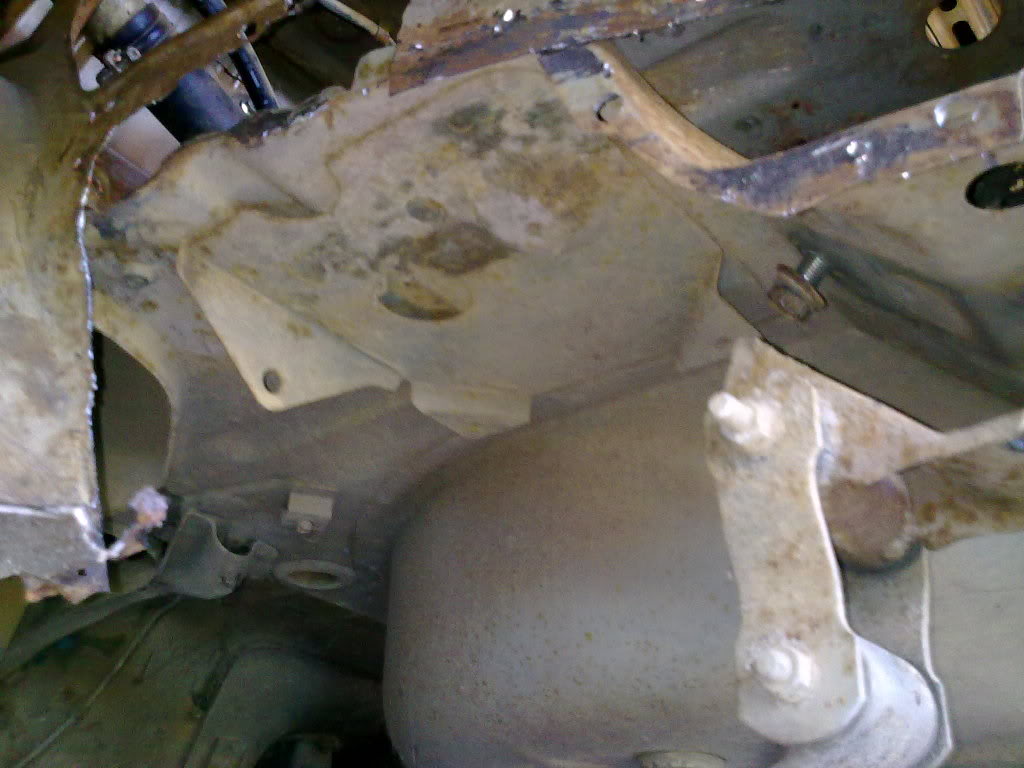
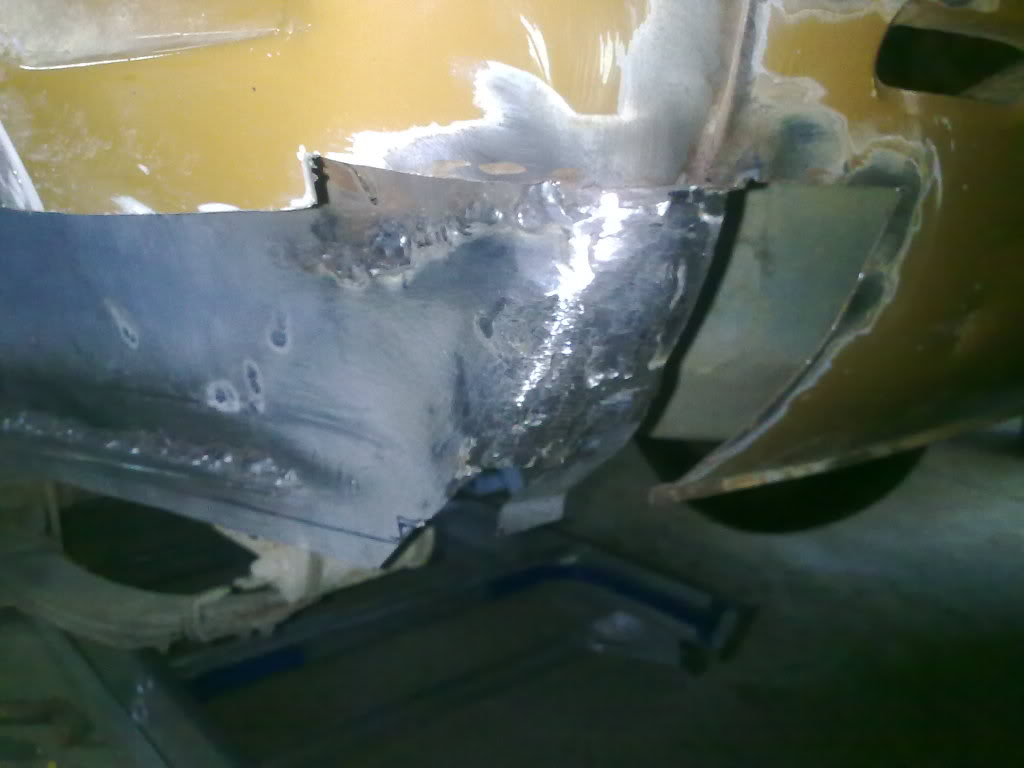
bastard rear quarter. everything overlaps an stuff
hooks into the boot floor supports.
this is the new compressor

hooks into the boot floor supports.
this is the new compressor
#40
_torana_umunga74_
_torana_umunga74_
-
- Guests
Posted 02 May 2010 - 03:12 PM
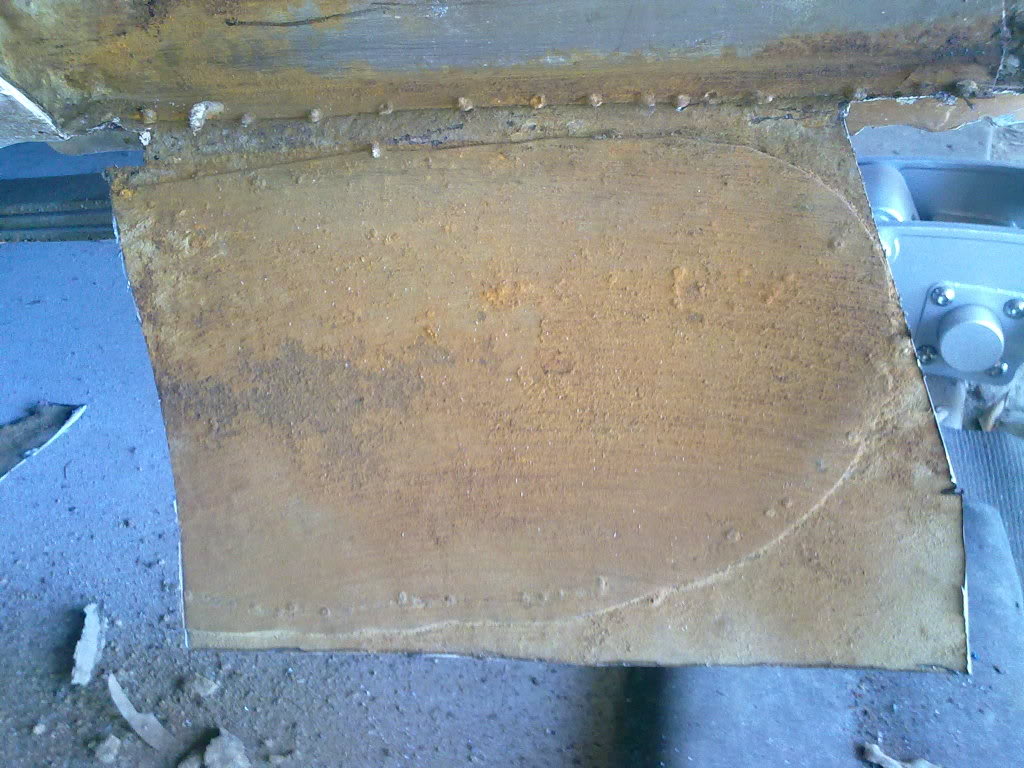
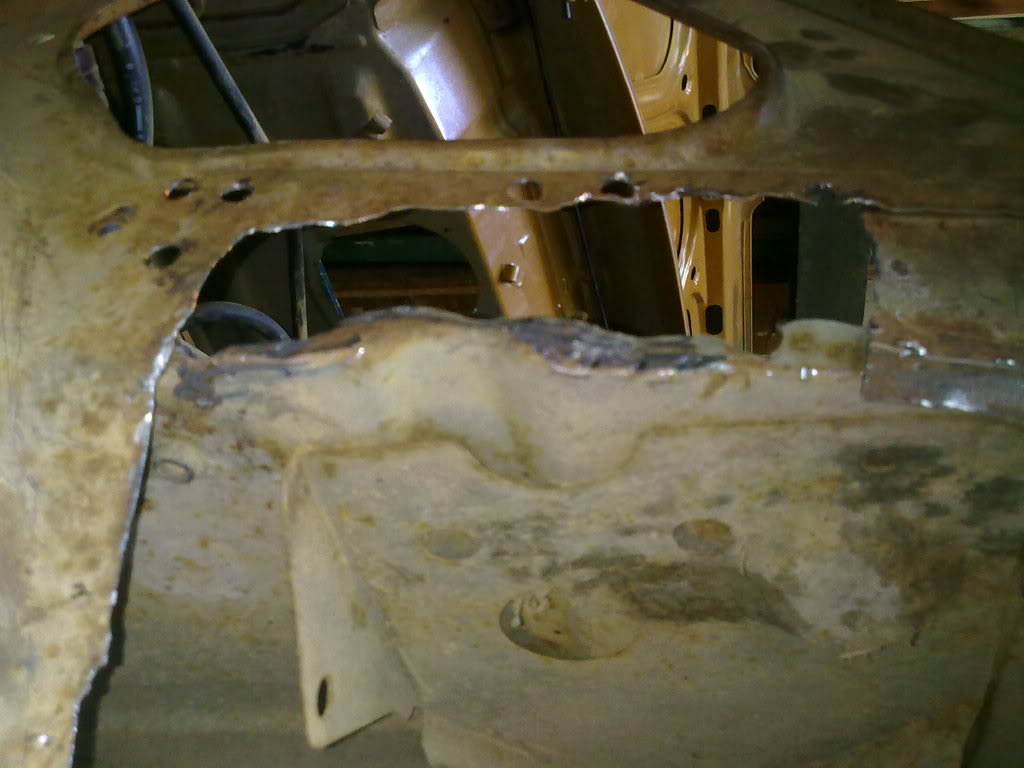
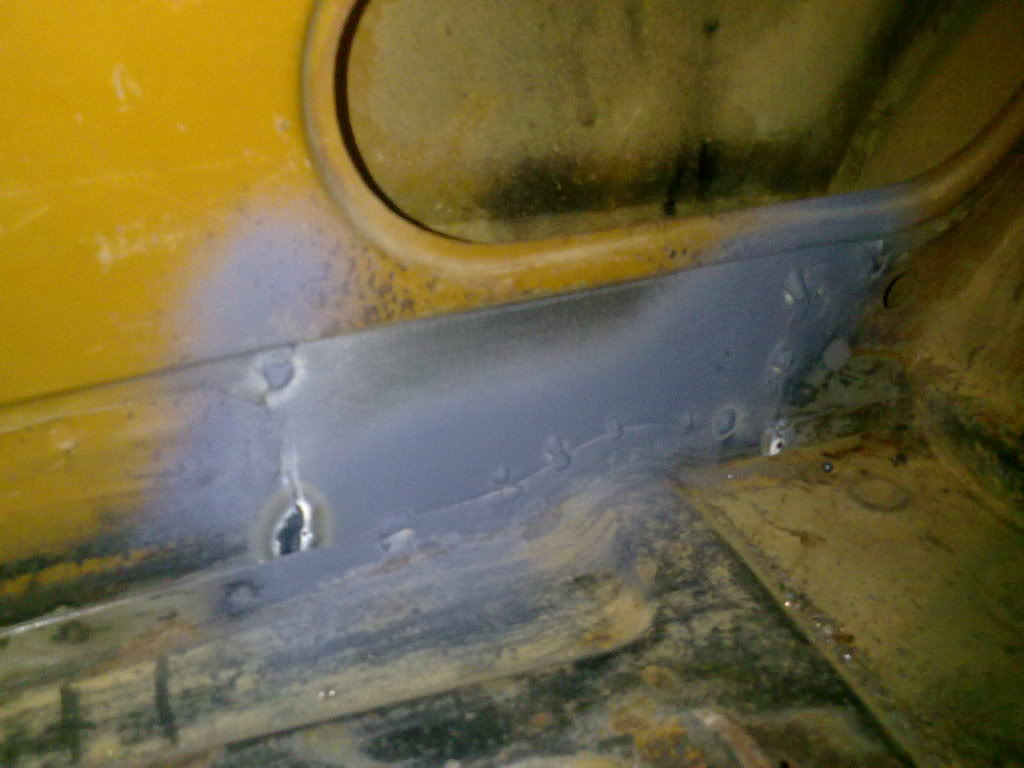
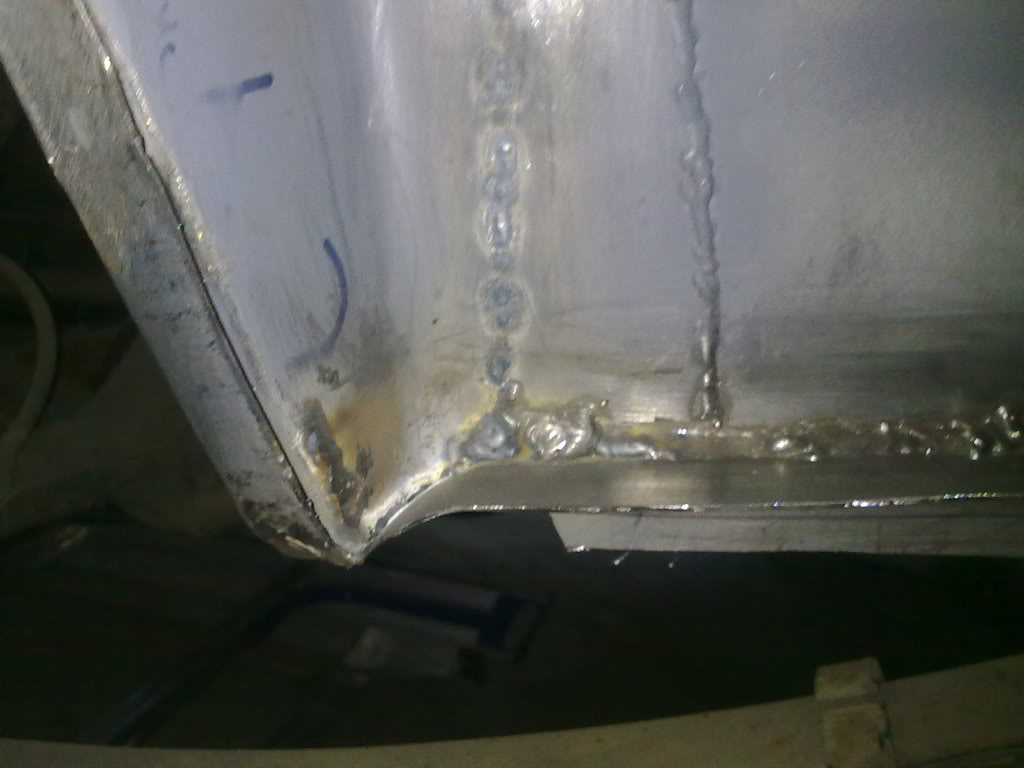
this is the flat piece that goes along the bottom of the quarter, ill drill holes in it for drainage.
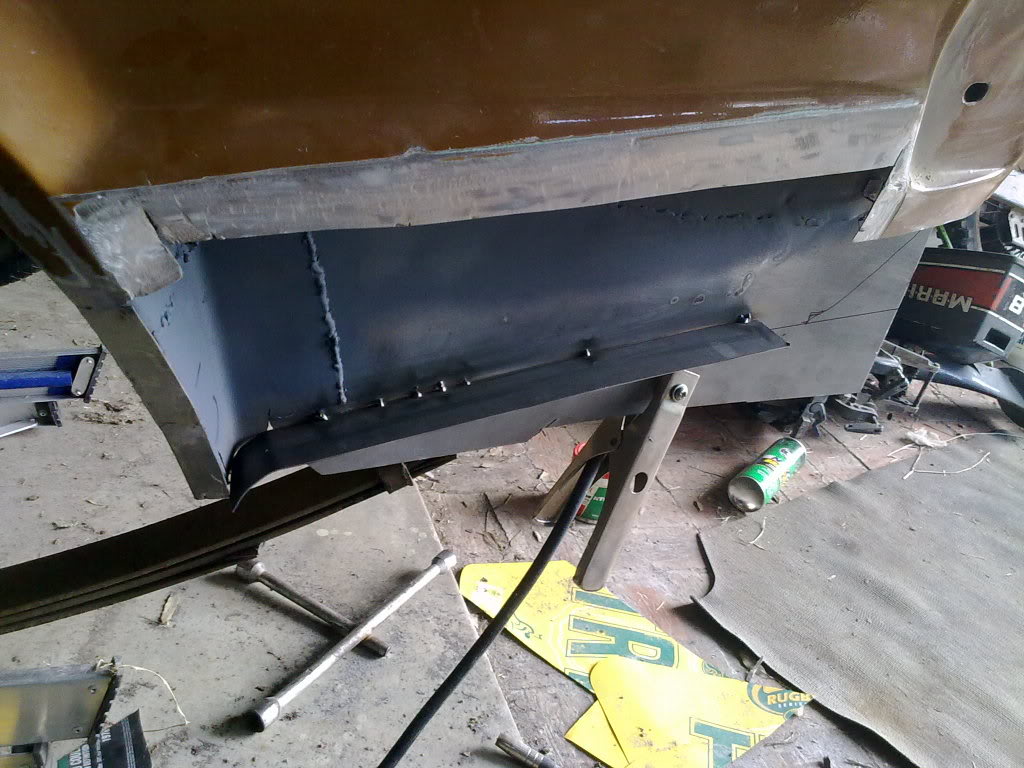
this is the inner quarter where it pushes around in a curve to support the end of the beaver panel, that also was rusty. did it with little strips an tappin with a hammer.
lower corner. it was hard to get the angles and curves and distances right cos all i could do was measure the other side and try to guess how to stitch it all up. all the panels overlap and curve around eachother but in some spots i just made it one piece instead of folding it over. i think it will hold fine, and it looks the same.
when i finish the beaver supportts ill tar it up or wax it whatever so it wont hold water.
what is the best way to seal up the other side of a weld? like i welded the inner pert of that flat piece but i dont want the underside to collect shit either.. lead?
some of those welds look horrible but there were only a couple of holes, some are done from the other side too so ths just dirty burns an stuff. clean new steel is so much more fun.
Edited by torana_umunga74, 02 May 2010 - 03:14 PM.
#41
_torana_umunga74_
_torana_umunga74_
-
- Guests
Posted 24 March 2014 - 03:44 PM
i actually finished this quarter and did the doors and some other stuff. its now being painted. decided to go with letting a pro do it because the old paint is shifty enamel. might get it back this year all shiny and brown.
#42
wot179
-

- Members
-

- 6,784 posts
Green Eggs and Spam
- Name:Jesus Bloody Christ
- Location:Sunny Santa Maria
- Car:Goon
- Joined: 06-February 09
Posted 24 March 2014 - 03:49 PM
almost 4 years between drinks...not bad Nic...lol
Welcome back.
#43
Collo
-

- Members
-
- 114,647 posts
( . Y . )
- Location:Newcastle...Home of me.
- Car:A Black POS
- Joined: 29-February 08
Posted 24 March 2014 - 05:42 PM
Hey Nic good to see you back
#44
_torana_umunga74_
_torana_umunga74_
-
- Guests
Posted 12 April 2014 - 09:34 PM
i found so many hours in the day not fixing the torana just so i could drive it ha ha. i did a lot of work all at once and bought some panels but decided against spraying. i have the mini for that  ill try dig up some photos. SO MUCH ACTIVITY ROOM IN MY SHED NOW.


0 user(s) are reading this topic
0 members, 0 guests, 0 anonymous users

