Not much progress this weekend, got pounded at work so i was tired saturday, didn't really do much & pulled the pin early. Got to work at 11.30am today & went hard till 4.00pm so this is what i got done. First up, rust repairs. I started by making a channel from an off cut of steel at work.

There were about 5 or 6 areas that needed plating, both lower corners & along the base.


I started on the right side & began working my way along to the left. First step, cut a section from my pre-made channel to cover the rusted corner & scribe the outline onto the aperture.


Then i cut the rusted section off carefully using a cut off wheel & air hacksaw. I'm butt welding all the repairs & metal finishing them so i won't have to use bog to "hide" the repairs so everything has to line up perfectly. Here, the aperture is ready for the repair section to be welded in. The blue paint is zinc weld thru primer, i plug weld the repair section here as i don't have a spot welder.

I tack weld the corners then slowly & paitently weld the section in, finishing with an air grinder, belt sander for the tight confined areas, then an air sander. I got about half the aperture done. The line between where i joined the rust repair & the panel directly below is where i had to sand away the factory lead wiped join. I can fill this with polyester filler.


This is what i have left to complete the rust repairs.


When i got sick of grinding & welding, i worked on the rhs rear quarter, i've got it 80% finished so far.


While i was working on the rust repairs & rear quarter, my mate was finishing off the lhs door aperture removing all trace of the original paint & sealer from the rain gutters & body joins so we can address any minor rust that might be forming. So far so good, the body shell is exceptionaly clean & rust free confirming my faith in older drivers. The original 85 yo owner of this car took very good care of it.


Next step is to finish the rust repairs & lhs quarter, then move onto repairing the beaver panel. Tomorrow the front panels will be going to get media blasted followed by the doors. I've already re-skinned both passenger doors with NOS skins, the rhf door maybe getting re-skinned too as it has rust near the belt mould & i have a NOS skin if i need it.


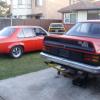
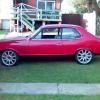
 View Garage
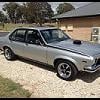
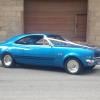