Jump to content


Photo
- - - - -

SS Hatch


  • Please log in to reply
589 replies to this topic

#126 76lxhatch

76lxhatch

    That was easy!

  • Members
  • PipPipPipPipPipPipPip
  • 7,153 posts
  • Location:Unzud
  • Car:SS
  • Joined: 04-August 08
Garage View Garage

Posted 23 March 2012 - 09:20 PM

17s eh? bit on the large side, you gunna run rubber bands for tires? :P

As above 255/40 on the front and 275/40 on the rear, I didn't want to go under 100mm sidewall if I could help it for both ride and aesthetics. Spent some time looking at pics and happy that the 255s are just tall enough not to look silly, and have cut out enough to get clearance. These wheels are lighter than the 15s they are replacing, and its much easier to get proper performance tyres, in the right widths.


i love the wheels

any more info on them?

thanks

I've been keen on them for a while, finally decided bugger it
Year One Rally II wheels
Wheels themselves aren't really all that expensive and to me they're a lot nicer version than any others I've seen in larger than 15" diameter, but the freight was the killer

#127 TerrA LX

TerrA LX

    Fulcrum Fixture

  • Members
  • PipPipPipPipPipPipPip
  • 14,241 posts
  • Location:Sid 'n' knee
  • Joined: 31-May 06

Posted 23 March 2012 - 09:51 PM

Wheels are maddness, love the overall planing and execution of this car.

#128 TerrA LX

TerrA LX

    Fulcrum Fixture

  • Members
  • PipPipPipPipPipPipPip
  • 14,241 posts
  • Location:Sid 'n' knee
  • Joined: 31-May 06

Posted 23 March 2012 - 10:03 PM

Did you go with 5"back spacing front and rear?

#129 76lxhatch

76lxhatch

    That was easy!

  • Members
  • PipPipPipPipPipPipPip
  • 7,153 posts
  • Location:Unzud
  • Car:SS
  • Joined: 04-August 08
Garage View Garage

Posted 23 March 2012 - 10:32 PM

Yes 5" backspace (+3 offset stamped on the wheels), one of the things I wanted to achieve was a better balance front and rear rather than the bigs and littles

#130 _ass308_

_ass308_
  • Guests

Posted 24 March 2012 - 08:00 AM

thoose wheels look awesome,im keen to see what they look like all fitted up :)

#131 _j.e.d._

_j.e.d._
  • Guests

Posted 24 March 2012 - 02:03 PM

Looking good Karl, can't wait to see some tyres on it as well..(gee I need to get my arse into gear with mine!) B)

#132 76lxhatch

76lxhatch

    That was easy!

  • Members
  • PipPipPipPipPipPipPip
  • 7,153 posts
  • Location:Unzud
  • Car:SS
  • Joined: 04-August 08
Garage View Garage

Posted 26 March 2012 - 06:50 AM

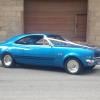
I've ordered some tyres so fingers crossed they turn up this week, I'm keen to see what it looks like too!

Obviously fitting 255s to the front isn't going to happen without a little tweaking, so here is what I've been working on.

First I needed a wheel and tyre - its perhaps a bit of a gamble doing it this way but I made it to absolute full size and allowed for very little rounded edges so by my reckoning if this clears then the real thing should have slightly more room (turns out the wheels are +3 too)
P1000449.jpg

Previously I'd done a rough job of hammering the firewall edge flatter, and as you can see the 225/50/15s (on a -6 offset 15x8) were just barely rubbing on occasion
P1000447.jpg

Time to get a bit more adventurous with the angle grinder!
P1000452.jpg
P1000455.jpg
P1000459.jpg
P1000460.jpg
The finish isn't quite as awful as it looks in the pics, and the underseal will blend in with the rest after a short while. I've basically just taken the corner off the firewall, it only goes a few inches inboard and doesn't interfere with anything inside the car at all.

On to the flares which needed a bit more clearance at front and rear edges - start cutting and tape in place on the car, then add some fibreglassed reinforced bog to hold things in place for fibreglassing off the car - then bolt back on to cure, or they end up a completely different shape!
P1000471.jpg
P1000475.jpg
P1000485.jpg
P1000507.jpg

After the fibreglass dries add some filler on the outside to smooth things off then sand and paint (still to do). I've tried to keep a reasonable shape and curve to the flares rather than cutting chunks out of them so they still look OK, and the rear in particular still retains the inner portion but its angled back a lot more sharply to gain clearance for the tyre.

I have yet to check it properly but all this allows for at least 3 degrees of positive caster, and gives full steering lock, so aside from having to cut the car to achieve it there aren't really any compromises. I've done the exact same thing on the other side.

Edited by 76lxhatch, 21 July 2017 - 11:14 PM.


#133 _j.e.d._

_j.e.d._
  • Guests

Posted 26 March 2012 - 07:21 AM

That's a pretty cool idea! I can see the advantage also of doing it that way, is that you have a lot more clearance while working on the mod's & it stays bolted to the hub so you check clearances throughout the process a lot easier & quicker.. well done :D

#134 76lxhatch

76lxhatch

    That was easy!

  • Members
  • PipPipPipPipPipPipPip
  • 7,153 posts
  • Location:Unzud
  • Car:SS
  • Joined: 04-August 08
Garage View Garage

Posted 26 March 2012 - 04:58 PM

Just heard this afternoon that there is no way the tyres will be here - stuck on a boat in Auckland that now has to go to Tauranga... maybe late next week :(

#135 76lxhatch

76lxhatch

    That was easy!

  • Members
  • PipPipPipPipPipPipPip
  • 7,153 posts
  • Location:Unzud
  • Car:SS
  • Joined: 04-August 08
Garage View Garage

Posted 28 March 2012 - 04:05 PM

Installed some 6mm insulators/spacers on the front springs
P1000526.jpg

Some time ago I measured and drilled pilot holes for shifting the upper arm mounts down, so while I was there I finally finished drilling the holes and moved the bolts
P1000529.jpg

The rear studs had seen better days and the hubs on these wheels are quite thick so I got some new longer ones
P1000534.jpg
P1000535.jpg

Edited by 76lxhatch, 21 July 2017 - 11:15 PM.


#136 hanra

hanra

    Oh My, Don't you post alot

  • Members
  • PipPipPipPipPipPipPip
  • 10,832 posts
  • Name:Brad
  • Location:Farrrrrr North Qld
  • Car:1975 LH SL/R 5000, 1967 Morris Cooper S, E36 BMW, Toyota Corolla, Isuzu DMax
  • Joined: 24-March 11

Posted 28 March 2012 - 06:02 PM

What is the idea behind the spring insulators on the front springs?

#137 76lxhatch

76lxhatch

    That was easy!

  • Members
  • PipPipPipPipPipPipPip
  • 7,153 posts
  • Location:Unzud
  • Car:SS
  • Joined: 04-August 08
Garage View Garage

Posted 28 March 2012 - 06:27 PM

Mainly the extra height, the top of the smaller diameter tyres was in a good spot in relation to the guards and flares but with the bigger rolling diameter I'm going to now I think the tyres would tuck up too far. If I've planned everything right the car should lose a lot of the rake and be reasonably level with the new wheels and tyres, should gain nearly half an inch with the insulators and another half inch or so with the additional rolling diameter.

Doesn't hurt to insulate the spring a bit either, but 6mm of urethane probably won't do much in that department

#138 76lxhatch

76lxhatch

    That was easy!

  • Members
  • PipPipPipPipPipPipPip
  • 7,153 posts
  • Location:Unzud
  • Car:SS
  • Joined: 04-August 08
Garage View Garage

Posted 31 March 2012 - 12:40 PM

Got the front end back together with hubs and brakes etc all on, had to try out a wheel to see how it looks
P1000548.jpg

Splattered some paint on the flares
P1000551.jpg

Also checked out the wheel alignment this morning; I've got approx 1.5 degrees negative camber, 4 degrees caster and a touch of toe in so pretty happy with that.

Edited by 76lxhatch, 21 July 2017 - 11:15 PM.


#139 fatslr

fatslr

    Forum Fixture

  • Members
  • PipPipPipPipPip
  • 1,247 posts
  • Name:Garth
  • Location:Dunsborough W.A.
  • Joined: 17-July 07
Garage View Garage

Posted 31 March 2012 - 03:50 PM

Looking good cant wait to see it rubbered up lol

#140 76lxhatch

76lxhatch

    That was easy!

  • Members
  • PipPipPipPipPipPipPip
  • 7,153 posts
  • Location:Unzud
  • Car:SS
  • Joined: 04-August 08
Garage View Garage

Posted 03 April 2012 - 02:47 PM

Tyres are getting further away, boat is due in Wellington tomorrow now then via Tauranga to Auckland so they can courier them down to me... :angry:

#141 _nzstato_

_nzstato_
  • Guests

Posted 03 April 2012 - 07:17 PM

Now thats just silly. I had some tyres ordered just went the quake hit, took 2 weeks to get them down here.

#142 76lxhatch

76lxhatch

    That was easy!

  • Members
  • PipPipPipPipPipPipPip
  • 7,153 posts
  • Location:Unzud
  • Car:SS
  • Joined: 04-August 08
Garage View Garage

Posted 03 April 2012 - 08:09 PM

Problem is they were on the boat ready to be unloaded at Auckland wharf but thanks to the union that wasn't going to happen... will only be overnight freight once the supplier finally receives them

#143 76lxhatch

76lxhatch

    That was easy!

  • Members
  • PipPipPipPipPipPipPip
  • 7,153 posts
  • Location:Unzud
  • Car:SS
  • Joined: 04-August 08
Garage View Garage

Posted 19 April 2012 - 05:51 AM

Tyres have finally arrived!

P1000590.jpg

Not exactly what I wanted, had to settle for Federal SS-595 on the back (fronts are Falken FK452, was supposed to be this all round but suddenly unavailable).

Hoping to get them mounted this afternoon or tomorrow

Edited by 76lxhatch, 21 July 2017 - 11:15 PM.


#144 76lxhatch

76lxhatch

    That was easy!

  • Members
  • PipPipPipPipPipPipPip
  • 7,153 posts
  • Location:Unzud
  • Car:SS
  • Joined: 04-August 08
Garage View Garage

Posted 19 April 2012 - 02:31 PM

Front
P1000594.jpg

Rear
P1000593.jpg

Add centre caps
P1000597.jpg

and bolt on
P1000600.jpg

P1000604.jpg
P1000605.jpg

P1000606.jpg
P1000607.jpg

Sorry about the photos, sun was a bit bright and low, and the reflection off the grass gives the wheels a strange colour which they don't actually have. The first pic showing the front wheel on the back of the ute is the best representation of how they actually look.

Despite being a wider tyre the rears sit in a bit further than the old ones (it is a narrower wheel) but still looks OK to me. I have full clearance lock to lock thanks to the modifications above, no issues anywhere. Ride is surprisingly good - no worse than before, in fact maybe a little better due to the bigger rolling diameter on the front getting through the harsh bumps a bit easier. It rides better than my old VK did on 17s and this has much stiffer suspension, go figure.

Edited by 76lxhatch, 21 July 2017 - 11:16 PM.


#145 _LS1 Hatch_

_LS1 Hatch_
  • Guests

Posted 19 April 2012 - 03:16 PM

Looks good !

#146 MRLXSS

MRLXSS

    The Render Garage

  • Members
  • PipPipPipPipPipPipPip
  • 12,396 posts
  • Name:Matt
  • Location:Upwey, Melbourne
  • Car:355 LX Hatchback, DeLorean DMC-12, LX SS Hatch, VY Cross8 Crewman
  • Joined: 09-November 05

Posted 19 April 2012 - 03:29 PM

They look great!!!!

#147 tsn007

tsn007

    Forum Fixture

  • Members
  • PipPipPipPipPip
  • 1,010 posts
  • Name:Tony
  • Location:LIVERPOOL, NSW
  • Car:LX hatch, LX sedan
  • Joined: 25-April 07

Posted 19 April 2012 - 08:15 PM

love it

nice dish

#148 76lxhatch

76lxhatch

    That was easy!

  • Members
  • PipPipPipPipPipPipPip
  • 7,153 posts
  • Location:Unzud
  • Car:SS
  • Joined: 04-August 08
Garage View Garage

Posted 13 September 2012 - 10:43 AM

Have been working on a few upgrades over recent months. Power steering conversion
IMAG0126.jpg
more info here

Also scored this (unused but someone has started sanding it back to be polished, need to blast it or something to make it look normal again)...
208146614_full.jpg
... currently away being machined to fit these...
IMAG0128.jpg
... and will be topped with this
IMAG0129.jpg
plus something shiny to hide away at the back end of the car
IMAG0130.jpg
All standard GM sensors etc and the whole thing will be run by a Commodore Delco so I can tune it all myself.


I finally figured out an acceptable way to get side exit exhaust with full sized mufflers and keep reasonable ground clearance - its good to have a shell on the rotisserie for mockup! (original muffler exits have since been removed and sealed off)
IMAG0074.jpg
The exits are 1.5" tall to give clearance to the lower arms and just wide enough to have around the same cross sectional area as a round 2.5" pipe (which the rest of the new system will use). I just used some 1.5" mandrel bends, welded to the shape required then split them lengthways and added some flat sheet to get the extra width.
IMAG0072.jpg
Some minor re-routing of the fuel lines on the drive side may be required (will probably change them for the injection surge tank setup anyway) but otherwise its just a matter of a small trim to the seam under the sill and put a tab on them with a rubber mount to the chassis. Going to add a couple of hotdogs/resonators in front of the mufflers and an X pipe between there and the collectors.

Edited by 76lxhatch, 21 July 2017 - 11:17 PM.


#149 TerrA LX

TerrA LX

    Fulcrum Fixture

  • Members
  • PipPipPipPipPipPipPip
  • 14,241 posts
  • Location:Sid 'n' knee
  • Joined: 31-May 06

Posted 13 September 2012 - 11:28 AM

Love the injection set up so far, what throttle body did you go with?

#150 76lxhatch

76lxhatch

    That was easy!

  • Members
  • PipPipPipPipPipPipPip
  • 7,153 posts
  • Location:Unzud
  • Car:SS
  • Joined: 04-August 08
Garage View Garage

Posted 13 September 2012 - 12:20 PM

I think its just a Holley, another never used second hand score so didn't come with any info. Billet machined item though and it looks like it will flow plenty, gotta be at least 700-800cfm I'd say. Didn't have the IAC when I got it but based on pics off the web that's where most brands put them so I drilled/machined it to suit a standard one and I'm sure it will do the trick just fine.

Hoping to keep the existing big K&N filter and squeeze it all under the scoop with a big drop base so that will hide much of the throttle body anyway.


0 user(s) are reading this topic

0 members, 0 guests, 0 anonymous users