Jump to content


Photo

Body resto on rusty 1969 Camaro


  • Please log in to reply
324 replies to this topic

#301 Bart

Bart

    Shit a brick

  • Members
  • PipPipPipPipPipPip
  • 2,559 posts
  • Location:Sydney
  • Car:LJ Torana
  • Joined: 20-November 05

Posted 29 June 2011 - 11:49 AM

You've gotta love the aftermarket support for american cars, its amazing.

It is yummy
I would prefer NASCAR syle sway bars on it though

http://www.google.com.au/imgres?imgurl=http://image.circletrack.com/f/images/8996057%2Bw200/ctrp_0704_03z%2Bsoft_spring_setup%2B.jpg&imgrefurl=http://www.circletrack.com/techarticles/ctrp_0704_soft_spring_setups/index.html&usg=__Um7fS7bu_JmwPWOsMxXWQJyD6so=&h=150&w=200&sz=9&hl=en&start=14&zoom=1&itbs=1&tbnid=oXQyChN9gfsA-M:&tbnh=78&tbnw=104&prev=/search%3Fq%3Dnascar%2Bstyle%2Bsway%2Bbars%26hl%3Den%26sa%3DX%26rls%3Dcom.microsoft:en-US%26rlz%3D1I7GGLL_en%26biw%3D1004%26bih%3D610%26tbm%3Disch%26prmd%3Divns&ei=QYYKTrbZHO3RmAXjjeGTAQ

Edited by Bart, 29 June 2011 - 12:03 PM.


#302 Bart

Bart

    Shit a brick

  • Members
  • PipPipPipPipPipPip
  • 2,559 posts
  • Location:Sydney
  • Car:LJ Torana
  • Joined: 20-November 05

Posted 29 June 2011 - 12:08 PM


You've gotta love the aftermarket support for american cars, its amazing.

It is yummy
I would prefer NASCAR syle sway bars on it though

http://www.google.com.au/imgres?imgurl=http://image.circletrack.com/f/images/8996057%2Bw200/ctrp_0704_03z%2Bsoft_spring_setup%2B.jpg&imgrefurl=http://www.circletrack.com/techarticles/ctrp_0704_soft_spring_setups/index.html&usg=__Um7fS7bu_JmwPWOsMxXWQJyD6so=&h=150&w=200&sz=9&hl=en&start=14&zoom=1&itbs=1&tbnid=oXQyChN9gfsA-M:&tbnh=78&tbnw=104&prev=/search%3Fq%3Dnascar%2Bstyle%2Bsway%2Bbars%26hl%3Den%26sa%3DX%26rls%3Dcom.microsoft:en-US%26rlz%3D1I7GGLL_en%26biw%3D1004%26bih%3D610%26tbm%3Disch%26prmd%3Divns&ei=QYYKTrbZHO3RmAXjjeGTAQ


http://www.google.com.au/imgres?imgurl=http://www.colemanracing.com/Assets/ProductImages/21900.jpg&imgrefurl=http://www.colemanracing.com/%252FSway-Bar-1-14-49-Spline-Solid-P3539.aspx&usg=__yGwZ23iE-LSQztPP298zAeBvZLM=&h=230&w=473&sz=18&hl=en&start=15&zoom=1&itbs=1&tbnid=YA6ZIujzdUhllM:&tbnh=63&tbnw=129&prev=/search%3Fq%3Dnascar%2Bstyle%2Bsway%2Bbars%26hl%3Den%26sa%3DX%26rls%3Dcom.microsoft:en-US%26rlz%3D1I7GGLL_en%26biw%3D1004%26bih%3D610%26tbm%3Disch%26prmd%3Divns&ei=QYYKTrbZHO3RmAXjjeGTAQ

#303 Bart

Bart

    Shit a brick

  • Members
  • PipPipPipPipPipPip
  • 2,559 posts
  • Location:Sydney
  • Car:LJ Torana
  • Joined: 20-November 05

Posted 30 August 2011 - 12:13 PM

http://www.google.co...sch&um=1&itbs=1

Posted Image

#304 dirtbag

dirtbag

    Street Machines current Biatch!

  • Members
  • PipPipPipPipPip
  • 1,927 posts
  • Name:Tim
  • Location:Sunshine Coast
  • Car:1995 V8 2wd hilux, LH torana ute, 1970 Volksrod, MK1 2 door escort, CJ6 Jeep, VX commodore wagon.
  • Joined: 29-December 09

Posted 30 August 2011 - 12:57 PM

Yeah there's certainly some nice stuff available from the states, but in Qld anyway not a lot of it can be used due to it not having ADR approval : (

So Bart, can I interest you in the VH45 out of my firebird yet?

Edited by dirtbag, 30 August 2011 - 12:57 PM.


#305 Bart

Bart

    Shit a brick

  • Members
  • PipPipPipPipPipPip
  • 2,559 posts
  • Location:Sydney
  • Car:LJ Torana
  • Joined: 20-November 05

Posted 30 August 2011 - 01:33 PM

Yeah there's certainly some nice stuff available from the states, but in Qld anyway not a lot of it can be used due to it not having ADR approval : (

So Bart, can I interest you in the VH45 out of my firebird yet?

I would love to grab it for the crankshaft but my wife would kill me as we are renovating

#306 dirtbag

dirtbag

    Street Machines current Biatch!

  • Members
  • PipPipPipPipPip
  • 1,927 posts
  • Name:Tim
  • Location:Sunshine Coast
  • Car:1995 V8 2wd hilux, LH torana ute, 1970 Volksrod, MK1 2 door escort, CJ6 Jeep, VX commodore wagon.
  • Joined: 29-December 09

Posted 07 June 2012 - 12:54 AM

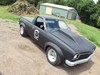
Well after 12 months or so of this car being gone it's come back for round two!


I need to fit the brake booster assembly and clutch master under the dash to keep the firewall clean. So that means cutting : )


I started by doing a basic fit up of the pedal box to see how much I need to cut out. Then I cut the outer plenum more than that, so I'd have access to the edges of where I need to weld in the new inner plenum. Make sense? Not really : )


Posted Image


Then I cut the inner plenum, as it's too low and doesn't allow the pedal box to go where I want it. Much like what I had to do to the monaro.


Posted Image


Once I was happy it had room to sit where I wanted it to, I could make a start on the mounts.


Posted Image


The mounts are just 3mm angle with nutserts pressed and tacked in.


Posted Image

Posted Image


With the basic brackets sorted I then had to make a frame to support it, as the firewall isn't supposed to take the load from the pedals. I made a 50x25x2.5mm frame that will get welded to the inside of each A pillar and stitched to the brace I put inside the firewall recess.


Posted Image

Posted Image


For now it's still just tacked in, until I'm 100% sure it's in the right spot.


Posted Image


Where the frame meets the inside of the A pillar is a factory seam with 3 pieces spot welded together, so it'll be plenty strong enough to hold this frame.


Posted Image


The pedal box bolted in.


Posted Image


I'm happy with the clearance under the dash.


Posted Image


The pedals hang in a good possie too. Plenty of room for a loud pedal : )


Posted Image


Next job is to make the new inner plenum. I've cut out where the vent hole used to be, as it's now irrelevant. I'll fill this back in then make the new cover for the plenum.


Posted Image


Here's the vent hole filled and one side of the new inner plenum made and welded into place.


Posted Image


Here's the new inner plenum screwed into place.


Posted Image


All welded. I used the old spot weld way with this as I find when it's done quickly you can weld nearly as fast as doing a full weld but without the chance of burn throughs. I also plug welded through the slots I'd punched in the lid where the screws used to be.


Posted Image


Once everything under here has been cleaned and etch primed I'll sikaflex all the seams.


Posted Image

Plenty of room in here now,


Posted Image


With all the welding done on the inner part I sanded the primer from the edge of the outer plenum, blew the plenum out then masked it so I can etch prime the new metal.


Posted Image

Posted Image


I also etched under the piece of the outer plenum that's getting welded back in,


Posted Image

Posted Image


I was quick to unmask the plenum, but then thought I could paint inside satin black while the outer plenum isn't in the way, so I remasked it and blacked it out.


Posted Image

Posted Image

Posted Image

Posted Image

Posted Image

Posted Image

Posted Image


I sikaflexed all the seams under the dash too.


Posted Image

Posted Image


Plenty of room to get to the fluid reserviors.


Posted Image

Posted Image


Once the plenum cover goes back on none of this will be visible. Lovely : )


Posted Image


It'll get a set of cable drive wipers same as the monaro to deal with the smaller area in the plenum, but that's a small price to pay for a nice smooth firewall : )

Edited by dirtbag, 07 June 2012 - 12:58 AM.


#307 _LS1 Hatch_

_LS1 Hatch_
  • Guests

Posted 07 June 2012 - 01:26 AM

Really good stuff !

And sure it will be a lot neater under the dash than the Camaro I did...ha ha..

http://www.cardomain.com/ride/2682662

#308 lxsstorana

lxsstorana

    Forum Fixture

  • Members
  • PipPipPipPipPip
  • 2,499 posts
  • Name:Mick
  • Location:Eastwood, Sydney
  • Car:SS Hatchback
  • Joined: 23-March 06

Posted 07 June 2012 - 05:14 AM

Great work and you make it look so easy to do.

#309 StephenSLR

StephenSLR

    Oh My, Don't you post alot

  • Members
  • PipPipPipPipPipPipPip
  • 6,707 posts
  • Name:Stephen
  • Location:Sydney
  • Car:1976 LX SL/R
  • Joined: 12-November 05

Posted 18 June 2012 - 02:09 PM

So he has to fill it from inside the car?

You'd want no leaks onto the carpet, brake fluid is quite smelly.

s

#310 dirtbag

dirtbag

    Street Machines current Biatch!

  • Members
  • PipPipPipPipPip
  • 1,927 posts
  • Name:Tim
  • Location:Sunshine Coast
  • Car:1995 V8 2wd hilux, LH torana ute, 1970 Volksrod, MK1 2 door escort, CJ6 Jeep, VX commodore wagon.
  • Joined: 29-December 09

Posted 29 October 2013 - 07:03 PM

Yes it'll get filled from inside the car, like all under dash assemblies.


Well the next thing I attacked after mounting the late model celica seats was the dash. 69 camaro dashes look like crap so I made a few changes.


IMG_8290.jpg


I brought the base of the whole dash rearwards 50mm so it wasn't sloping so much.


IMG_8299.jpg


IMG_8292.jpg


IMG_8314.jpg


This thick wall pipe will be the mounts for the Audi air vents.


IMG_9586.jpg


IMG_9681.jpg


IMG_9708.jpg


I wanted to make the guage cluster narrower as they're too wide and ugly. I also wanted to make more space for another vent on the drivers side.


IMG_9716.jpg


IMG_9742.jpg


So now I needed to bring the other side of the guage opening in so it was the same as the other side. I ended up just removing the whole centre section and remaking it.


IMG_9818.jpg


IMG_9836.jpg


The custom dash pad will cover the top part of the dash, but I steeled it out so it has plenty to bolt to.


Then I sawed some holes for more vents. Heater/air controls and stereo will be added in here later.


IMG_9839.jpg\


Here's a standard dash.


03.jpg


IMG_0491.jpg


I then made up a simple guage cluster.


IMG_2475.jpg


IMG_2482_zpsf3e454de.jpg


After a bit of mucking about I got the posts for the cable drive wipers mounted.


IMG_6352_zps4de9ca5e.jpg


Then I mounted the new RS hideaway headlight assemblies and spot lights.


IMG_3503_zps51f1a842.jpg


We didn't like how you could see the top edge of the grill below the nose cone so I extended the nose cone out half an inch and down about 10mm to cover it.


IMG_3508_zps9c023612.jpg


IMG_0001_zps7d958f29.jpg


Next up was to mount the radiator and fabricate an engine bay.


IMG_2073_zpsc2cca2c0.jpg


IMG_2102_zpsae72caee.jpg


IMG_2188_zpsf9c3116a.jpg


IMG_2227_zpsa5bbc658.jpg


IMG_2967_zps48b48218.jpg


IMG_4518_zpsec39969a.jpg


IMG_4695_zps0f2340b4.jpg


IMG_4715_zps0fa2a758.jpg


#311 _Bomber Watson_

_Bomber Watson_
  • Guests

Posted 29 October 2013 - 07:43 PM

I will be blunt, i dont like the new dash to much, so far. 


But i also dislike the stock dash, so disregard this for now.


That engine bay is sensational though.


Picks of the grille fitted with the modded nosecone?


Cheers.


#312 _BARRY JACKPOT_

_BARRY JACKPOT_
  • Guests

Posted 30 October 2013 - 05:02 AM

Luv the dash

#313 dirtbag

dirtbag

    Street Machines current Biatch!

  • Members
  • PipPipPipPipPip
  • 1,927 posts
  • Name:Tim
  • Location:Sunshine Coast
  • Car:1995 V8 2wd hilux, LH torana ute, 1970 Volksrod, MK1 2 door escort, CJ6 Jeep, VX commodore wagon.
  • Joined: 29-December 09

Posted 30 October 2013 - 01:57 PM

Here's some pics of how I extended the nose. It's subtle, but at least it hides the plastic top edge of the grill and makes it look a bit more aggressive.


IMG_8760_zps9c6fad3e.jpg


IMG_8771_zps5c7fdaaf.jpg


After just lightly tacking the wire in place I used some tape to fill in it and see if it was going to have the look I was after. It did : )


IMG_8773_zpsd17cfbb4.jpg


IMG_8781_zps07f9a3b4.jpg


IMG_8780_zpsc74b93e5.jpg


IMG_8779_zps6e429875.jpg


So with that sorted I steeled it out and primed it.


IMG_7554_zpseea39c0b.jpg


#314 _LS1 Hatch_

_LS1 Hatch_
  • Guests

Posted 30 October 2013 - 02:10 PM

Pretty neat idea....little hard to tell (for me) from the pics , but are you still using the factory metal upper grill reinforment piece ?


I've done up a few '69s and that little gap between the reinforment and top panel does look a little odd when you get up close to the cars.


#315 _LS1 Hatch_

_LS1 Hatch_
  • Guests

Posted 30 October 2013 - 02:14 PM

PS, did you swap to the conversion style electric headlight doors instead of the original vacuum ones?  Makes it a lot easier now with kits for them, ha ha..


(I did it a while ago and made my own using '69 housings and adapting the original electric motors and arms from a '67)


If you scroll down a bit, you can see the ones I did here..


http://www.cardomain...evrolet-camaro/


Your engine bay sure looks a lot more fancy though :)


Edited by LS1 Hatch, 30 October 2013 - 02:16 PM.


#316 dirtbag

dirtbag

    Street Machines current Biatch!

  • Members
  • PipPipPipPipPip
  • 1,927 posts
  • Name:Tim
  • Location:Sunshine Coast
  • Car:1995 V8 2wd hilux, LH torana ute, 1970 Volksrod, MK1 2 door escort, CJ6 Jeep, VX commodore wagon.
  • Joined: 29-December 09

Posted 30 October 2013 - 02:19 PM

I don't have a metal grill piece so I guess the answer is no : )


It's a very subtle mod that not many people will ever notice but now I've done it and narrowed the bumper I look at the front of other 69s and they look pretty crap. Maybe I'm biased   hahaha.


The rear end came in for a change or two as well.


IMG_6507_zpsc69aa778.jpg


IMG_6512_zps2d917984.jpg


IMG_6870_zps489cf518.jpg


IMG_1294_zps91c7750d.jpg


IMG_1365_zps23b7d062.jpg


IMG_1367_zpsf3d4978c.jpg


IMG_1374_zps9ad928eb.jpg


IMG_1384_zps6e29fd63.jpg


New front brakes. C5 corvette 6 piston calipers and alloy stubs. Nice!


IMG_1352_zps10556e98.jpg


Here's another pic showing the nose mods.


IMG_0986_zps321f7420.jpg


Jeff yes they're electric. Quite a pain to fit but they look awesome.


#317 _LS1 Hatch_

_LS1 Hatch_
  • Guests

Posted 30 October 2013 - 02:24 PM

Brakes are a little bit small ;)


Great looking work as always though :D


Oh, and the piece was a factory thing that went along the top egde of the grill..


http://www.classicin...ts/3949707.html


I mucked around trying to get it to fit decently on the orange car I built, but in the end let Stylerod (where it was painted there..) sort it out properly since that is not really my exact skill, ha ha.


Oh, and good deal on being electric, the factory vacuum ones are a pain...


(the ones I did from scratch were a pain too, but worth it in the end I reckon and saves a heap of room over the big vacuum pods and linkage,etc )


#318 _LS1 Hatch_

_LS1 Hatch_
  • Guests

Posted 30 October 2013 - 02:27 PM

PS... if you ever find yourself visiting SoCal, sure I could keep you busy for an afternoon or two with the rear pillar on my hatch....ha ha..


#319 _BARRY JACKPOT_

_BARRY JACKPOT_
  • Guests

Posted 30 October 2013 - 07:53 PM

Luv Luv Luv those wheels, what are they.

#320 dirtbag

dirtbag

    Street Machines current Biatch!

  • Members
  • PipPipPipPipPip
  • 1,927 posts
  • Name:Tim
  • Location:Sunshine Coast
  • Car:1995 V8 2wd hilux, LH torana ute, 1970 Volksrod, MK1 2 door escort, CJ6 Jeep, VX commodore wagon.
  • Joined: 29-December 09

Posted 31 October 2013 - 12:52 PM

Wheels are Rushforths Rated X.


Here's something else you might like. 408 cube cast iron block LS from Texas Speed, Holley EFI, Tremec 600 5 speed and pro charger.


IMG_8288_zpsa726df2a.jpg


IMG_8289_zps4843fcb7.jpg


IMG_8290_zps7905db8c.jpg


IMG_8295_zps36e8c2e3.jpg


Unfortunately I'm going to have to cut the extractors apart and re coat them as they hang down too low.


IMG_8305_zpsbf888b24.jpg


IMG_8306_zpsc578bb80.jpg


IMG_8324_zps19fb0132.jpg


I had to notch out a piece of the inner guard to fit the blower.


IMG_8369_zps702ad9b8.jpg


IMG_8375_zpsdccf61e2.jpg


I had to make a new bracket to relocate the power steering pump to suit the blower.


IMG_8447_zpsef3159e8.jpg


IMG_8450_zps0217e3c9.jpg


IMG_8465_zpsf8f6458e.jpg


IMG_8489_zps5ff85822.jpg


IMG_8495_zpsb796c4cf.jpg


IMG_8496_zps171f4945.jpg


#321 _LS1 Hatch_

_LS1 Hatch_
  • Guests

Posted 31 October 2013 - 12:56 PM

Saw those intakes at SEMA last year...they were tall from memory, made my Edelbrock look low rise nearly, ha ha..


Pretty neat powerplant for the car though. :)


#322 Bart

Bart

    Shit a brick

  • Members
  • PipPipPipPipPipPip
  • 2,559 posts
  • Location:Sydney
  • Car:LJ Torana
  • Joined: 20-November 05

Posted 31 October 2013 - 08:11 PM

You may be interested I used similar in my LJ top front arms


http://scandc.com/new/node/56


http://scandc.com/new/node/762


Edited by Bart, 31 October 2013 - 08:13 PM.


#323 _Bomber Watson_

_Bomber Watson_
  • Guests

Posted 31 October 2013 - 08:14 PM

I shall concede, thats an alright looking engine :P


#324 mitchg

mitchg

    The guy with the Torailer

  • Members
  • PipPipPipPipPipPip
  • 3,111 posts
  • Name:Mitch
  • Location:Ingleburn, NSW
  • Car:Was a '77 LX V6 Torana + Torailer now VX SS
  • Joined: 19-May 07

Posted 31 October 2013 - 08:18 PM

:o quick, screenshot this before he changes it :P

#325 _BARRY JACKPOT_

_BARRY JACKPOT_
  • Guests

Posted 31 October 2013 - 10:20 PM

Thanks Tim, yep this thing is right up my alley, those wheels would look great on the Challenger.


0 user(s) are reading this topic

0 members, 0 guests, 0 anonymous users