
Thanks for that mate.


Axistr's Father & Son LH SLR Project.
Started by
axistr
, Jan 27 2012 04:20 PM
333 replies to this topic
#101

Ruts
-

- Moderators
-

- 1,118 posts
How Fast!?
- Location:Bargo, NSW
- Car:Blown A9X replica, Black SS hatchback, LH SLR5000
- Joined: 23-December 06
Posted 20 March 2013 - 09:01 PM
#102
_A9XOSS_
_A9XOSS_
-

- Guests
Posted 21 March 2013 - 09:36 AM
I like the paint job on the dash, but I will have to copy u. thanx for sharing the tips too, your car will look tuff as nails when it's all done. Great job.
#103
axistr
 View Garage
-
- Members
-
- 1,224 posts
Forum Fixture
- Location:North west sydney
- Joined: 19-November 05
View Garage
Posted 26 June 2013 - 06:41 PM
Ok time for the Air Conditioner conversion while I wait for the boy to get the body done. I will need to do this post in a few sections in steps. Hope this helps Welby.
I am using a Denso A/C evaporator & blower fan from a Toyota Hilux LN106 but any Hilux or 4 Runner from 1990-2000 will do for the conversion. I cut out a new hole in the fire wall just above the original wiring harness hole for the original fire wall engine side blower fan motor. I will retain the original air duct for two reasons I prefer the look and to hide the coil and other engine EFI stuff.
 274.JPG 63.51K
43 downloads
280.JPG 60.81K
34 downloads
274.JPG 63.51K
43 downloads
280.JPG 60.81K
34 downloads
281.JPG 61.19K
34 downloads
282.JPG 65.82K
30 downloads
Before I stripped out the Torana air box I cut out a air box entry blanking plate for a sheet of ABS plastic using the original plastic gasket as a templet then checked & fitted.
276.JPG 59.71K
30 downloads
277.JPG 63.99K
27 downloads
278.JPG 62.63K
31 downloads
286.JPG 68.53K
28 downloads
I stripped out the box and removed the heater flap.
The heater flap needs to be shortened and the end turned up. I then made a plastic plate and drilled 3x 55mm holes in it and the Torana air box so the flexiable air hoses can poke through.
296.JPG 66.84K
31 downloads
291.JPG 67.95K
33 downloads
292.JPG 74.2K
27 downloads
I will post so more info and photos tomorrow as I have to watch the Blues win in the State of Origin now
#104
A9X
View Garage
-

- Members
-
- 5,024 posts
A fortunate run
- Name:Welby
- Location:Perth
- Joined: 09-November 05
View Garage
Posted 26 June 2013 - 06:48 PM
my head hurts
#105
stevemc32
-
- Members
-
- 324 posts
Forum Fan
- Name:Steve
- Location:Sydney
- Car:LJ 4 Door
- Joined: 14-September 12
Posted 26 June 2013 - 07:06 PM
Looking forward to the next step.
#106
axistr
View Garage
-
- Members
-
- 1,224 posts
Forum Fixture
- Location:North west sydney
- Joined: 19-November 05
View Garage
Posted 26 June 2013 - 07:07 PM
Which part Welby, come on keep up.
#107
SmacT
-

- Members
-
- 1,007 posts
Forum Fixture
- Name:Sam
- Location:Sydney
- Car:LX 4dr 355, TKX, BW
- Joined: 24-December 08
Posted 26 June 2013 - 08:52 PM
Cool (literally). Was wondering how this was going. Can't wait to see the next steps.
#108
Mort
View Garage
-

- Members
-
- 2,760 posts
Lotsa Posts!
- Name:Mort
- Location:Moranbah, QLD.
- Car:74 LH SL/R 4.2, 75 LH 4 door 186
- Joined: 16-December 07
View Garage
Posted 27 June 2013 - 06:19 AM
Very interested so far, don't take too long with episode 2.
Don't worry about the loss, they are just messing with the toads this year
Don't worry about the loss, they are just messing with the toads this year
#109
_BARRY JACKPOT_
_BARRY JACKPOT_
-
- Guests
Posted 27 June 2013 - 09:05 AM
Bippy ice creams after a day at the beach and eating wizz fizz till you were pinging off your head. Sitting on the old mans lap having a steer while driving round the neighborhood at night in the XU-1 and sitting in the back of the ute on the way back from the tip.
I feel sorry for the youth of today
I feel sorry for the youth of today
#110
_BARRY JACKPOT_
_BARRY JACKPOT_
-
- Guests
Posted 27 June 2013 - 09:14 AM
Sorry boys wrong thread lol.
#111
Mort
View Garage
-
- Members
-
- 2,760 posts
Lotsa Posts!
- Name:Mort
- Location:Moranbah, QLD.
- Car:74 LH SL/R 4.2, 75 LH 4 door 186
- Joined: 16-December 07
View Garage
Posted 27 June 2013 - 04:54 PM
HAHAHAHAHAHA, good on ya Chris
#112
axistr
View Garage
-
- Members
-
- 1,224 posts
Forum Fixture
- Location:North west sydney
- Joined: 19-November 05
View Garage
Posted 27 June 2013 - 06:11 PM
Step two, now its time to make an air duct box to deliver the air from the Toyota A/C evaporator to the Torana air box, Using the same plastic sheet I cut out and bent the adaptor box up. This plastic bends well and holds its shape with a bit of heat
After bending to the correct angles and shape I plastic welded both ends of the box.
DSC00309.JPG 68.68K
29 downloads
DSC00310.JPG 70.9K
30 downloads
DSC00311.JPG 70.54K
31 downloads
DSC00319.JPG 69.02K
31 downloads
DSC00321.JPG 69.68K
30 downloads
There is three holes in the new box and room dictates where the holes need to be drilled.
Now I have fitted the air box adaptor and connected the flexible hoses to the new adaptor box.
DSC00322.JPG 65.91K
29 downloads
I will take some more photos of the installation into the car when I can. it looks a bit of a mess sitting on the bench but when its all aligned and hoses secured at the exact lengths it looks very neat tidy and closer to factory air.
I could take heaps more photos and text of every step but this would take around ten pages, so if you don't understand any parts or want better clarification, just post your comment so I can add it.
There is still a bit to do to complete the A/C conversion so I will add it as I am doing that part.
Lenny
When complete it should look like this
DSC00316.JPG 64.71K
55 downloads
#113
_330OLX_
_330OLX_
-
- Guests
Posted 27 June 2013 - 06:16 PM
I have to watch the Blues win in the State of Origin now
How did that work out for you?
GO QUEENSLANDER
P.S. - great work on this build & your hatch as well
Edited by 330OLX, 27 June 2013 - 06:23 PM.
#114
axistr
View Garage
-
- Members
-
- 1,224 posts
Forum Fixture
- Location:North west sydney
- Joined: 19-November 05
View Garage
Posted 27 June 2013 - 06:31 PM
As you would expect 3300LX, what a poor run, I expect you guys had something to do with the bus braking down LOL. Oh well better luck in three weeks maybe. They deserved to win they played much better on the night, and QLD had the insight to give the reffs the brown paper bag beforehand.
But the biggest win last night was that the bitch has now left the play ground, and now we have a recycled idiot running the side show.
#115
_LXSS350_
_LXSS350_
-
- Guests
Posted 27 June 2013 - 11:42 PM
But the biggest win last night was that the bitch has now left the play ground, and now we have a recycled idiot running the side show.
Ain't that the truth. Its called scraping the dregs up from the bottom of the barrel.

It's a circus. 
#116
Peter UC
-
- Members
-
- 771 posts
Forum Fixture
- Location:Emerald Vic
- Joined: 08-November 05
Posted 28 June 2013 - 12:44 PM
What are you using to control the Aircon?
#117
_toranajohn_
_toranajohn_
-
- Guests
Posted 29 June 2013 - 12:03 AM
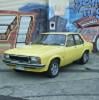
nice stuff Lenny as always hope the console was ok for it ,will it be ready for toranafest september and are u going thanks john
Attached Files
-
IMG_1329 (640x478).jpg 172.01K
26 downloads
Edited by toranajohn, 29 June 2013 - 12:06 AM.
#118
axistr
View Garage
-
- Members
-
- 1,224 posts
Forum Fixture
- Location:North west sydney
- Joined: 19-November 05
View Garage
Posted 29 June 2013 - 09:21 AM
Hi Peter UC, your one step ahead. as yet I haven't taken any photos of the controls. I use the standard Torana cable controls but I will piggy back an extra cable at the heater control leaver end to control the heater tap. I have a Dayco heater tap to go into the system so no coolant will flow through the heater core when in the off position. It is very important to get a heater tap that has zero flow when closed due to the heater box flap now being modified. The blower fan pushes around 60% more air than the original Torana fan, and it needs it because the air now needs to blow through the A/C evaporator and part of the heater core. When you slide the heater control to the heat position (flap up) all of the air is then forced through the heater core and of course at the same time the heater tap open producing the heat. Doing it this way enables you to have the A/C on if you want to dry the air before it passes through the heater core so you can defrost the inside of the car and windscreens. It still has around 30% better air flow from the air vents than standard. I will also plumb the side vents into the air box and block off the holes in the fire wall that originally supply then. The Toyota blower fan unit has a fresh & recycle flap, the top of the blower box lines up close to the original hole where the air duct connects to the Torana fan. With the original inside plastic duct removed and A bit of foam it all matches up great. I use the choke cable to control the fresh/recycle flap. My hatch runs an electric choke so the cable was redundant and the SLR will be EFI so I will do the same. The only extra part you will notice is a small A/C push button switch that will bring in the compressor, I will also use a relay to bring in the slow fan speed when the button is pushed which will give my the four fan speeds.
Hope that all makes sense.
G'day John, Good to hear from you, WOW a new Torana in the shed, looks like its in good nick mate. You will have to bring it round for a look.
Yep booked into Toranafest again. Was hoping to take the SLR but pretty bloody sure it wont be ready in time so I have booked in the hatch again this year.
See you there.
Lenny.
#119
_toranajohn_
_toranajohn_
-
- Guests
Posted 30 June 2013 - 12:39 AM
yea ill give u a ring but u got your hands full with this one at the moment ,the black one was ok but hey this one drives brand new and always wanted another white one ,maybe able to cruise up to the fest together .sorry my pic was so big was trying to put it on the side with my black one
Edited by toranajohn, 30 June 2013 - 12:41 AM.
#120
axistr
View Garage
-
- Members
-
- 1,224 posts
Forum Fixture
- Location:North west sydney
- Joined: 19-November 05
View Garage
Posted 04 July 2013 - 04:27 PM
Step 3,
I drilled two holes in the file wall and inserted 2x flare nuts to mount the blower & evaporator, then reconfigured the wiring harness and fitted a new plug to suit the four speed fan.
262.JPG 66.3K
31 downloads
263.JPG 71K
33 downloads
Then you can install the unit assemble and connect the three air delivery hoses into the torana air box.
The vent control can be left standard except I mounted the four speed fan switch and piggy backed an extra Torana heater cable to operate the new heater tap. The photo on the right showing the extra hole drilled to take the smaller inlet pipe. When the original engine side plastic fan cowl is fitted there is just enough clearance to fit the high pressure pipe connection,
270.JPG 68.06K
27 downloads
269.JPG 66.19K
32 downloads
torana 328.JPG 355.38K
34 downloads
Its a bit hard to see in the photo below but the fresh air duct hole almost lines up with the Toyota fan blower box. I will make a plastic plate and fit some foam to ensure that there are no air leaks.
266.JPG 59.41K
23 downloads
264.JPG 69.55K
28 downloads
I carn't do much more with the A/C until I start fitting out the car after paint.
I drilled two holes in the file wall and inserted 2x flare nuts to mount the blower & evaporator, then reconfigured the wiring harness and fitted a new plug to suit the four speed fan.
262.JPG 66.3K
31 downloads
263.JPG 71K
33 downloadsThen you can install the unit assemble and connect the three air delivery hoses into the torana air box.
The vent control can be left standard except I mounted the four speed fan switch and piggy backed an extra Torana heater cable to operate the new heater tap. The photo on the right showing the extra hole drilled to take the smaller inlet pipe. When the original engine side plastic fan cowl is fitted there is just enough clearance to fit the high pressure pipe connection,
270.JPG 68.06K
27 downloads
269.JPG 66.19K
32 downloads
torana 328.JPG 355.38K
34 downloadsIts a bit hard to see in the photo below but the fresh air duct hole almost lines up with the Toyota fan blower box. I will make a plastic plate and fit some foam to ensure that there are no air leaks.
266.JPG 59.41K
23 downloads
264.JPG 69.55K
28 downloadsI carn't do much more with the A/C until I start fitting out the car after paint.
#121
axistr
View Garage
-
- Members
-
- 1,224 posts
Forum Fixture
- Location:North west sydney
- Joined: 19-November 05
View Garage
Posted 08 July 2013 - 06:05 PM
To give me the extra space needed to clear the E.F.I rail. I know there is 101 ways to modify the air duct cowl but this is my version. I cut out a V in the heater box cowl and plastic welded it which gives me an extra 1 1/4 more clearance and that's all I needed. I will use a fraction of filler on the outside and paint it black. It plastic welded very easy and when finished you won't pick the difference unless you put an unmodified one next to it.
I should have taken a photo showing the cut but didn't have the camera handy.
DSC00337.JPG 63.96K
27 downloads
DSC00338.JPG 60.28K
24 downloads
DSC00339.JPG 60.58K
25 downloads
DSC00340.JPG 60.26K
24 downloads
I should have taken a photo showing the cut but didn't have the camera handy.
DSC00337.JPG 63.96K
27 downloads
DSC00338.JPG 60.28K
24 downloads
DSC00339.JPG 60.58K
25 downloads
DSC00340.JPG 60.26K
24 downloads
Attached Files
-
DSC00341.JPG 59.73K
19 downloads
#122
Stinga
-

- Members
-
- 2,114 posts
.
- Name:Stinga
- Location:Wollongong, NSW
- Car:HD Holden ute, and sedan, UC torana
- Joined: 05-December 05
Posted 08 July 2013 - 09:10 PM
nice job on the heater duct
#123
_toranajohn_
_toranajohn_
-
- Guests
Posted 31 August 2013 - 09:01 PM
hello lenny what,s the latest on the boys torry
#124
axistr
View Garage
-
- Members
-
- 1,224 posts
Forum Fixture
- Location:North west sydney
- Joined: 19-November 05
View Garage
Posted 01 September 2013 - 08:51 AM
G'day John,
Still waiting for the boy to finish the body work so I can send it out for paint. It only need around 8-10 hours to finish it off , He has had 14 months to do it and I can't do much till he finishes his bit. If he doesn't get back on to it in the next four weeks I will just have to send it to a panel shop and keep the ball rolling. I have done most of the body work so far but I am not confident in getting the last bit right, those fine little ripples, the part that really count when you look down the side after paint and they show up. It needs a professional not a mechanic, the son has the touch but unfortunately not me.
#125
_toranajohn_
_toranajohn_
-
- Guests
Posted 09 September 2013 - 09:05 PM
hey, Lenny just got back from 30 days in the states , but unfortunately wont be going to torana fest as the entries closed on the 23 august for inside and i was away and forgot to pre enter ,and the boats are on at windsor anyway , so maybe next year hope u and the missus have a great time up there .


0 user(s) are reading this topic
0 members, 0 guests, 0 anonymous users

