
It may sound strange coming from someone with a Barbados Green one, but I actually prefer the more subdued colours when used with the LH stripes.Yep that's it, it is a nice old colour, don't know if I'll stick with it yet or go something brighter.

 1 votes
Awesome LH in the making
Started by
Covert
, Jan 08 2015 01:48 AM
117 replies to this topic
#26

Shiney005
 View Garage
-

- Members
-

- 9,034 posts
Oh My, Don't you post alot
- Name:Laurie
- Location:Dubya Hay
- Car:Toyota Mirai
- Joined: 19-January 12
View Garage
Posted 10 January 2015 - 12:10 PM
#27
Covert
-
- Members
-
- 1,987 posts
Forum Fixture
- Location:In my LH
- Car:LH
- Joined: 08-November 13
Posted 10 January 2015 - 01:05 PM
I've decided to go front and rear spoilers with LH SLR blackouts, as for flares and colour, I'll think about that while I'm doing my bodywork
#28
_LHSL308_
_LHSL308_
-

- Guests
Posted 10 January 2015 - 07:45 PM
It may sound strange coming from someone with a Barbados Green one, but I actually prefer the more subdued colours when used with the LH stripes.
Your right it does sound strange, especially when that car is an L34.
At the end of the day bud its your car, you do what you want with it.
#29
Covert
-
- Members
-
- 1,987 posts
Forum Fixture
- Location:In my LH
- Car:LH
- Joined: 08-November 13
Posted 10 January 2015 - 08:39 PM
I appreciate your input guys, there's a couple of car shows coming up down here so having a good squizz at some side by side should help
#30
Covert
-
- Members
-
- 1,987 posts
Forum Fixture
- Location:In my LH
- Car:LH
- Joined: 08-November 13
Posted 11 January 2015 - 09:06 PM
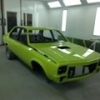
A pic of the car from around 2005 when it was my daily
#31
_j.e.d._
_j.e.d._
-
- Guests
Posted 12 January 2015 - 08:50 AM
That's such a nice photo Mav - it's good when you can look back on what it looked like 
Good on ya for not making a decision on flares or flareless just yet - it's a big one.
I know I keep on changing my mind with mine, but for me it doesn't help when I haven't made a proper start on either of them & keep buying other cars as well haha...one day 
#32
Covert
-
- Members
-
- 1,987 posts
Forum Fixture
- Location:In my LH
- Car:LH
- Joined: 08-November 13
Posted 12 January 2015 - 06:03 PM
Thanks Jase I'm glad I took the pic when I did because all my other pics of the car are post hibernation.
#33
Covert
-
- Members
-
- 1,987 posts
Forum Fixture
- Location:In my LH
- Car:LH
- Joined: 08-November 13
Posted 14 January 2015 - 12:00 AM
Got a 308 out of a HX ute. Heard it running before pulling it out.
#34
Covert
-
- Members
-
- 1,987 posts
Forum Fixture
- Location:In my LH
- Car:LH
- Joined: 08-November 13
Posted 14 January 2015 - 12:23 AM
VN heads
#35
_Lazarus_
_Lazarus_
-
- Guests
Posted 14 January 2015 - 12:24 AM
Paint it original, with LH SL/R blackouts and GTS wheels ?
It's a nice colour.
#36
Covert
-
- Members
-
- 1,987 posts
Forum Fixture
- Location:In my LH
- Car:LH
- Joined: 08-November 13
Posted 14 January 2015 - 05:32 AM
GTS wheels would suit, hotwires are growing on me but 15s are bloody expensive
#37
Covert
-
- Members
-
- 1,987 posts
Forum Fixture
- Location:In my LH
- Car:LH
- Joined: 08-November 13
Posted 21 January 2015 - 01:23 AM
Removed rear end, then butchered out control arm bushes, they were well and truly in there but nothing a drill, screwdriver and hammer couldn't fix.
#38
Covert
-
- Members
-
- 1,987 posts
Forum Fixture
- Location:In my LH
- Car:LH
- Joined: 08-November 13
Posted 01 February 2015 - 10:19 AM
Bought myself a new toy, this things the bees knees, time for some body work
#39
Covert
-
- Members
-
- 1,987 posts
Forum Fixture
- Location:In my LH
- Car:LH
- Joined: 08-November 13
Posted 03 February 2015 - 05:43 AM
Behind bonnet hinges seems like a good place to start
Tried a spot weld drill bit on this plate, but only ended up with 2 holes and a blunt bit.
So out came a standard drill bit. Glad the rust doesn't reach the bolt holes
Seems like a ship load of holes in such a small space
That looks better
#40
torana_nick
-
- Members
-
- 759 posts
Forum Fixture
- Name:Nick
- Location:victoria
- Car:LH Torana Project
- Joined: 11-December 11
Posted 03 February 2015 - 08:46 AM
Looking good mate, and with that welder all the rust will be done in no time. 
#41
Shiney005
View Garage
-
- Members
-
- 9,034 posts
Oh My, Don't you post alot
- Name:Laurie
- Location:Dubya Hay
- Car:Toyota Mirai
- Joined: 19-January 12
View Garage
Posted 03 February 2015 - 09:07 AM
What do you do to ensure it doesn't happen again? Seam weld it? Sikaflex?
#42
Covert
-
- Members
-
- 1,987 posts
Forum Fixture
- Location:In my LH
- Car:LH
- Joined: 08-November 13
Posted 03 February 2015 - 07:35 PM
Looking good mate, and with that welder all the rust will be done in no time.
Thanks nick, it's nice to do something to the car other than take it apart lol, not that I didn't enjoy pulling it apart
What do you do to ensure it doesn't happen again? Seam weld it? Sikaflex?
Yep, I've seen someone else put sealant along the top of the support plate, seems like a good idea, I'll have too look into what type is best
#43
_Bomber Watson_
_Bomber Watson_
-
- Guests
Posted 03 February 2015 - 07:39 PM
Sika 252, Wurth KD bond, or i've been using cheap ass Parafix polyurethane sealant from bunnigns recently, seems as good as anything else.
If your going the whole 2k epoxy route, squirt the back of the plate and the panel before putting it back on. Just clean it off where you want to weld.
Cheers.
#44
Covert
-
- Members
-
- 1,987 posts
Forum Fixture
- Location:In my LH
- Car:LH
- Joined: 08-November 13
Posted 03 February 2015 - 08:41 PM
Thanks for the heads up, I'll check those sealing products out
Yep going 2K Epoxy, was gonna use a cheap etch temporarily over the bare stuff untill I finish rust repairs, but yeah will need something more permanent between the plate and panel before I weld back on
Yep going 2K Epoxy, was gonna use a cheap etch temporarily over the bare stuff untill I finish rust repairs, but yeah will need something more permanent between the plate and panel before I weld back on
#45
UCANG
-

- Members
-
- 448 posts
Forum Fan
- Name:Ang
- Location:Adelaide, South Australia
- Car:UC Hatch, UC Sedan, VL Turbo, ForFour Brabus, 2010 Fatboy
- Joined: 28-January 06
Posted 04 February 2015 - 02:17 PM
Looks like a nice clean body Mav...
Wouldn't a quality zinc rich weld thru primer be good also? That way you don't actually have to remove any product for where the welds are going to be. Saves rusting that is pin pointed to the area of the pool weld. Having said that, welding on clean bare metals gives the best results anyway.. Either way, properly sealed won't cause you any problems.
Heres to better than factory repairs!
Carry on
#46
Covert
-
- Members
-
- 1,987 posts
Forum Fixture
- Location:In my LH
- Car:LH
- Joined: 08-November 13
Posted 04 February 2015 - 11:27 PM
Thanks Ang, overall body is pretty good. It does have rust in all the common areas but nothing that cant be fixed.
I might experiment with some weld thru primer on some scrap and see how it goes as I havent used it before.
Have you had success with any particular brand?
#47
SmacT
-

- Members
-
- 907 posts
Forum Fixture
- Name:Sam
- Location:Sydney
- Car:LX 4dr 383, TKX, BW
- Joined: 24-December 08
Posted 05 February 2015 - 04:51 PM
Mav, I have used Upol weld thru primer (bright green can) successfully. It is only available from panel beater suppliers, I paid around $23 a can. It doesn't weld as well as bare, clean steel, but pretty close! I'm no panel beater, either, but the guy who recommended it is. :-)
#48
Covert
-
- Members
-
- 1,987 posts
Forum Fixture
- Location:In my LH
- Car:LH
- Joined: 08-November 13
Posted 06 February 2015 - 01:08 AM
Thanks Sam i'll check it out
#49
Covert
-
- Members
-
- 1,987 posts
Forum Fixture
- Location:In my LH
- Car:LH
- Joined: 08-November 13
Posted 14 February 2015 - 12:28 AM
I managed to spend some time on the car in the last couple of days and continued with my engine bay repairs.
Bear in mind these are my first attempts at car panel rust repairs and any comments or sugestions would be most welcome.
Apart from not looking as pretty as some of the welding ive seen on this site, ive been having quite a few pin holes appearing once i grind the welds down.
#50
Bigfella237
-

- Members
-
- 4,373 posts
Socially Distant
- Name:Andrew
- Location:Far South Coast of NSW
- Car:(s) not as many as I'd like but more than I've got space for!
- Joined: 31-October 14
Posted 14 February 2015 - 05:25 AM
G'day Mav,
You can see from your 4th photo (looking at the other side of the weld) that you aren't getting very good penetration. You can still clearly see a gap between the two panels meaning that the weld is just 'covering' the join, so when you grind it flat you're exposing the join again, hence the pinholes.
Looks like you need to increase the amps and maybe decrease the wire speed, generally speaking you want to use the maximum amps you can get away with without blowing too many holes. If you're not blowing any holes in the panel then it's likely the amps are set too low.
With the wire speed, you want to use the lowest setting you can get away with without the weld stopping and starting, the less wire you add the better (and the less grinding you'll have to do later).
If you're welding a nice thick piece of new steel to a thin old rusty bit, you'll find that the rusty bit will burn away before you can get a decent weld into it, normally I'd say that in this case you maybe should've removed more of the rusty panel and installed a bigger patch, but that's not always possible so what you can do instead is adjust the sideways angle of the welding torch to direct more heat into the thicker metal.
Also, try not to do long continuous welds or you'll end up with warped panels, it's maybe not so bad with this panel because the pressings brace it somewhat but once you get into big flat sections of bodywork you need to be extra careful. Once tacked in, just do something like a 20mm weld, then move to another side of the patch and do another 20mm weld and so on until all your 'stitches' join up.
Have a look at the back of the weld (easily accessible here) to check your penetration, you should see that molten metal has completely filled the gap and probably needs a touch-up with the grinder on this side as well.
Lastly, throw a straight-edge (ie a steel ruler) across the inside of this repair when you're done to make sure it's flat in both directions, I reckon you might have trouble with the bonnet hinge binding if it isn't?


0 user(s) are reading this topic
0 members, 0 guests, 0 anonymous users

