


Stav's LC 'GTR' Project
Started by
_73LJWhiteSL_
, Jul 02 2007 05:39 PM
118 replies to this topic
#76

rodomo
-

- Members
-

- 18,063 posts
To advertise here, call 13TORANA
- Name:R - O - B Dammit!
- Location:Way out west of Melbourne Awstraylya
- Joined: 10-December 05
Posted 01 November 2012 - 07:44 PM
By the time you finish this one you could buy the white one back and fix it too?
#77
_73LJWhiteSL_
_73LJWhiteSL_
-

- Guests
Posted 01 November 2012 - 09:00 PM
Thanks Ryan. 
Rob, If i knew then what I do now... but thats life isn't it?
Nah the guy who brought it off me would proabaly want $10K for it now. I'm gonna stick at this one and drive it to Toranafest 2013.
Oh by the way managed to spend a few hours on the brace tonight.

Steve
Rob, If i knew then what I do now... but thats life isn't it?
Nah the guy who brought it off me would proabaly want $10K for it now. I'm gonna stick at this one and drive it to Toranafest 2013.
Oh by the way managed to spend a few hours on the brace tonight.
Steve
Edited by 73LJWhiteSL, 01 November 2012 - 09:03 PM.
#78
_73LJWhiteSL_
_73LJWhiteSL_
-
- Guests
Posted 07 November 2012 - 10:35 PM
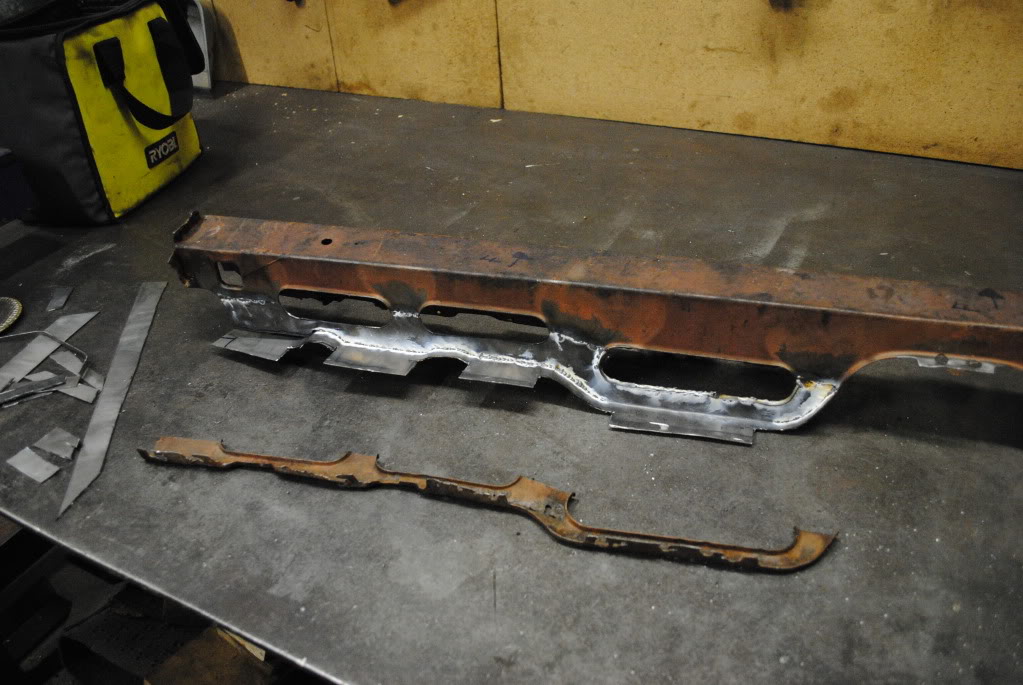
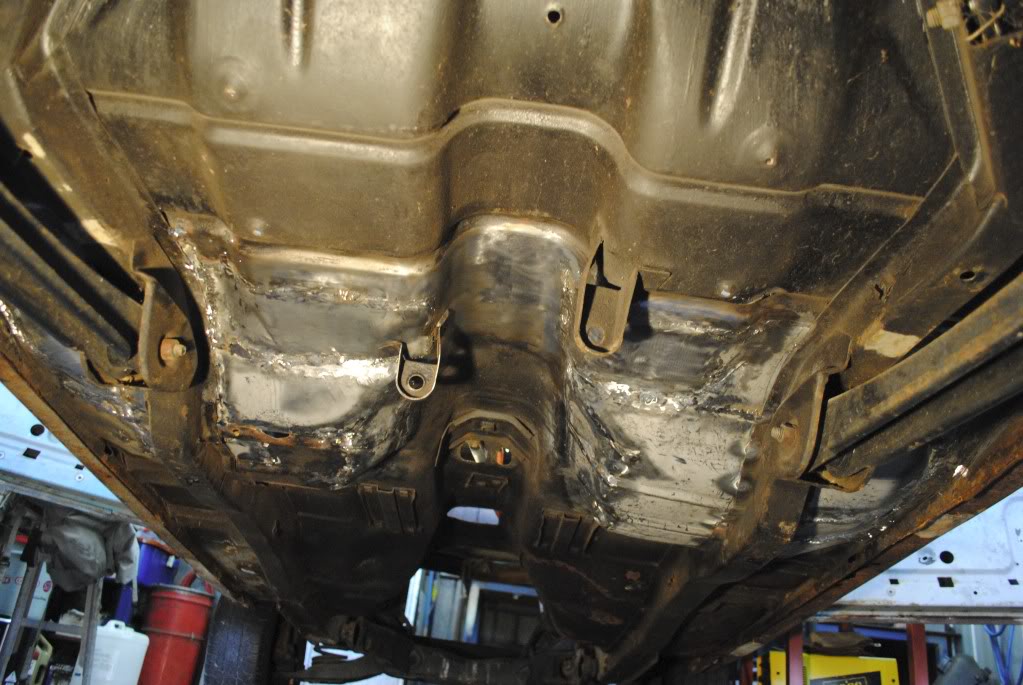
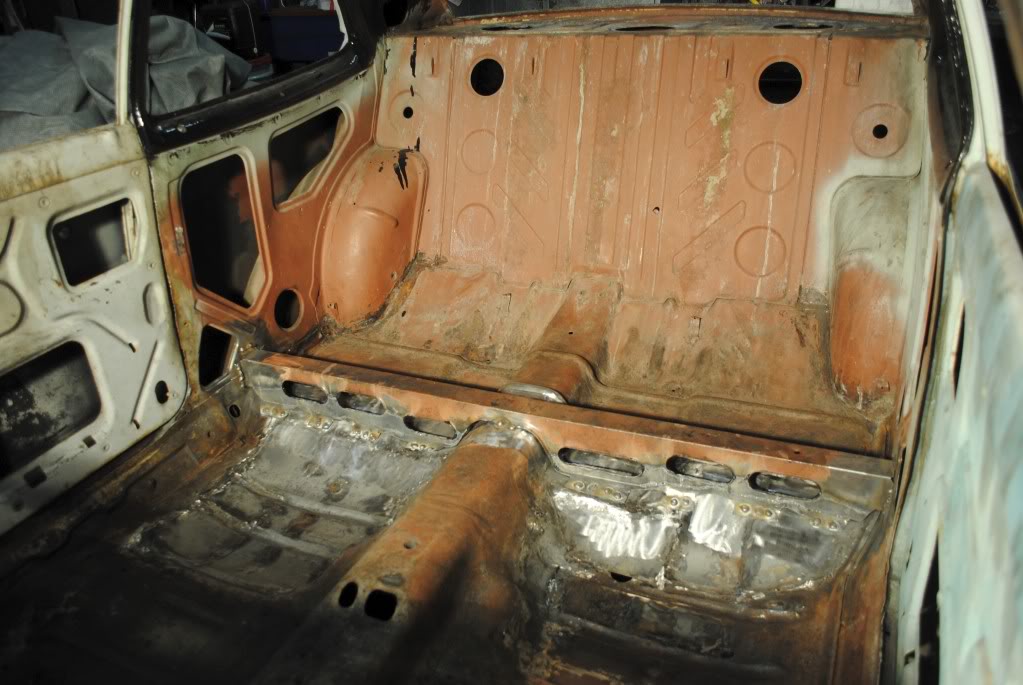
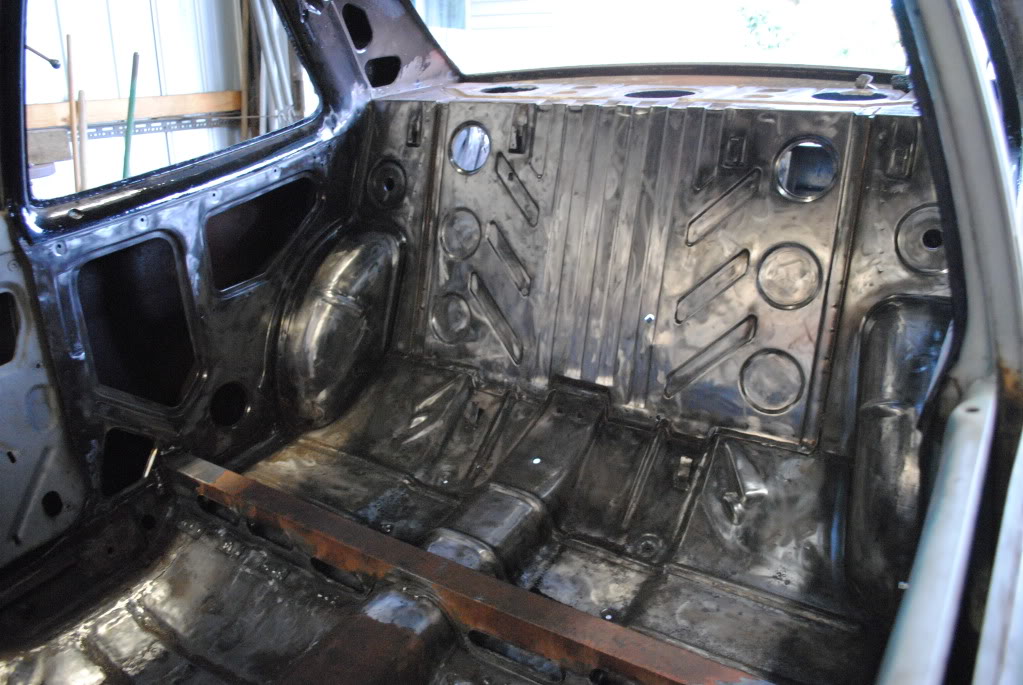
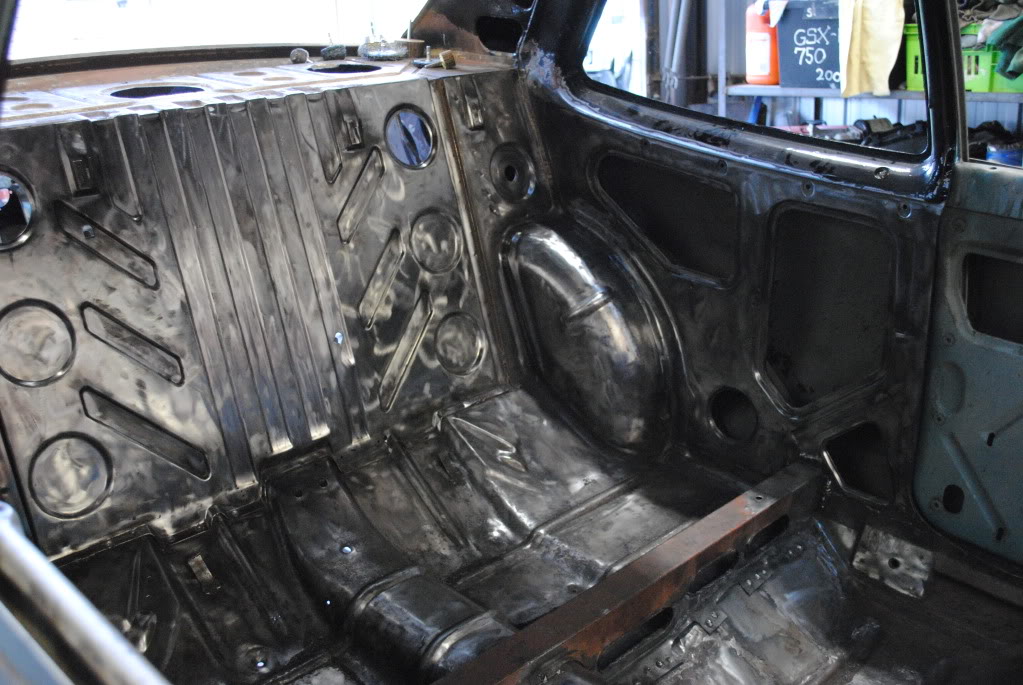
After a big weekend and all Cup day the brace is back in. Tomorrow I am going to Vicroads to get the Surrogate Chassis number which should finally mean registration once the rust is fixed and its painted and assembled.
Heres the pics.
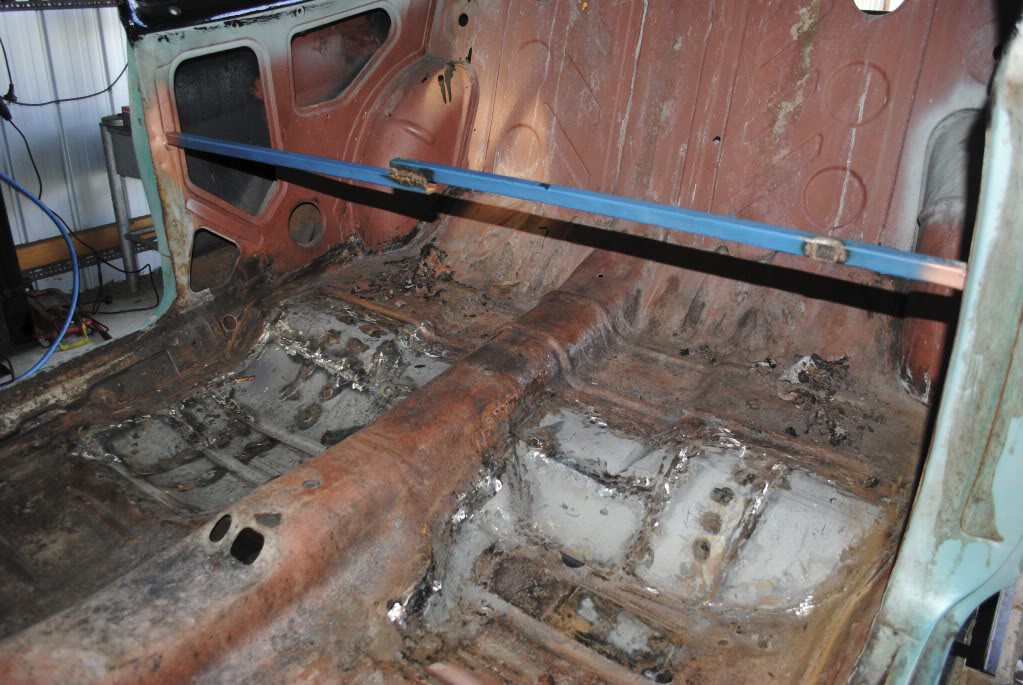
Cleaning the seal sealer out of the rear floor in prep for paint
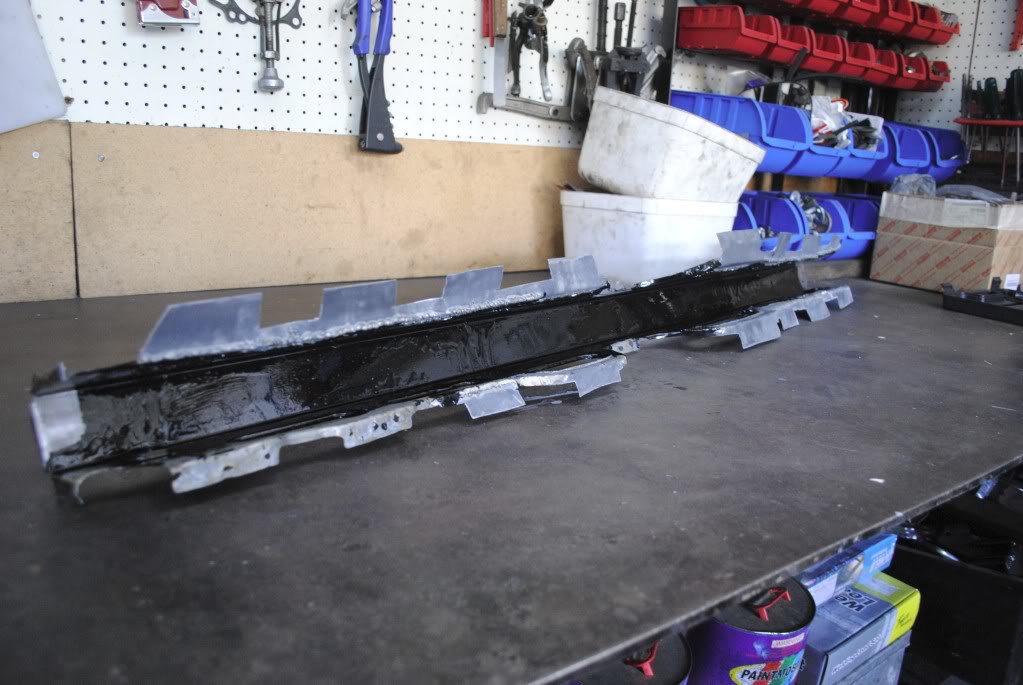
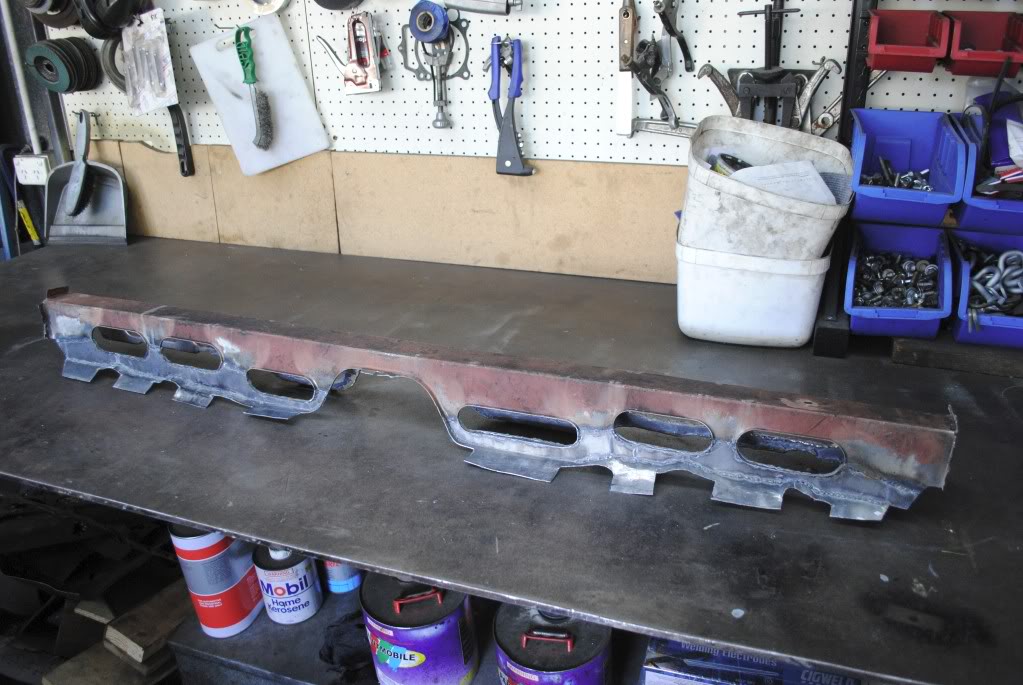
Inside of Floor brace painted with KBS RustSeal
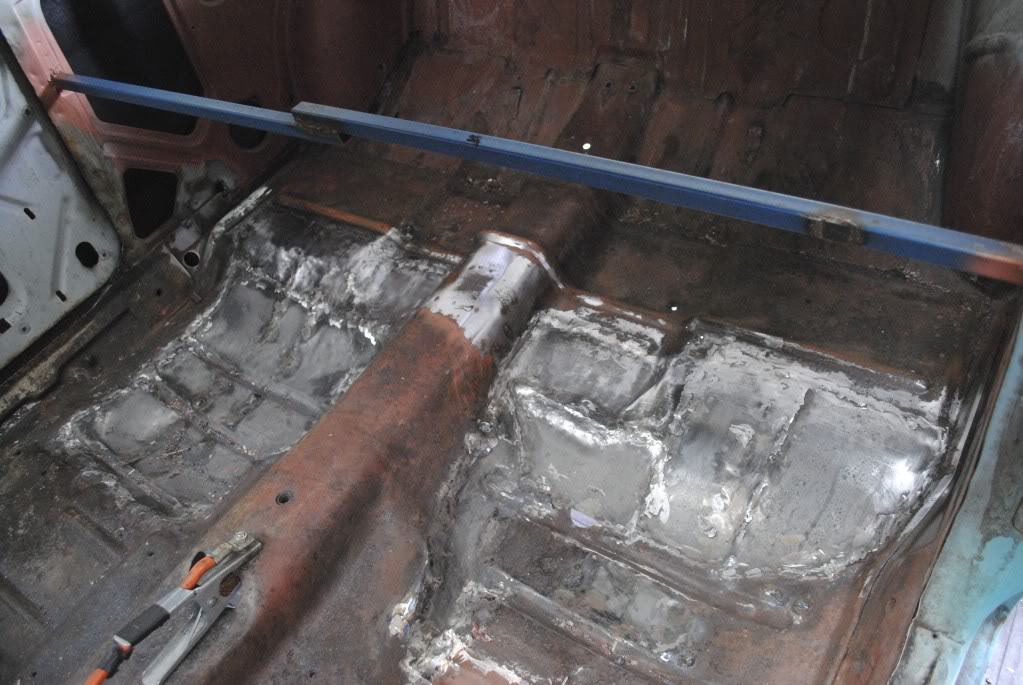
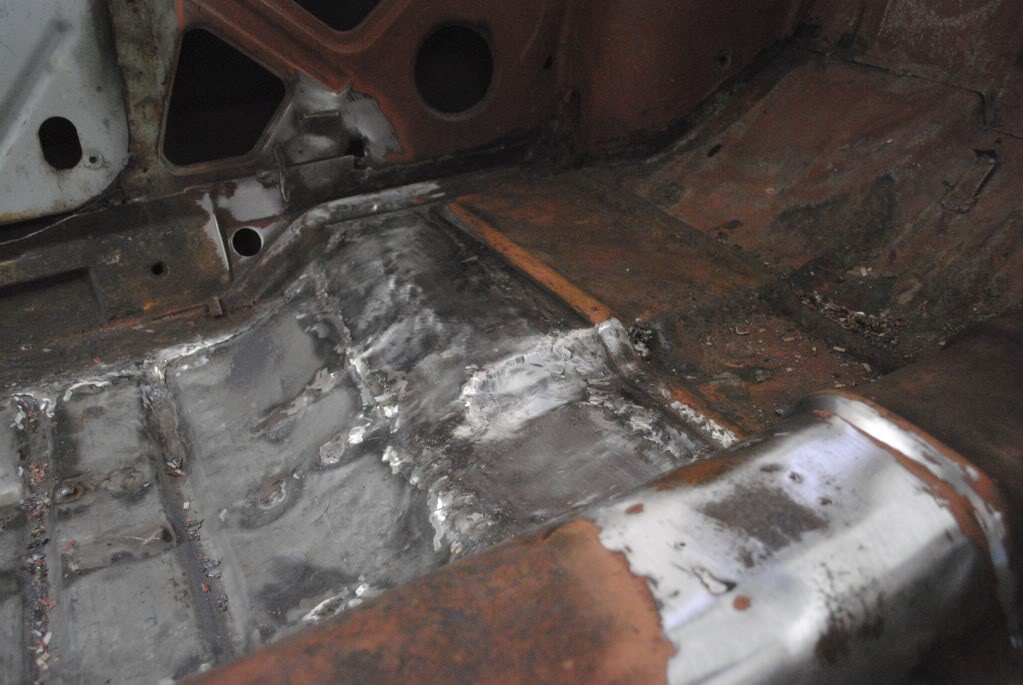
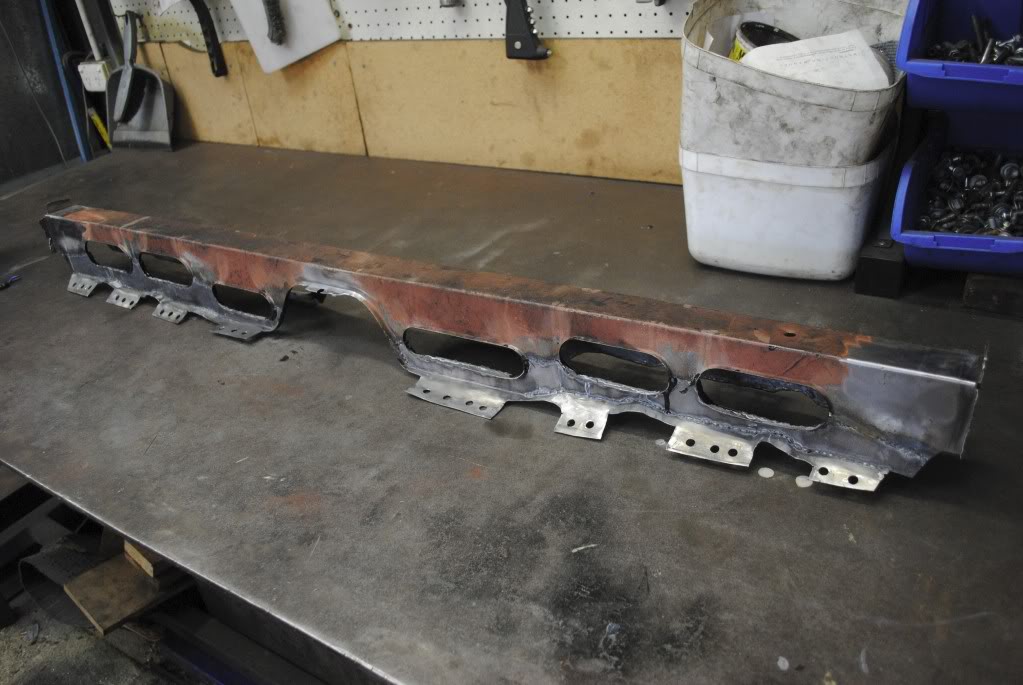
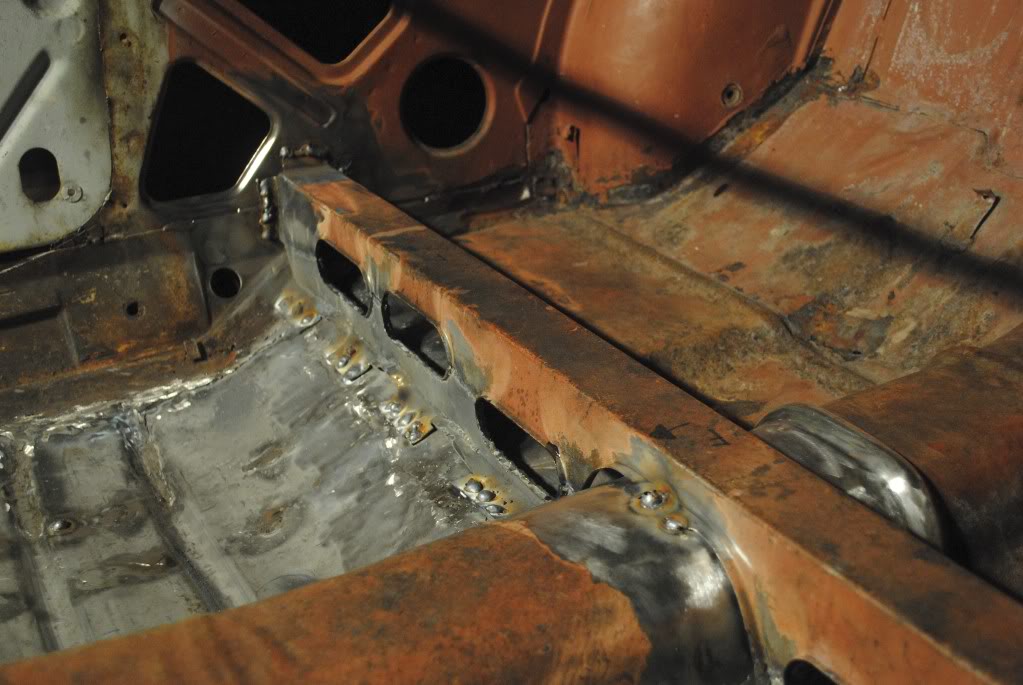
Holes drilled for Plug welds.
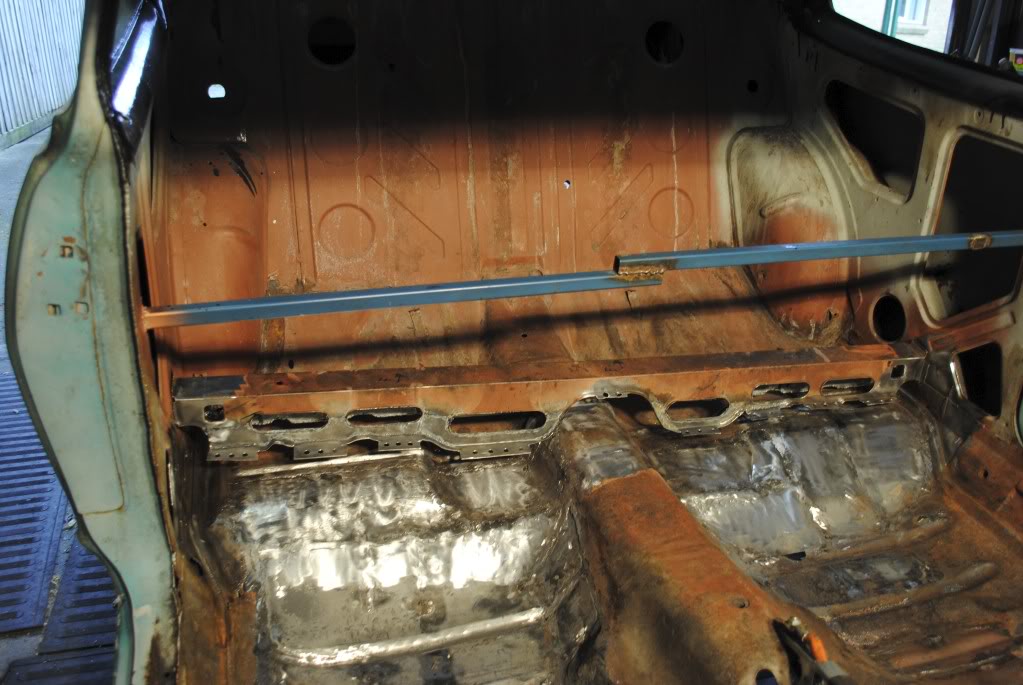
Just for interests sake i sat the brace in round the rong way to see if the tunnel was central. It appears it is not.
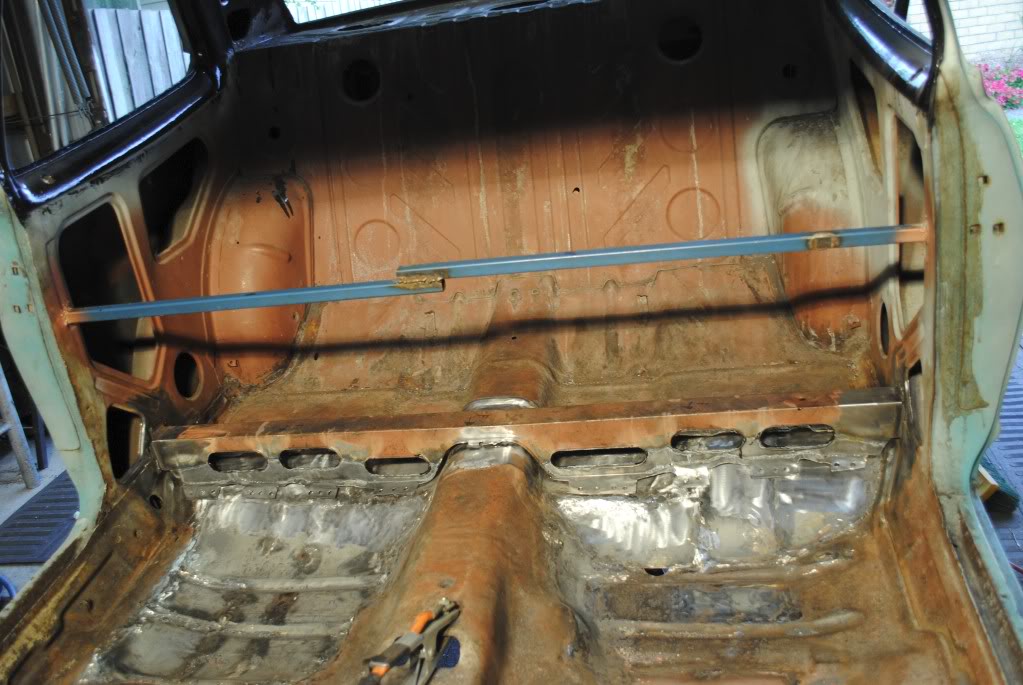
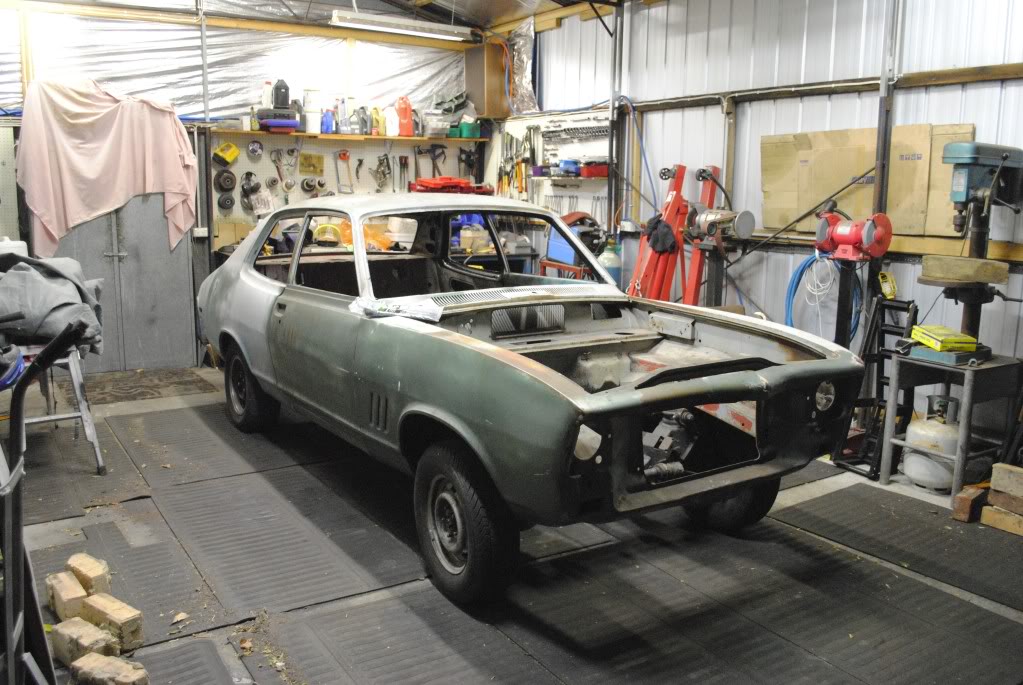
First off the ramps back on the ground in 3 months.
Brace in and welded. Temporary brace removed.
Steve
Heres the pics.
Cleaning the seal sealer out of the rear floor in prep for paint
Inside of Floor brace painted with KBS RustSeal
Holes drilled for Plug welds.
Just for interests sake i sat the brace in round the rong way to see if the tunnel was central. It appears it is not.
First off the ramps back on the ground in 3 months.
Brace in and welded. Temporary brace removed.
Steve
#79
_73LJWhiteSL_
_73LJWhiteSL_
-
- Guests
Posted 19 November 2012 - 08:14 PM
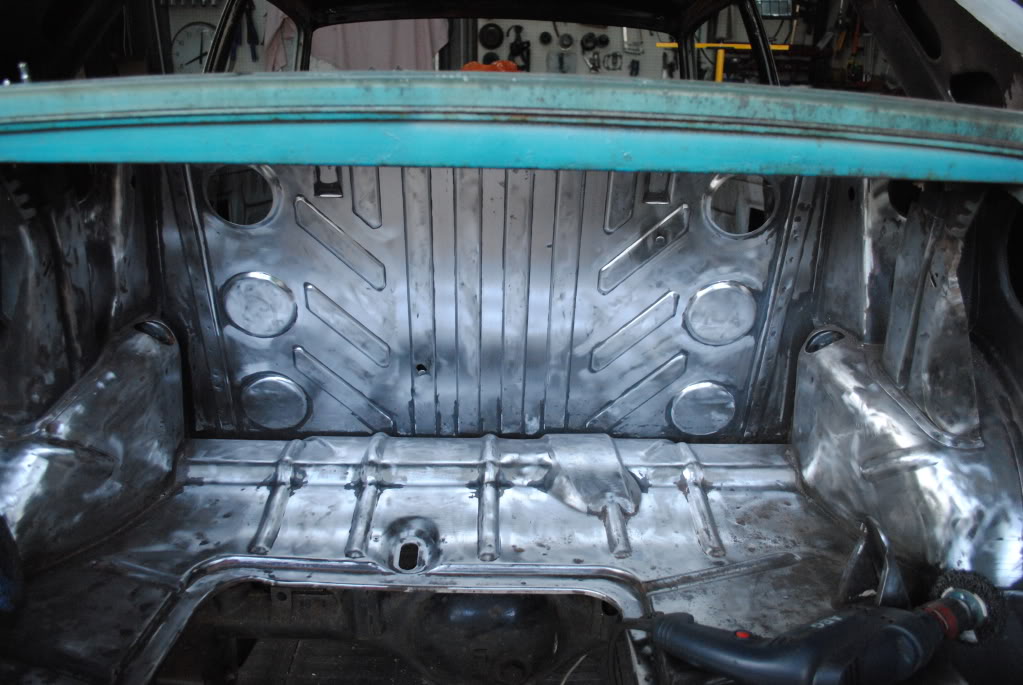
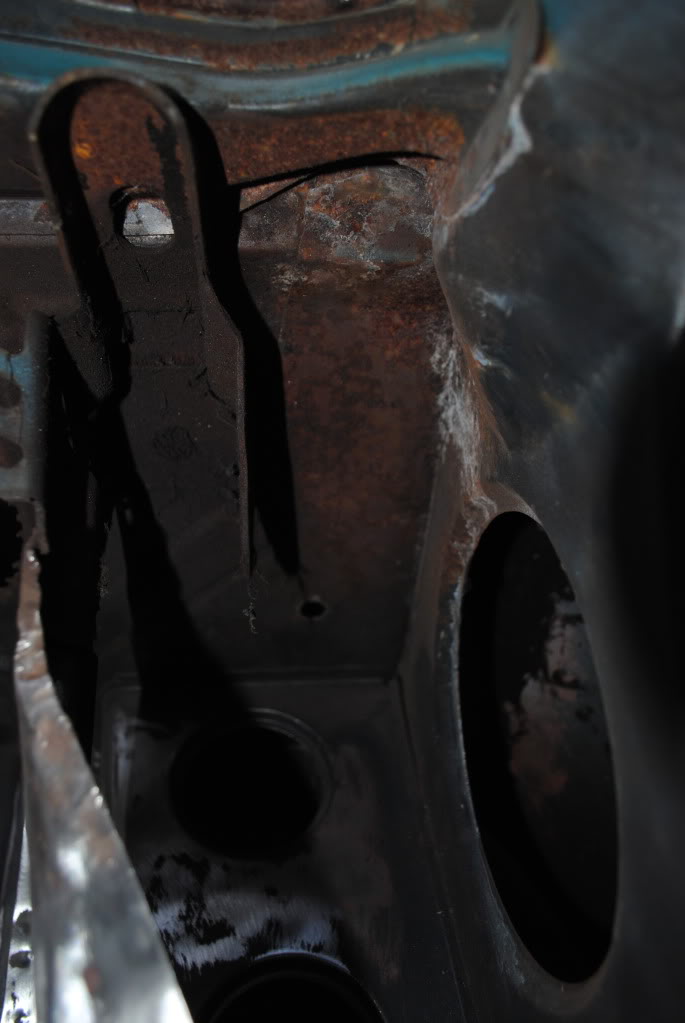
Bit more of an update, I am stripping the rear floor and will paint it all with KBS RustSeal. Ended up starting on the boot as well, as the boot wall has rust down the bottom. Gonna do it all in KBS. Pics:
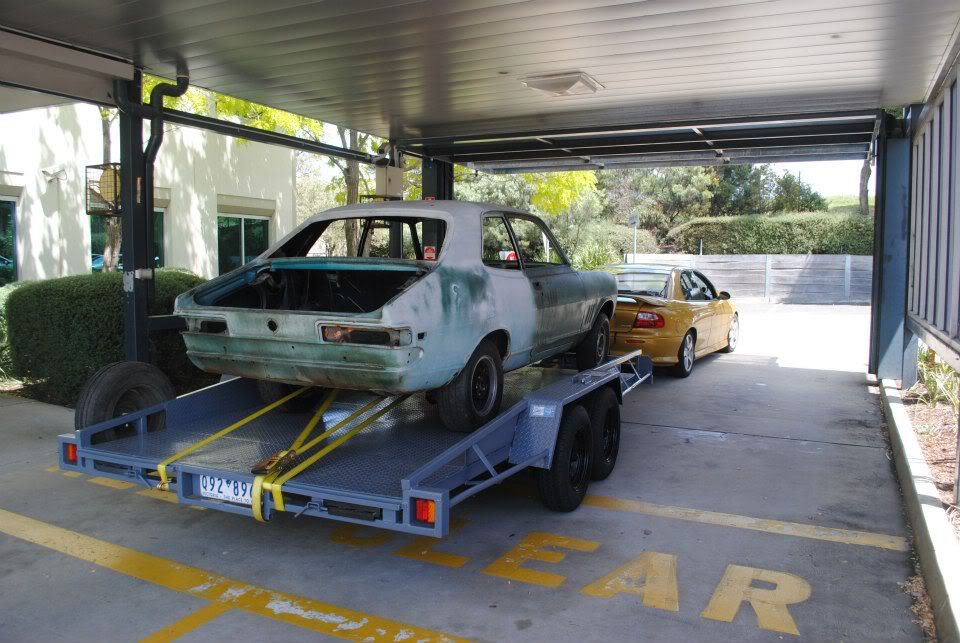
At VIcroads. In the end they deemed the chassis number good enough. Bit of a waste of a day, but thats life sometimes.

Stripping the inside of the car.
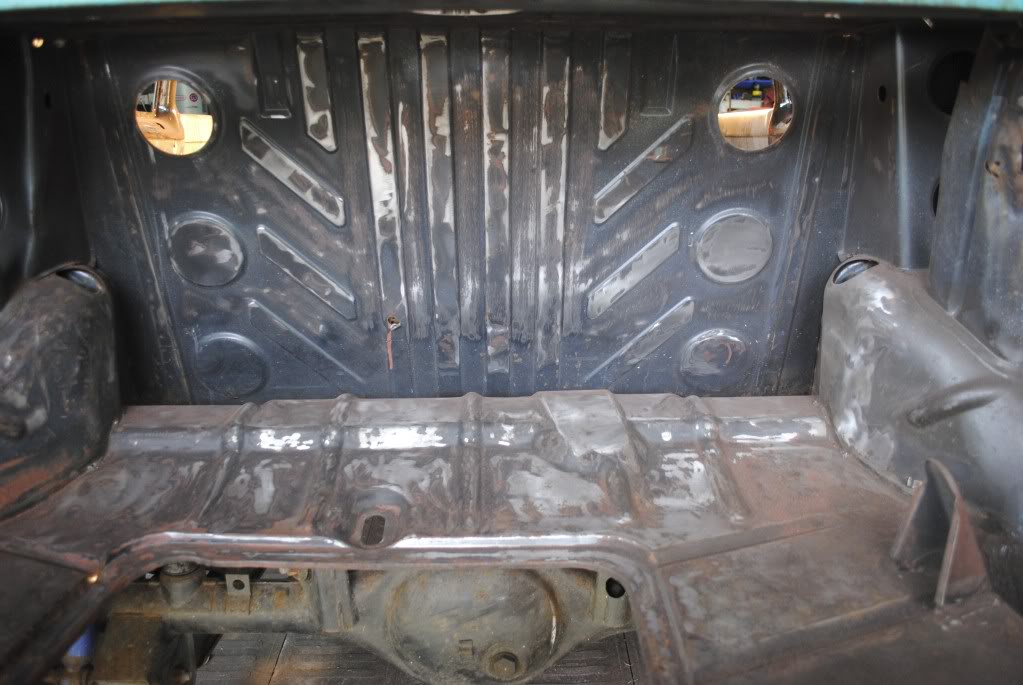

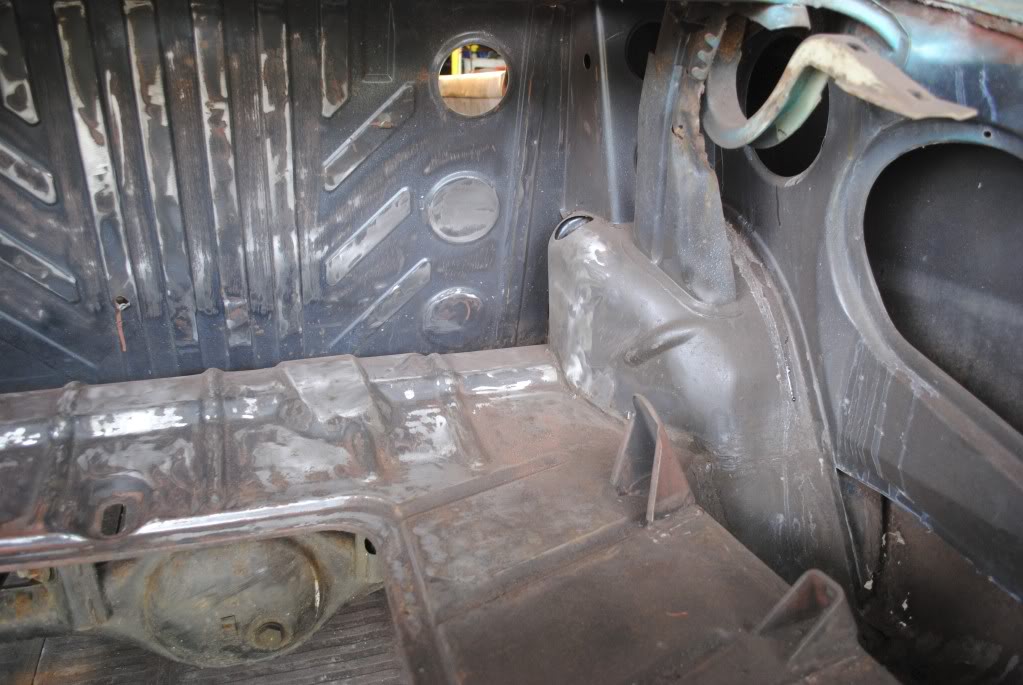
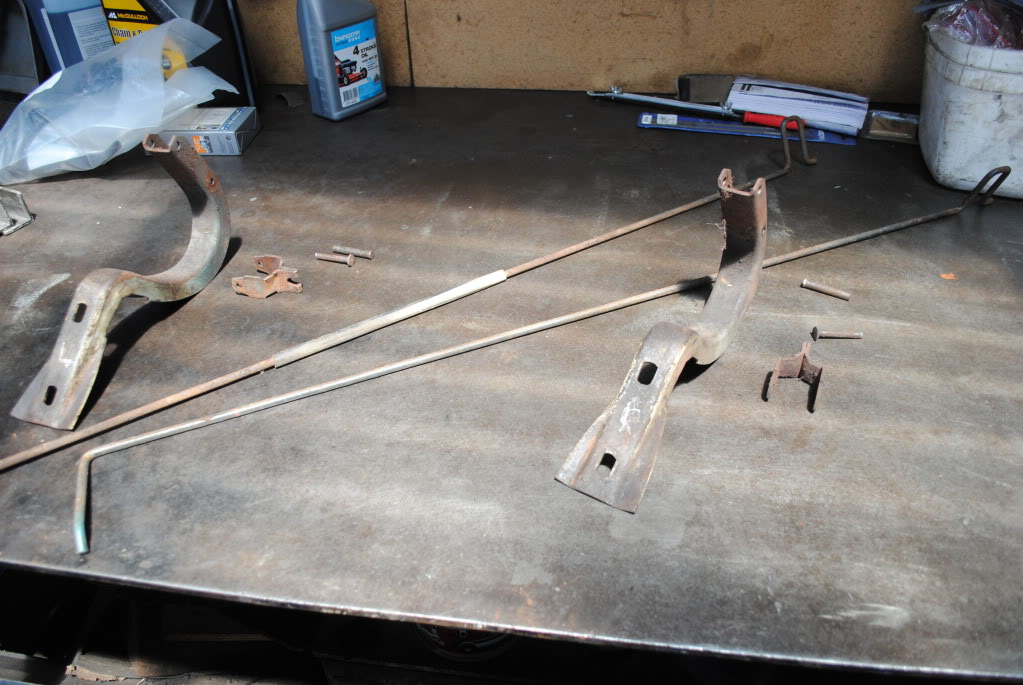
Note the damage to the inside of the boot. I removed the Hinges and have started panel beating.
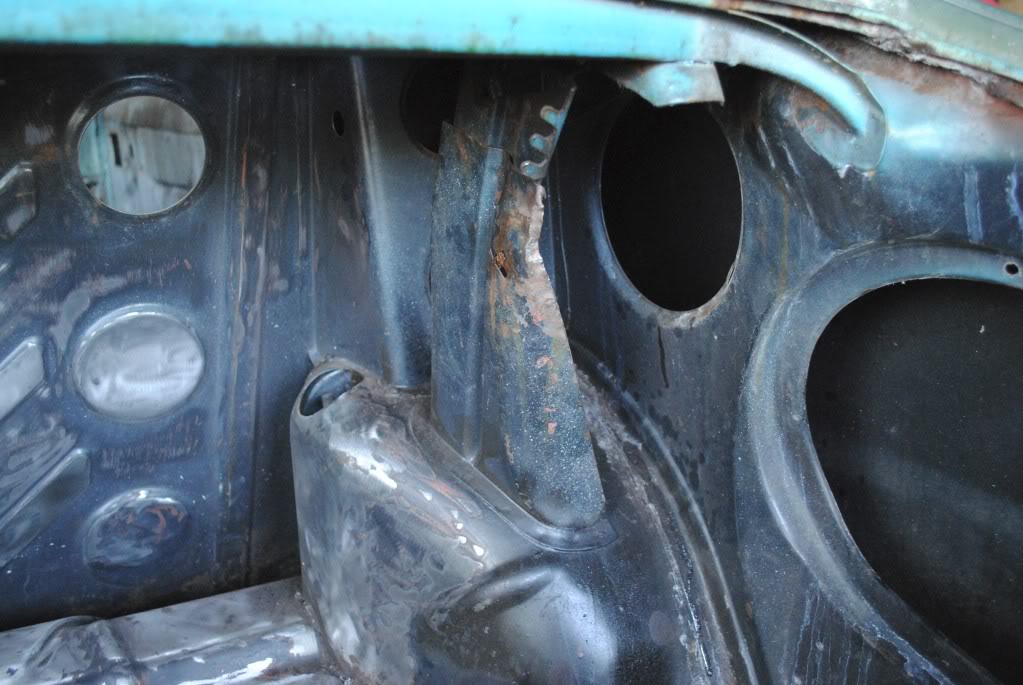
Drivers side looking a bit better.
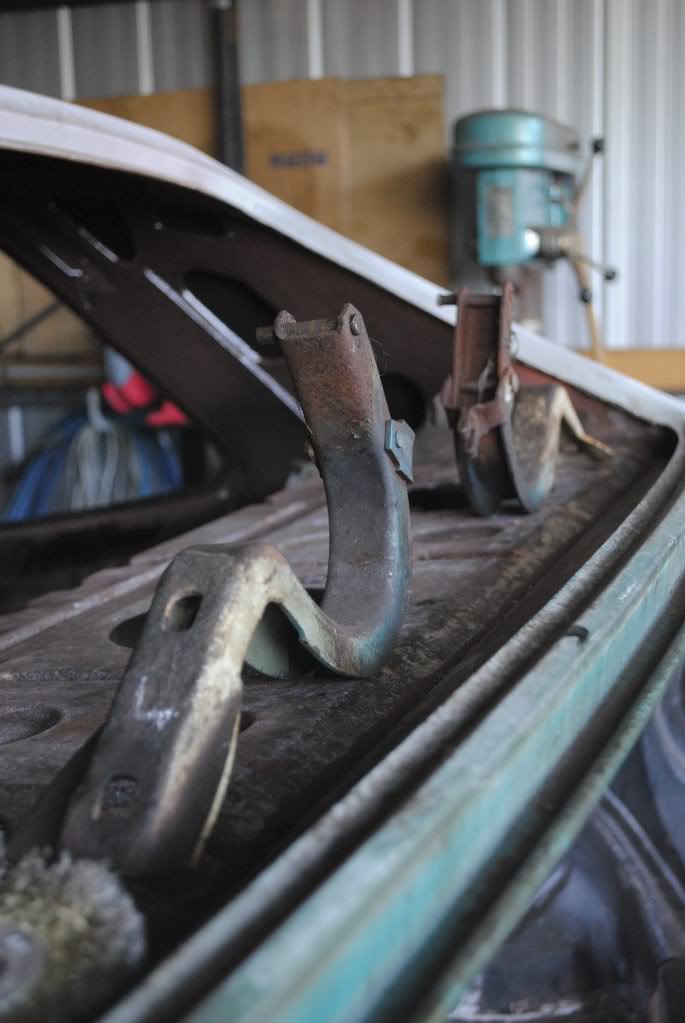
Hinges
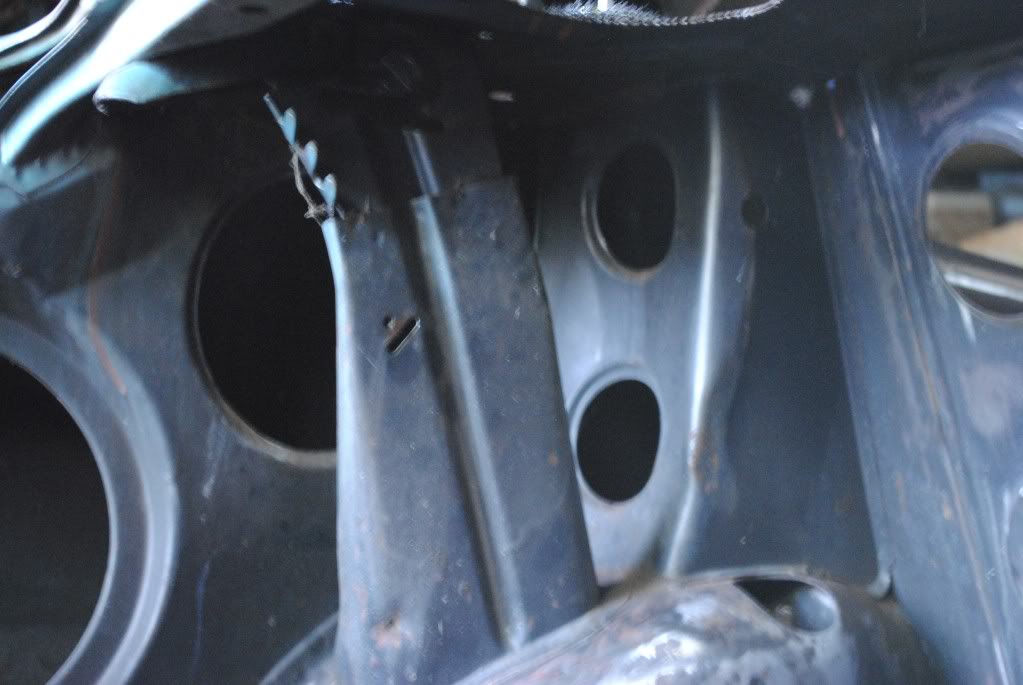
Another view of the damage.
Steve
At VIcroads. In the end they deemed the chassis number good enough. Bit of a waste of a day, but thats life sometimes.
Stripping the inside of the car.
Note the damage to the inside of the boot. I removed the Hinges and have started panel beating.
Drivers side looking a bit better.
Hinges
Another view of the damage.
Steve
#80
_73LJWhiteSL_
_73LJWhiteSL_
-
- Guests
Posted 06 December 2012 - 10:01 PM
Been a slow few weeks. Eatten through a couple of Strip-it Disks in the grinder, a couple of tiny flap wheels and a half a wire wheel. Also had to pull a few dints with the slide hammer.
And my missing seat belt brackets for the pracel shelf. The hole is there but not the bracket.
Steve
And my missing seat belt brackets for the pracel shelf. The hole is there but not the bracket.
Steve
#81
sibhs
-

- Members
-
- 2,724 posts
Lotsa Posts!
- Name:Martin
- Location:Perth
- Car:LJ Coupe S
- Joined: 27-July 12
Posted 06 December 2012 - 11:16 PM
Looking good Steve, that boot reminds of the Delorean from 'Back to The Future'.
Marty
Marty
#82
_mick74lh_
_mick74lh_
-
- Guests
Posted 08 December 2012 - 03:55 PM
Thats good Steve. So I take it registration will be all okay now then?
Love your work on this so far. Don't lose sight just keep at it.
Love your work on this so far. Don't lose sight just keep at it.
#83
_toranatime_
_toranatime_
-
- Guests
Posted 08 December 2012 - 06:38 PM
Thats looking good, i know how much work there is in stripping the inside of a car like that, i gave up and bought a sandblaster haha
Keep it up mate, you'll get there.
cheers
Keep it up mate, you'll get there.
cheers
#84
_73LJWhiteSL_
_73LJWhiteSL_
-
- Guests
Posted 11 December 2012 - 12:43 PM
Thanks guys. Rego Shouldn't be a problem, but i will need to supply the reciept and a Stat Deck detailing the cars history (or what i know of it) with the usual RWC.
Right now i have a fair bit of time to work on the car, so progress should be keep moving along. Plan is Paint all the inside of the car and underside with KBS RustSeal and then once thats all done work out how i am gonna spray the outside.
Steve
Right now i have a fair bit of time to work on the car, so progress should be keep moving along. Plan is Paint all the inside of the car and underside with KBS RustSeal and then once thats all done work out how i am gonna spray the outside.
Steve
#85
_73LJWhiteSL_
_73LJWhiteSL_
-
- Guests
Posted 20 December 2012 - 09:00 PM
Typical December madness, haven't had time to touch the car in a few weeks. Broke the drought today with some sandblasting. Seperated the hinges sandblasted them and the springs at dads work. Also made up my parcel shelf seat belt brackets.
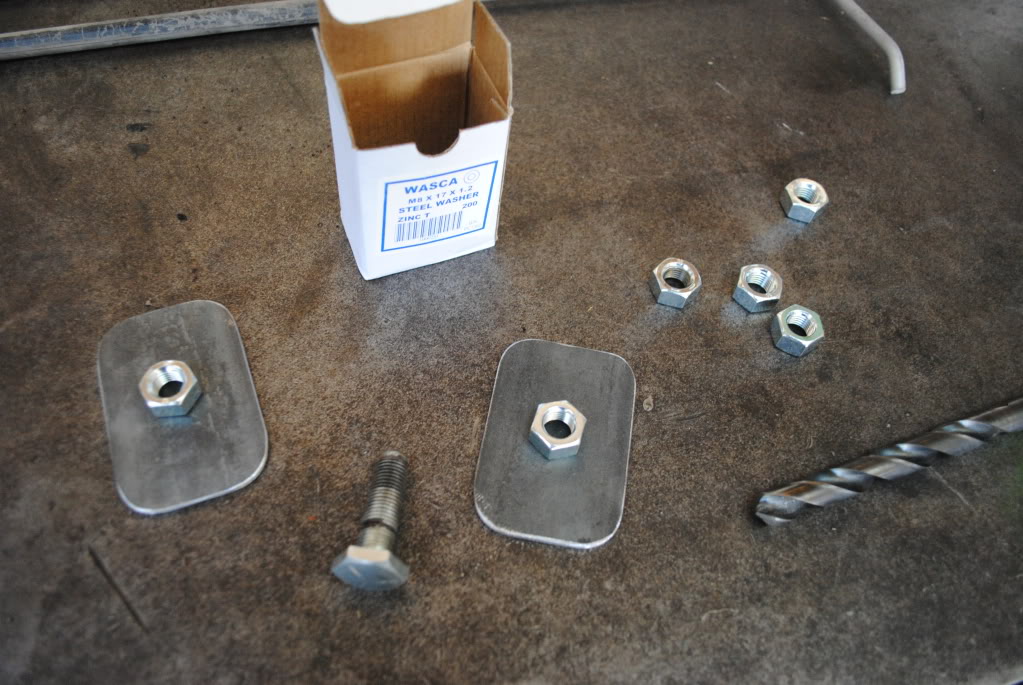
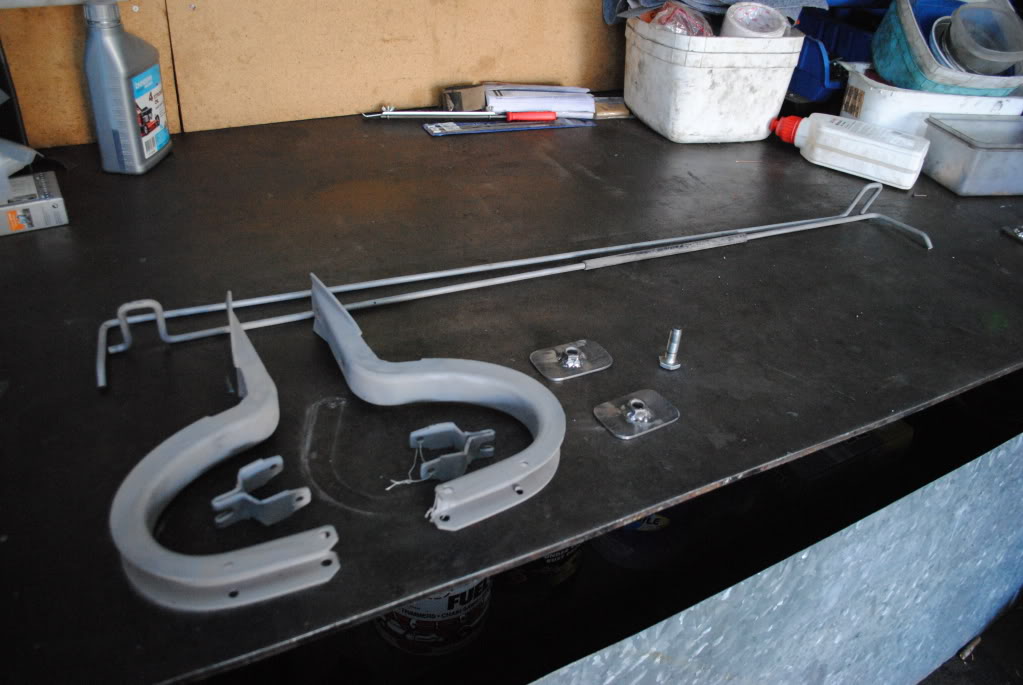
Steve
Steve
#86
_73LJWhiteSL_
_73LJWhiteSL_
-
- Guests
Posted 20 December 2012 - 09:30 PM
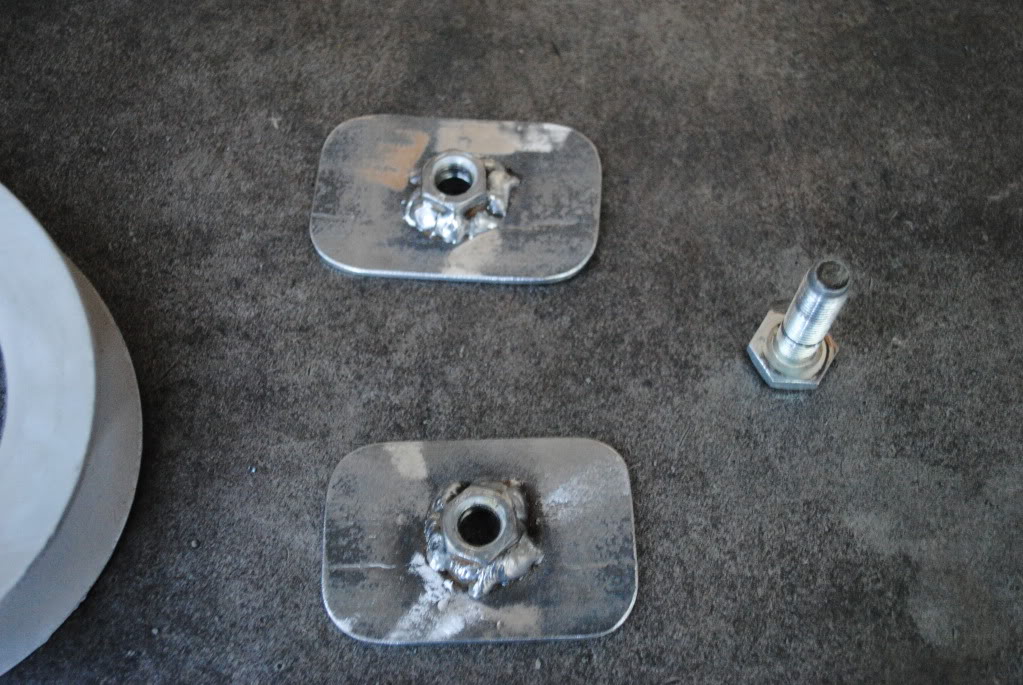
Some people have expressed concern about the welds in my seat belt brackets, so I am going to turn the mig up more, grind them down and redo them tomorrow. I wouldn't want to put someone elses life at risk.
Steve
Steve
#87
Peter UC
-
- Members
-
- 771 posts
Forum Fixture
- Location:Emerald Vic
- Joined: 08-November 05
Posted 21 December 2012 - 05:41 PM
I wouldn't concern yourself. The weld on the nut is purely to stop the nut turning when the seatbelts are done up, the welds do not take any load.
#88
sibhs
-
- Members
-
- 2,724 posts
Lotsa Posts!
- Name:Martin
- Location:Perth
- Car:LJ Coupe S
- Joined: 27-July 12
Posted 10 April 2014 - 10:34 PM
Hi Steve, you've gone quiet.
What's been happening?
Marty
#89
_73LJWhiteSL_
_73LJWhiteSL_
-
- Guests
Posted 25 December 2016 - 08:50 AM
This thread is pretty behind as those I have on Facebook will know I am a lot further along than this, however Its not painted or assembled yet!
After bare metalling the back seat, parcel shelf and inside boot area I painted with KBS using a paint brush. Results are quite good I am happy with it. It shouldn't rust again. Still a bit of repair work to be done in the rear floor (actually fixed already but pictures not uploaded yet).


I then made up a tool to remove the Door pins and remove the doors (Only took me three attempts to get a tool that worked!).


I will try and get this thread up to date, Car currently has no front guards, drivers sill and the outer layer of the drivers a pillar has been removed. for repair. Oh yeah and I got married and moved in with my wife back in 2015 so that kind of slowed things up a little. 
#90
rodomo
-
- Members
-
- 18,063 posts
To advertise here, call 13TORANA
- Name:R - O - B Dammit!
- Location:Way out west of Melbourne Awstraylya
- Joined: 10-December 05
Posted 26 December 2016 - 12:06 AM
Good work Steve and congratulations!
#91
_73LJWhiteSL_
_73LJWhiteSL_
-
- Guests
Posted 28 December 2016 - 05:08 PM
Thanks Rob! 
Once the doors were off next were the guards. Here I discovered when cutting through the body filler in the front between the nosecone and the guards this car had already had a hit in the front and repaired. Further investigation revealed the drivers guard was brazed on, and I suspect the nose cone, radiator support panel, drivers guard had been replaced. Also found a weld join through the boot floor in front of the taillights that would suggest the rear panel has been replaced.
Anyway pictures.


Appears to be 73 Guards. You can see the braze here.


Awesome sill repair...


Next A Pillar repair
#92
rodomo
-
- Members
-
- 18,063 posts
To advertise here, call 13TORANA
- Name:R - O - B Dammit!
- Location:Way out west of Melbourne Awstraylya
- Joined: 10-December 05
Posted 28 December 2016 - 10:56 PM
YUCK! That's worsorer than mine!
#93
_73LJWhiteSL_
_73LJWhiteSL_
-
- Guests
Posted 31 December 2016 - 10:16 AM
Good job i am up for the challenge then!
After removing the doors I braced the A and B pillars so i could star repair of the A Pillar. After reading Mikecatts threads i attacked the A pillar with the spot weld drill bit.

To be honest I kind of swisscheesed the A pillar outter getting it off...


Passenger side A pillar isn't any better


Plenty of bog and rust in the Drivers Sill

So it was removed to repair the inner sill.


Repairing A pillar Inner


Repairing front of inner sill


Drivers Floor pan (this already had a patch when I got it, but it had already rusted through and had not been welded to the chassis rails when it was installed)

More rust to repair on the inner sill further back

#94
_73LJWhiteSL_
_73LJWhiteSL_
-
- Guests
Posted 31 December 2016 - 10:35 AM
Finishing the rear floor


More grinding down welds from the previous patch in the drivers floor pan

#95
_73LJWhiteSL_
_73LJWhiteSL_
-
- Guests
Posted 02 January 2017 - 07:18 AM
Cleaned, treated and painted the chassis rail in KBS ready for the new drivers floor pan

Drivers floor pan ready for fitment. Things you learn over time. To get the floor to fit snuggly I used tek screws to hold it down and removed them progressively as I plug welded the floor pan in.


I have found the drivers wheel arch is rusted out and it appears the drivers guard has been replaced at some stage. I will fix the rust but am not going to replace the whole guard, as most of the repair work is satisfactory.


Rusted out rear guards


Starting repair of the outer layer of the A Pillar. I know it would probably be better to replace it, but I don't have space for any parts cars, and I believe this is a common rust spot so I am fixing what I have.


Removed the end of the cowl to make repairs to the A pillar easier (and it was rusted anyways). Should also give me good access to cleaning up the inside of the cowl area.


#96
_73LJWhiteSL_
_73LJWhiteSL_
-
- Guests
Posted 15 January 2017 - 08:52 PM
I have continued on my repair of the a pillar, patches number 4 and 5 added. No more rust left in this one, well except the bottom.


Test fitting the Rare Spares LC GTR guard to ensure fitement with the a pillar. Its nice to see a front guard on the car even if its just clamped on for the moment

Now onto the repair of the bottom of the a pillar. I was planning on using the end of the Rare Spares sill section, but it didn't quite go to plan. Considering the Rare Spares Sill replacement section now

Edited by 73LJWhiteSL, 15 January 2017 - 08:55 PM.
#97
lctriples
-
- Members
-
- 414 posts
Forum Fan
- Name:paul
- Location:melbourne
- Car:LC 2 door, HR prem wagon
- Joined: 02-April 15
Posted 16 January 2017 - 08:52 PM
Steve, just discovered your thread, great job you are doing, and it appears you are getting more confidence as work progresses. keep post's coming and what colour will you be painting the car?, cheers paul
#98
rodomo
-
- Members
-
- 18,063 posts
To advertise here, call 13TORANA
- Name:R - O - B Dammit!
- Location:Way out west of Melbourne Awstraylya
- Joined: 10-December 05
Posted 16 January 2017 - 08:58 PM
Steve is just a smarty britches Paul. Pay him no real attention.
#99
_73LJWhiteSL_
_73LJWhiteSL_
-
- Guests
Posted 16 January 2017 - 09:20 PM
Steve, just discovered your thread, great job you are doing, and it appears you are getting more confidence as work progresses. keep post's coming and what colour will you be painting the car?, cheers paul
I started with the floor because I wasn't very confident, but I've certainly learned a lot. To be honest getting exterior panels right does make me nervous. However if I have to use a little bit of body filler (read not 1" thick!) I will be happy. Paul I will be doing it as a Lina Mint GTR replica. Head overseas on Saturday for a couple of weeks so won't be anymore updates till mid Feb I suspect.
Steve is just a smarty britches Paul. Pay him no real attention.
Come on now Rob, I hear crickets and see spider webs in your thread. 
#100
lctriples
-
- Members
-
- 414 posts
Forum Fan
- Name:paul
- Location:melbourne
- Car:LC 2 door, HR prem wagon
- Joined: 02-April 15
Posted 16 January 2017 - 09:40 PM
Steve, Rob: nothing like a bit of friendly banter I say! Good colour choice, the main reason I asked is that I need to pick a colour myself and am steering towards cyan blue, but its always interesting to see what colour other people choose. Enjoy your well deserved holiday, and will keep an eye out for updates as they come through.


0 user(s) are reading this topic
0 members, 0 guests, 0 anonymous users

