Jump to content


- - - - -

My GTR Torana


  • Please log in to reply
206 replies to this topic

#151 _2runa_

_2runa_
  • Guests

Posted 07 July 2008 - 10:23 PM

Posted Image
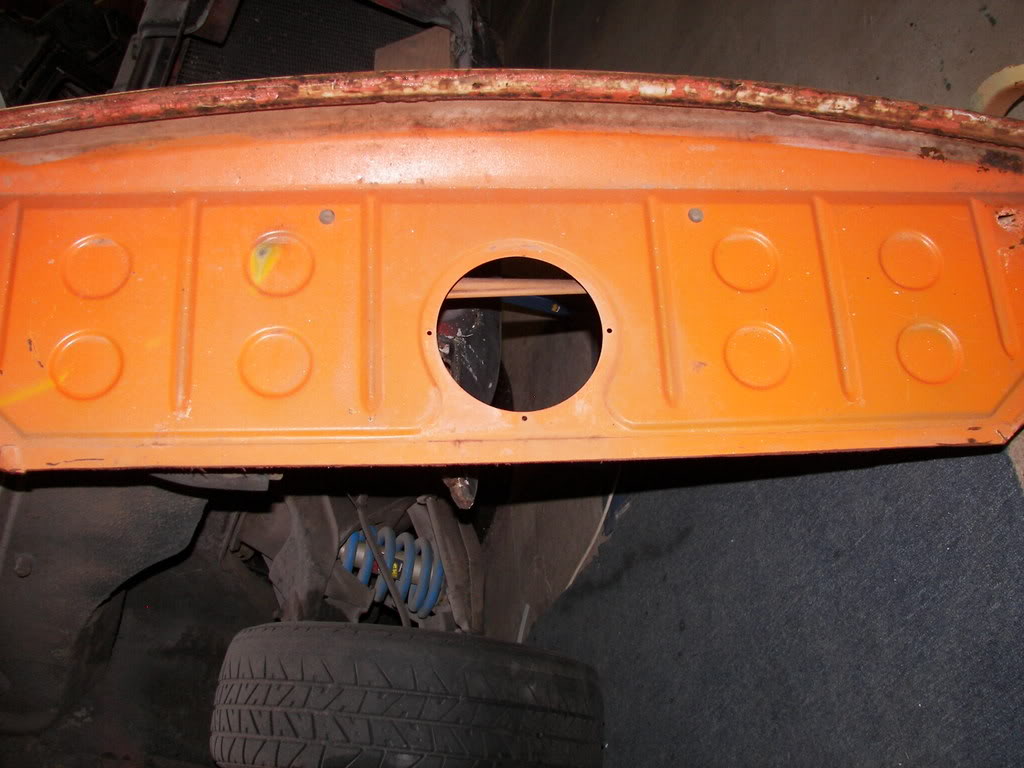
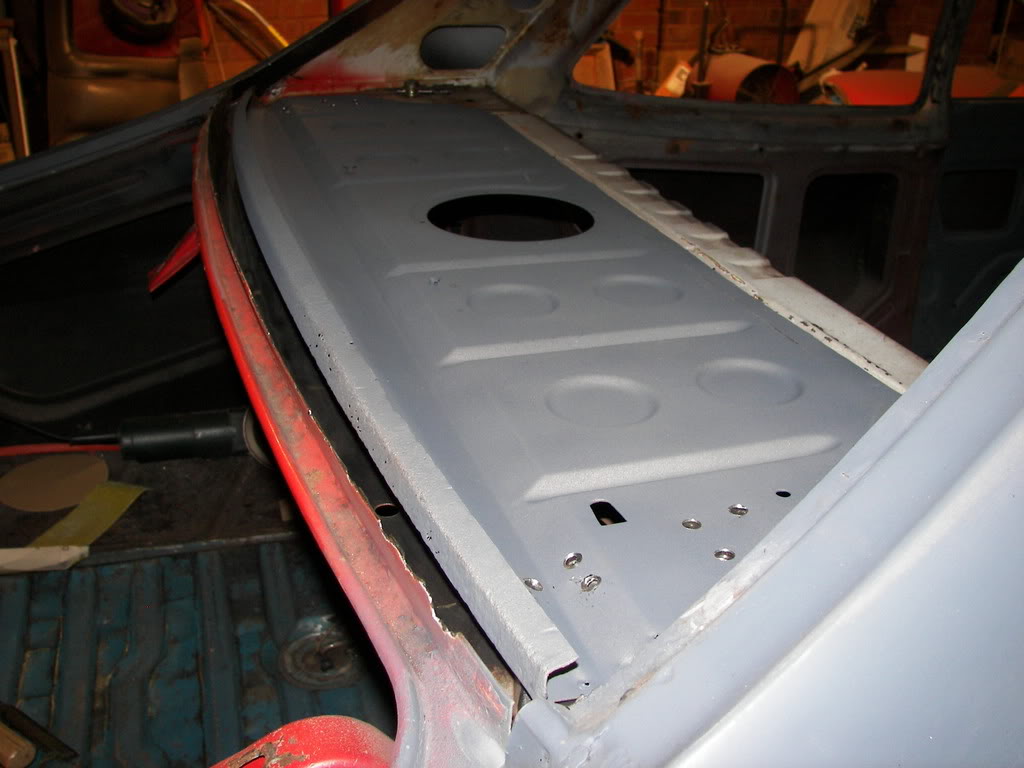
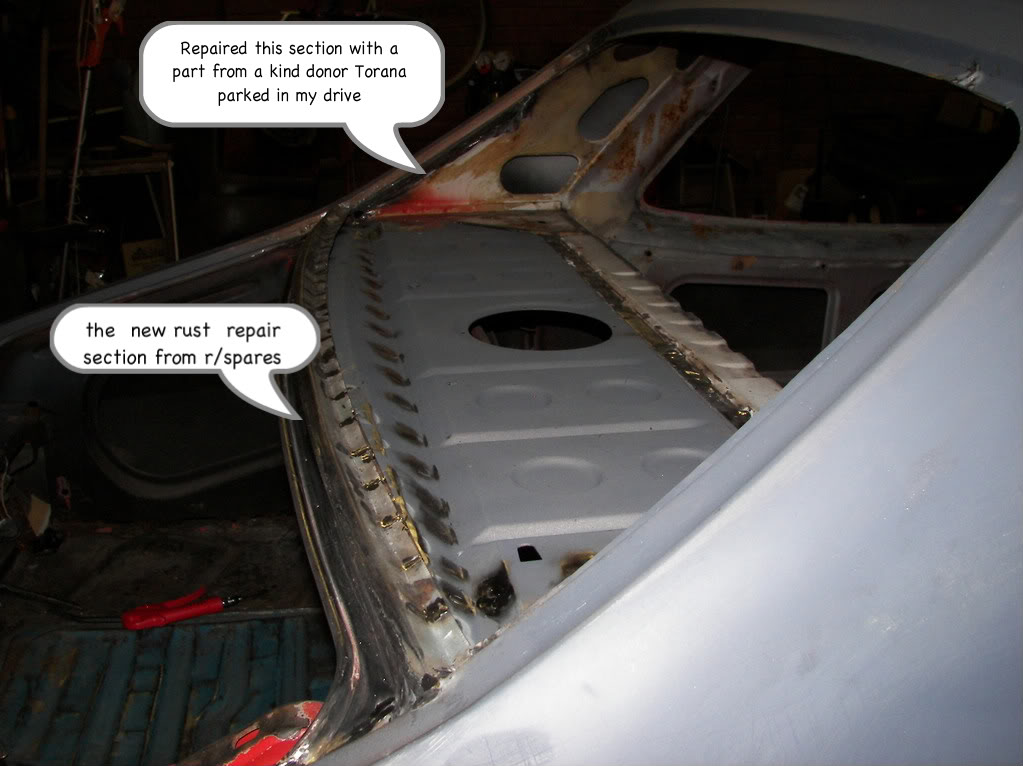
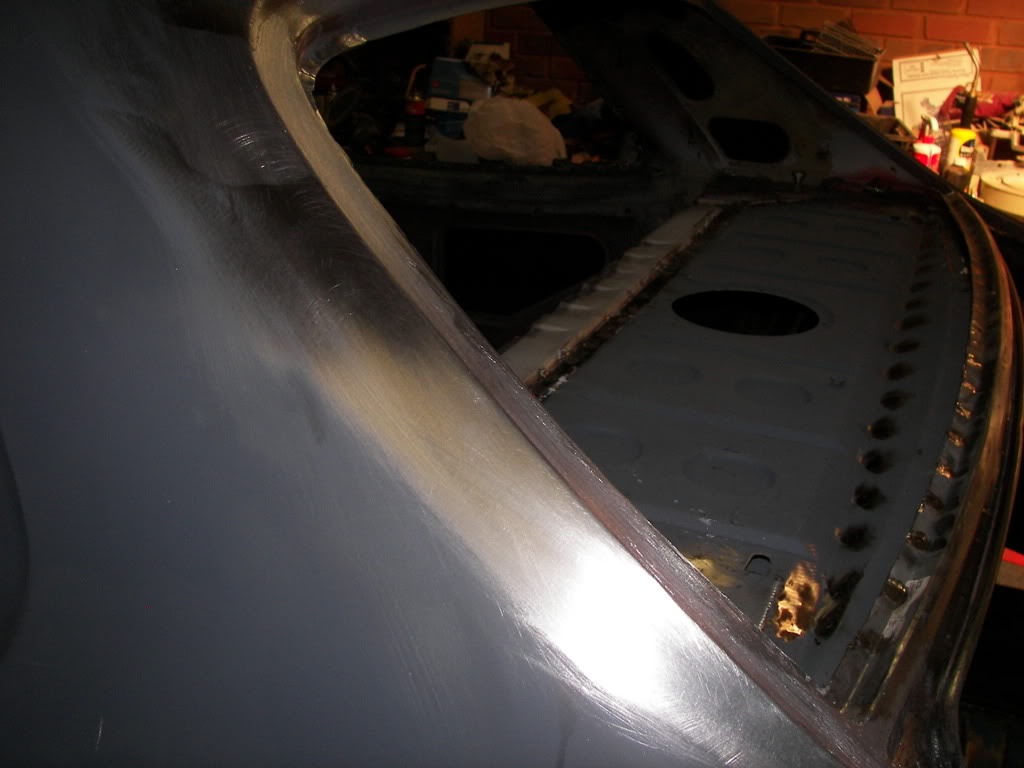
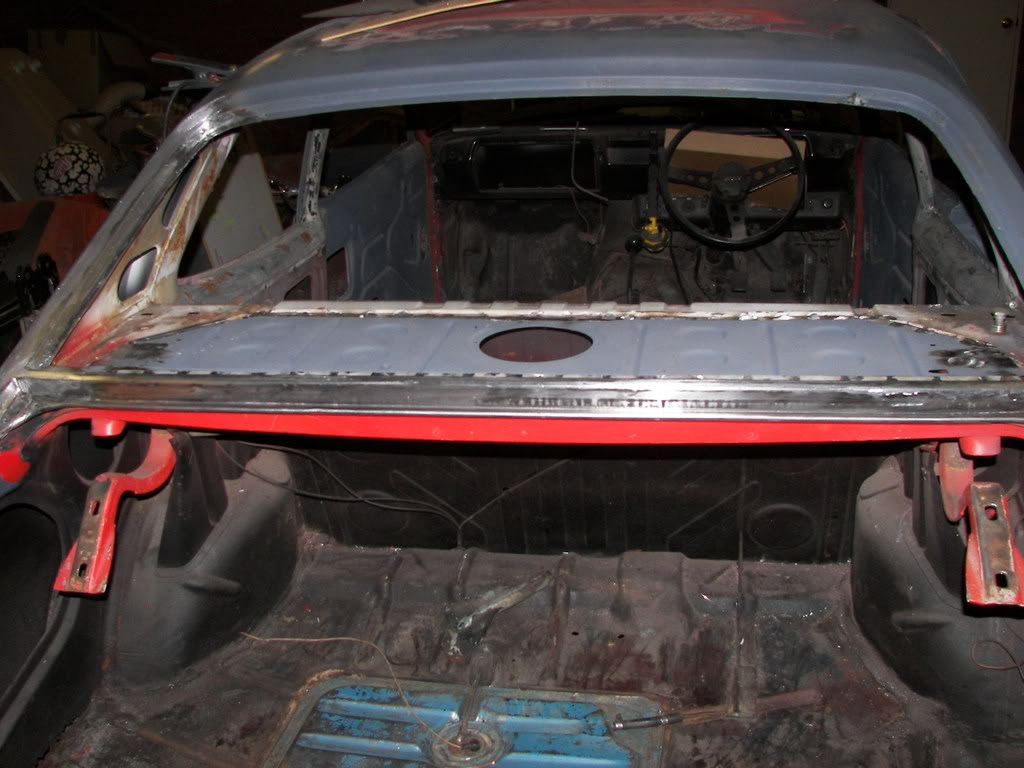
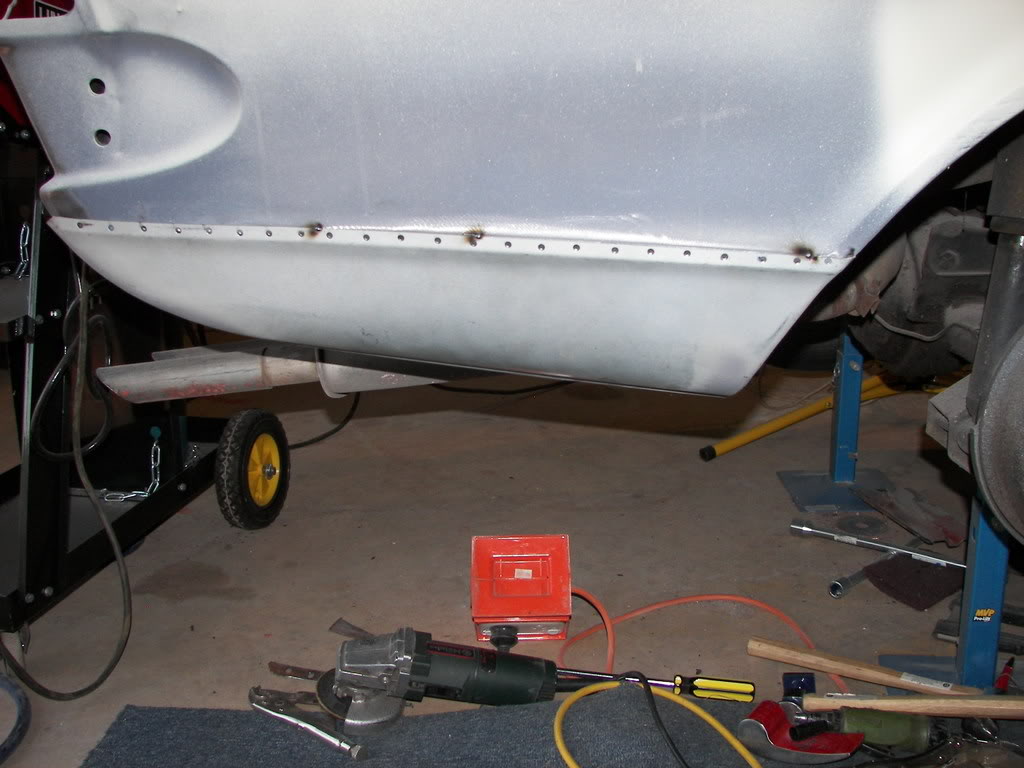
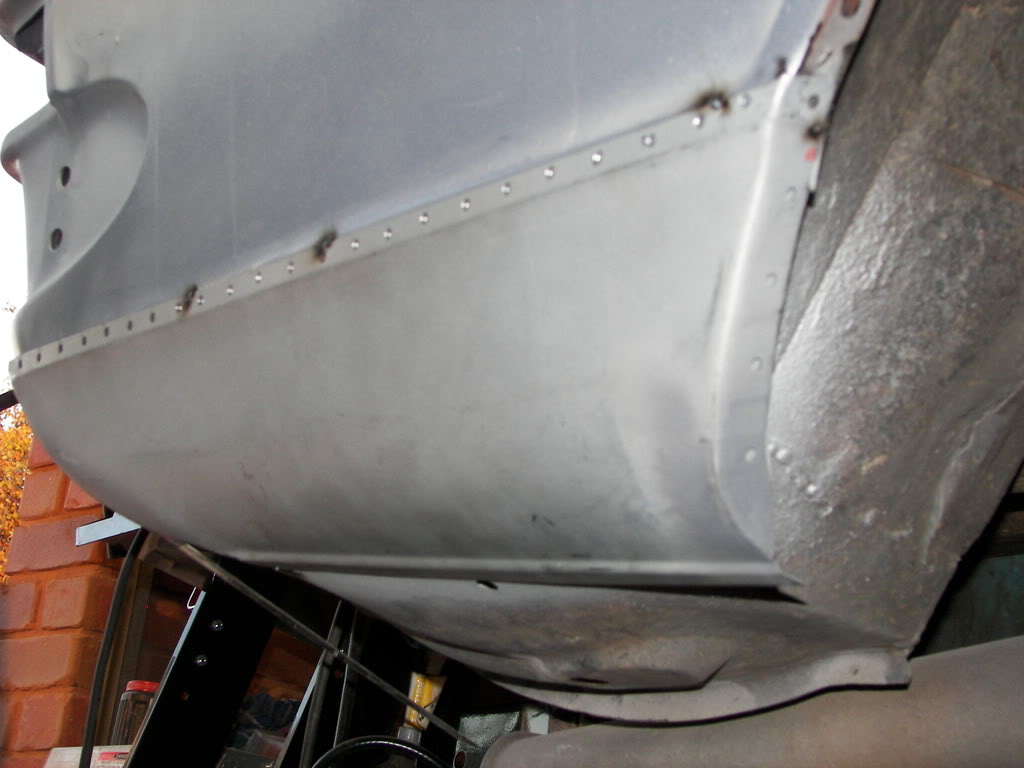
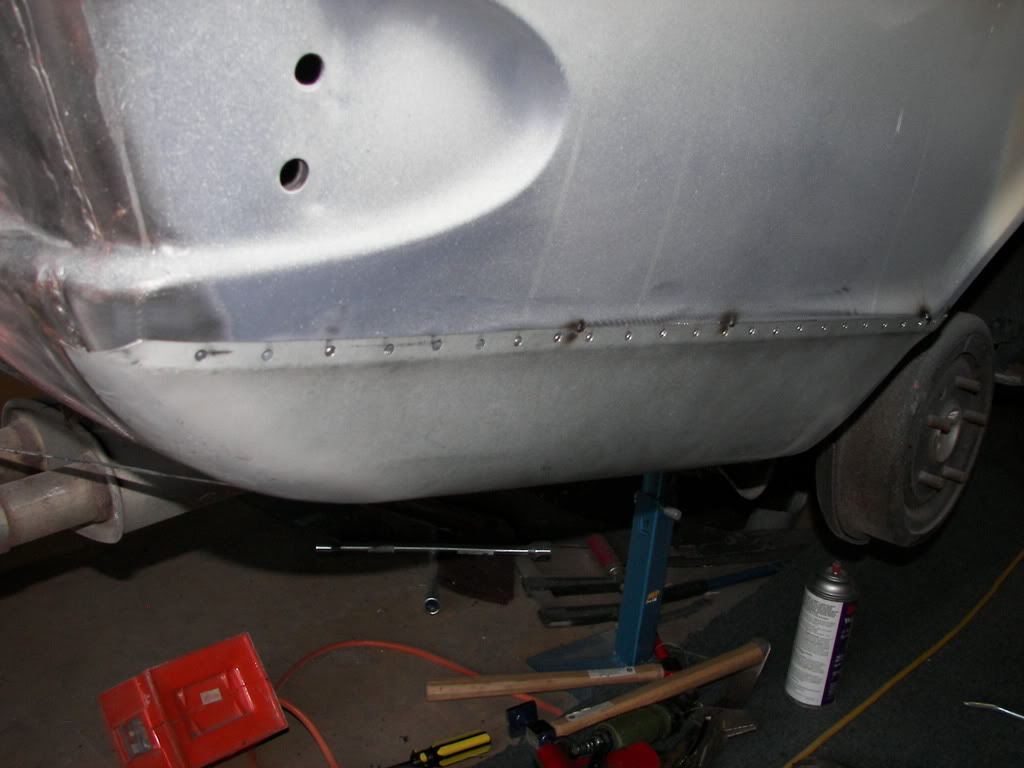
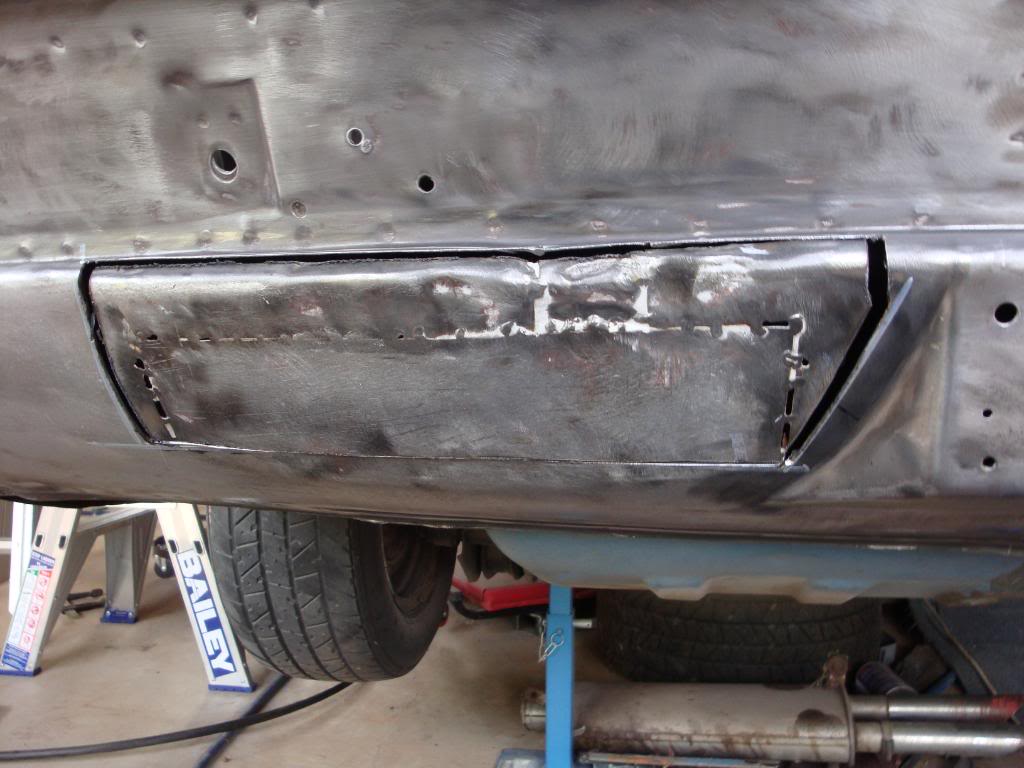
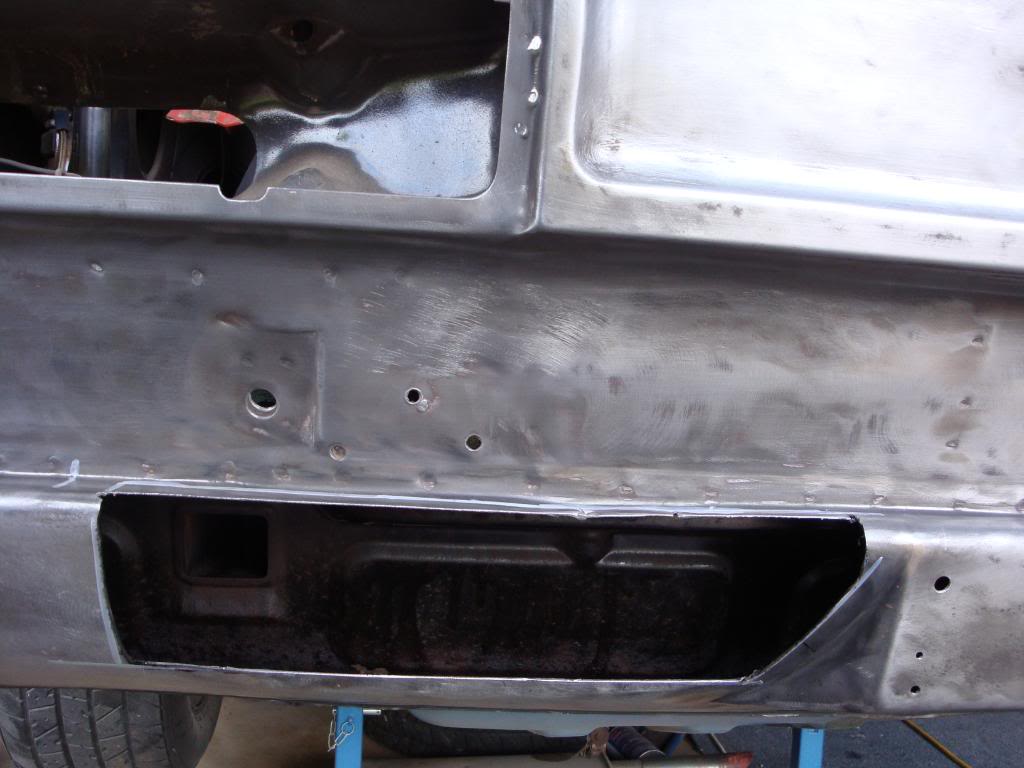
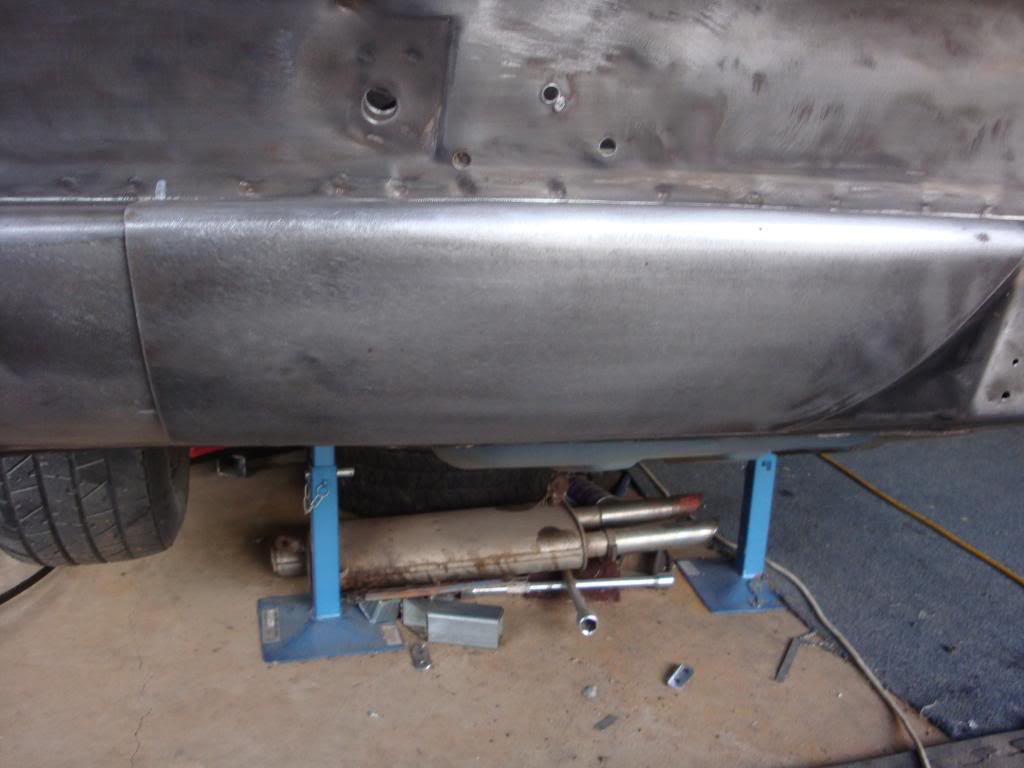
Yeah Mort it's pretty average I recon, however I have two of these panels, this one has a little surface rust. I will pick the best one and use it. The thing I hate the most is the unpicking doner panels :furious:

#152 rodomo

rodomo

    To advertise here, call 13TORANA

  • Members
  • PipPipPipPipPipPipPip
  • 17,999 posts
  • Name:R - O - B Dammit!
  • Location:Way out west of Melbourne Awstraylya
  • Joined: 10-December 05

Posted 07 July 2008 - 11:29 PM

The thing I hate the most is the unpicking doner panels :furious:

You love it or you wouldn't be doing it. :spoton:

#153 _2runa_

_2runa_
  • Guests

Posted 07 July 2008 - 11:39 PM

I wish my talents were just us good as the talented person who put the speaker holes in with an axe. I would have completed the project by now :spoton:

#154 _2runa_

_2runa_
  • Guests

Posted 08 August 2008 - 12:25 AM

Posted Image
this took a fair bit of time to UNPIC i hate it :cry: 
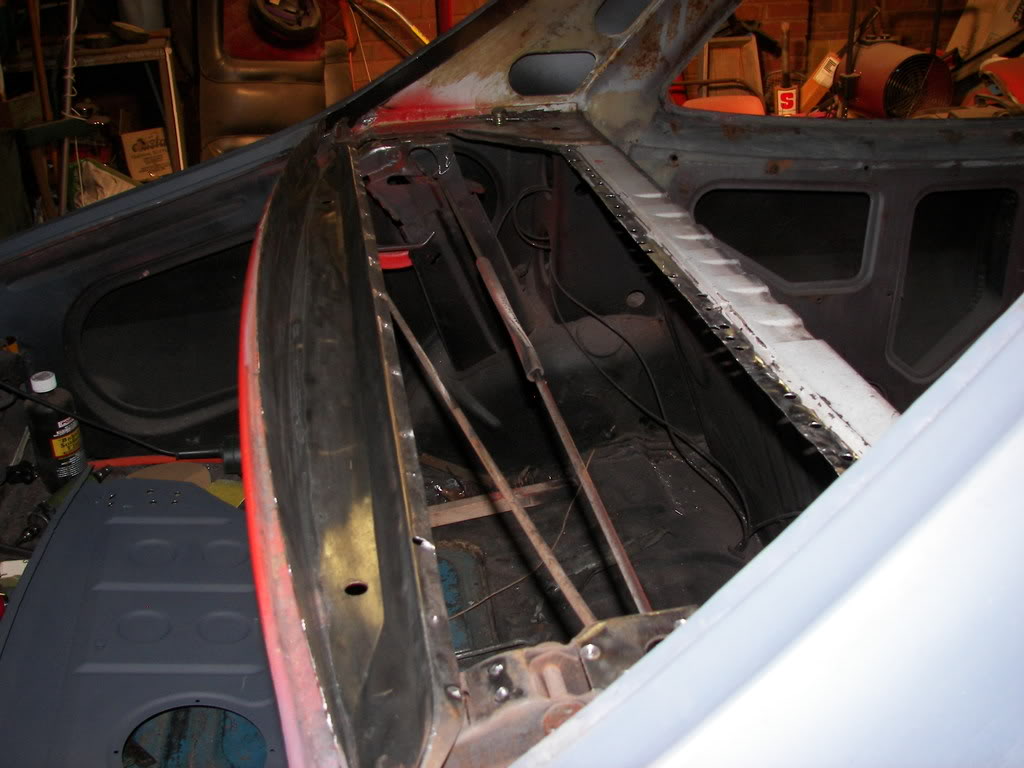
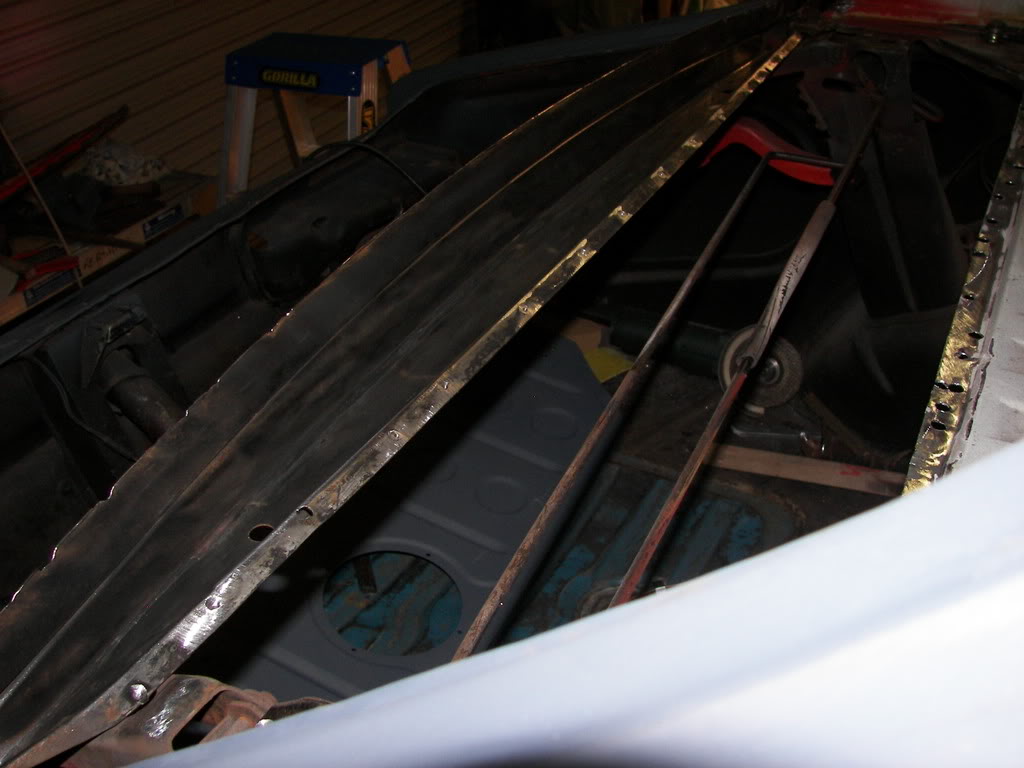
however no rust in the rear window panel amazing :spoton:

#155 _2runa_

_2runa_
  • Guests

Posted 08 August 2008 - 01:04 AM

Posted Image
just an other shot of where i cut some more rust out :spoton:

#156 _2runa_

_2runa_
  • Guests

Posted 08 August 2008 - 01:21 AM

Posted Image

#157 _Machine_

_Machine_
  • Guests

Posted 08 August 2008 - 11:03 AM

Great work mate, excellent to see.
Theyre rusty bustards the old torries but worth it.
M.

#158 _2runa_

_2runa_
  • Guests

Posted 08 August 2008 - 09:05 PM

Posted Image
Just a mock fit up to make sure it fits :clap:

#159 _2runa_

_2runa_
  • Guests

Posted 09 August 2008 - 11:42 AM

Posted Image
I"m glad to have this section of the car completed, it took a while however the effort was worth it. NO RUST :clap:

#160 _2runa_

_2runa_
  • Guests

Posted 10 August 2008 - 02:22 AM

Posted Image
Leaded the repair just need to a do a little more shaping an she's done :spoton:

Edited by 2runa, 10 August 2008 - 02:25 AM.


#161 rodomo

rodomo

    To advertise here, call 13TORANA

  • Members
  • PipPipPipPipPipPipPip
  • 17,999 posts
  • Name:R - O - B Dammit!
  • Location:Way out west of Melbourne Awstraylya
  • Joined: 10-December 05

Posted 10 August 2008 - 09:19 AM

There's that much lead in that thing now, I reckon you should name her "The Bullet" :tease:

Keep up the good work and the pics, you're an inspiration! :clap:

Edited by rodomo, 10 August 2008 - 09:20 AM.


#162 _2runa_

_2runa_
  • Guests

Posted 10 August 2008 - 11:49 AM

Hopefully it doesn't start to peel back like a hollow tip during it projectory. great name though. there's not alot of lead work left and when you file it back there 's only a thin layer, just enough to hide the seam. At least this GTR will survive . Hope these post help to inspire as this is my first project like this :blink: , just step back picture what you want to achieve and measure twice and mock fit every component making sure it has even gaps and lines :spoton: Thanks again for your comment Rodomo

#163 _v6locker_

_v6locker_
  • Guests

Posted 10 August 2008 - 12:52 PM

great work my friend makes me want to get stuck into my project...

#164 _2runa_

_2runa_
  • Guests

Posted 10 August 2008 - 08:31 PM

Posted Image
well jobs done just a little etch primer and then two pack hi fill primer on this section and.... :D and thanks V6 for your coments

#165 _2runa_

_2runa_
  • Guests

Posted 24 August 2008 - 11:28 AM

Posted Image


Posted Image


Posted Image
I was really surprised how well the R/Spares panel fitted . I plug welded the
edge through the puch holes then fully welded the seam. Then I lead the ....
rear seam :spoton: 
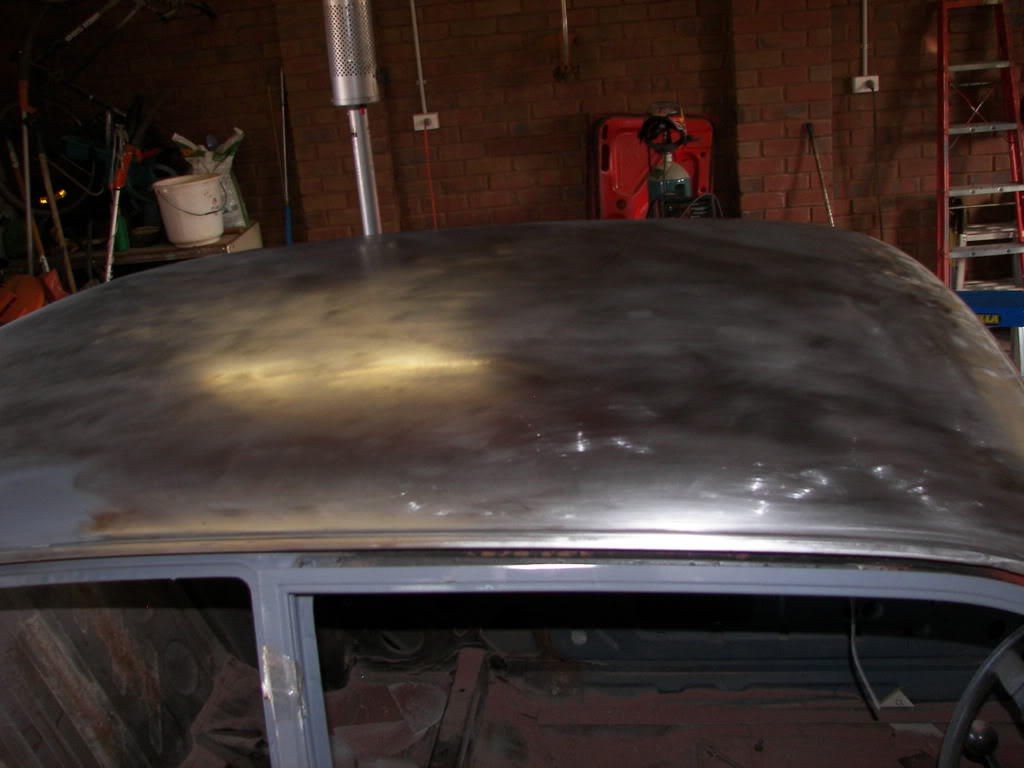
Ha Ha ! Just about out of lead :cry:

#166 _2runa_

_2runa_
  • Guests

Posted 25 August 2008 - 12:25 AM

Posted Image
There was three layers of Red paint, Blue spray putty, Cream undercoat and the
original Glacer White. I tried paint stripper on the roof but it was to slow,
Five 36 grit sticky back sanding disc did the job stopping short of the last layer
I was happy there was no big surprises under the last layer :D

#167 _2runa_

_2runa_
  • Guests

Posted 14 January 2009 - 02:49 PM

Well....its happening OK.. first of all in was to cold now its to hot 44deg. but i have to do something so i've started again
will post some pics as soon as i down load them. Im at work 6 days a wk from 6 to 6 how do you guys find the time?

#168 _2runa_

_2runa_
  • Guests

Posted 14 January 2009 - 11:47 PM

Posted Image
These pics are some of the surprises that I found when I striped the paint of the
beaver panel, notice the poor workmanship.
Who would do this to a Torana :<_<:
Posted Image

#169 Heath

Heath

    I like cars.

  • Administrators
  • PipPipPipPipPipPipPip
  • 18,315 posts
  • Name:Heath
  • Location:Eastern Suburbs, Melbourne
  • Car:Heavily Modified UC Sunbird Hatchback
  • Joined: 07-November 05
Garage View Garage

Posted 15 January 2009 - 08:37 AM

lol at least it's made of metal and not glass. Even if it isn't properly welded in hehe

#170 _2runa_

_2runa_
  • Guests

Posted 15 January 2009 - 09:13 AM

I recon they have done the 3 sided cut, folded the flap back then tried to extract the dent which was unsuccessfull then tack welded it and coved it up with heaps of bog. I must be the only one who finds bodgy work like this. Shame A

#171 GML-31

GML-31

    Oh My, Don't you post alot

  • Members
  • PipPipPipPipPipPipPip
  • 5,239 posts
  • Name:Kev
  • Location:Highland Park
  • Car:too many
  • Joined: 08-November 05

Posted 15 January 2009 - 09:48 AM

I know its a pain while you are doing the repairs properly but after its finished you wont have anything to worry about, peace of mind is priceless...

#172 _2runa_

_2runa_
  • Guests

Posted 15 January 2009 - 07:36 PM

Posted Image
Just a pic to show that I did cut it out completely and it look great inside as well :spoton:

#173 _2runa_

_2runa_
  • Guests

Posted 15 January 2009 - 09:15 PM

Posted Image
I placed the new panel over the area that it was to be fitted too and further
marked the the exact area that i needed to cut. Could never of done it
without a willing donor :spoton:

#174 _gtr161s_

_gtr161s_
  • Guests

Posted 16 January 2009 - 07:02 AM

Does anyone know where to get the Kemtex flux for lead wiping from? I tried Bakers but I feel its to severe. And how do you neutralize it so it does't cause a corrosion problem?


I bought my kemtex thru B J Howes on the central coast nsw..they sourced thru a supplier in smithfield syd

unreal stuff for tinning but one thing i found was to make sure that every part of welded area is COMPLETELY dressed to bare metal or else the tinning wont take properly

#175 _2runa_

_2runa_
  • Guests

Posted 16 January 2009 - 07:41 AM

I bought my kemtex thru B J Howes on the central coast nsw..they sourced thru a supplier in smithfield syd

unreal stuff for tinning but one thing i found was to make sure that every part of welded area is COMPLETELY dressed to bare metal or else the tinning wont take properly

One of the things about using lead is your arms will know about it I use 80 grit as the final surface prep, then scub with a small wire brush and acid . Just prior to painting make sure you clean the area well after lead wiping :spoton:
love using it :D


0 user(s) are reading this topic

0 members, 0 guests, 0 anonymous users