
Compounding Paint
When I rub down a fresh Lacquer finish I usually start with 1500wet with some car wash in the water to help lube it, and use a Soft block. Most soft blocks will allow you to squeegee the water off so you can see how your going when your rubbing down. I like to rub in one direction so it minimises swirl marks. Obviously how flat or peely your paint goes on will have an affect on how much you want to block it flat etc. I like to aim for even "flatness" on everything with an exception to the edges as the machine buff will knock them down quick. To finish I use a light touch with some 2000grit Wet on a thin piece of rubber foam stuff I bought to make gaskets out of once. I do this to clean up any potential block marks that may be on the surface.
Then I use a medium-coarse foam buff pad on a machine with some green compound (the coarser stuff) and use this on a slow-medium setting with medium pressure to buff out the sanding marks. I'm not aiming for gloss here mainly eveness of the finish. Then I switch to a finer foam buff pad with a higher speed setting and a lighter touch and use Mequires Fine Cut Cleaner to bring out the gloss and clean up any swirl marks. I then use Mequires Wetlook to polish the surface and seal it, then a coat of liquid Wax like Mequires or Mothers I like. Then finish off with some Mequires Final Inspection to remove and wax/polish residue. For wiping off polish and waxes and final inspection I swear by Microfibe polishing cloths. I use a brand called OZGEL that I get from work and found them fantastic.
I actually only just tidied up the paintwork on a friends Black RAV4 last week using this method and it came out great. I really should have grabbed some pics.
Here's a link to a Detailing website that has some great examples of guys work and also product discussion that you might find useful.
Detail Paradise website
No worries at all, always happy if I can help out in any way. I think you will like the foam pads, Now that I'm used to them I couldn't go back to a Lambswool again!!. Being smaller and lighter than most lambswool/backing pad combos means it will feel funny at first when you use it but if you try and keep the pad flat and use an even pressure you will get the hang of them. At home here I'm currently using a cheap Ryobi 7in Sander/Polisher (after an expensive buff packed it in and couldnt be repaired 1month out of a 2yr warranty, bloody chinese electrics).
To clean your foam buff pads you fold up some sandpaper (I'm using 120grit) and run the buff on the ground and start at the centre and hold the paper and let the buff spin so it cleans off etc. Same way you would use a screw driver handle etc on a Lambswool to clean off dried compound if you know what I mean, Just don't dig the paper in, let it skim across the surface of the spinning buff pad.
I forgot to add in the last PM that you should wash/clean compound off between the steps/product changes but you probably already knew that.
I used to think Cheesecloth was the only way until I used Microfibre cloths, you won't beleive the difference. The ones I get through work cost me about $13 ea and the best part is you can put them in your washing machine to clean them and reuse them for ages. They look a bit dirty after awhile but they are still perfect to use.
Give a finer cut cleaner compound a go too, you might be suprised on how much hand polishing they save and really increase the gloss depth too. Repco and other Auto accessory outlets that carry Meguires range should have it on the shelf. I think it's around $20-25 a bottle and you will get a couple of cars out of a bottle easy.
The water bottle advice is good too, I don't tend to use it a lot but I find all I need is a fine mist from a distance to keep the compound moist.
Compounding Paint
#1
 _Yella SLuR_
-

- Guests
Posted 26 February 2008 - 07:48 PM
#2
_Yella SLuR_
-
- Guests
Posted 26 February 2008 - 07:50 PM
PS, thanks heaps, this has got my paint better than it's ever been.
Edited by Yella SLuR, 26 February 2008 - 07:51 PM.
#3
_Pete_
-
- Guests
Posted 26 February 2008 - 08:04 PM
I can still see the join between my new and old paint. Does this indicate more sanding required? Still some spots in it as well. Mosquito's near carried me away, so had to stop.
When you say this, what kind of paintwork did you do? A blend or a touch up etc?
#4
_Yella SLuR_
-
- Guests
Posted 26 February 2008 - 08:05 PM
Oh, I've not machine buffed yet, just hand buffed to see how it was going. Would that make a difference? Still don't think I've sanded enough.
Edited by Yella SLuR, 26 February 2008 - 08:07 PM.
#5
_Yella SLuR_
-
- Guests
Posted 26 February 2008 - 08:14 PM
#6
_Pete_
-
- Guests
Posted 26 February 2008 - 08:22 PM
What is happening now is the layer of paint you have wet-in is doing what they call "pulling", the more you sand the more the line will retreat back if you know what I mean and it won't disappear. I'm guessing where the line is it appears like a dark line when your looking at it?
I think if your only doing a touch-up and don't want to paint the whole panel, I would buff the panel so you get the gloss you want. Then go back to the area you painted including the blend line and give it a light sand with 1500-2000 and then using a thinner mix of colour, paint a couple of coats so you going past your original blend line. Then using some retarder thinners only in your gun, really lightly dust some thinners on the edges you want to blend in. You don't want to make it really wet, just enough to get the applied paint to bite into the original surface and smooth the transition.
I would then machine buff the paintwork without any sanding. The machine will knockdown any peel pretty easy being fresh paintwork, just use a really light touch with the buff around your blends so they dont pull.
Good luck, feel free to post pics. Hopefully I've guessed your problem correctly and not made things worse..lol
#7
_Yella SLuR_
-
- Guests
Posted 26 February 2008 - 08:30 PM
Oh, nother thing I discovered. Don't just shake your paint tin, the paint won't mix correctly. Stuck a ruler in it this time and felt all this heavy sediment in the bottom of the can, so stirred for a good 5 minutes. Colour came out very Yella. Nother trick for young players.
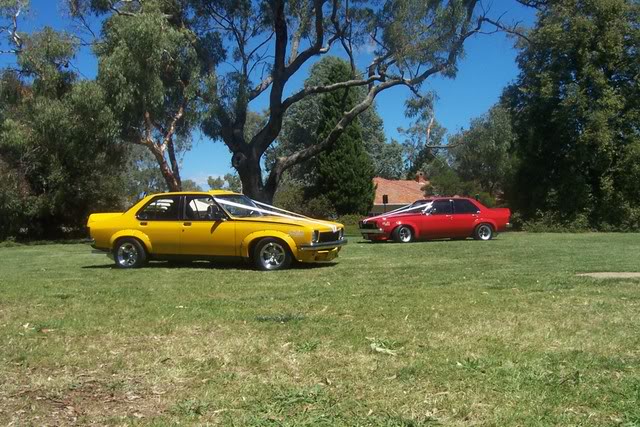
Just fixing the car up a bit for the wedding this weekend. The Red and Yella car will be out and about.
Edited by Yella SLuR, 26 February 2008 - 08:32 PM.
#8
_Pete_
-
- Guests
Posted 26 February 2008 - 09:17 PM
Torana's in weddings are a winner, I put together my LX to get married in 4yrs ago now. Just make sure you get plenty of pics for us too see!!
#9
_Yella SLuR_
-
- Guests
Posted 26 February 2008 - 09:17 PM
How it's looking from most angles:

How it's looking looking into the light. New paint is front edge of bonnet, extending up the side. Started off as stone chip repairs!!!

Hope you can see what I'm talking about.
#10
_Yella SLuR_
-
- Guests
Posted 26 February 2008 - 09:25 PM

#11
_Yella SLuR_
-
- Guests
Posted 26 February 2008 - 09:40 PM
Pete, finish is great, thanks for the pointers. Now if I can just solve the blend line issue, I'll be one happy chappy.
For others, still has the swirl lines in the paint from the cutting compound. Not fine polished yet.
Edited by Yella SLuR, 26 February 2008 - 09:45 PM.
#12
-

- Members
-

- 12,415 posts
The Render Garage
- Name:Matt
- Location:Upwey, Melbourne
- Car:355 LX Hatchback, DeLorean DMC-12, LX SS Hatch, VY Cross8 Crewman
- Joined: 09-November 05
Posted 27 February 2008 - 02:53 PM
Does the wet look polish live up to its name? Because that is really what i am after! When i was the hq and the panels are Wet, the pearls really stand out and the colour looks stunning! I want to achieve this look when its dry!
Cheers guys!
#13
_Yella SLuR_
-
- Guests
Posted 27 February 2008 - 06:35 PM
Yup, this bit is the key to it I reckon. Got the pads and polishes to finish it off today, along with some retarder thinners. I can now tell you that you primix your thinners, 25% retarder thinners to how ever much thinners you measure out.
Here's hoping I don't burn no paint, as I haven't used the foam buffing pads before, normally I use the lambs wool.
I think burning paint is one of the things you have to do to learn how easy it is to do. So plan to do a little respray if it is your first buff.
Edited by Yella SLuR, 27 February 2008 - 06:37 PM.
#14
_Yella SLuR_
-
- Guests
Posted 27 February 2008 - 07:35 PM
Think you jinxed me Pete. Nah, shit happens.
I've prepped it by hand, and it looks good enough for the wedding.
To prevent geting into trouble with my panel beater mate, gave the McGuires a miss and went AutoGlym.
Edited by Yella SLuR, 27 February 2008 - 07:37 PM.
#15
_Yella SLuR_
-
- Guests
Posted 01 March 2008 - 03:26 PM

Edited by Yella SLuR, 01 March 2008 - 03:34 PM.
#16
_Yella SLuR_
-
- Guests
Posted 09 March 2008 - 11:44 AM
Touched up where the paint was a bit thin on the other side of the bonnet ridge today, decided to try the retarding thinners (25% retarder to normal thinners). How flat is that shit sitting, apart from a bit of overspray, I reckon it's going to more than half the sanding time. Looking forward to finishing this bit of paint off. Next to no orange peel, maybe like 2 pack, but that's about it.
Edited by Yella SLuR, 09 March 2008 - 11:45 AM.
#17
_Pete_
-
- Guests
Posted 09 March 2008 - 12:12 PM
Just gotta have a little caution of using too much otherwise it will bite in too hard and cause the paint to fry up.
It's perfect for blending/Wetting In touch ups and also when doing full repaints as it slows the drying time of the thinners considerably allowing it to flow out and settle nicely with no dry spray sitting on top.
#18
_Herne_
-
- Guests
Posted 09 March 2008 - 12:56 PM
Glad to hear you making good progress YellaI'm in love ---> retarding thinners.
Touched up where the paint was a bit thin on the other side of the bonnet ridge today, decided to try the retarding thinners (25% retarder to normal thinners). How flat is that shit sitting, apart from a bit of overspray, I reckon it's going to more than half the sanding time. Looking forward to finishing this bit of paint off. Next to no orange peel, maybe like 2 pack, but that's about it.
Cheers
Herne
#19
_Yella SLuR_
-
- Guests
Posted 09 March 2008 - 01:14 PM
Shit yeah!!! So I was wise using it sparingly then. I'd heard you didn't need much, so played it on the conservative side.Yeah the s**t is like a godsend when you first discover it.....and you will wonder how you ever got by without it!!
#20
_Pete_
-
- Guests
Posted 09 March 2008 - 03:49 PM
But when you can paint a Panel Van roof in Acrylic Lacquer and not get any dry spray and have it wet and glossy straight off the gun like it should be you will be jumping for joy!!
#21
_Yella SLuR_
-
- Guests
Posted 09 March 2008 - 08:04 PM
#22
-
- Members
-
- 12,415 posts
The Render Garage
- Name:Matt
- Location:Upwey, Melbourne
- Car:355 LX Hatchback, DeLorean DMC-12, LX SS Hatch, VY Cross8 Crewman
- Joined: 09-November 05
Posted 09 March 2008 - 08:14 PM
#23
_Yella SLuR_
-
- Guests
Posted 09 March 2008 - 08:18 PM
#24
-
- Members
-
- 12,415 posts
The Render Garage
- Name:Matt
- Location:Upwey, Melbourne
- Car:355 LX Hatchback, DeLorean DMC-12, LX SS Hatch, VY Cross8 Crewman
- Joined: 09-November 05
Posted 09 March 2008 - 08:21 PM
#25
_Yella SLuR_
-
- Guests
Posted 09 March 2008 - 08:38 PM


1 user(s) are reading this topic
0 members, 1 guests, 0 anonymous users

