
Keep in mind that a sideways mounted carb will NOT work on a dual plane intake.
426, your right, It worked well on 4BBL 265's back in the day.


Yep, one more UC with a SBC project !!!
Started by
Struggler
, Mar 25 2009 04:28 PM
476 replies to this topic
#26

Struggler
-
- Members
-

- 2,426 posts
Forum Fixture
- Name:Andrew or AJ
- Location:Canberra A.C.T.
- Car:UC Sedan
- Joined: 08-November 05
Posted 14 April 2009 - 09:48 PM
#27
_Herne_
_Herne_
-

- Guests
Posted 14 April 2009 - 10:08 PM
Keep in mind that a sideways mounted carb will NOT work on a dual plane intake.
Thanks Struggler you just blew me out of the water lol damnit, dont really want to go to the expense of a single plane manifold just yet

But I really do love the balanced look the sideways mounted carb gives. Maybe another day.
Cheers
Herne
Edited by Herne, 14 April 2009 - 10:12 PM.
#28
TempesT
-
- Members
-
- 493 posts
Forum Fan
- Name:James - JImmy or Jim
- Location:Snowy Mountains
- Car:LX hatch
- Joined: 08-November 05
Posted 15 April 2009 - 09:19 AM
hey struggler, its looking the goods 
is that an xf falcoon i spy in the other side of the garage? Holding out on your projects hey!
keep up the good work, i wouldnt mind having a look at the UC some time.
cheers
is that an xf falcoon i spy in the other side of the garage? Holding out on your projects hey!
keep up the good work, i wouldnt mind having a look at the UC some time.
cheers
#29
myss427
 View Garage
-

- Members
-
- 1,636 posts
Forum Fixture
- Location:Canberra
- Car:427 hatch, CV8 Monaro, Ve SSV ute. Was part owner A9X sedan until he sold it without telling me!
- Joined: 17-November 05
View Garage
Posted 15 April 2009 - 09:34 AM
Struggler, you have a talent for making very fast attractive cars for very little outlay!
#30
Heath
View Garage
-

- Administrators
-
- 18,402 posts
I like cars.
- Name:Heath
- Location:Eastern Suburbs, Melbourne
- Car:Heavily Modified UC Sunbird Hatchback
- Joined: 07-November 05
View Garage
Posted 15 April 2009 - 11:47 AM
I thought it was a Commodoreis that an xf falcoon i spy in the other side of the garage?
It's amazing what an engine transplant can do! haha
#31
Struggler
-
- Members
-
- 2,426 posts
Forum Fixture
- Name:Andrew or AJ
- Location:Canberra A.C.T.
- Car:UC Sedan
- Joined: 08-November 05
Posted 15 April 2009 - 09:42 PM
OK, for a start that other beast is a VH SL/E I couldn't knock back a month or 2 ago. I was about to bash a 308 in it (currently 202) when this UC reared its head. James, you know where I am.
Myss427, its not that attractive....... but it should be fast enough !!!
Heath, well picked !!
Hoping to get on the tailshaft trail tomorrow.
Myss427, its not that attractive....... but it should be fast enough !!!
Heath, well picked !!
Hoping to get on the tailshaft trail tomorrow.
#32
_UDLOSE_
_UDLOSE_
-
- Guests
Posted 15 April 2009 - 09:52 PM
Glad your back in the game mate! Love your work 
Marty
Marty
#33
Struggler
-
- Members
-
- 2,426 posts
Forum Fixture
- Name:Andrew or AJ
- Location:Canberra A.C.T.
- Car:UC Sedan
- Joined: 08-November 05
Posted 03 May 2009 - 10:55 AM
Tailshaft has been sorted (standard 202 tri) and the car is driveable.
I picked it up from the exhaust shop yesterday and brought it back home. It runs a single 3 1/2" with an Aerochamber 3 1/2" muffler with no tail pipe (ends at the diff).
Sounds glorious !!!
Hope to have the diff out for welding this week and then get some track time up. The more I look at it the less hope I hold out for the small salisbury. If I have to put a diff in it it won't be standard width !!
#34
_ChevLX_77_
_ChevLX_77_
-
- Guests
Posted 03 May 2009 - 12:04 PM
Wheres the pics!!!
Have you got the rims on yet???
Have you got the rims on yet???
#35
LXCHEV
-

- Members
-
- 3,645 posts
Lotsa Posts!
- Name:Brett
- Location:Melbourne
- Car:'76 LX - 383 Chev
- Joined: 08-November 05
Posted 06 May 2009 - 07:59 PM
Cool project Struggler! Looking sweet. I'm very interested to hear the dyno results to see if these pipes are hurting the power or not...
Also spotted the sideways carby, and was going to ask about that too... it looks pretty neat. Keep us updated, nice work
Also spotted the sideways carby, and was going to ask about that too... it looks pretty neat. Keep us updated, nice work
#36
Struggler
-
- Members
-
- 2,426 posts
Forum Fixture
- Name:Andrew or AJ
- Location:Canberra A.C.T.
- Car:UC Sedan
- Joined: 08-November 05
Posted 06 May 2009 - 09:59 PM
Have you got the rims on yet???
Sort of, seems Saab has a 110mm PCD where the Torana has a 108mm one. The rims fit but don't bolt on concentrically.
Wish I worked this out before I sandblasted, painted and fit tyres to them, not to mention belting the inner guards to suit. I'm off to the Volvo wreckers tomorrow to find some 15x6's for the rear.
On a happier note the 15x5 Volvo rims are on the front with conventionals and I welded the 3.90 small salisbury diff up today. I also "modified" a pair of IRS C/dore rear springs to suit the UC and fitted them up to lower and stiffen up the rear a bit. It worked out quite well.
I'll sort out the rear wheels first then post some pics.
#37
Struggler
-
- Members
-
- 2,426 posts
Forum Fixture
- Name:Andrew or AJ
- Location:Canberra A.C.T.
- Car:UC Sedan
- Joined: 08-November 05
Posted 14 May 2009 - 09:13 AM
I had some time up my sleeve yesterday so loaded up the UC and towed it to WSID for the street meet.
As I was a little worried about the small salisbury gears and standard 6 cyl tailshaft I fitted a pair of worn 205/65R15's to some Volvo 15x6 rims and had a bit of a laugh.
I got in 4 runs varying from 15.2 to 11.7 depending on wheelspin but the MPH on the better runs (11.7 and 12.2) it ran 121 MPH so there is 10 sec potential there with some traction. The faster runs were done by driving off at 1/3 to 1/2 throttle before giving it full throttle at about 80kmh.
The car drove perfectly and was really stable at almost 200kmh with no vibrations at all.
I'll post a few pics when the track photographers get them up on the net.
#38
LS1LX
-

- Members
-
- 1,931 posts
Forum Fixture
- Location:Sydney
- Joined: 22-November 05
Posted 14 May 2009 - 10:34 AM
Nice work mate, how much grunt does this baby pump out?
#39
_noslx_
_noslx_
-
- Guests
Posted 14 May 2009 - 10:52 AM
good one mate..got plenty of potential there ay..i,d be concerned about the tailshaft too
#40
Struggler
-
- Members
-
- 2,426 posts
Forum Fixture
- Name:Andrew or AJ
- Location:Canberra A.C.T.
- Car:UC Sedan
- Joined: 08-November 05
Posted 14 May 2009 - 04:18 PM
Nice work mate, how much grunt does this baby pump out?
When the engine was in my HQ it put 279.6 Kw to the tyres in shootout mode. The only change to fit it in the UC was the wheezy extractors and the new system (HQ had 1 3/4 4:1's and dual 3").
NosLX, thanks. This is the most power I've put thru a 6cyl 'shaft but its still hanging in there !!!
#41
Struggler
-
- Members
-
- 2,426 posts
Forum Fixture
- Name:Andrew or AJ
- Location:Canberra A.C.T.
- Car:UC Sedan
- Joined: 08-November 05
Posted 15 May 2009 - 08:20 PM
As promised, here are some pics from Wed. night......


#42
_OLC383_
_OLC383_
-
- Guests
Posted 15 May 2009 - 09:35 PM
Struggler,
Im not sure about sailsbury diff yokes & tail shafts but id assume they would be the same as banjo set ups were the only difference between the 6cyl & V8 is in the bigger diff yoke, if im right just fit some 1 tonner uni's in it & a V8 diff yoke, or find a V8 tail shaft if possible, id feel a bit safer than relying on the 6cyl uni's.
A diff or tail shaft mob might beable to help you out..
Wayne
#43
_noslx_
_noslx_
-
- Guests
Posted 15 May 2009 - 09:47 PM
thanks for the pics,,,looks like heaps a fun!!!,,,get some slicks or semis on and we,ll see some good times here lol 
#44
Struggler
-
- Members
-
- 2,426 posts
Forum Fixture
- Name:Andrew or AJ
- Location:Canberra A.C.T.
- Car:UC Sedan
- Joined: 08-November 05
Posted 21 May 2009 - 07:45 PM
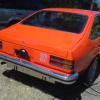
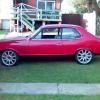
OK, there's no turning back now. I have stripped the interior and fuel system out and towed the beast to the exhaust shop after taking some measurements and drilling a few holes. I got the shop to cut the rear inner guards and spare wheel well out and I bought it back home. Here are a couple of pics of the carnage.....


As can be seen the chassis rail in the boot is the closest to the tyre (now the shock has been removed), followed by the spring. The plan is to fit a smaller diameter spring in the original location and move the shock inboard of the spring. I will remake the rear rail so it comes straight back from the spring platform to the bumper bar. The inside rail will get narrowed a few mm so its in line with the spring. The tub will cover eveything and extend to the already cut rear firewall.
All I really want to achieve is space to fit a 275/60R15 Drag Radial and to be able to get a 205/65R15 inside the rear quarter so when the tread comes flying off it won't damage the paint/panel. Obviously a diff upgrade is in order however I haven't yet decided whether it will be a 9" or V8 Salisbury. Hopefully this won't take too long, I want to be back on the road with the big diff in a month, two maximum.
#45
gtrboyy
-
- Members
-
- 3,241 posts
Lotsa Posts!
- Location:SYDNEY,NSW
- Joined: 07-November 05
Posted 21 May 2009 - 07:59 PM
Oooh no turning back now lol.
Another option might be worth a try would be a skyline diff to use instead of salisbury,easier to get parts & cheap.
This one going to get a cage when it runs a 10?
Another option might be worth a try would be a skyline diff to use instead of salisbury,easier to get parts & cheap.
This one going to get a cage when it runs a 10?
#46
Struggler
-
- Members
-
- 2,426 posts
Forum Fixture
- Name:Andrew or AJ
- Location:Canberra A.C.T.
- Car:UC Sedan
- Joined: 08-November 05
Posted 21 May 2009 - 09:57 PM
I'm seriously thinking of doing the cage now while its stripped out.
It should run a 10 next time out with some real tyres and I would hate to have to strip it out again after only a few passes.
It should run a 10 next time out with some real tyres and I would hate to have to strip it out again after only a few passes.
#47
_1QUICK LJ_
_1QUICK LJ_
-
- Guests
Posted 21 May 2009 - 10:59 PM
awesome little project youve got there mate, should be a killar
#48
Struggler
-
- Members
-
- 2,426 posts
Forum Fixture
- Name:Andrew or AJ
- Location:Canberra A.C.T.
- Car:UC Sedan
- Joined: 08-November 05
Posted 29 May 2009 - 07:59 PM
OK, I've had a good couple of hours into it this week and thought it was time for an update, but first a disclaimer......
I must state that this is an unregistered car that will not be used on public roads and I am not an engineer or for that matter a qualified welder. Anyone contemplating a similar procedure on their own vehicle does so at their own risk. I have taken steps that I feel are adequate to ensure the car is as strong or stronger than original (as I will obviously be driving it in off road events) however this is no guarantee that it can be engineered and/or registered. This is the first time I have mini tubbed a car, previously I have only stepped the chassis in a one tonner.
OK, back to the build....
As you can see in the pics the car is jacked up and supported in 6 places by jackstands in a position that is level L to R and F to R. All this work has been carried out in the driveway as I didn't want to be throwing ground metal around the garage that is full of cars and engines. This does however mean that I have to pack up about 5PM when it gets dark !!
First here is a comparison of the standard 4cyl Sunbird spring, the modified VT IRS spring I ran for a week or two and the 65mm ID Pedders Motorsport spring I will be utilizing to gain as much space as I can.

Next pic is of the rear rails I have made up. I cut the standard rail right out to a point 50mm behind the wheel arch. This will allow me to run a 50x50 from the new rail to the inside of the rear quarter. I ran the replacement rails from the rear beaver panel to the area where the spring platform runs down into a rail. I cut the existing rail and split it 4 ways, splicing the new rail into the old with an overlap of about 50mm. As you can see I lost the entire boot floor in the process. It was a little messed up as I cut a hole for the fuel cell sump as well as removing the spare wheel well. I decided it would be easier to replace the lot rather than just patch it up.

Now for the front part of the tub. As the spring platform is now the closest to the tyre there is no reason to move the front part of the rail inboad anymore than nec. I split the existing rail down the middle and fitted some 50x50x1.6 square tube (same gauge as OE) inside the rail that was left. As the rail curves around a bit I had to do it in a few pieces and weld them all together in situ. I tried to make this area about 10mm further in than the spring platform so to give me maximum clearance. In the area where the rail crosses over the lower control arm the rail is at its narrowest. Here I had to cut it down to about 20mm wide. To keep the strength in it I filled the void with 6mm plate as well as the 50x50 square tube (cut down to suit). In order to fit the 28" tyres I also had to take a notch out of the leading and trailing edges of the guard and tap the lip back and reweld it to look standard. The 275/60R15 MT Street Radials now fit a treat. As can be seen in this pic the spring platform is now the limiting factor and I have given myself about another 80mm of room. I have also left the diff in place up till now. This has been my reference point for all internal measurements (as the axle bolt up faces should be parallel to each other and the centreline of the car).

I also fitted some chassis connectors the same as Moot has in his thread. These are just a pair of 75x25x3 rectangular tubes bashed up inside the existing rail, coming through the floor and connecting to the rear lower control arm mounts just in front of the rear seat. This is a fairly common practice, I have seen it a few times in the pits at WSID.
I hope this all makes sense, let me know if you want any clarification.
Next step is to remove the diff and get a new one made up that is about 3" or 75mm shorter per side. I will then fit the Mc Donald Bros tubs and get started on making a new boot floor.
I must state that this is an unregistered car that will not be used on public roads and I am not an engineer or for that matter a qualified welder. Anyone contemplating a similar procedure on their own vehicle does so at their own risk. I have taken steps that I feel are adequate to ensure the car is as strong or stronger than original (as I will obviously be driving it in off road events) however this is no guarantee that it can be engineered and/or registered. This is the first time I have mini tubbed a car, previously I have only stepped the chassis in a one tonner.
OK, back to the build....
As you can see in the pics the car is jacked up and supported in 6 places by jackstands in a position that is level L to R and F to R. All this work has been carried out in the driveway as I didn't want to be throwing ground metal around the garage that is full of cars and engines. This does however mean that I have to pack up about 5PM when it gets dark !!
First here is a comparison of the standard 4cyl Sunbird spring, the modified VT IRS spring I ran for a week or two and the 65mm ID Pedders Motorsport spring I will be utilizing to gain as much space as I can.
Next pic is of the rear rails I have made up. I cut the standard rail right out to a point 50mm behind the wheel arch. This will allow me to run a 50x50 from the new rail to the inside of the rear quarter. I ran the replacement rails from the rear beaver panel to the area where the spring platform runs down into a rail. I cut the existing rail and split it 4 ways, splicing the new rail into the old with an overlap of about 50mm. As you can see I lost the entire boot floor in the process. It was a little messed up as I cut a hole for the fuel cell sump as well as removing the spare wheel well. I decided it would be easier to replace the lot rather than just patch it up.
Now for the front part of the tub. As the spring platform is now the closest to the tyre there is no reason to move the front part of the rail inboad anymore than nec. I split the existing rail down the middle and fitted some 50x50x1.6 square tube (same gauge as OE) inside the rail that was left. As the rail curves around a bit I had to do it in a few pieces and weld them all together in situ. I tried to make this area about 10mm further in than the spring platform so to give me maximum clearance. In the area where the rail crosses over the lower control arm the rail is at its narrowest. Here I had to cut it down to about 20mm wide. To keep the strength in it I filled the void with 6mm plate as well as the 50x50 square tube (cut down to suit). In order to fit the 28" tyres I also had to take a notch out of the leading and trailing edges of the guard and tap the lip back and reweld it to look standard. The 275/60R15 MT Street Radials now fit a treat. As can be seen in this pic the spring platform is now the limiting factor and I have given myself about another 80mm of room. I have also left the diff in place up till now. This has been my reference point for all internal measurements (as the axle bolt up faces should be parallel to each other and the centreline of the car).
I also fitted some chassis connectors the same as Moot has in his thread. These are just a pair of 75x25x3 rectangular tubes bashed up inside the existing rail, coming through the floor and connecting to the rear lower control arm mounts just in front of the rear seat. This is a fairly common practice, I have seen it a few times in the pits at WSID.
I hope this all makes sense, let me know if you want any clarification.
Next step is to remove the diff and get a new one made up that is about 3" or 75mm shorter per side. I will then fit the Mc Donald Bros tubs and get started on making a new boot floor.
#49
_SLR Goat_
_SLR Goat_
-
- Guests
Posted 29 May 2009 - 09:40 PM
Its looking good i have to say u make it look so simple i take my hat off to you
#50
Struggler
-
- Members
-
- 2,426 posts
Forum Fixture
- Name:Andrew or AJ
- Location:Canberra A.C.T.
- Car:UC Sedan
- Joined: 08-November 05
Posted 21 June 2009 - 08:29 PM
Yes, I know it looks like I haven't done anything but I have been busy. I decided to get an ANDRA spec cage installed professionally by a local. When I first spoke to him almost a month ago he said he could take it that week so I pulled out the screens, headlining and dash so he could go for gold. Unfortunately 3+ weeks later I'm still waiting to get it in the door. I can't fit the tubs as the cage runs right up against them and this would prevent an adequate weld bead. So basically the car has been idle for 3 weeks now. In the meantime I found a diff to suit. An old friend was selling his car in bits and I took his 9" with Romac floating hubs and axles. I have had the housing shortened and the axles cut to suit and have mocked it up in the car (I still need to weld shock mounts and some other stuff on it yet). I also took the guys centre that was a Strange alloy carrier with Romac alloy pinion support and Romac spool to suit. I have had my 4.30 gears and Aussie pinion yoke fitted to it and its also ready to go. The tubs are here but still require trimming and final fitment so I'm really at the mercy of the 'cage man. If he doesn't take it this week I will have a go at it myself.
Anyway enough of my problems, here are some pics of the diff and the car rolling on it. In the pic it has HQ 14x5.5 rims fitted and they still have clearance to the outer most part of the inner rail of about an inch. This well and truly fits my requirement of getting the tyres inside the guards !! For those of you that like numbers the diff is now 1280mm bolt-up-face to bolt-up-face or about 80mm a side narrower than standard.
Enjoy !!
 P1020041.JPG 80.96K
81 downloads
P1020041.JPG 80.96K
81 downloads
P1020042.JPG 89.6K
74 downloads
P1020043.JPG 91.63K
80 downloads
P1020044.JPG 105.54K
94 downloads
Anyway enough of my problems, here are some pics of the diff and the car rolling on it. In the pic it has HQ 14x5.5 rims fitted and they still have clearance to the outer most part of the inner rail of about an inch. This well and truly fits my requirement of getting the tyres inside the guards !! For those of you that like numbers the diff is now 1280mm bolt-up-face to bolt-up-face or about 80mm a side narrower than standard.
Enjoy !!
P1020041.JPG 80.96K
81 downloads
P1020042.JPG 89.6K
74 downloads
P1020043.JPG 91.63K
80 downloads
P1020044.JPG 105.54K
94 downloads


0 user(s) are reading this topic
0 members, 0 guests, 0 anonymous users

