Jump to content


Photo
- - - - -

LX Hatch RB30 Turbo


  • Please log in to reply
183 replies to this topic

#51 _UCaLX_

_UCaLX_
  • Guests

Posted 05 February 2010 - 02:53 PM


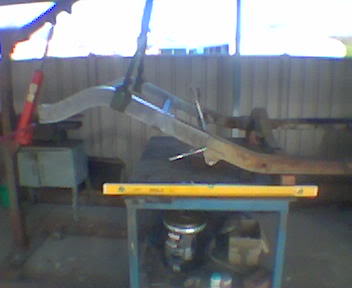
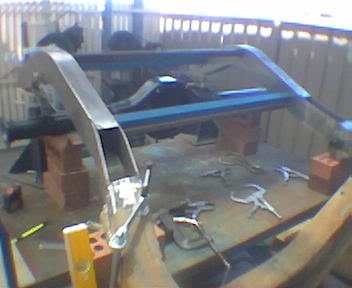
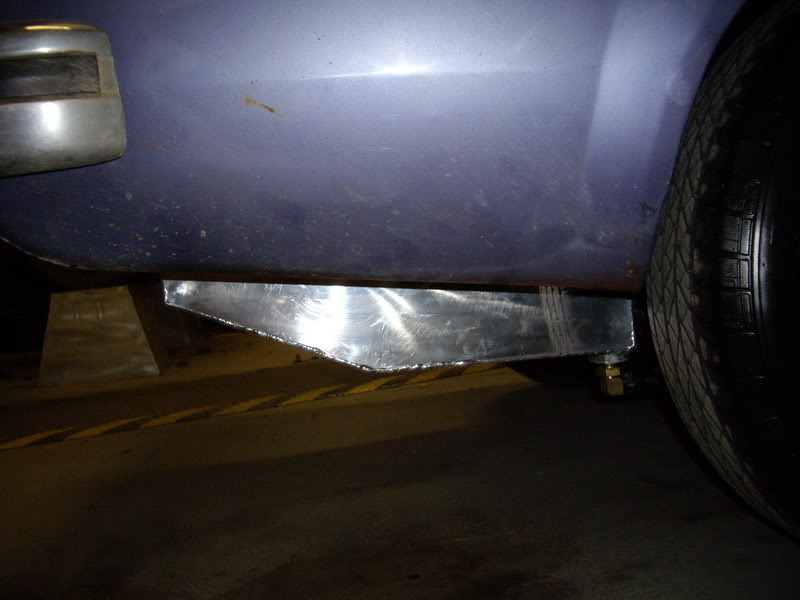
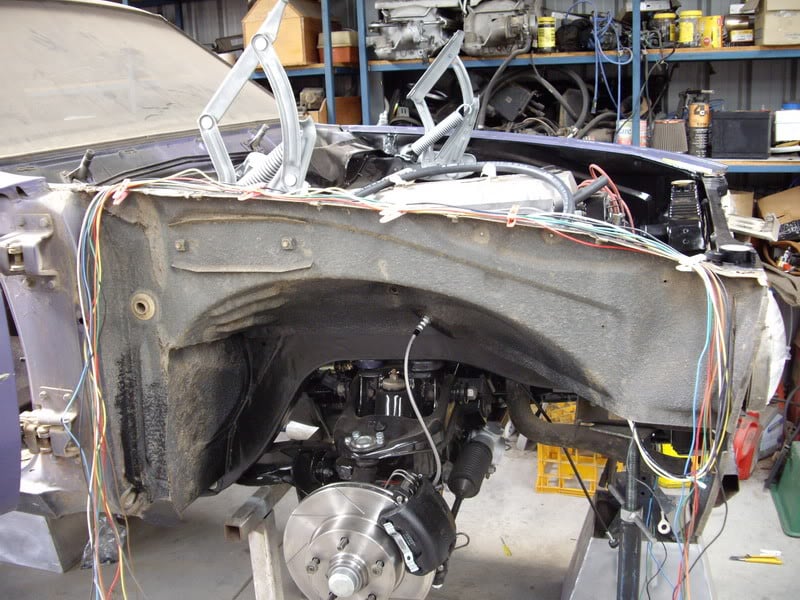
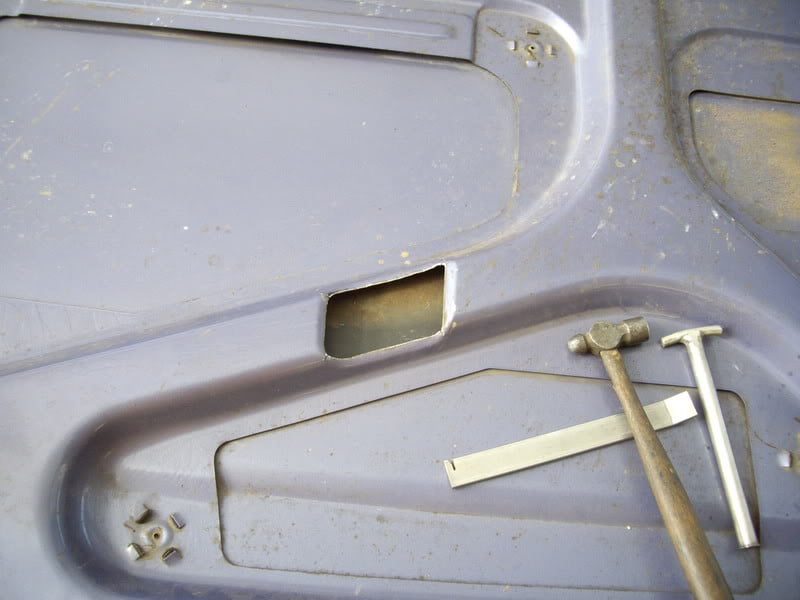
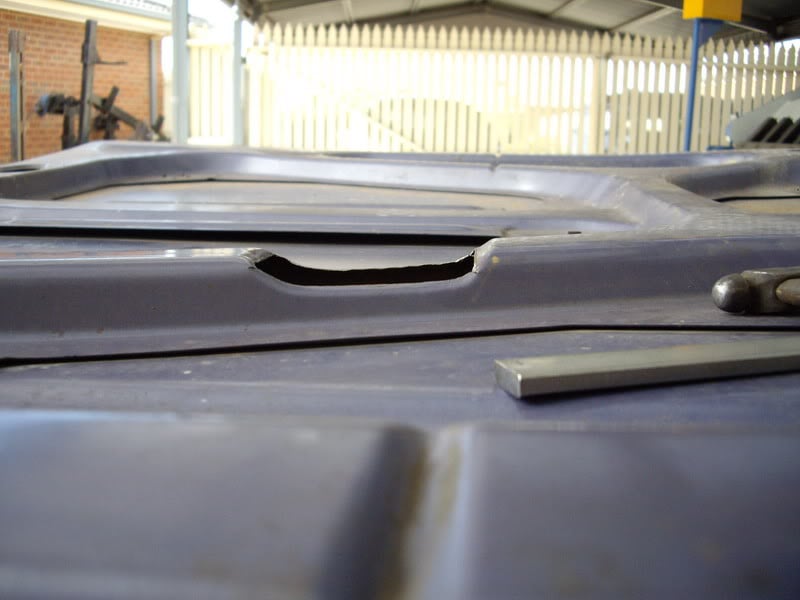
How do you go for rego with the modified chassis section (dog leg) I thought these days that was a big no no when it came to getting it engineered and legal?

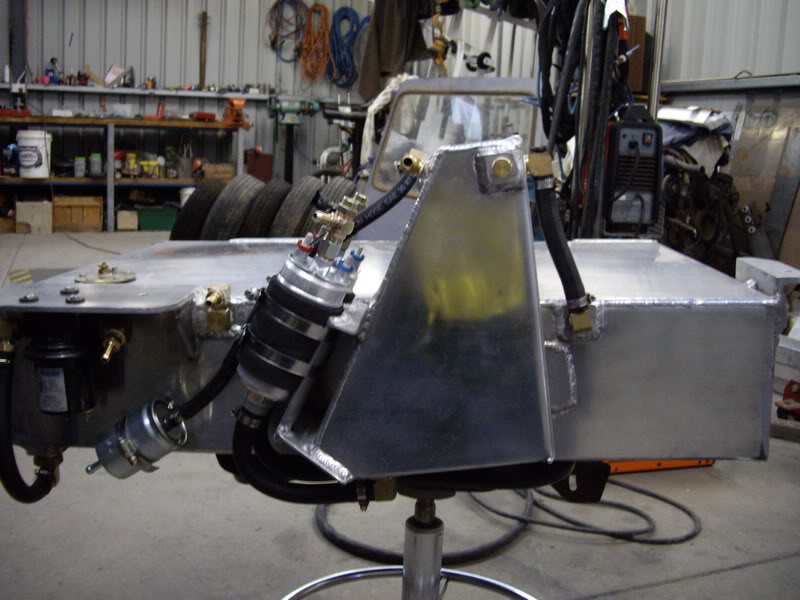
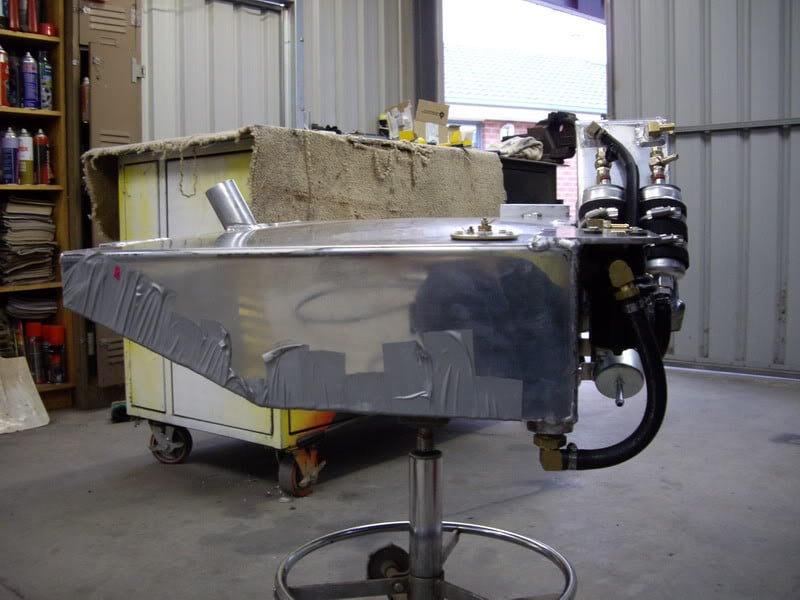
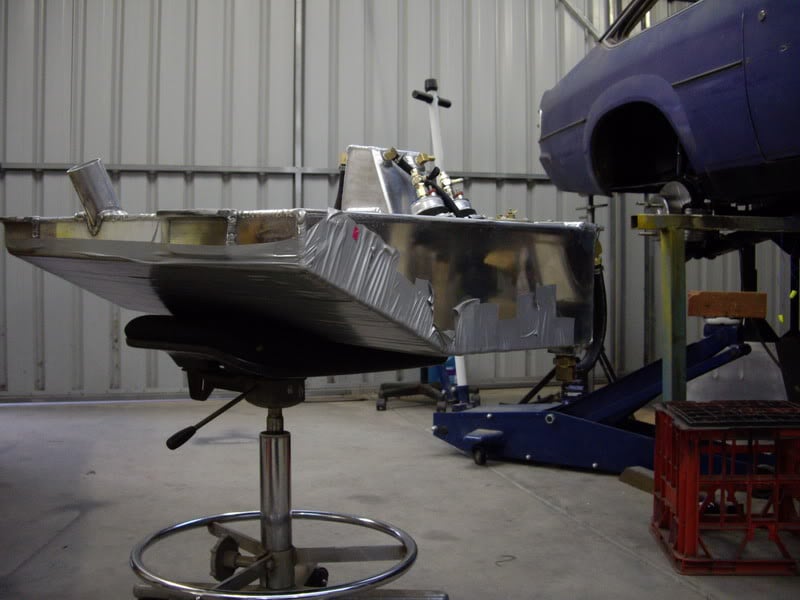
I envy your fab skills, that cooler and pipes are artwork.


in nsw you cant touch the chassis rail before the axle.they wont rego the car and the rta will mark it as a stat write off if they find it.

this doesnt apply to other states though


G'day,

Do you know the reason behind the rta marking it a stat write off?? :dontknow: yet other sates a ok. I hate NSW laws :cry:

#52 76lxhatch

76lxhatch

    That was easy!

  • Members
  • PipPipPipPipPipPipPip
  • 7,156 posts
  • Location:Unzud
  • Car:SS
  • Joined: 04-August 08
Garage View Garage

Posted 05 February 2010 - 03:51 PM

You have too many toys!

Surely there is no such thing...

#53 _dirtbag_

_dirtbag_
  • Guests

Posted 05 February 2010 - 04:16 PM

Qld wouldn't let me do any mods to the rear of my wifes 1968 firebird chassis. I squared the tubs to make more room, but wasn't allowed to make them any wider, or even fit a pair of top links to help stabilise the diff. Any mod was a big NO. Nazis! : )

#54 turbo76lx

turbo76lx

    Forum Fixture

  • Members
  • PipPipPipPipPip
  • 645 posts
  • Name:Glen
  • Location:Vic
  • Car:LX
  • Joined: 15-August 08

Posted 06 February 2010 - 12:43 PM

I thought Victoria had some of the hardest rules. With the panel van i done i cut the chassis just behind the drivers seat and made a complete new rear end.

I stepped up the rail 90mm above the diff and narrowed each side by 40mm plus add a 9" and 4 link setup with air bags then added tubs and also stepped up the floor.

The engineer had no problems with this and he was one to follow the rules and make up a few extra one's when he felt like it (but i think that was just to get more money

out of me).

Posted Image
Posted Image
Posted Image
Posted Image

#55 turbo76lx

turbo76lx

    Forum Fixture

  • Members
  • PipPipPipPipPip
  • 645 posts
  • Name:Glen
  • Location:Vic
  • Car:LX
  • Joined: 15-August 08

Posted 06 February 2010 - 01:30 PM

Dirtbag - the v8 hatch is running a 308, trimatic and 9". The previous owner had twin 600's on the tunnel ram and only had a holley red fuel pump.

He ran it down the 1/4 a few times, it ran flat 13's on street tyres and at that time was running a t350 and 4.11 diff gears. He wondered why it was

running out of fuel at half track. Then the t350 gave up so he replaced it with a trimatic and at the same time decided to paint the car but then lost

interest and i ended up with it.

#56 turbo76lx

turbo76lx

    Forum Fixture

  • Members
  • PipPipPipPipPip
  • 645 posts
  • Name:Glen
  • Location:Vic
  • Car:LX
  • Joined: 15-August 08

Posted 06 February 2010 - 08:32 PM

The boot floor.
Needed some more room for the fuel tank so cut it out.

Posted Image

Folded up a fill in piece.

Posted Image
Posted Image

#57 turbo76lx

turbo76lx

    Forum Fixture

  • Members
  • PipPipPipPipPip
  • 645 posts
  • Name:Glen
  • Location:Vic
  • Car:LX
  • Joined: 15-August 08

Posted 06 February 2010 - 09:16 PM

The fuel tank, surge tank, carter lift pump and twin bosch 044 pumps. Might paint it black yet, stands out a bit.

Posted Image
Posted Image
Posted Image
Posted Image
Posted Image

#58 turbo76lx

turbo76lx

    Forum Fixture

  • Members
  • PipPipPipPipPip
  • 645 posts
  • Name:Glen
  • Location:Vic
  • Car:LX
  • Joined: 15-August 08

Posted 07 February 2010 - 07:52 PM

The front end. Just done the usual UC top arm, steering arms and rack with HQ stubs and brakes and used super pro bushes through out.

But one thing i did to give the brake calliper a bit more clearance was to turn a lip up on the top arm.

You can see the arm on the right hasn't been lipped yet, this gives the calliper clearance on full lock and even looks factory.

Posted Image
Posted Image

This is two UC L/H top arms one lipped and one not.

Posted Image

#59 76lxhatch

76lxhatch

    That was easy!

  • Members
  • PipPipPipPipPipPipPip
  • 7,156 posts
  • Location:Unzud
  • Car:SS
  • Joined: 04-August 08
Garage View Garage

Posted 08 February 2010 - 07:16 AM

That's a great idea, much better than cutting bits out and those arms can always do with a bit more rigidity

#60 Heath

Heath

    I like cars.

  • Administrators
  • PipPipPipPipPipPipPip
  • 18,322 posts
  • Name:Heath
  • Location:Eastern Suburbs, Melbourne
  • Car:Heavily Modified UC Sunbird Hatchback
  • Joined: 07-November 05
Garage View Garage

Posted 08 February 2010 - 04:13 PM

Is it possible to do that without special equipment? What was your method if you can explain it easily?

#61 turbo76lx

turbo76lx

    Forum Fixture

  • Members
  • PipPipPipPipPip
  • 645 posts
  • Name:Glen
  • Location:Vic
  • Car:LX
  • Joined: 15-August 08

Posted 08 February 2010 - 06:06 PM

Heath

The method.......

Posted Image

And yes i should put a new handle on that hammer.

You need something very solid to hammer against. My bench has a 10mm steel top with a small radius on the edge, you don't want a square edge.

A welding glove helps take out some of the shock when you are smashing the hell out of it. Basically you want to continue the lip on the side around to

the ball joint. I hit over about 8mm but hold about 10mm over the edge, don't try and hit it all over at once just work it a little bit at a time.

I went over it 5 times, the first run just knock it down 5 degrees to start with, this will determine where the fold will be. When finished hammering just

give it a light sand.

I only had to hit over 8mm but this was to suit a PBR cast calliper and the top arm in the lower RTS holes in the sub-frame different callipers may

need more folded over. Hope this is clear enough, the photos should give you the general idea.

Posted Image
Posted Image
Posted Image
Posted Image

#62 _niterida_

_niterida_
  • Guests

Posted 08 February 2010 - 07:00 PM

ummmmmmm doesn't that lip give those arms strength ? By removing it, it is possible the arm will now flex and bend. I think an engineer would have fit if he saw that.

Edited by niterida, 08 February 2010 - 07:01 PM.


#63 turbo76lx

turbo76lx

    Forum Fixture

  • Members
  • PipPipPipPipPip
  • 645 posts
  • Name:Glen
  • Location:Vic
  • Car:LX
  • Joined: 15-August 08

Posted 08 February 2010 - 07:01 PM

The diff - new 9+ housing, strange carrier, detroil locker, moser 35 spline axles with 1/2 studs and 1350 billiet yoke.

Posted Image
Posted Image

#64 turbo76lx

turbo76lx

    Forum Fixture

  • Members
  • PipPipPipPipPip
  • 645 posts
  • Name:Glen
  • Location:Vic
  • Car:LX
  • Joined: 15-August 08

Posted 08 February 2010 - 07:48 PM

Niterida, i didn't cut any of the arm only lipped the edge, most people just cut the arm for clearance or don't realise with HQ stubs and brake that on

full lock and full upper supension travel that the calliper will hit the upper arm. As for engineering the front lower arms on my panel van were cut

and welded, the engineer only make me get them crack tested (die pen'ed).

From vic roads Vehicle Standards Information

"Axles, Suspension and Steering Components
An Approval Certificate is required for any modification to axles, suspension or steering components.

Modifications to any of these components should be carried out be selecting production components which do not require cutting, heating, bending or welding.
However, where cutting, heating, bending or welding cannot be avoided, acceptable testing, which may include x-ray or other non destructive methods, must
be undertaken before an Approval Certificate can be issued."

#65 _niterida_

_niterida_
  • Guests

Posted 08 February 2010 - 07:55 PM

Niterida, i didn't cut any of the arm only lipped the edge,


Its the shape of the lip that gives it strength. If you remove the lip you have to do something to regain the lost strength eg; weld a plate across the arm.

Its your car but I wouldn't do that to mine.

#66 _v6locker_

_v6locker_
  • Guests

Posted 08 February 2010 - 08:06 PM

i can't keep my eyes off this thread mate good work, keep it coming..

#67 turbo76lx

turbo76lx

    Forum Fixture

  • Members
  • PipPipPipPipPip
  • 645 posts
  • Name:Glen
  • Location:Vic
  • Car:LX
  • Joined: 15-August 08

Posted 08 February 2010 - 08:36 PM

Rear lower trailing arms.

Posted Image

Rear brakes, used VN commodore discs and backing plates but had problems using the hand brake set up so used pintara callipers with the internal hand brake.

The pintara callipers are mounted to the rear of the disc but i needed them mounted to the front. So swapped the pistons and hand brake mechanism from left to right.

Original calliper

Posted Image

Modified calliper and brake set up.

Posted Image

Wrong photo, this one.

Posted Image

#68 Stinga

Stinga

    .

  • Members
  • PipPipPipPipPip
  • 2,114 posts
  • Name:Stinga
  • Location:Wollongong, NSW
  • Car:HD Holden ute, and sedan, UC torana
  • Joined: 05-December 05

Posted 08 February 2010 - 08:44 PM


Niterida, i didn't cut any of the arm only lipped the edge,


Its the shape of the lip that gives it strength. If you remove the lip you have to do something to regain the lost strength eg; weld a plate across the arm.

Its your car but I wouldn't do that to mine.


he didnt remove the lip though, he extended it?


i vote for the black tank to try and keep it a bit more stealth

#69 _niterida_

_niterida_
  • Guests

Posted 08 February 2010 - 09:52 PM

he didnt remove the lip though, he extended it?


hahaha whos an idiot ?????


I just reread his posts and he actually put a lip on it - giving it more strength - I thought he took the lip off - ooops


I take everything back..........

#70 turbo76lx

turbo76lx

    Forum Fixture

  • Members
  • PipPipPipPipPip
  • 645 posts
  • Name:Glen
  • Location:Vic
  • Car:LX
  • Joined: 15-August 08

Posted 09 February 2010 - 06:46 PM

Wiring the computer was not something that i was looking forward to but it had to be done. I am using a VIPEC V88 computer, probably more than

what i need, all i know it's loom has about 70 wires.

Posted Image

Also made a mounting plate with extra fuses and relays which will all be mounted in the glove box.

Posted Image

The fun of wiring.....

Posted Image
Posted Image

And rewired the head lights as well.

Posted Image

#71 lxsstorana

lxsstorana

    Forum Fixture

  • Members
  • PipPipPipPipPip
  • 2,499 posts
  • Name:Mick
  • Location:Eastwood, Sydney
  • Car:SS Hatchback
  • Joined: 23-March 06

Posted 09 February 2010 - 06:52 PM

Nice progress and I'm glad you're doing the wiring as there's no way I'd try and do that.

Mick.

#72 turbo76lx

turbo76lx

    Forum Fixture

  • Members
  • PipPipPipPipPip
  • 645 posts
  • Name:Glen
  • Location:Vic
  • Car:LX
  • Joined: 15-August 08

Posted 09 February 2010 - 07:00 PM

Yes the wiring did do my head in. After reading the manual 6 time i think i worked it out. I know it starts and will idle so i must have done something right.

#73 turbo76lx

turbo76lx

    Forum Fixture

  • Members
  • PipPipPipPipPip
  • 645 posts
  • Name:Glen
  • Location:Vic
  • Car:LX
  • Joined: 15-August 08

Posted 09 February 2010 - 07:29 PM

The dash is in good condition so didn't want to cut it up. I had the speedo converted to electronic and all the other gauges calibrated.

The only thing that is a little out of place is the 3 gauges in the centre console, boost pressure, oil pressure and trans temp. One thing i

forgot to say is that i modified a trimatic shifter to work with the powerglide, just welded up the gates and filed them out. The rest of the

interior is stock.

A few photos of the guages.

Posted Image
Posted Image
Posted Image
Posted Image
Posted Image

#74 turbo76lx

turbo76lx

    Forum Fixture

  • Members
  • PipPipPipPipPip
  • 645 posts
  • Name:Glen
  • Location:Vic
  • Car:LX
  • Joined: 15-August 08

Posted 09 February 2010 - 08:22 PM

The rib under the bonnet was touching the turbo so cut and shut time.

Posted Image
Posted Image
Posted Image
Posted Image
Posted Image

#75 Heath

Heath

    I like cars.

  • Administrators
  • PipPipPipPipPipPipPip
  • 18,322 posts
  • Name:Heath
  • Location:Eastern Suburbs, Melbourne
  • Car:Heavily Modified UC Sunbird Hatchback
  • Joined: 07-November 05
Garage View Garage

Posted 10 February 2010 - 01:32 PM

Mmmmm really tasteful work. I like the gauge setup a lot - guages mounted in the middle of the car sitting flush with the dash always annoy me, nice that you've actually set it up that they point towards the driver and you haven't ruined the original look of the interior at all :)

Edited by Heath, 10 February 2010 - 01:33 PM.


1 user(s) are reading this topic

0 members, 1 guests, 0 anonymous users