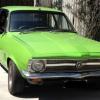
Group C Opel Monza build by Dirtbag
#201
 _mick74lh_
Posted 17 July 2012 - 09:32 PM
#202
 _dirtbag_
Posted 17 July 2012 - 10:56 PM
#203

Posted 18 July 2012 - 12:50 AM
You should still have some lying around somewhere.
#204
 _dirtbag_
Posted 31 July 2012 - 04:39 PM
#205
 _dirtbag_
Posted 31 July 2012 - 05:22 PM


The lower section is pretty knackered, but I have a feeling it's going to be too short anyway to I'll just make a new piece for there.
First job on the car was removing the fuel tank. What a mission. Took an hour to undo 4 bolts! Damn old rusty cars hahaha!!!!

Then I finally got to start chopping the outer skin off.

I've started a "chopped off bits" pile on the floor : )

The owner wants a flat floor in the back so I can make up a nice big drop tank for underneath so the spare wheel well had to go.

All the inner surfaces are pretty stuffed, and I don't want to have exhaust cut outs in the rear panel anyway so I'm going to get rid of all the inner parts as well.

This is looking up at the inside of the drivers quarter and boot floor. Nice : )


Next job I did was to cut the old floor out of the commodore rear clip.

I've kept the inner panel that mounts the tail lights for now, but I have a feeling this will need to get cut out to fit properly, as I don't want to cut the inner panel out of the monza as the hatch latches mount there.

The inside of the lower part of the rear clip has had some dodgy repairs so I'll definitely be cutting the whole lower part off.

After making some measurements I found I need to cut 2 1/2 inches from the end of the boot floor and chassis rails on the monza, as the back of the monza tapers outwards from top to bottom whereas the commodore tucks in at the bottom.

First trial fit was as successful as I'd have thought. At least I know the amount I need to cut off is correct. Doing the trial fit before cutting the chassis is a good move : )

The lip that usually mounts the boot rubber on the commodore has to go, as does the section inside I kept that the tail lights mount to. However it looks like once the rear is in place I'll be able to use the monza inner panel to mount the tail lights instead. Yay! : )

The pile is growing hahaha!

So once I cut 2 1/2 inches off the floor and chassis and cut the inner parts out of the commodore clip things started to look good.

OK, so with the outer part looking like it'll fit I need to make the inner parts. I started by welding a piece of thick wall RHS between the chassis rails. It didn't used to have this brace, but I figure it'll be a good place to mount the drop tank straps.

I then made up the inner panel that joins the boot floor to the lower part of the outer panel that I've yet to make. You can see where I've welded the ends of the chassis rails to this piece as well.

I made the new inner panel with the same slight curve that the old panel had.

It's definitely not pretty but here you can see where the new inner panel is welded to the chassis rail, boot floor and inner rear quarter panel.

I gave it a but of a sand up as I'll etch prime this before I weld the new lower section on. I also need to connect the monza inner panel to the boot floor. I'll do that once the outer pieces are all in place.


Finally I cut the bottom of the rear clip off and tacked the top part into place.


I wish I had a rear bumper to put on it!!! I like how the rear has a shorter look now. The steel bumper will help too.

Monza with commodore bum and UC with firebird bum : )

Obviously there's still all the rust repairs and guard cutting to do on this side, but even with it just looking stock on this side I think the VH tail lights are an improvement. I'll be getting rid of the fuel filler from the quarter too.

So that's all I have done so far. Doesn't look much but this crap takes a while. Tomorrow I'll make the new lower valance and hopefully the corner pieces too. See how I go. As for how it looks, well I really like the new rear clip in place. I really don't have much love for the original monza rear.


So there you go ; )
#206

Posted 31 July 2012 - 06:24 PM
#207

Posted 31 July 2012 - 06:55 PM
#208

Posted 31 July 2012 - 07:19 PM
#209
 _L32M20_
Posted 31 July 2012 - 08:15 PM
#210
 _mick74lh_
Posted 31 July 2012 - 09:52 PM
#211

Posted 01 August 2012 - 04:22 PM
#212
 _dirtbag_
Posted 01 August 2012 - 06:21 PM
#213
 _dirtbag_
Posted 01 August 2012 - 11:05 PM

The commodore boot opening is wider than the monza hatch opening meaning there was a gap on each side that needed filling above the tail light.


By keeping that top section of the commodore rear clip above the tail light means the tail light doesn't stick out any further than it would do on a commodore.

I also welded the commodore piece to the monza section above the tail light, I left a step in there as I think it looks good and a has a more factory look to it.


Because I kept the top of the commodore panel above the tail light means the tail light is lower than the monza tail lights. I think this helps the look, but means I'll have to extend the lower edge of the hatch to suit. It wont be difficult and it'll help to integrate the tail lights into the rear better.


Once the hatch has the extra 10mm on the lower edge it'll stop the tail lights looking like they stick out so much. But let's face it, when they don't have the chrome trims around them they stick out on commodores anyway, so this'll be fine in my opinion.

OK, next job was to make the new lower valance. I folded a return on a sheet of 1.2mm zinc then shrunk it to get the same curve that I put in the new inner panel I made yesterday.

I then used the english wheel to put some crown in the panel, so it doesn't just look like a flat piece across the back.

It's not much crown, just the same as what it had originally.

I sprayed a bit of acid etch onto the inner surface before welding the new outer piece on.

This shows how mild the curve is in the panel, but if it were just flat it would look tacky.


Ready for more plug welds : )

I'm happy enough with the shape of the new panel.

Welded on.


#214
 _dirtbag_
Posted 01 August 2012 - 11:14 PM

I then started on the corner piece. I'm cheating here and doing it in two pieces.

I really like the look of not having an exhaust cut out, as it's going to be running a drop tank and I'm hoping twin pipes like a torana.

I like the new side profile with the short bum. i think it makes the factory spoiler look a lot bigger and nicer.


I've still got plenty of work to do in here.

Well I'm sure there'll be plenty of you that don't like it, but I do. I cant wait to see it with a bumper on it! And some decent wheels : )


Here's a good reference point.

So that's it for today.
#215
 _mick74lh_
Posted 01 August 2012 - 11:28 PM
#216

Posted 02 August 2012 - 08:41 AM
Great work Tim.
#217

Posted 02 August 2012 - 08:58 AM
#218

Posted 02 August 2012 - 12:31 PM
I love how you can just imagine something in your head and a few days later there is is right in front of you!
Dirtbag the artist!!
#219

Posted 02 August 2012 - 03:15 PM
#220

Posted 02 August 2012 - 03:30 PM
#221
 _dirtbag_
Posted 02 August 2012 - 04:04 PM
#222
 _dirtbag_
Posted 02 August 2012 - 04:14 PM


With the playing around with the bumper finished I thought I'd finishe the corner. I cut the hole a bit bigger to make shaping the new piece a bit easier.


Again, I really like the look of not having the exhaust cut out.

It's starting to look like a car. I also bought a piece of 12x3mm flat bar to weld along the lower edge of the hatch so it all lines up along the back above the tail lights, but ran out of day. Tomorrow!

Some rust converter. I'm glad I wheeled up this panel instead of leaving it flat. I know it's not noticable but I notice the difference.

And that's all I got done on this today. I had a million and one other things to sort out, but that's life : )

Obviously I haven't done the other corner, as I still need to rebuild the lower rear quarter, cut the guard, replace the sill, replace the A pillars.................
#223

Posted 02 August 2012 - 05:07 PM
#224
 _dirtbag_
Posted 02 August 2012 - 05:17 PM
#225
 _cruiza_
Posted 02 August 2012 - 06:11 PM
1 user(s) are reading this topic
0 members, 1 guests, 0 anonymous users


