#1
Posted 03 January 2013 - 10:14 PM
Never too late to start a build thread, so here’s mine, four years after I actually started. Pretty slow old build, but it’s happening on spare time and spare money of which I have none, like a lot of us! I’ll summarise the build up until now over three parts, then update in real time – I look forward to the feedback and knowledge that sets this forum apart from most others.
I have a thread in the Introduction forum http://www.gmh-toran...ike-guy-reborn/ for those wanting to know where I have come from, but to summarise, this is my fourth Torana (or fifth if you include the one I owned twice) but first re-build. I discovered bikes after my third Torana back when I was 21 or so, and have since made them my job working for bike magazines, but I always had a hankering for another Torana. I reckon everyone here understands that.
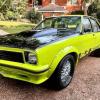
Here are my first three cars back in the day (literally, my fourth car was my first non-Torana), starting with a re-shelled LJ XU-1 replica. It had all the XU-1 running gear (apart from the big tank) and interior, a set of truly rank fiberglass flares and 13-inch chromies. I was 19 at the time, that’s my defence. Then there was a LX SLR5000 replica, and a genuine LX SS hatch, which was my favourite. It had a 308 in it but was originally a six. 300hp at the treads was enough power for me at the time.
LJ XU-1 rep 4.jpeg 75.92K 20 downloads
slr5000 rep 2.jpeg 47.75K 20 downloads
LX SS Hatch 2.jpeg 61.73K 18 downloads
Here’s my new car back when I bought it. It was a Persian Sand (obviously) roller I picked up from Yass, NSW from the bloke who used to own a Top Ten SLR5000 some would remember, Bollistic. I actually hunted down the Street Machine (they are in the same building as my magazine) his car featured in back in the eighties and sent it to him afterwards. I got it for $1900 just as the muscle car bubble was bursting (end of 2008) and the world was hitting recession.
New Torrie.jpg 54.41K 17 downloads
New torrie 2.jpg 61.81K 17 downloads
New Torrie 3.jpg 38.31K 20 downloads
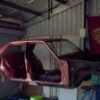
Original plan was to just to rub it back as it looked so straight, paint it myself in my shed (with zero experience or idea), and fill it with an injected 304, T5 and nine-inch. Then in walked a mate, panel shop owner, Frank, who wisely slapped me over the back of the head, loudly decreed it an injustice to not do it properly, that he would help, and to strip that front guard and hand it over, asap. So I did.
Strip Torrie.jpg 63.31K 16 downloads
Things were slow, my fault as I was in no rush, and would just strip a panel, give it to Frank who would file finish it and spray it in 2pac primer in the time his shop wasn’t busy, then swap for the next panel and a bit of cash. I was very content with this method, and I knew it was being done properly.
I ended up stripping the entire car – engine bay and all – by hand with a paint scraper (well, six of 'em) and two tins of paint stripper, which wouldn’t have been too bad, but the car was full of bog. Shitloads of it. And it takes a while to remove that by hand. I hadn’t heard of Graffiti strip discs and couldn’t afford media blasting, so my right hand has never been the same since. Some would suggest other reasons, but they’re just rude.
Then, with the birth of my third child imminent, I got the entire shell up to Frank’s shop. There I learnt to weld, make my own rust patches, etc as I was nicking up there regularly to learn more and do more. He let me use his tools and space, and I learnt heaps. Prior to that, I didn’t know what a nibbler was, or etch primer, or how to use a MIG, and while no craftsmen now, at least I have an idea and have done a lot myself. Frank and his crew have done the hard bits and really helped me out. Again, bikes are my thing, but I was getting closer to adding cars to being “my thing” too.
Nibbler.jpg 48.45K 13 downloads
Patch.jpg 58.3K 13 downloads
It was great rust-wise, just the plenum, lower rear quarter, mild patches in the boot, behind the hinges, battery tray and a stuffed rad support. I made my own battery tray (with a bit of help!), amused the panelshop spraying myself in welding spatter welding in the new plenum patch on my back and had a ball doing something I'd never done. Very satisfying.
Battery tray.jpg 35.48K 15 downloads
Battery Tray 2.jpg 34.5K 12 downloads
Plenum.jpg 36.25K 13 downloads
Plenum 3.jpg 55.02K 13 downloads
Plenum 4.jpg 65.45K 12 downloads
I have a new lower quarter panel, which looks good, but am concentrating on the driveline for the next little while. That’s in update two, soon, along with some much prettier pics of the car as it takes shape.
#2 _j.e.d._
Posted 04 January 2013 - 05:25 AM
#3
Posted 04 January 2013 - 07:03 AM
Part two
Driveline time. I bought a V8 T5, a 304i engine out of a VS SS (I accidentally hit Buy it Now and then Confirm Bid on eBay late one night in bed on my effin iPhone – my wife still thinks I did it on purpose, but I didn’t. Had to ship the bloody thing from Townsville to Sydney!!) and nine inch diff, all without much experience. And I made mistakes.
The T5 bellhousing was a custom Dellow number for a Chev with the clutch fork on the wrong side, the Nine inch was commodore stud pattern back when I thought that was the best way to go, and the engine was out of an auto, so while I got the loom, I had to buy a flywheel, still needed a manual computer, etc. Not major issues, but expensive when you thought you had all you needed in these departments. I still cleaned them all up and got them ready to fit.
Driveline.jpg 53.4K 13 downloads
Driveline 2.jpg 59.67K 16 downloads
Driveline 3.jpg 81.67K 13 downloads
Driveline 4.jpg 84.56K 14 downloads
Then, when I dummy fitted everything, the engine was pointing the gearbox out to sea… Yep, wrong crossmember. It was originally a four cylinder Sunbird (the engine that uses a different crossmember, with offset mounts, to the rest of the model range, the Opel engine is it? Can't remember), and the crossmember had also been tampered with to fit a 350 Chev (the car came with a ruined 010 4-bolt block in it). All rookie errors, and all fixed thanks to this forum! I ended up with a new k-frame thanks to UncleFesta, and re-bushed it and Frank painted it.
Crossmember .jpg 48.24K 16 downloads
Crossmember new.jpg 83.09K 13 downloads
Engine in.jpg 47.88K 13 downloads
I did make some good buys, including a KMac/Koni suspension (including swaybars not pictured) package from a forum member and a Hoppers 290mm kit with HQ stud pattern, so it wasn’t all stupid. Not totally.
Hoppers.jpg 50.16K 14 downloads
Koni.jpg 50.45K 13 downloads
My initial idea had been to buy a donor car, but I didn’t due to initial cost, and this is a budget build with a capital B. But when I added up all the bits I needed, then subtracted the money I could make selling the bits I no longer needed and wrecking the donor car, it all made sense again. More importantly, my wife saw my point too.
So, I sold the T5 and 9-inch, and recently bought a complete, running SV LE Commodore 5-speed V8 in crashed condition and started again. Lucky I have patience.
Commode.jpg 58.22K 14 downloads
Commode 4.jpg 64.66K 12 downloads
Commode 2.jpg 70.19K 13 downloads
Which almost brings me to where I am now, which I will show in the next update!
#4 _j.e.d._
Posted 04 January 2013 - 07:44 AM
Looking forward to more updates
#5
Posted 05 January 2013 - 10:24 AM
So, with the new commodore sitting in the driveway (my three kids love playing in it, my wife just wants it gone asap), I brought my Torana home from Frank’s as I simply wasn’t getting up there enough and was worried it was overstaying its welcome. Here's a pictorial taste of what was done while there.
Made from scratch the battery tray
Battery tray again.jpg 34.5K 13 downloads
Hinge rust sorted
Hinges .jpg 47.44K 14 downloads
Hinges 2.jpg 25.33K 13 downloads
About to weld in the new plenum patch - no pic of that I'm afraid. Pity, because that was a challenge to do! All the inside was covered in rust converter then KBS
Plenum4.jpg 55.83K 15 downloads
And the stuffed rad support
Rad Support.jpg 58.09K 14 downloads
Then got it home - my boys were almost as excited as I was
Home.jpg 59.42K 14 downloads
At home I stripped the floor on top and underneath of years of crud (with a wirewheel this time – much better!), then hit it with metal conditioner and KBS. It was a mission with no rotisserie, but stuff it – it had to be done. A week of annoying the neighbours late at night and it was done top and bottom. I still need to touch up some areas with a paintbrush, and I have nightmares about lying on my back spraying a floor one foot from my face, but it’s over.
Undercarriage.jpg 58.25K 12 downloads
Undercarriage2.jpg 58.63K 12 downloads
KBS.jpg 55.04K 14 downloads
KBS2.jpg 51.8K 12 downloads
The KBS ninja
KBS3.jpg 46.41K 14 downloads
Then I yanked the engine and box out of the commode after labeling everything and being very careful not to damage the wiring I needed, stuck it on the Torana K-frame and wheeled it in. Not before realizing the re-built/painted K-frame had had the outrigger bushes installed as per the manual, which meant the wrong way. Thanks again to the forum, I reversed them. I used the outrigger bolt and some washers as a press and squeezed them in with a bit of dishwashing liquid.
Engine out.jpg 54.64K 11 downloads
It turns out the HSV extractors don't fit - anyone know why? I have seen them inn other Torris, but p/s fouls on K-frame in mine.
Engine Kframe.jpg 40.92K 14 downloads
Bushes.jpg 56.64K 13 downloads
Then I wheeled it under the car and bolted it up, after coaxing my wife into the garage in her pyjamas at the critical moment to run the engine crane. I won’t do it this way again, I find it much easier to install the engine and box into the car with the k-frame already installed. If I wasn’t doing it on my own, that view may change.
Rolling engine in.jpg 51.67K 10 downloads
In, but not torqued up
Engine in again.jpg 51K 11 downloads
I also used a spare tailshaft yoke to stick in the gearbox so I didn’t need to drain the auto fluid they run.
Yoke.jpg 32.72K 11 downloads
And that’s basically where I am now. Most of the hanging panels are in primer, a full flare kit is ready to fit (I bought a Wilsons set before he retired), I have the wheels I bought from the US and shipped over thanks to GMHT member Jeff (LS1 Hatch), and am chasing a R31 diff to use up the back with the commodore’s LSD center. I will also use the VN’s brake master, booster, pedals, etc, and want to use as much as I can. Anything else I should take off it? I will sell the interior, and keep the power windows for later.
I have the wiring looms on the bench and have to sort that according to the link I found on this site, and to hassle a few forum members who have done it before and offered help. I am crap at wiring anything, and a bit scared of it, but hey, I was scared of welding in rust patches when this all began, so hopefully I will get over it!
Once the driveline is dummy fitted, I will pull it all out again for paint, and much smaller updates in the future!
#6
Posted 05 January 2013 - 10:49 AM
I have just PM'd Brad (Hanra) about my harness, he cleaned, fixed and rewrapped his so i thought i'de bug him about it, he has been very helpfully with other questions i have had, i offten visit his build thread for tips and pics.
#7 _Richie_Sebring_
Posted 05 January 2013 - 10:55 AM
#8
Posted 05 January 2013 - 10:57 AM
cheers. Nothing groundbreaking here, but I am trying to do a good job.
yes, I have hassled Hanra before too - I love that car of his, and his attention to detail makes me re-think things sometimes, as I can get impatient at times... The harness out of the donor car is in great nick and I know it works, problem is the Torana was bought as a roller, so I don't know what's missing from its harness. There are alot of wires there, so I'll have a go this week at hooking up the efi harness to the Torrie's. Matt (LHSLR3300) from here has offered a look at his car too, which I will take him up on once the festive season is over and I am further along with this one. This forum has been a lifesaver for me!
#9 _Richie_Sebring_
Posted 05 January 2013 - 10:58 AM
rick
#10
Posted 05 January 2013 - 10:59 AM
#11
Posted 05 January 2013 - 11:02 AM
Hi Neil, it wasn't the sensor hitting, it was the collector?? Anyway, I'll ebay them and source a set of efi extractors for a torrie somehow. Not keen on $600 for new castle ones, as my engine is basically stock to start, and I reckon I can better spend money on other stuff. And I'm tight.
#12
Posted 05 January 2013 - 02:35 PM
#13
Posted 05 January 2013 - 04:11 PM
#14
Posted 05 January 2013 - 04:17 PM
#15
Posted 05 January 2013 - 05:19 PM
Yeah its in there, just used the factory headers moved the passenger side so it fitted and then used twin cats with a ballencer.Hi Neil - I was thinking I could do that, but if I can get good money for them on eBay I could then just buy a set that fits. But now you've said that... It would just be a matter of moving the collector and oxy sensor I Spose. What did you do? Is it in your build thread?
#16
Posted 05 January 2013 - 07:24 PM
Yeah its in there, just used the factory headers moved the passenger side so it fitted and then used twin cats with a ballencer.
Alright, I will give it a go. They will do the job until I save up enough to get some decent power. I will check out your thread - again - to see what you did. Cheers.
#17
Posted 05 January 2013 - 08:32 PM
way more progress than me unfortunately..
I often wondered about your user name, then awhile back i saw a picture of a black, hatch i think it was, taken out on one of your rides, in an issue of that once great mag and though that it was you on here.
Edited by racean69, 05 January 2013 - 08:33 PM.
#18
Posted 05 January 2013 - 09:07 PM
And don't be fooled by the progress, that's four years worth there... :-)
#19
Posted 11 January 2013 - 07:34 PM
IMG_3009.jpg 71.54K 8 downloads
Funny thing is, though, that once I spread out the two looms I was left with after stripping the Commodore, and following this thread to wire it up - http://www.gmh-toran...ion#entry493314 - it's all starting to make sense. Mind you I haven't tested anything yet, but I am getting there.
I found labelling absolutely everything has helped, even what appears simple, because you just forget. The yellow electrical tape has saved me a few times this week.
IMG_3012.jpg 40.52K 7 downloads
Using the above thread was so, so helpful, however made a little difficult because my car was bought as a roller, so I wasn't sure how original the wiring was, and what I actually had. The main engine plug I have, but not the engine side of it, which would make the wiring up even easier - does anyone have the female side of the plug complete with wires they want to sell? Unlikely I know, but worth a shot. Here's what I have - I have taped the wires in place for now.
IMG_3014.jpg 62.39K 9 downloads
I am unsure how to wire into the yellow/pink wires with the pink/black VN wires without the plug. Any help would be great. I assume I just wire the four together, or get another plug? So green at this...
Once I have it dummy wired up, I'll go about hiding the wiring, mounting the computer and relays etc. I still need to modify the extractors to fit - I am going to cut and shut the passenger side as suggested by NeilsLX above - and stick the fuel tank back in with a fuel pump from the commodore to get it going and test everything works. Man I hope it does. That will be next week I think. And not before I have bought the biggest fire extinguisher I can afford.
I have also found out the hard way to plug the K-frame bush holes with something to prevent sockets and crap rolling around in there while you drive, in this case a pair of one of my kids socks they were foolish enough to leave in Daddy's garage. That will teach them.
IMG_3007.jpg 48.13K 8 downloads
I'm really enjoying this stage, as it feels like the thing is coming together finally. Pretty crazy given how far away I am, but it's all about how you feel so I am going with it!
#20 _Holden89nut_
Posted 11 January 2013 - 10:39 PM
Up a treat!!
#21
Posted 12 January 2013 - 11:16 AM
I just set up my welder too, a cheap-ish mig that will do the job for the small panel stuff I have left. More updates soon.
#22 _LH SLR 3300_
Posted 12 January 2013 - 12:02 PM
#23 _LH SLR 3300_
Posted 12 January 2013 - 12:04 PM
#24
Posted 12 January 2013 - 12:13 PM
#25 _ausdev_
Posted 27 January 2013 - 05:51 PM
Looks like it is all coming along for you there. I am working towards installing the 304 and tremec as well so i will keep my eye on this thread. I could do with some help in regard to which engine mount/plate, sump, gearbox crossmember combo you used for your conversion and if they fitted well or not...?
Many Thanx
Al
0 user(s) are reading this topic
0 members, 0 guests, 0 anonymous users