Jump to content


RUST REPAIRS ON LJ GTR


  • Please log in to reply
96 replies to this topic

#1 _mikecatts_

_mikecatts_
  • Guests

Posted 05 March 2013 - 01:12 PM

Hi all...

Ive started the repairs for a fellow forum member..

Its a LJ GTR.. Has rust in all the common spots....

Some repo panels supplied... The car is sanblasted and etched primed and stripped.. well done.. a clean car for once :)


estimated repaire time is 8 weeks...


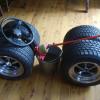
Pics are before starting work.. Put on jack stands and made sure is level.


Mike


Attached File  01.jpg   27.48K   31 downloadsAttached File  02.jpg   28.77K   24 downloadsAttached File  IMG_4111.JPG   26.15K   23 downloadsAttached File  IMG_4112.JPG   21.38K   22 downloadsAttached File  IMG_4113.JPG   19.51K   17 downloadsAttached File  IMG_4114.JPG   18.45K   17 downloadsAttached File  IMG_4115.JPG   22.45K   16 downloadsAttached File  IMG_4116.JPG   25.36K   16 downloadsAttached File  IMG_4118.JPG   17.05K   16 downloadsAttached File  IMG_4119.JPG   18.66K   13 downloadsAttached File  IMG_4123.JPG   12.42K   12 downloadsAttached File  IMG_4124.JPG   17.9K   14 downloadsAttached File  IMG_4125.JPG   20.67K   14 downloadsAttached File  IMG_4126.JPG   20.19K   16 downloadsAttached File  IMG_4127.JPG   27.47K   14 downloadsAttached File  IMG_4128.1.JPG   24.54K   15 downloadsAttached File  IMG_4128.JPG   19.87K   15 downloadsAttached File  IMG_4129.JPG   16.86K   14 downloadsAttached File  IMG_4130.JPG   23.2K   15 downloadsAttached File  IMG_4135.JPG   24.63K   17 downloadsAttached File  IMG_4136.JPG   23.34K   14 downloadsAttached File  IMG_4138.JPG   21.88K   16 downloadsAttached File  IMG_4139.JPG   25K   16 downloads


#2 _mikecatts_

_mikecatts_
  • Guests

Posted 05 March 2013 - 01:18 PM

I started to have a good look and decided to take off the RH guard so I can fix the A-pillar properly.. Has rust behind so the guard had to come off... Its not hard to take off the gurad.. Just takes time..


And the A-pillar hole is way bigger than thought..., Plus the usual rust.. Ill sandblast and POR 15 after repairs are done.. and the bottom of the guard is stuffed as well...

While off Ill replace the door sill and end...


I see the hardest thing to do is replace the whole roof as it has a sunroof hole...


Off to work now..I might do some more tonight.


Next time..


Attached File  IMG_4144.JPG   30.03K   24 downloadsAttached File  IMG_4145.JPG   62.05K   21 downloadsAttached File  IMG_4147.JPG   32.44K   14 downloadsAttached File  IMG_4148.JPG   24.37K   10 downloadsAttached File  IMG_4149.JPG   20.65K   12 downloadsAttached File  IMG_4150.JPG   24.79K   11 downloadsAttached File  IMG_4151.JPG   30.57K   17 downloadsAttached File  IMG_4152.JPG   28.04K   8 downloadsAttached File  IMG_4154.JPG   27.79K   10 downloadsAttached File  IMG_4155.JPG   19.05K   13 downloadsAttached File  IMG_4162.JPG   29.9K   15 downloadsAttached File  IMG_4163.JPG   25.18K   17 downloads


#3 Ice

Ice

    Cool

  • Members
  • PipPipPipPipPipPipPip
  • 15,126 posts
  • Name:Gene
  • Location:Galaxy's away from Ipswich
  • Car:77 HZ Sandman Van
  • Joined: 03-January 07

Posted 05 March 2013 - 01:47 PM

Love your work mike thats why im scared to strip mine because of the nastys i might find keep up the good work mate its a pleasure to watch your progress
cheers gene.

Wish i had your talent alas not

#4 _mikecatts_

_mikecatts_
  • Guests

Posted 05 March 2013 - 09:09 PM

Love your work mike thats why im scared to strip mine because of the nastys i might find keep up the good work mate its a pleasure to watch your progress
cheers gene.

Wish i had your talent alas not

Ta for the words gene..


#5 _mikecatts_

_mikecatts_
  • Guests

Posted 05 March 2013 - 09:14 PM

Hi all..

I did some more.. It was bugging me to see how bad the rust is under the outer A-pillar.. .

So I took it off and the outer sill as well...

The previouse repairs didnt help with the rust.. They didnt even take off the old weld seam.. Just plug welded over it..

I braced the door jam just to be sure it doesnt move


Anyway.. Looks like under the outer is rusty.. It has to go.... A supplied a-pillar will be pulled apart to see what its like..


The rear seal is ok.. no holes.. Will re-seam seal before I weld in new panel.


Mike


Attached File  IMG_4164.JPG   56.6K   20 downloadsAttached File  IMG_4165.JPG   39.97K   10 downloadsAttached File  IMG_4166.JPG   38.92K   14 downloadsAttached File  IMG_4167.JPG   44.51K   21 downloadsAttached File  IMG_4172.JPG   45.01K   16 downloadsAttached File  IMG_4174.JPG   46.31K   15 downloads


Edited by mikecatts, 05 March 2013 - 09:15 PM.


#6 _mikecatts_

_mikecatts_
  • Guests

Posted 06 March 2013 - 06:15 PM

Hi all...

I managed to get some time to pull aprt the donour A-pillar.

It looked ok from outside, but after a few hours to pull apart.. Shit job by the way, you always come across more spot welds..... It has suface rust underneath...

Ill sanblast.. Fix some small rust holes then POR 15 both the inner and outer.. Should keep a lot of the future moister off it.. Then fish oil when together.


Im only going to do the outer skin as the inner is solid.. Just needs a clean.. That way I wont have to set the doors,, Just adjust for gaps.. A bit of stuffing around, But as I see it..The better choice.


Guys.. Ide fish oil behind my pillars/ window frames.L and R.. squirt some down the hole that the over head interior light wire goes down.. and in the little hole inside the dash.. That way you will get both sides.. .. In my experiance.. If there isnt any rust showing.. I garrentee that there is some surface rust between the panels..


Mike


Attached File  IMG_4177.JPG   52.71K   17 downloadsAttached File  IMG_4178.JPG   38.52K   13 downloadsAttached File  IMG_4179.JPG   47.64K   14 downloadsAttached File  IMG_4180.JPG   45.89K   11 downloadsAttached File  IMG_4181.JPG   49.79K   12 downloadsAttached File  IMG_4182.JPG   43.82K   13 downloadsAttached File  IMG_4183.JPG   45.15K   9 downloads


#7 _LONA-CK_

_LONA-CK_
  • Guests

Posted 06 March 2013 - 07:09 PM

go hard mike.

plenty of dajavue there my friend


cheers gong


Edited by LONA-CK, 06 March 2013 - 07:10 PM.


#8 _Skapinad_

_Skapinad_
  • Guests

Posted 06 March 2013 - 07:16 PM

Mike,

You remind me of Dirtbag when he used to post heaps of useful informative posts detailing his skills.......

Even though some dont reply, the info and hands on details are still appreciated..

Cheers.

#9 rodomo

rodomo

    To advertise here, call 13TORANA

  • Members
  • PipPipPipPipPipPipPip
  • 17,999 posts
  • Name:R - O - B Dammit!
  • Location:Way out west of Melbourne Awstraylya
  • Joined: 10-December 05

Posted 06 March 2013 - 08:40 PM

Did Skap just say something positive towards another forum member or am I reading it wrong?..................................Maybe mellowing? :dontknow:


#10 Ice

Ice

    Cool

  • Members
  • PipPipPipPipPipPipPip
  • 15,126 posts
  • Name:Gene
  • Location:Galaxy's away from Ipswich
  • Car:77 HZ Sandman Van
  • Joined: 03-January 07

Posted 06 March 2013 - 09:15 PM

Did Skap just say something positive towards another forum member or am I reading it wrong?..................................Maybe mellowing? :dontknow:


He is getting soft in his old age rob

#11 _ChaosWeaver_

_ChaosWeaver_
  • Guests

Posted 06 March 2013 - 09:53 PM

Yep so true I've looked at all your handy work in your previous posts, but i have never commented,  I cant believe how bad they were b 4 you started....  I sold an LX 4.2 for $500 because i thought it was unrepairable... how wrong I was..... Great work Mike... look forward to seeing more... 

ps someone's hacked Skaps Ipad.... ;)


#12 _Skapinad_

_Skapinad_
  • Guests

Posted 07 March 2013 - 07:40 PM

Unlike you other daisy chains, Mike does th yards and deserves credit !

In hindsight my response is soft... Ohh well.

Edited by Skapinad, 07 March 2013 - 07:42 PM.


#13 _mikecatts_

_mikecatts_
  • Guests

Posted 07 March 2013 - 09:39 PM

Now guys.. keep it civil :).


Back to the important stuff..


I sanblasted/welded up the rust holes in the replacement A-pillar/cowl and seal plate..

I only etched primed so I can fit, Then Ill sanblast and POR 15.. Will work fine as a replacement panel..


I took off the rusty A-pillar outer as well.... Look at the mess.. Heaps of sand/hard seam sealer/rust.

Amazing whats underneath..

Ill sanblast and POR 15 tomm.. then reassemble... Fairly easy job.. Just time consuming...

The inner panel looks solid..But you never know wht the sanblaster reveils. 


I filled all the holes in the inner guard lip as well.. The previouse repaire drilled straight through. .Made a mess of it to.


While poking around I found some pretyy bad rust in the Vent wall/under the inside dash.. Now we know where all the water was comming from to kill the inside..

Im thinking of replacing the whole window cowl.. I tried to see if I can fix.. Way too close to the vents and will buckle form heat.. and its rusty as and I will just keep rusty metal.. Wont work.. A replacement cowl.


sorry for the big pics..I couldnt be bothered to make smaller tonight.. Its been a long day in the heat..


Attached File  IMG_4186.JPG   46.97K   12 downloadsAttached File  IMG_4187.JPG   32.41K   8 downloadsAttached File  IMG_4188.JPG   42.27K   8 downloadsAttached File  IMG_4189.JPG   43.75K   8 downloadsAttached File  IMG_4190.JPG   41.13K   9 downloadsAttached File  IMG_4191.JPG   43.12K   7 downloadsAttached File  IMG_4193.JPG   44.44K   8 downloadsAttached File  IMG_4194.JPG   39.04K   8 downloadsAttached File  IMG_4195.JPG   42.01K   5 downloadsAttached File  IMG_4196.JPG   37.25K   8 downloadsAttached File  IMG_4197.JPG   55.06K   7 downloadsAttached File  IMG_4200.JPG   46.66K   7 downloadsAttached File  IMG_4201.JPG   59.55K   13 downloadsAttached File  IMG_4203.JPG   46.91K   6 downloadsAttached File  IMG_4204.JPG   46.83K   9 downloadsAttached File  IMG_4205.JPG   49.12K   8 downloadsAttached File  IMG_4207.JPG   48.83K   12 downloadsAttached File  IMG_4209.JPG   38.25K   10 downloadsAttached File  IMG_4211.JPG   32.83K   11 downloadsAttached File  IMG_4212.JPG   54.31K   11 downloadsAttached File  IMG_4213.JPG   56.42K   14 downloads


Edited by mikecatts, 07 March 2013 - 09:41 PM.


#14 _mikecatts_

_mikecatts_
  • Guests

Posted 07 March 2013 - 09:42 PM

more pics..


Attached File  IMG_4214.JPG   54.87K   15 downloadsAttached File  IMG_4215.JPG   53.03K   12 downloadsAttached File  IMG_4216.JPG   68.12K   9 downloadsAttached File  IMG_4217.JPG   48.28K   10 downloadsAttached File  IMG_4218.JPG   71.64K   7 downloadsAttached File  IMG_4219.JPG   47.94K   10 downloadsAttached File  IMG_4220.JPG   45.37K   10 downloads


#15 frash da bucket

frash da bucket

    Forum Fixture

  • Members
  • PipPipPipPipPip
  • 1,890 posts
  • Location:NSW
  • Joined: 23-April 07

Posted 07 March 2013 - 09:55 PM

Hi Mike,


Thats some fine work that you are doing and saving that genuine gtr,will look fantastic when finished.


Regards John.


#16 _mikecatts_

_mikecatts_
  • Guests

Posted 13 March 2013 - 09:47 PM

Hi all...


  I spent some time on the car today...
I started to fix the RH door, to see if it is worth saving.. It had some small rust holes.. Welded those up no problems.. The biggy is the large rusty section on the top outer.. Some one attempted to at fix.. They just did some bodgey welds and fibre filled it.. Ill do better :)


  I think ill cut a patch out of a smelly door or make a piece.., I cant use a sedan door as the inner lip is different.. wont work. I have a repo repair section for this.. Dont know??.. Ill sleep on that one for now.. Its thin metal and will warp easy.. I dont want to create more work fixing this, so Ill wait a day or two.. All told.. I have saved this door... and the owner some cash trying to buy one.. It has a small dent which Im sure my mate will take out and some metal finnishing to finnish.


I then moved back to the A-pillar/sill area..


  First I sanblasted the area Im working on... Revealed some nasties... The water well RH corner is stuffed...

I have to replace the WHOLE window cowl.. Its too far gone to fix...  Off half it came, I decieded to remove the wiper motor wall??? better access to fix the well properly...  and it will weld back together where the heater vent seal goes.. U wont even know it was off..

  Im glad I did as it was heaps worse when looked at closer.. I patched the kicker panel first, there were a few holes.

Then started to cut out the rusty well section... I got interupted and didnt get a chance to finnish tonight..

Note how much rust is under the seam!.. Ill clean and panel bond when I put back..


all well and said a productive arvo.. Im happy

Later..


Attached File  IMG_4240.JPG   20.1K   14 downloadsAttached File  IMG_4242.6.JPG   12.37K   8 downloadsAttached File  IMG_4242.7.JPG   19.62K   7 downloadsAttached File  IMG_4242.JPG   16.94K   7 downloadsAttached File  IMG_4244.5.JPG   19.82K   8 downloadsAttached File  IMG_4244.JPG   12.97K   7 downloadsAttached File  IMG_4245.5.JPG   17.13K   5 downloadsAttached File  IMG_4245.JPG   15.96K   7 downloadsAttached File  IMG_4246.4.JPG   17.68K   7 downloadsAttached File  IMG_4246.5.JPG   21.19K   9 downloadsAttached File  IMG_4246.JPG   16.58K   9 downloadsAttached File  IMG_4247.5.JPG   18.21K   7 downloadsAttached File  IMG_4247.6.JPG   26.55K   6 downloadsAttached File  IMG_4247.JPG   19.5K   6 downloadsAttached File  IMG_4253.JPG   23.14K   5 downloadsAttached File  IMG_4254.5.JPG   17.54K   4 downloadsAttached File  IMG_4254.JPG   19.74K   5 downloadsAttached File  IMG_4255.JPG   20.05K   5 downloadsAttached File  IMG_4265.JPG   19.22K   11 downloadsAttached File  IMG_4266.JPG   17.46K   10 downloadsAttached File  IMG_4272.JPG   14.91K   8 downloadsAttached File  IMG_4274.5.JPG   16.04K   6 downloadsAttached File  IMG_4274.JPG   19.19K   7 downloadsAttached File  IMG_4275.5.JPG   20.63K   9 downloadsAttached File  IMG_4275.6.JPG   17.89K   5 downloadsAttached File  IMG_4275.7.JPG   20.41K   4 downloadsAttached File  IMG_4277.4.JPG   18.8K   4 downloadsAttached File  IMG_4277.5.JPG   20.47K   5 downloadsAttached File  IMG_4277.JPG   18.55K   5 downloadsAttached File  IMG_4279.JPG   15.79K   6 downloadsAttached File  IMG_4280.JPG   23.85K   6 downloadsAttached File  IMG_4282.JPG   19.46K   6 downloadsAttached File  IMG_4284.JPG   23.01K   6 downloadsAttached File  IMG_4285.JPG   18.3K   6 downloadsAttached File  IMG_4286.JPG   20.06K   7 downloads


#17 _mikecatts_

_mikecatts_
  • Guests

Posted 14 March 2013 - 05:06 PM

Hi all...


I finnished all the repairs needed on the RH side of the car.. POR 15 and ready to put the outer sill on...

The water well turned out well... Nice and water tight now..  I will seam seal when the paint is cured.. Rust in the future will not be a problem.. :)

Ill do the same to the LH side when I get there...


Attached File  IMG_4288.JPG   18.36K   11 downloadsAttached File  IMG_4289.JPG   15.16K   8 downloadsAttached File  IMG_4293.JPG   18.1K   6 downloadsAttached File  IMG_4294.JPG   17.14K   5 downloadsAttached File  IMG_4295.JPG   17.73K   5 downloadsAttached File  IMG_4296.4.JPG   18.32K   6 downloadsAttached File  IMG_4296.5.JPG   17.74K   6 downloadsAttached File  IMG_4298.JPG   18.92K   3 downloadsAttached File  IMG_4299.JPG   16.35K   4 downloadsAttached File  IMG_4300.5.JPG   15.39K   5 downloadsAttached File  IMG_4300.JPG   20.83K   2 downloadsAttached File  IMG_4301.JPG   16.33K   2 downloadsAttached File  IMG_4302.JPG   16.29K   5 downloadsAttached File  IMG_4304.JPG   17.01K   2 downloadsAttached File  IMG_4305.5.JPG   19.18K   4 downloadsAttached File  IMG_4305.JPG   16.84K   4 downloadsAttached File  IMG_4308.JPG   19.05K   10 downloadsAttached File  IMG_4309.JPG   19.36K   5 downloadsAttached File  IMG_4310.JPG   17.53K   6 downloadsAttached File  IMG_4311.JPG   18.05K   5 downloadsAttached File  IMG_4312.JPG   14.91K   4 downloadsAttached File  IMG_4313.JPG   20.04K   2 downloadsAttached File  IMG_4316.5.JPG   21.14K   8 downloadsAttached File  IMG_4317.JPG   25.39K   7 downloads


#18 hawk

hawk

    Forum Fixture

  • Members
  • PipPipPipPipPip
  • 2,143 posts
  • Name:steve
  • Location:Berwick, Melbourne
  • Car:UC Torana
  • Joined: 16-July 09

Posted 14 March 2013 - 05:34 PM

Awesome repairs as usual

#19 Ice

Ice

    Cool

  • Members
  • PipPipPipPipPipPipPip
  • 15,126 posts
  • Name:Gene
  • Location:Galaxy's away from Ipswich
  • Car:77 HZ Sandman Van
  • Joined: 03-January 07

Posted 14 March 2013 - 05:41 PM

Where was that car dragged out from mike bottom of a lake great repairs with that much por15 on it it shouldnt rust for another 40 years
cheers gene.

#20 _mikecatts_

_mikecatts_
  • Guests

Posted 14 March 2013 - 06:34 PM

Awesome repairs as usual

I try :)


#21 _mikecatts_

_mikecatts_
  • Guests

Posted 14 March 2013 - 06:40 PM

Where was that car dragged out from mike bottom of a lake great repairs with that much por15 on it it shouldnt rust for another 40 years
cheers gene.


Na.. was a darwin car.. Full of that red dirt I assume.. It came sanblasted.. I know where ther is a bit of red dust in this car.. stay tuned.

 Will out live us, anyway..


One thing..

Im very trempted to take the window cowl of my XU-1 and do the same, I want to replace the metal dash panel in it anyway..... I had MAJOR rust issues with that baby.. Note "had" :)


#22 _mikecatts_

_mikecatts_
  • Guests

Posted 15 March 2013 - 07:33 PM

Hi all...


I played with the RH side door again today..

I decided to use the repo panel.. I wasnt happy with their shape, after a little playing I was happy to fit..

I took my time welding, It didnt get hot at all and no warps/shrinking.. Worked out really well.. Ill remember this for next time.. Ill have to borrow my mates oxy to heat and bend the tab over.. It has to curve with the bend, so a little heat me thinks.


I showed my mate.. He said it will need a little metal finishing, but that will be in the hands of the painter..


all told, worked out well and this door is saved.. I have a few doors that have this rust.. Ill fix them now..


Next time.


Attached File  IMG_4319.JPG   21.66K   10 downloadsAttached File  IMG_4321.JPG   19.76K   6 downloadsAttached File  IMG_4323.JPG   22.25K   6 downloadsAttached File  IMG_4325.JPG   18.7K   7 downloadsAttached File  IMG_4326.JPG   20.31K   5 downloadsAttached File  IMG_4327.JPG   25.38K   5 downloadsAttached File  IMG_4328.JPG   26.09K   4 downloadsAttached File  IMG_4329.JPG   14.15K   5 downloadsAttached File  IMG_4330.JPG   19.79K   6 downloadsAttached File  IMG_4331.JPG   19.97K   6 downloadsAttached File  IMG_4332.JPG   20.55K   4 downloads


#23 _AD_75_

_AD_75_
  • Guests

Posted 16 March 2013 - 03:57 AM

I used to think "Torana" meant "to fly" but now i know it really means "to rust".. :D great work as usual mike! thanks for sharing.


#24 _mikecatts_

_mikecatts_
  • Guests

Posted 19 March 2013 - 07:43 PM

I used to think "Torana" meant "to fly" but now i know it really means "to rust".. :D great work as usual mike! thanks for sharing.

Well... Thats my "torana" experiance to date... Rust.


#25 _mikecatts_

_mikecatts_
  • Guests

Posted 19 March 2013 - 07:52 PM

Hi all...


I had a go at fixing another RH door.. The other door is LC and this car is LJ.. Would be nice to keep correct..

anyway.. I had to cut a sedan door for the peice.. as you can see. It is pretty rusty..

after carefully lifting/bending the door skin lip away... I then cut, sandblasted where its going to be sealed, cleaned/S blasted the patch.. Zinc primed, then tacked/ welded on.. Was a BIG, long weld.. I took my time.. No shrinking/warping.. Turned out well...

I just have to fix a couple of small holes where the patch didnt reach.. Good as new...


Ill ask the owner to get sanblasted, then ill seee what the skin is like.. I know it has a couple of small holes up top lip and on bottom... Its all fixable.

Sanblasting will show..


Anyway, its rust free and ready to hang.. I do need  a door for a guide..


Its hard to buy a good rust free door..


Attached File  IMG_4360.JPG   31.51K   5 downloadsAttached File  IMG_4361.JPG   34.29K   5 downloadsAttached File  IMG_4362.JPG   26.17K   4 downloadsAttached File  IMG_4363.JPG   28.38K   3 downloadsAttached File  IMG_4364.JPG   32.91K   5 downloadsAttached File  IMG_4365.JPG   28.88K   3 downloadsAttached File  IMG_4367.JPG   19.55K   4 downloadsAttached File  IMG_4368.JPG   19.1K   5 downloadsAttached File  IMG_4369.JPG   31.48K   2 downloadsAttached File  IMG_4370.JPG   30.13K   5 downloadsAttached File  IMG_4371.JPG   31.98K   2 downloadsAttached File  IMG_4373.JPG   31.95K   1 downloadsAttached File  IMG_4374.JPG   27.81K   4 downloadsAttached File  IMG_4375.JPG   26.92K   3 downloadsAttached File  IMG_4377.JPG   30.92K   3 downloadsAttached File  IMG_4378.JPG   32.72K   2 downloadsAttached File  IMG_4381.JPG   29.35K   5 downloadsAttached File  IMG_4382.JPG   33.05K   4 downloads


0 user(s) are reading this topic

0 members, 0 guests, 0 anonymous users