Getting into the real stuff now Mike,
A GTR, and you never cease to amaze me, all you need to do is show us a 4 door to a 2 door conversion. Dave I

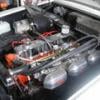
CABIN ENGINE CONTROLS GALORE


Posted 09 June 2013 - 07:39 PM
Getting into the real stuff now Mike,
A GTR, and you never cease to amaze me, all you need to do is show us a 4 door to a 2 door conversion. Dave I

Posted 10 June 2013 - 06:44 AM
Getting into the real stuff now Mike,
A GTR, and you never cease to amaze me, all you need to do is show us a 4 door to a 2 door conversion. Dave I
if you look at my xu-1 build thread... i alreadt have done a 4 to 6 conversion on a lc coupe...
Posted 17 June 2013 - 07:48 PM
Hi all...
Got some ore done on the car the last few days.. I have done some renos, the missus is happy.. Im taking a week off the house to finnsh this car. 
I finnishd the door, looks good.
I took off the old roof as it had a sunroof at one stage..
Both rear drip rails needed replacing..
Sanblasted and POR 15 the donour roof, pulled apart the donour drip rails.. Now to fix, sanblast and replace..
Alls good..
 IMG_5059.JPG 9.99K
7 downloads
IMG_5060.JPG 19.23K
3 downloads
IMG_5062.JPG 21.81K
3 downloads
IMG_5064.JPG 26.26K
5 downloads
IMG_5065.JPG 22.79K
1 downloads
IMG_5066.JPG 26.08K
9 downloads
IMG_5068.JPG 23.61K
4 downloads
IMG_5071.JPG 32.18K
5 downloads
IMG_5072.JPG 22.46K
5 downloads
IMG_5075.JPG 26.29K
5 downloads
IMG_5079.JPG 28.61K
8 downloads
IMG_5080.JPG 24.13K
9 downloads
IMG_5081.JPG 25.99K
8 downloads
IMG_5082.JPG 25K
4 downloads
IMG_5083.JPG 23.21K
5 downloads
IMG_5085.JPG 39.96K
6 downloads
IMG_5086.JPG 38.8K
4 downloads
IMG_5059.JPG 9.99K
7 downloads
IMG_5060.JPG 19.23K
3 downloads
IMG_5062.JPG 21.81K
3 downloads
IMG_5064.JPG 26.26K
5 downloads
IMG_5065.JPG 22.79K
1 downloads
IMG_5066.JPG 26.08K
9 downloads
IMG_5068.JPG 23.61K
4 downloads
IMG_5071.JPG 32.18K
5 downloads
IMG_5072.JPG 22.46K
5 downloads
IMG_5075.JPG 26.29K
5 downloads
IMG_5079.JPG 28.61K
8 downloads
IMG_5080.JPG 24.13K
9 downloads
IMG_5081.JPG 25.99K
8 downloads
IMG_5082.JPG 25K
4 downloads
IMG_5083.JPG 23.21K
5 downloads
IMG_5085.JPG 39.96K
6 downloads
IMG_5086.JPG 38.8K
4 downloads
CABIN ENGINE CONTROLS GALORE
Posted 17 June 2013 - 08:03 PM
Hi Mike,
Nice Job, never seen a Torana without the roof skin before, Well Done. Dave I
Posted 18 June 2013 - 07:41 AM
Hi Dave... They are pretty flimsey.... A roll bar would be nice... I might try and fit a hidden one in my toy...
Posted 18 June 2013 - 07:45 AM
http://www.gmh-toran...rebuild/page-13
Getting into the real stuff now Mike,
A GTR, and you never cease to amaze me, all you need to do is show us a 4 door to a 2 door conversion. Dave I
Posted 19 June 2013 - 03:40 AM
Hey Mike, great work as usual. Just a quick question as I'm not sure if it's been asked before, when you POR15 the panels on the underside & then weld together, is the POR15 still effective in protecting the bare steel at the weld? or do you cavity wax afterward or something? just curious mate as I'm looking at doing a similar thing but thought maybe a weld through primer would be good to use as well. Cheers 
Posted 19 June 2013 - 07:54 AM
Hi JED... The way I plug weld... I use a 2mm centering drill bit and drill trought the top sheet and let the 2mm bit drill into the bottom sht... That way the POR 15 is cleared away from the weld... The POR will burn, And correct..when ALL welding is done it then gets cavity wax or fish oil.... The welds will oxadise and rust..
If Im spot welding,, I scrap away the POR 15 and paint with weld through primer where Im going to spot... Its in this post some ware.
The POR 15 will be covering most of the metal..exept where you weld.. I think its better than just bare metal or welding primer alone.
Weld through primer is designed for spot welding mainkly.. It tends to "blow back" when mig welding... you have to scrape it away...
Ill do some pics to show how I "plug weld"...
Mike
Hey Mike, great work as usual. Just a quick question as I'm not sure if it's been asked before, when you POR15 the panels on the underside & then weld together, is the POR15 still effective in protecting the bare steel at the weld? or do you cavity wax afterward or something? just curious mate as I'm looking at doing a similar thing but thought maybe a weld through primer would be good to use as well. Cheers
Posted 19 June 2013 - 08:46 AM
That's awesome mate, thanks for the detailed run down as that explains it much better for me. Looking forward to seeing those plug weld pics.
Cheers
Forum Fixture

Posted 19 June 2013 - 11:40 AM
Another question for you Mike, how did yo remove the skin from the side drip rails on the new roof, and how do you plan to weld it along the sides. Not sure if the LJ is the same as LX but they are like a continual crimp weld along the sides.
Posted 20 June 2013 - 07:31 AM
Ill post pics as I go... Going to attempt today.
Another question for you Mike, how did yo remove the skin from the side drip rails on the new roof, and how do you plan to weld it along the sides. Not sure if the LJ is the same as LX but they are like a continual crimp weld along the sides.
Posted 20 June 2013 - 07:38 AM
Hi all...
I managed to repair, sandblast and POR 15 the roof rails, inside the rear drip rail area and inside the donour drip rail inners and outers...
I welded the rear drip rail inners on.. Por 15 and all rust s gone.
I managed to get inside and behind the inner rail with POR 15.. All sealed.
When I replace the roof, Ill then weld on the outer rails..
Im going to do the roof today... Should be interesting..
Ive posted a couple of pics of how I plug weld.. I use an alumin block to put behind... good penetration as strong...
Mike
IMG_5089.JPG 18.15K
8 downloads
IMG_5090.JPG 17.01K
7 downloads
IMG_5096.JPG 30.9K
11 downloads
IMG_5097.JPG 21.74K
4 downloads
IMG_5098.JPG 22.57K
3 downloads
IMG_5099.JPG 24.77K
7 downloads
IMG_5100.JPG 23.99K
4 downloads
IMG_5101.JPG 32.43K
6 downloads
IMG_5102.JPG 27.41K
4 downloads
IMG_5103.JPG 24.04K
4 downloads
IMG_5104.JPG 27.58K
3 downloads
IMG_5105.JPG 24.94K
2 downloads
IMG_5107.JPG 29.39K
2 downloads
IMG_5118.JPG 15.26K
4 downloads
IMG_5119.JPG 31.12K
3 downloads
IMG_5120.JPG 27.58K
3 downloads
IMG_5121.JPG 13.8K
3 downloads
IMG_5122.JPG 13.58K
4 downloads
IMG_5123.JPG 28.34K
4 downloads
IMG_5124.JPG 26.54K
4 downloads
IMG_5125.JPG 27.39K
5 downloads
IMG_5126.JPG 25.55K
6 downloads
IMG_5127.JPG 23.45K
5 downloads
IMG_5129.JPG 22.53K
5 downloads
Posted 20 June 2013 - 06:53 PM
Hi all...
I managed to get the roof panel in position and tacked in place.. I started to plug weld up... Ive had a LONG day and thats enough, Ill finnish tomm or the weekend....
It turned out well, very easy to fit, I used some windows to make sure the gaps were even.. I used a complete car as a guide.. No probs...
Its going to be fun grinding the plugs in the drip rail... Will take my time.. I did the plugs every 20mm or so.. They look messy, I wanted good penetration so I held the trigger for a bit longer..
All told, as good as new.. and not that hard to do really.. It took longer to get the donour roof ready as to taking off and putting on a new one..
I will clean and etch prime when finnished...
IMG_5133.JPG 26.57K
6 downloads
IMG_5134.JPG 24.13K
3 downloads
IMG_5135.JPG 29.01K
1 downloads
IMG_5136.JPG 26.99K
3 downloads
IMG_5139.JPG 24.79K
3 downloads
IMG_5141.JPG 17.71K
1 downloads
IMG_5142.JPG 23.36K
0 downloads
IMG_5145.JPG 31.26K
3 downloads
IMG_5146.JPG 24.89K
0 downloads
IMG_5148.JPG 26.92K
1 downloads
IMG_5149.JPG 20.61K
3 downloads
IMG_5152.JPG 22.99K
3 downloads
IMG_5154.JPG 34.36K
2 downloads
IMG_5157.JPG 22.29K
3 downloads
IMG_5158.JPG 17.8K
2 downloads
Forum Fixture
Posted 20 June 2013 - 10:38 PM
Posted 21 June 2013 - 06:17 AM
Yep..Thats how I did it.. Slowly ground it away after cutting off the drip rail... I used a 6mm grinding disc on its side...worked very well... Just take your time and dont hold in one spot for too long as it will heat up and move.. and the panel becomes very floppy once the rails are off... B carefull... Its do-able..
Looks like a long day, you got a lot done. Did you have much trouble in getting the side gutters off the new skin. I've got a skin with the remains of the gutters still attached, only way I can see to get them off is carefully grinding from underneath but a bit worried of grinding too far and eating into the skin.
Posted 25 June 2013 - 06:45 PM
Hi all...
The roof is on and welded tight... Turned out very well.. Not too hard to do.. Just takes time..
I sandblasted and POR 15 inside the drip rails on the roof side and making sure to get some behind and in front of the rear drip rails... I did the windows while I was at it... All sealed tight and wont rust..
All I have to do to finnish now is to clean the roof a bit and etch prime.. Fit the bonnet / doors and push out the rear beaver as its in a bit.. Then all done.. Ill take some final pics and post..
Guys I can honestyly say this car is now RUST FREE.... when it gets painted... It will stay that way...
I sealed it as much as I could with POR 15, cavity wax, seam sealer, etc... It will out last us anyways and is now a part of Australian motoring history..
He should be happy...
I think I did a good job.. Took way longer than thought, you get that... Its done now.. Thats the main thing..
Im having a break for a bit.. Then I have a 1970 LC rally red XU-1 to fix the A-pillars and line up the doors/ guards etc... Plus any other nasties which will be there...
Ill keep you all posted..
Mike
IMG_5160.JPG 25.58K
4 downloads
IMG_5161.JPG 23.46K
3 downloads
IMG_5163.JPG 23.83K
3 downloads
IMG_5165.JPG 24.17K
4 downloads
IMG_5166.JPG 26.82K
2 downloads
IMG_5167.JPG 25.51K
3 downloads
IMG_5168.JPG 26.11K
3 downloads
IMG_5169.5.JPG 29.55K
3 downloads
IMG_5169.JPG 30.22K
3 downloads
Posted 29 June 2013 - 01:51 PM
Hi all....
This car is officially completed..
I sanded/rust killed and etched primed the roof... I didnt sandblast as the whole car will need some sandblasting before it gets painted..
I POR 15 the rain channel and windows lips, making sure to do the rear drip rails.. The using the POR 15 Tie coat on top..... no more rust there .. ever .
I cavity waxed EVERYWARE I could.... Should be ok to sit for a bit before it gets painted... All told.. about 300 hours (he wasnt charged this).... and $1000 worth of materials.. It does add up...
I fiddled with the door gaps again.. I used the trusty old paddle pop stick as my gage...all good and even....
Im very happy with the car, Hoping the owner is too......
Looking back over the pics from when I got it... There was a LOT of work into this car.... Was a mess, now its beautiful.
IMG_5176.JPG 27.02K
5 downloads
IMG_5179.JPG 26.41K
3 downloads
IMG_5181.JPG 35.29K
3 downloads
IMG_5182.JPG 38.35K
2 downloads
IMG_5184.JPG 19.08K
4 downloads
IMG_5187.JPG 26.33K
3 downloads
IMG_5188.JPG 31.83K
3 downloads
IMG_5189.JPG 35.34K
2 downloads
IMG_5190.JPG 32.67K
3 downloads
IMG_5192.JPG 29.29K
4 downloads
IMG_5193.JPG 15.19K
1 downloads
IMG_5195.JPG 30.1K
2 downloads
IMG_5197.JPG 38.31K
2 downloads
IMG_5198.JPG 24.05K
4 downloads
IMG_5199.JPG 26.22K
2 downloads
IMG_5200.JPG 24.06K
1 downloads
IMG_5206.JPG 27.44K
3 downloads
IMG_5207.JPG 29.18K
1 downloads
IMG_5208.JPG 21.74K
2 downloads
IMG_5209.JPG 21.75K
2 downloads
IMG_5211.JPG 30.55K
4 downloads
IMG_5212.JPG 27.19K
5 downloads
IMG_5213.JPG 29.43K
4 downloads
Posted 29 June 2013 - 01:54 PM
I forgot... I pushed the rear beaver out as far as I could to match the boot.. It has had a rear hit at some stage.. Not perfect, buts heaps better..
Forum Fixture
Posted 29 June 2013 - 02:45 PM
Forum Fixture
Posted 29 June 2013 - 03:56 PM
Forum Participant

Posted 13 September 2014 - 08:40 PM
I am restoring a LC torana coupe at the moment have found your thread very useful
Have to renew roof skin and would not have attempted if it hadn't been for this page
Really like your work and want to say how much I appreciate you sharing your knowledge, worth its weight in gold.
Cheers
Kym
Posted 14 September 2014 - 06:44 AM
I am restoring a LC torana coupe at the moment have found your thread very useful
Have to renew roof skin and would not have attempted if it hadn't been for this page
Really like your work and want to say how much I appreciate you sharing your knowledge, worth its weight in gold.
Cheers
Kym
Hi Kym.. Its an older thread of mine.. Keep looking as Ive done a few more cars.. Im working on LC gtr at the momonet.. No roof replacement, but a few other items not covered before. and Ta for the kind words..
I post pics/summery to help and glad that it has helped.. any questions.. Just ask.
Mike


0 members, 0 guests, 0 anonymous users

