Jump to content


Reaper Customs Projects


  • Please log in to reply
76 replies to this topic

#1 _Viper_

_Viper_
  • Guests

Posted 08 May 2014 - 11:22 PM

Hey guys, I thought id show everyone what me and the boys have been getting up to at work...I'll use this one thread to show our various projects but first up is actually a Torana.


John, a fellow member on here came to us after the car had been sitting at another shop for over a year pushed into a corner :/ They had done some decent work and replaced most of the front panels but most of the gutters were rusted out as well as some issues with the fitment of the tail lights and rust in the beaver. But ill start off with the roof swap.


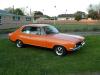
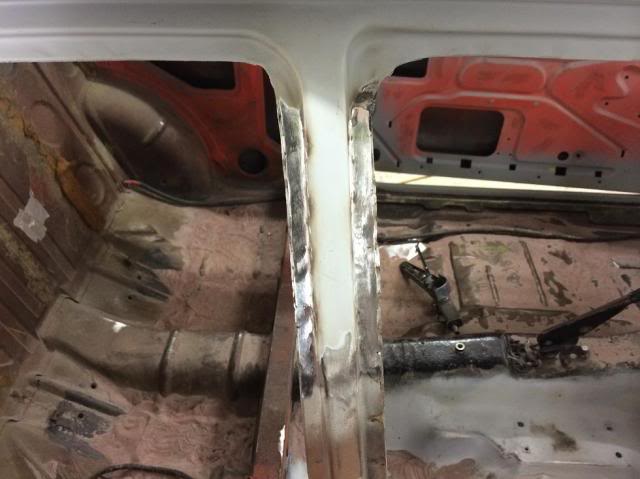
This is pretty much how it came to us:

t1_zps1765d965.jpg


Took a bunch of measurements first, like the width of the gap between the tops of the doors and the roof, bottom of the windscreens to the top, height of the side windows etc to ensure the new roof went back on in the same position... Then a bunch of temporary bracing was welded inside to keep everything in place once the top was removed:

t2_zps3f10eadd.jpg


Then out came the Air-Grinder, at this stage everything was just cut off near on as high as possible.

t3_zpsbec0e1b6.jpg


Unsurprisingly all the internal structure was abit rusty since its all bare metal inside from factory

t4_zps998bec6c.jpg


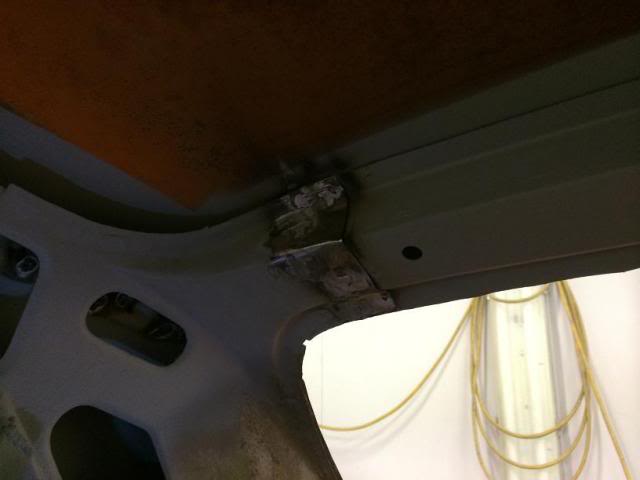
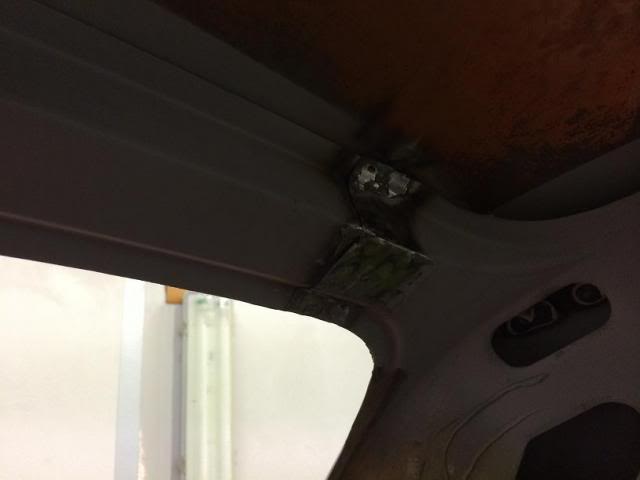
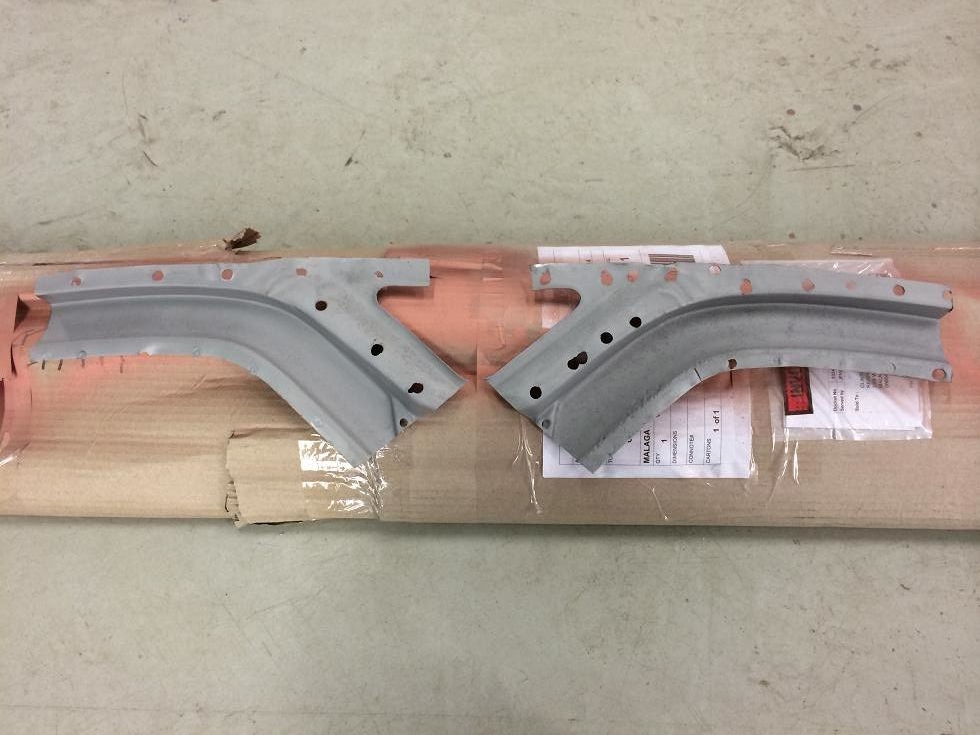
Then I removed the layers of skins so there was only one layer left per pillar... All the cuts are staggered so once its welded back together all the welds are not in the same place to increase strength, next is a pic of the aforementioned pieces... all fairly rusty and were thrown in the blast cabinet and cleaned back to fresh steel (the piece in the top left of the bottom-right pic had already been blasted)

t5_zps4a21a06b.jpg


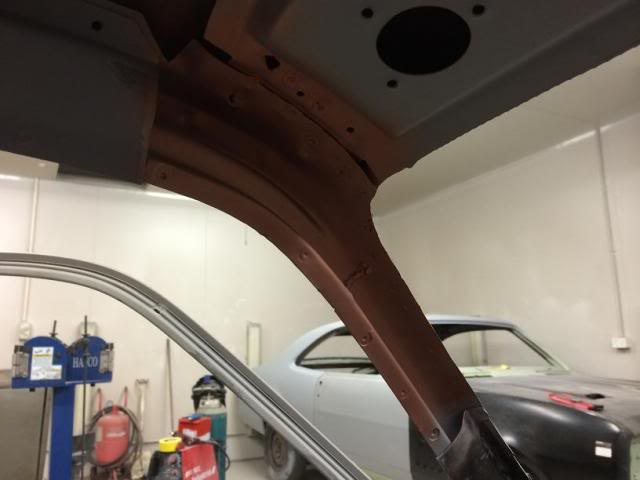
All the exposed sections on the body were blasted and cleaned and coated in epoxy inside n out.

t6_zps57e40aab.jpg


After alot of measurements the new roof was carefully trimmed back, test fitted, trimmed abit more etc etc until I was happy with the fitment then the whole inner frame was sandblasted as well as the gutters, outer skin was already bare metal when delivered to us so just used some ranex to clean it up, Then the lot was also coated in epoxy

t7_zpsf9bfc7de.jpg


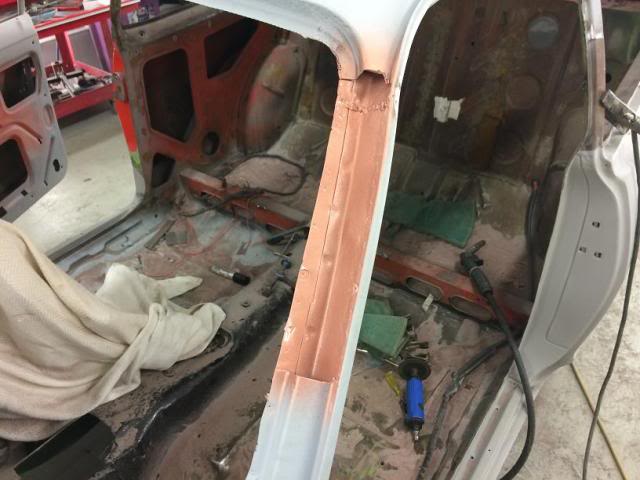
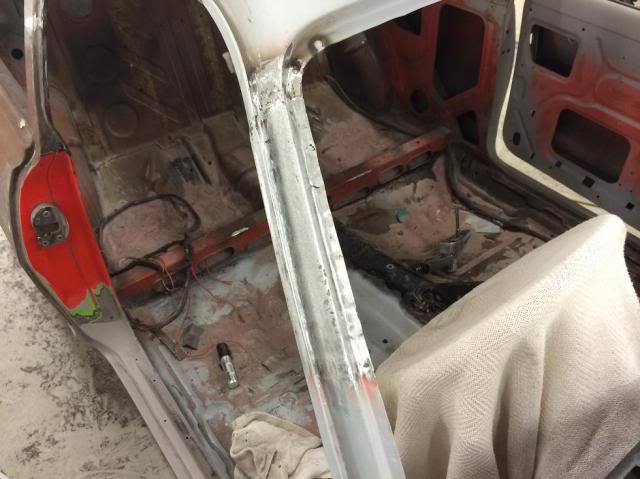
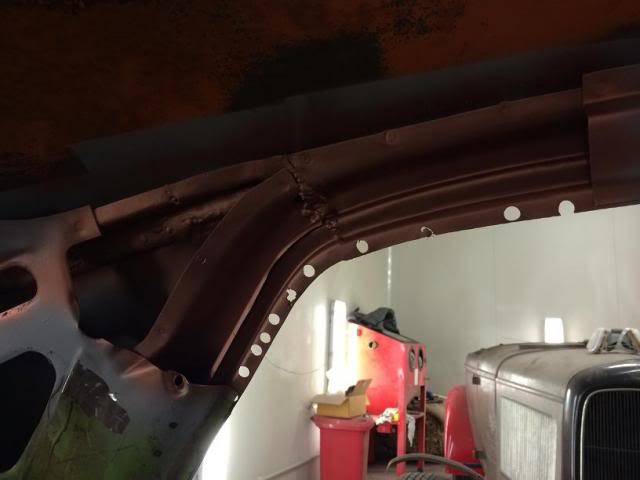
Once cured all the edged that were to be welded were cleaned up, weld through primer applied to areas I wont have access to later, roof was sat on the car and after many measurements while compared to the measurements taken at the start the roof was tacked in place:

t10_zpsf3dcab3e.jpg


Glass was also test fitted, the rear glass sat in nicely with even gaps all the way around:

t8_zpsca58f3aa.jpg


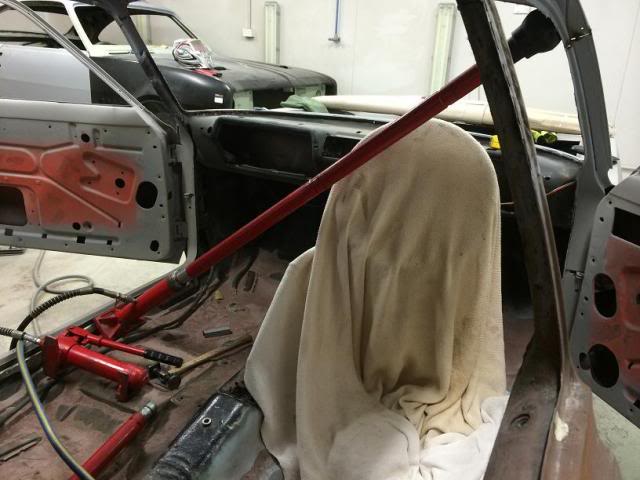
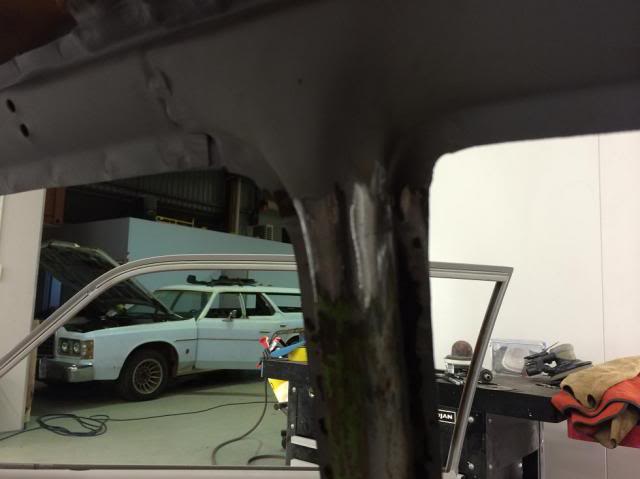
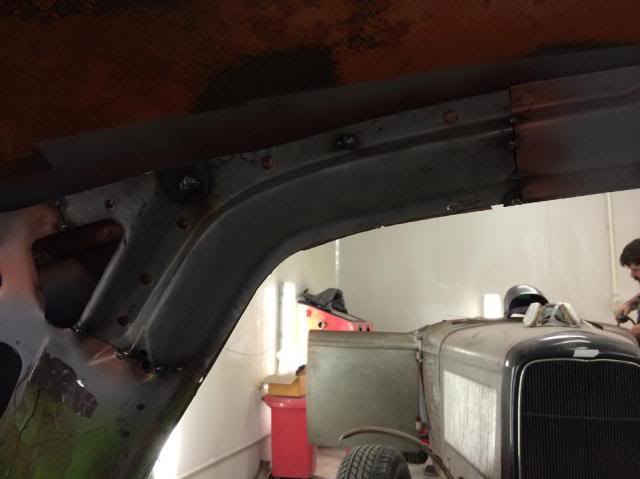
But when I fit the front window frame seemed abit out of square even tho it measured up ok. You can see how the gap is tighter near the bottom (red circle) but opens up at the top (blue circle) and it was the opposite on the drivers side.

t9_zpsc1135d51.jpg


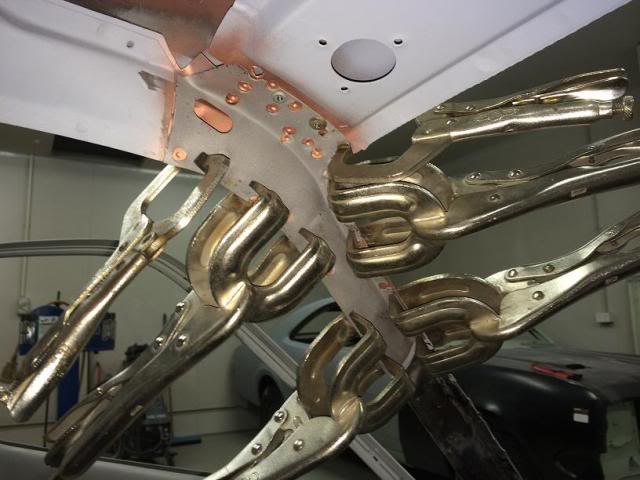
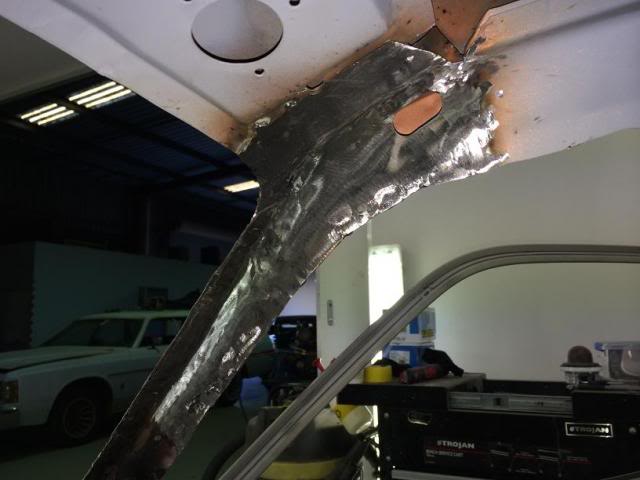
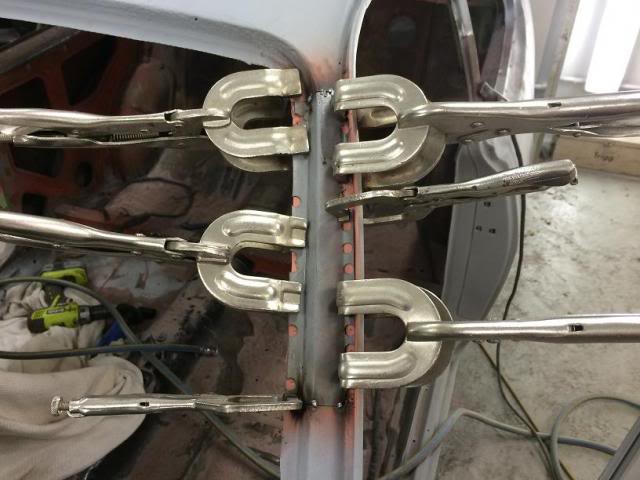
So decided to put some decent welds on the B and C pillars as I was happy with where they were and then use the port-a-power to adjust the front pillars slightly (talking a few mm)

t11_zps05e69a7b.jpg


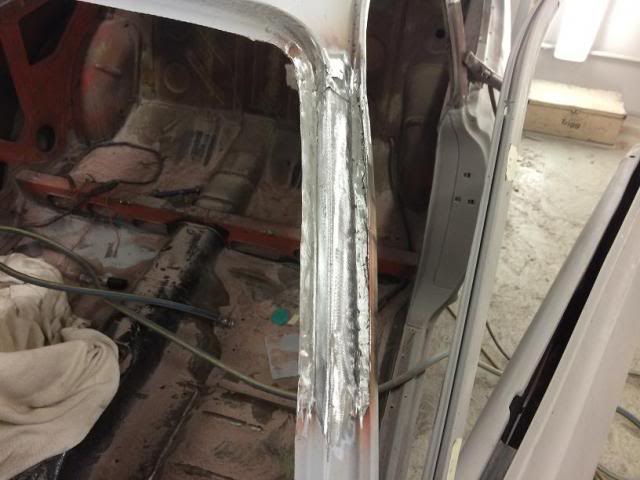
Thats where I am up to at the moment, Will clean back all the welds, then adjust the front until im happy... tripple check everything measures up nicely, start welding in the outer layers then Lead wipe the factory joins.


#2 Ice

Ice

    Cool

  • Members
  • PipPipPipPipPipPipPip
  • 15,123 posts
  • Name:Gene
  • Location:Galaxy's away from Ipswich
  • Car:77 HZ Sandman Van
  • Joined: 03-January 07

Posted 08 May 2014 - 11:41 PM

Nice work Clint you guys that do this sort of work truly amaze me
now whats with the hot rod in the corner

#3 _Viper_

_Viper_
  • Guests

Posted 08 May 2014 - 11:50 PM

Full Resto, Original 32 Steel body. Robs working on that one at the moment... I'll put pics up of that one soon


#4 _Bomber Watson_

_Bomber Watson_
  • Guests

Posted 09 May 2014 - 09:45 AM

Looking good.

Any particular reason you will be lead wiping the joins Clint?

Cheers.

Edited by Bomber Watson, 09 May 2014 - 09:47 AM.


#5 _Viper_

_Viper_
  • Guests

Posted 09 May 2014 - 10:30 AM

Requested by customer, cars going back to original.

Even so, personally for a join like this that is quite deep with sharp edges I prefer lead as it's abit thick for bog and sinkback is a issue

Oh and I'm just talking about the join on the outside of the c-pillar where there was lead from factory, the other joins are all butt welded and no filler required

#6 _Bomber Watson_

_Bomber Watson_
  • Guests

Posted 09 May 2014 - 12:14 PM

Fairy nough.

#7 _Viper_

_Viper_
  • Guests

Posted 09 May 2014 - 04:01 PM

Here is a quick little job from the other day... Domonic had fitted a RB25DET to a R31 Skyline, wasnt happy with the piping he had as the pipe between the Turbo and intercooler was hitting the power steering pump aswell as the pipe between the Intercooler and Intake was sitting on the radiator hose so I made up a new set in Stainless for him.


Before:

Attached File  Dompipesb4.jpg   93.81K   11 downloads


After:

Attached File  dompipesafter.jpg   117.88K   11 downloads


-Clint


#8 Evan

Evan

    Forum Fixture

  • Members
  • PipPipPipPipPip
  • 1,287 posts
  • Location:Perth Western Australia
  • Joined: 14-January 06
Garage View Garage

Posted 09 May 2014 - 10:19 PM

Amazing Clint!


Its refreshing to see someone doing a job properly.


A few months back i was purchasing some fiberglass from a reputable panel and paint shop and the first thing he said was "Are you fiber glassing over some rust?" 


I will have to pop in one day.


#9 Ice

Ice

    Cool

  • Members
  • PipPipPipPipPipPipPip
  • 15,123 posts
  • Name:Gene
  • Location:Galaxy's away from Ipswich
  • Car:77 HZ Sandman Van
  • Joined: 03-January 07

Posted 09 May 2014 - 10:51 PM

We might need to talk Clint about a certain project of mine

#10 LXCHEV

LXCHEV

    Lotsa Posts!

  • Members
  • PipPipPipPipPipPip
  • 3,510 posts
  • Name:Brett
  • Location:Melbourne
  • Car:'76 LX - 383 Chev
  • Joined: 08-November 05

Posted 10 May 2014 - 07:56 AM

Awesome stuff, keep the photos coming.

#11 _Viper_

_Viper_
  • Guests

Posted 10 May 2014 - 09:41 PM

Thanks Evan, yea we have seen some serious dodgy work on some cars that have come in... We will never be the cheapest we are not trying to compete with anyone else just try to do the best work that we can do. But yea come down any time :)


No worries Gene, im curious now ;)


More pics eh? Well while we are on the subject of pipe work here is a couple more:


This was on a Gemini with a little turbo motor. Made up a 3" Stainless dump pipe from a 90' Mandrel bend... first used the press to squish it down to the basic oval shape, then abit more hammer work just to get it inside of the flange, tacked it in place at the right angle I wanted then beat it from the inside out to match the shape of the flange... only one corner needed abit of heat to get it fitting nicely... weld it all up then sand sand and polish :)

Attached File  dump.jpg   154.29K   7 downloads

Attached File  insidedump.jpg   149.33K   6 downloads

Attached File  dumptestfit.jpg   175.46K   7 downloads


Then made the rest of the exhaust, all polished 316 stainless with V-band clamps dumping just before the diff. It sure is loud! even with the turbo.

Attached File  brodiesexhaust.jpg   24.88K   7 downloads

Attached File  brodiesexhaust2.jpg   34.55K   7 downloads

Attached File  exhaustfitted.jpg   196.93K   7 downloads


#12 _Viper_

_Viper_
  • Guests

Posted 10 May 2014 - 09:53 PM

This was another Gemini, this car will be running some quick times soon! (I seem to get alot of Gemini work)

Attached File  gemwrcpipes2.jpg   199.68K   8 downloads

Attached File  gemwrcpipes.jpg   116.89K   7 downloads

Attached File  Gemwrcpipesfitted.jpg   192.39K   7 downloads


This pipework was part of a RB25DET conversion into a E36 BMW I did, including a Haltech Sport 2000 install and tune, made 336rwhp and ran a 12.5 before sheering an axle at the next meet.

Attached File  coolerpipetakk.jpg   168.62K   7 downloads

Attached File  coolertotbpipe.jpg   148.16K   7 downloads

1504096_681412608557970_1545338872_n.jpg


10171775_739739222725308_2138343028_n.jp

1779192_708393279193236_862949761_n.jpg?

1536724_708393252526572_274720222_n.jpg


Edited by Viper, 10 May 2014 - 09:59 PM.


#13 _mello92_

_mello92_
  • Guests

Posted 10 May 2014 - 09:58 PM

Very impressive, looks fantastic!

#14 _05-BROCKY-05_

_05-BROCKY-05_
  • Guests

Posted 12 May 2014 - 03:58 PM

Loving this thread. :clap:


#15 _Viper_

_Viper_
  • Guests

Posted 12 May 2014 - 10:25 PM

Well didnt get to spend much time on the Torana today but here is what I did get done.


Plug welded the rear inner roof brace to the C-pillars:

Roofinternalrearl_zpsd1b6856d.jpg

Roofinternalrearr_zps3a594b44.jpg


Had to make a slight adjustment to the front window frame as it was out of square and had to move it over towards the drivers side 3mm


adjustment_zpsd24ac2c7.jpg


Not having much experience with LC/LJ's myself, today I noticed their dashes are almost identical left to right... were these cars ever offered in left hand drive countries?


Anyway now I was happy with where the A-pillars were I fully welded the first join, cleaned up the welds a little and sprayed the insides with weld through primer (this stuff smells so good!)

Apillarweldthru_zpsfd32cbbf.jpg


The inner A-piller section was sandblasted, the back side sprayed with the same weld through primer and put in place.... Can never have enough clamps ;)

clamps_zpsd54eba88.jpg


Weld weld weld, grind grind grind... still abit more grinding to do but ran out of time.

Apillerinnercleaned_zpsb1e636a6.jpg


Next time ill finish cleaning it up, then fit the outer skin section then ditto on the drivers side :)


#16 MictheAussie

MictheAussie

    Forum Member

  • Members
  • PipPipPip
  • 234 posts
  • Name:Mic
  • Location:Colorado, USA
  • Car:LJ
  • Joined: 14-January 10

Posted 13 May 2014 - 11:51 AM

LJs went to somewhere in Asia as a LHD Chevrolet.

#17 355LX

355LX

    Long Term Project

  • Members
  • PipPipPipPipPip
  • 611 posts
  • Name:Dave
  • Location:Perth, WA
  • Car:LX hatch
  • Joined: 08-November 05

Posted 13 May 2014 - 03:40 PM

Great work Clint! What brand of weld through primer are you using?


#18 _Viper_

_Viper_
  • Guests

Posted 13 May 2014 - 08:30 PM

U-pol weld through primer #2 it's in a green aerosol can, tried a few others and this is the best so far.

#19 rodomo

rodomo

    To advertise here, call 13TORANA

  • Members
  • PipPipPipPipPipPipPip
  • 17,999 posts
  • Name:R - O - B Dammit!
  • Location:Way out west of Melbourne Awstraylya
  • Joined: 10-December 05

Posted 13 May 2014 - 08:50 PM

Looks like it's full of copper?


#20 _Viper_

_Viper_
  • Guests

Posted 14 May 2014 - 12:11 AM

http://www.u-pol.co....ELD2-TDS-EN.pdf


#21 _Viper_

_Viper_
  • Guests

Posted 14 May 2014 - 09:52 PM

I'll start off with a quick job I did this morning, Fella came in for a service... was chatting about the car and ended up adjusting the front Torsion bars and fitting 3" lowering blocks to the rear

10325344_10152141275953391_6496568550595


Back to the Torana, Did the same on the inside of the Drivers side A-piller:

1DriversApillerinternalwelded_zpse10ec67


Next was the outer section of the passenger side A pillar

2passengerouterApillerweldthru_zps8e5596

3passengerouterApillerclamped_zps505816e

4passengerouterApillerground_zps17d21f07

Ditto on the drivers side:

5dribersouterApillerground_zps38fb5c2f.j


Finished off the B-pillers up to this stage:

6innerbpillardone_zps269bfeb4.jpg

7outerbpillardone_zps4e01d618.jpg


Next what the Inner C-pillar sections, they were blasted and sprayed with weld through primer on the inside:

8cpillarpeices_zps355baed7.jpg


Ditto on the C piller

9cpillerweldthru_zpse40bcef9.jpg


Then tacked in place... and thats where Im up to atm... Will fully weld this, same for the drivers side. The 2 gutter sections on the C-piller need re-instating then all these sections will get sandblasted and sprayed in epoxy.

99cpillertacked_zpsd2975822.jpg


Here's a oddball one for you, Came in yesterday... Old fella passed away and left it to his son... Needs to pass the yearly hot rod inspection so we are just getting it up to scratch, replacing bushes, cracked hoses, wiring etc... 34 Ford Rat

Rat34_zps57a8709b.jpg


Then had a welcome surprise visit from an old customer, we Resprayed his 2005 Ford GT a year or so ago... hes just finished getting it all together so payed us a visit and booked it in for the final de-nib and buff and a run on the Dyno! Should be about 600rwhp


Owner on the left, Cam my business partner in the middle and our panel beater Rob on the right.

GTFront_zps7d1f1c8a.jpg

GTRear_zpsbf3b9102.jpg


Shame the sun wasnt out, Will have more pics of this after we do the polish but you can see pics from when we sprayed it here:

https://www.facebook...78198932&type=3


#22 rodomo

rodomo

    To advertise here, call 13TORANA

  • Members
  • PipPipPipPipPipPipPip
  • 17,999 posts
  • Name:R - O - B Dammit!
  • Location:Way out west of Melbourne Awstraylya
  • Joined: 10-December 05

Posted 14 May 2014 - 11:31 PM

Did you do a front end alignment after the torsion bar adjustment?


#23 dattoman

dattoman

    Do I feel lucky? Well, do ya, punk?

  • Administrators
  • PipPipPipPipPipPipPip
  • 16,471 posts
  • Name:Neil
  • Location:Perth Western Australia
  • Car:LX SS , 76 Cadillac , 3 x dattos
  • Joined: 04-February 07

Posted 14 May 2014 - 11:59 PM

And fit shorter shocks ?


#24 _Viper_

_Viper_
  • Guests

Posted 15 May 2014 - 12:27 AM

Did you do a front end alignment after the torsion bar adjustment?


We personally didn't no (is that what you meant?) altho I wish we did, we don't have every tool yet. We send our customers cars to Pedders down the road.


And fit shorter shocks ?


Interesting? why would you need shorter shocks, The car is not hitting bump stops, are the standard shocks not designed to be able to reach the bump stops?


#25 _mick74lh_

_mick74lh_
  • Guests

Posted 15 May 2014 - 10:39 PM

I'd be interested to know that too. I just thought that shorter shocks were only needed with coil springs so that shorter springs are still held captive at all times?


Nice work you're doing though Clint. Some of that pipe work is amazing!


0 user(s) are reading this topic

0 members, 0 guests, 0 anonymous users