

Really??..... I thought our rules and regulations were pretty strict here. Yes you can but a supercharged 426 Hemi in a LC if you want, and drive it on the road legally ... but there are still lots of hoops to jump through.
Wow they sure must be fairly large hoops as not much chance in NSW, unless you don’t need either of your kidneys that is..
Lots of cars down here lost their rego even with engineer certificates as inspectors got scared to pass anything modified in case vehicle got defected their license gets suspended or taken off them if audited if it happens 2nd or 3rd time.
Apparently started with easy defects at RBT stations like 4wd's on oversized tyres & cars with dark tints then progressed to social media,car shows,magazines etc where they went after heavily modified crowd getting number plates contacting owners to have their cars gone over with fine tooth comb.
Was posted on Street Machine fb page during Anzac weekend
There used to be a whole lot more “engineers” than there is nowadays as most would pass near anything.. This is the reason why they clamped down wanting to inspect modified vehicles.. They’ve greatly reduced the amount of certified engineering places that can do it and hold them to much stricter compliance rules… Hence the ones that are still licensed want more $$$$’s as it’s their lively hood on the line for everything they certify..


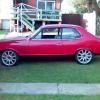
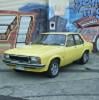
 View Garage
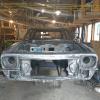
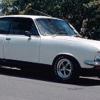