
Cheers Steve, good to know.
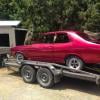
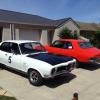
Thanks mate, the car in the background is a Plymouth barracuda which was shipped from Mexico...it's a nice car. Il grab a couple photos to put up for interest sake.


Lone Ranger LC 2door
Started by
Davis
, Jan 11 2014 04:50 PM
230 replies to this topic
#51

Davis
-
- Members
-

- 343 posts
Forum Fan
- Name:Drew
- Location:.
- Car:LC 2 door
- Joined: 26-October 13
Posted 19 March 2014 - 12:03 PM
#52
_greg2240_
_greg2240_
-

- Guests
Posted 19 March 2014 - 04:30 PM
great job so far mate, keep up the good work, inspiring me to get onto my GTR.
#53
Davis
-
- Members
-
- 343 posts
Forum Fan
- Name:Drew
- Location:.
- Car:LC 2 door
- Joined: 26-October 13
Posted 25 March 2014 - 04:13 PM
Cheers Greg...get stuck into that GTR mate.
Time for another update, attention is being given to the passenger side boot floor with a replacement rare spares fill panel... I've also been spending countless hours sanding back various panels, including the boot lid as pictured.
The roof to windscreen frame repair has now been finished with nice clean lines...you can also see the lower windscreen panel has been finished and is looking the part.
Finally I have re furbished my GTR steering wheel, given it a fresh coat of paint and a good clean. I'm currently trying to source an LJ steering column with ignition barrel and key, so if your in Adelaide and have one in good nick, let me know.
Cheers
Attached Files
-
 IMG_3051a.jpg 83.17K
8 downloads
IMG_3051a.jpg 83.17K
8 downloads
-
IMG_3050a.jpg 76.86K
6 downloads
-
IMG_3049a.jpg 90.61K
6 downloads
-
IMG_3047a.jpg 99.6K
6 downloads
-
IMG_3044a.jpg 79.27K
6 downloads
#54
Davis
-
- Members
-
- 343 posts
Forum Fan
- Name:Drew
- Location:.
- Car:LC 2 door
- Joined: 26-October 13
Posted 27 March 2014 - 02:19 PM
Today I finished my dash / instrument cluster...just waiting on the sport comp tacho to match. Pretty happy with the finished product, I used a 'wrinkle' finish paint to create some texture on the gauge pods, this is very similar to the factory dash finish. It would also be perfect for those trying to re create a wrinkle finish on there lc gtr or xu1 glove box lids as it was from factory...I plan to do this also. Mounting the gauges at the rear caused me some headaches but I was able to bend up some brackets that do the job just nicely. Now I just need my car finished so I can install them.... Cheers
Attached Files
-
IMG_3061a.jpg 108.4K
8 downloads
-
IMG_3063a.jpg 108.79K
9 downloads
-
IMG_3064a.jpg 117.38K
6 downloads
#55
Davis
-
- Members
-
- 343 posts
Forum Fan
- Name:Drew
- Location:.
- Car:LC 2 door
- Joined: 26-October 13
Posted 28 March 2014 - 07:10 PM
Here is my attempt at re creating the textured / wrinkled glove box finish as per factory LC gtr and xu1 glove box lids. Now those of you who are observant will realise I'm using a LJ glove box lid, unfortunately I don't have an LC one yet so this was a bit of practice. I took the glove box back to bare metal and filled the pad holes, Using the 'VHT wrinkle plus' I applied 3 coats 5 minutes apart spraying from different angles as per instructions. When first painted it has a nice crisp gloss finish, its only as the paint starts to cure that the wrinkle will form and it has a matte finish. The last photo was taken about 2 hours after painting and it needs at least 48 hours to cure completely. Cheers
Attached Files
-
IMG_3071a.jpg 77.87K
7 downloads
-
IMG_3072a.jpg 82.82K
5 downloads
-
IMG_3073a.jpg 118.05K
6 downloads
#56
Davis
-
- Members
-
- 343 posts
Forum Fan
- Name:Drew
- Location:.
- Car:LC 2 door
- Joined: 26-October 13
Posted 10 April 2014 - 11:13 AM
So initially I didn't think the passenger front floor would need replacing, it had a couple little holes which I thought could be welded up. Unfortunately that attempt was short lived because it kept blowing through. Obviously the floor was more fatigued then what was obvious....so out with the old and in with a new rare spares floor patch. As you can see trans tunnel has also been refitted...I plan to give the whole floor a good clean up next week and hit it with the KBS rust real.
I've also starting preparing my callipers and associated parts, the callipers had been sitting for years and what a nightmare to blow the pistons out. They got a soak in a hot tank for 24 hours then a good scrub with metho, finally a fresh coat of calliper paint. I've also got some xu1 spacers and plan to re assemble with new calliper kits soon.
Finally here is a pic of things to come, tin of lone o'ranger orange....love this colour, cant wait to get it on some panels.
Cheers
Attached Files
-
IMG_3089a.jpg 97.33K
7 downloads
-
IMG_3099a.jpg 90.32K
6 downloads
-
IMG_3090a.jpg 87.7K
5 downloads
-
IMG_3094a.jpg 111.56K
6 downloads
-
IMG_3101a.jpg 96.02K
6 downloads
#57
Davis
-
- Members
-
- 343 posts
Forum Fan
- Name:Drew
- Location:.
- Car:LC 2 door
- Joined: 26-October 13
Posted 16 April 2014 - 08:00 PM
Spent the day stripping the inside floor and got it painted in in KBS rust seal...also picked up all my paint, hardener and primer/filler to start the hi fill process...expensive day at the paint shop! $$$$$$
Found myself some cheap 205/50/R15 tyres to fit to my superlites, as you can see the tyre profile is much better and this will keep my rolling diameter the same as factory. These tyres have since been changed over so might have to bolt them back on the car for another look.
I also pulled my steering column and pedal box out the car today...from what I understand I can turn my auto pedal box into a manual one by adding another pedal...if anyone can point me in the right direction on how to do this, it would be greatly appreciated.
Lastly just a random shot of my car from the rear...slowly getting there. Cheers
Attached Files
-
IMG_3132a.jpg 98.8K
6 downloads
-
IMG_3148a.jpg 85.94K
6 downloads
-
IMG_3146a.jpg 82.68K
8 downloads
-
IMG_3106a.jpg 79.38K
7 downloads
-
IMG_3147a.jpg 82.57K
7 downloads

#59
N/A-PWR
-

- Members
-
- 9,595 posts
CABIN ENGINE CONTROLS GALORE
- Name:Dave I
- Location:Wooroloo, 65km's East of Perth
- Car:'1969' LC RAT TORANA
- Joined: 08-December 12
Posted 16 April 2014 - 08:49 PM
Another quality Job Andrew,
I liked how you just unpicked a clean floor. Dave I
#60
_judgelj_
_judgelj_
-
- Guests
Posted 16 April 2014 - 09:25 PM
that dash looks coooooooooooooooooool
#61
Davis
-
- Members
-
- 343 posts
Forum Fan
- Name:Drew
- Location:.
- Car:LC 2 door
- Joined: 26-October 13
Posted 16 April 2014 - 11:04 PM
Thanks guys, appreciate the comments 
#62
_judgelj_
_judgelj_
-
- Guests
Posted 17 April 2014 - 12:41 PM
those protruding gauges are a very nice touch.
#63
stevemc32
-
- Members
-
- 297 posts
Forum Fan
- Name:Steve
- Location:Sydney
- Car:LJ 4 Door
- Joined: 14-September 12
Posted 21 April 2014 - 09:39 AM
Start looking for a manual brake pedal and clutch pedal pair Andrew. The manual brake pedal has a longer pivot that the clutch pedal is mounted to on the left hand side of the pedal box.
#64
N/A-PWR
-
- Members
-
- 9,595 posts
CABIN ENGINE CONTROLS GALORE
- Name:Dave I
- Location:Wooroloo, 65km's East of Perth
- Car:'1969' LC RAT TORANA
- Joined: 08-December 12
Posted 21 April 2014 - 06:43 PM
Countless hours later Andrew,
Your Machine is starting to take Shape,
GTR's are for Showing Off. Dave I
#65
Davis
-
- Members
-
- 343 posts
Forum Fan
- Name:Drew
- Location:.
- Car:LC 2 door
- Joined: 26-October 13
Posted 29 April 2014 - 12:28 AM
So I had a shot at restoring my headlights surrounds...as you can see originally in fairly bad shape, decided to strip of the anodizing and paint using a caustic bath. The anodizing reacts to the caustic soda and comes off within 5 to 10 minutes, word of warning wear gloves and goggles this is nasty stuff if it gets on you. An experienced panel beater worked the small dents out for me, then a quick polish and they are good as new...just need to mask up and paint black now.
Well the pace has picked up in the last couple weeks bodywork wise...and with any luck we should have some colour getting laid down very soon. As you can see from the driver rear quarter this had a heap of low spots (40 years of trolley and door dents) so a fair bit of hi fill in this area and plenty of sanding as usual....then a couple coats of prime and fill and who would have guessed, more sanding!
But finally we have some paint going down...engine bay done...stay tuned for some colour!
Attached Files
-
IMG_3133a.jpg 88.59K
7 downloads
-
IMG_3135a.jpg 84.25K
6 downloads
-
IMG_3177a.jpg 79.23K
6 downloads
-
IMG_3190a.jpg 76.85K
6 downloads
-
IMG_3178a.jpg 79.86K
9 downloads
-
IMG_3188a.jpg 82.57K
8 downloads
#66
N/A-PWR
-
- Members
-
- 9,595 posts
CABIN ENGINE CONTROLS GALORE
- Name:Dave I
- Location:Wooroloo, 65km's East of Perth
- Car:'1969' LC RAT TORANA
- Joined: 08-December 12
Posted 29 April 2014 - 12:49 AM
LC Torana's are nice in the Flesh, thank's Andrew
#67
purrlx
 View Garage
-

- Members
-
- 1,330 posts
Forum Fixture
- Name:Danny
- Location:Gladstone
- Car:LX hatch
- Joined: 23-December 11
View Garage
Posted 29 April 2014 - 06:08 PM
Nice work Andrew, looking good so far
#68
Davis
-
- Members
-
- 343 posts
Forum Fan
- Name:Drew
- Location:.
- Car:LC 2 door
- Joined: 26-October 13
Posted 04 May 2014 - 11:42 AM
Well the drivers side rear quarter has been hi filled and rubbed 3 times now and is looking nice and straight. Only a couple imperfections to fix up and the body will be ready for paint....speaking of paint, excited to say some colour went down this week on the boot and bonnet underside, very happy with the finish straight off the gun...these panels haven't been rubbed or polished yet. Hopefully the cold and wet weather stays away this week and I can show the finished product.
Cheers,
Attached Files
-
IMG_3203a.jpg 86.17K
7 downloads
-
IMG_3202a.jpg 62.99K
7 downloads
-
IMG_3221a.jpg 84.6K
7 downloads
-
IMG_3222a.jpg 77.84K
7 downloads
#69
Davis
-
- Members
-
- 343 posts
Forum Fan
- Name:Drew
- Location:.
- Car:LC 2 door
- Joined: 26-October 13
Posted 09 May 2014 - 07:59 PM
Few more pics of progress this week...very happy with the results especially given the colder weather and lack of spray booth. All the hanging panels are done except for the blackouts on the door bottoms. As you can see I've opted to paint the dash in the same colour as the car, I've done this because I wont be using trim tops on my doors and I wanted to incorporate the coloured top door panel with the rest of the interior....something a little different anyway. The front half of the car has also been painted with all door jambs cut in, as you can see I successfully managed to mask up my lower front guard blackouts now just to do the same at the rear. With any luck will have a finished car by the end of next week to show everyone.
Cheers
Attached Files
-
IMG_3230a.jpg 111.25K
8 downloads
-
IMG_3238a.jpg 90.42K
8 downloads
-
IMG_3237a.jpg 98.04K
8 downloads
-
IMG_3235a.jpg 84.43K
9 downloads
#70
shanegtr
View Garage
-

- Members
-
- 533 posts
Forum Fixture
- Name:Shane
- Location:Tom Price, Pilbara WA
- Car:LJ 2 door
- Joined: 10-November 05
View Garage
Posted 09 May 2014 - 09:27 PM
Love the body coloured dash.
#71
TOERUNNER
-
- Members
-
- 620 posts
Forum Fixture
- Name:RODNEY
- Location:central Qld
- Car:73 lj gtr 73 lj 2 dr S
- Joined: 01-July 09
Posted 10 May 2014 - 07:15 AM
looking good Andrew,do you have enough room to fit the speedo cable still ??
when I fitted the gauges to my dash I had to use an electronic speedo, but I did fit the gauges from behind the facia as per original
#72
N/A-PWR
-
- Members
-
- 9,595 posts
CABIN ENGINE CONTROLS GALORE
- Name:Dave I
- Location:Wooroloo, 65km's East of Perth
- Car:'1969' LC RAT TORANA
- Joined: 08-December 12
Posted 10 May 2014 - 11:48 AM
She has Brightened up your Workshop Andrew
#73
Davis
-
- Members
-
- 343 posts
Forum Fan
- Name:Drew
- Location:.
- Car:LC 2 door
- Joined: 26-October 13
Posted 10 May 2014 - 04:18 PM
looking good Andrew,do you have enough room to fit the speedo cable still ??
when I fitted the gauges to my dash I had to use an electronic speedo, but I did fit the gauges from behind the facia as per original
I think I should be good for room because all the gauges are front mounted which gives me some extra clearance at the rear....but time will tell.
#74
Davis
-
- Members
-
- 343 posts
Forum Fan
- Name:Drew
- Location:.
- Car:LC 2 door
- Joined: 26-October 13
Posted 12 May 2014 - 05:15 PM
Well all the colour is down, now just for the blackouts to be finished. Refitted the bonnet with my freshly anodised hinges and catch with all gaps looks pretty good. Cant wait to start putting everything back together! Cheers
Attached Files
-
IMG_3247a.jpg 84.75K
10 downloads
-
IMG_3248a.jpg 79.34K
8 downloads
-
IMG_3252a.jpg 95.19K
10 downloads
-
IMG_3255a.jpg 97.59K
9 downloads
#75
darway43
View Garage
-
- Members
-
- 215 posts
Forum Member
- Name:David
- Location:Glenelg East, South Australia
- Car:LJ 2 door
- Joined: 29-July 08
View Garage
Posted 12 May 2014 - 07:13 PM
Looking bloody awesome mate, will come round for a gander on the weekend


0 user(s) are reading this topic
0 members, 0 guests, 0 anonymous users

