
Nice progress there Andrew, and love a build with heaps of pics

Lone Ranger LC 2door
Started by
Davis
, Jan 11 2014 04:50 PM
230 replies to this topic
#26

purrlx
 View Garage
-

- Members
-

- 1,330 posts
Forum Fixture
- Name:Danny
- Location:Gladstone
- Car:LX hatch
- Joined: 23-December 11
View Garage
Posted 31 January 2014 - 03:50 PM
#27
sibhs
-

- Members
-
- 2,703 posts
Lotsa Posts!
- Name:Martin
- Location:Perth
- Car:LJ Coupe S
- Joined: 27-July 12
Posted 31 January 2014 - 04:53 PM
Seeing that flute ready to weld in. I can now say been there, done that.
Here's a vid of my effort.
Not saying I'm right, but I felt it best to do Sill first then lower guard and finally the flutes. Didn't like the idea of the guard flopping about while welding in flute. Good luck, if you need any advice from a total beginner, I'm happy to help.
Cheers
Marty
#28
Davis
-
- Members
-
- 343 posts
Forum Fan
- Name:Drew
- Location:.
- Car:LC 2 door
- Joined: 26-October 13
Posted 31 January 2014 - 05:23 PM
Spot on purrlx....pics keep the thread interesting.
Thanks sibhs, yea the the inner seal and lower guard will get done first...nice and accessible with the flute hole too. I like the time lapse video, nice work.
Thanks sibhs, yea the the inner seal and lower guard will get done first...nice and accessible with the flute hole too. I like the time lapse video, nice work.
#29
Davis
-
- Members
-
- 343 posts
Forum Fan
- Name:Drew
- Location:.
- Car:LC 2 door
- Joined: 26-October 13
Posted 03 February 2014 - 09:40 AM
Hey guys, had a shot at refurbishing my tail light surrounds over the weekend....
1. Remove taillight surround from lenses, being careful not to damage the lenses or seal.
2. Using a soft wire wheel and drill clean the surface and removed any minor pitting.
3. Give them a bath, remove all the dirt and grime.
4. Using a soft polishing wheel and 'autosol' polish the surround.
5. Mask up the lenses.
6. Paint...I used a black epoxy enamel (you don't have to prime the surface) took over 8 hours to dry but sicks very nicely to the surface.
7. Re assemble taillights (not quite there, just trying to find some pinstripe tape to do the twin taillight lines)
Cheers,
Attached Files
-
 IMG_2805a.jpg 88.31K
11 downloads
IMG_2805a.jpg 88.31K
11 downloads
-
IMG_2806a.jpg 70.25K
9 downloads
-
IMG_2808a.jpg 91.67K
9 downloads
-
IMG_2814a.jpg 97.98K
13 downloads
-
IMG_2817a.jpg 106.96K
13 downloads
-
IMG_2818a.jpg 70.14K
18 downloads
#30
_judgelj_
_judgelj_
-

- Guests
Posted 06 February 2014 - 11:48 AM
Why dont you use a silver paint pen for the lines?
They look fantastic by the way!
#31
Davis
-
- Members
-
- 343 posts
Forum Fan
- Name:Drew
- Location:.
- Car:LC 2 door
- Joined: 26-October 13
Posted 07 February 2014 - 12:39 PM
Cheers judge...I just want to get real crisp lines with the pin stipe and 3mm tape fits perfectly in the groove.
Wasn't very happy with the faded indicator lense so managed to find orange lense paint at autobahn...tiny can cost $22 (rip off) but looks the part now. Also got the pin stipe from autobahn and only cost $8 for 10 metres.
Pretty happy with the finished product
Attached Files
-
IMG_2835a.jpg 65.29K
10 downloads
-
IMG_2838a.jpg 67.63K
11 downloads
#32
_judgelj_
_judgelj_
-
- Guests
Posted 07 February 2014 - 04:41 PM
Wow!
OK how did you find orange indicator paint? I couldnt find any?
and that tape looks the goods, think i might buy some!!
#33
Davis
-
- Members
-
- 343 posts
Forum Fan
- Name:Drew
- Location:.
- Car:LC 2 door
- Joined: 26-October 13
Posted 07 February 2014 - 04:48 PM
Wow!
OK how did you find orange indicator paint? I couldnt find any?
and that tape looks the goods, think i might buy some!!
Here you go. http://www.autobarn....-aerosol-fs0007
Just do 1 coat on inside and 1 on the outside.
Cheers
#34
Davis
-
- Members
-
- 343 posts
Forum Fan
- Name:Drew
- Location:.
- Car:LC 2 door
- Joined: 26-October 13
Posted 13 February 2014 - 03:33 PM
Ok, just a quick update on rust repairs...
Driver side flute, lower guard and inner seal have been fitted, the lower guard isn't sitting as nicely as I want so this will require a little more attention to get spot on.
Inner seal and drivers floor pan lining up nicely and is almost finished.
Rear bottom windscreen panel has been removed and replace with a rare spares number...glad I did this, it looked ok originally but there was a lot of rust in this area and some old dodgy repairs with bog. Have trial fitted with the boot lid and lines up nicely.
Spare wheel well and rear quarter guard finished...this area just needs a tidy up and is looking the part.
So majority of rust repairs nearly complete, to finish will be fitting trans tunnel and passenger floor, some minor repairs to rear drivers foot well and replace top of front windscreen channel...looking forward to starting some panel prep work in the coming weeks.
Stay tuned....
Attached Files
-
IMG_2860a.jpg 80.77K
10 downloads
-
IMG_2861a.jpg 101.09K
7 downloads
-
IMG_2863a.jpg 104.42K
8 downloads
-
IMG_2865a.jpg 80.9K
8 downloads
-
IMG_2862a.jpg 90.2K
14 downloads
#35
Davis
-
- Members
-
- 343 posts
Forum Fan
- Name:Drew
- Location:.
- Car:LC 2 door
- Joined: 26-October 13
Posted 01 March 2014 - 06:22 PM
So whilst progress appears a little slow over the past couple weeks, things are getting there...The front lower guard has now been adjusted and is sitting very nicely with everything lining up correctly. Flutes, inner seal and drivers floor pan done and dusted.
Due to the last owner cutting of the door hinges (apparently wanted to fit suicide doors  ) had to source some new hinges and fit accordingly...was able to work off the measurements from passenger side to get them right. once welded we were able to trial fit the door. Using some boot hatch pins from an Astra (slightly smaller then torana) they fit tightly enough but able to remove with limited effort. As a result had a play with the drivers door gap. Its sitting ok at the moment (not mike catts paddle pop stick perfect) but you get the idea.
Next on the cards was take the engine bay back to bear metal, spent about 6 hours sitting in the engine bay sanding my little heart out, started with an orbital but due to all the little grooves and notches I had to purchase a mouse sander... Well thanks RYOBI, your mouse sander lasted about half the engine bay before blowing up! so I finished the rest by hand.
So I've found myself going through my boxes of parts and restoring the smaller items whilst bored at home and putting them aside ready for the car once painted. I plan on doing my grill and headlights surrounds this week...the surround have a couple little dents which need to be knocked out, so if anyone has some suggestions on the best way to do this please let me know.
cheers
Attached Files
-
IMG_2928a.jpg 82.04K
9 downloads
-
IMG_2929a.jpg 64.44K
9 downloads
-
IMG_2953a.jpg 109.68K
13 downloads
#36
_judgelj_
_judgelj_
-
- Guests
Posted 01 March 2014 - 11:49 PM
I find it hard to knock out the dents properly, definitely something i personally dont mind taking to a professional, despite my strong urge to do everything myself. If you want to give it a go try getting some nylon bar and heat it up with a torch. Press the bar on a non dented part of the piece with the profile you want, and allow it to take the shape. You can now use that as a dolly. Alternatively grind the nylon to shape for the piece you are beating. Just avoid sharp/square edges and take it slow little taps at a time. Its very easy to tap dents out, even easier to create more. You can even use a piece of alloy, anything that is not too hard not too soft.
Good luck
Edited by judgelj, 01 March 2014 - 11:50 PM.
#37
Davis
-
- Members
-
- 343 posts
Forum Fan
- Name:Drew
- Location:.
- Car:LC 2 door
- Joined: 26-October 13
Posted 03 March 2014 - 07:12 PM
Thanks judgelj, I think I might take the surrounds to a professional I only have 2 and would hate to damage them further.
I did however restore my grill today, as you can see from the before pic it was in relatively good shape...but some of the grill had compacted and caused a wave pattern in the bars. I was able to fix this with a block of timber and my trusty hammer (lightly).
Now after researching all the different grill paint options I decided to try something a little different...now the traditionalist might not like this but remember I'm not restoring a GTR. I decided to paint the centre bar black despite my car being painted lone o'ranger. Further more my grill badge had lost half the paint and had a big crack through the middle, so I decided to paint this black too.
I still may purchase a replacement grill badge, but I think it turned out alright.
Thoughts?
Attached Files
-
IMG_2963a.jpg 89.37K
7 downloads
-
IMG_2970a.jpg 83.73K
9 downloads
-
IMG_2971a.jpg 94.61K
8 downloads
#38
purrlx
View Garage
-
- Members
-
- 1,330 posts
Forum Fixture
- Name:Danny
- Location:Gladstone
- Car:LX hatch
- Joined: 23-December 11
View Garage
Posted 04 March 2014 - 03:27 AM
Nice work and progress so far, black stripe looks ok not sure about badge being black 
#39
gad05
-
- Members
-
- 420 posts
Forum Fan
- Name:Graham
- Location:Brisbane
- Car:73 lj 2 door , 74 lj sedan.
- Joined: 11-January 09
Posted 04 March 2014 - 09:49 AM
Hi Andrew,
Car looking really good mate.
Do you know what model Astra those pins come from,sounds like a good alternative .
Cheers Graham .
Car looking really good mate.
Do you know what model Astra those pins come from,sounds like a good alternative .
Cheers Graham .
#40
Davis
-
- Members
-
- 343 posts
Forum Fan
- Name:Drew
- Location:.
- Car:LC 2 door
- Joined: 26-October 13
Posted 04 March 2014 - 06:13 PM
thanks Gad05,
I think it was 2000 model or similar... I would only recommend using them to trial fit a door or whilst you are working on it. Definitely not a suitable long term option.
Cheers Andrew
I think it was 2000 model or similar... I would only recommend using them to trial fit a door or whilst you are working on it. Definitely not a suitable long term option.
Cheers Andrew
#41
_judgelj_
_judgelj_
-
- Guests
Posted 07 March 2014 - 09:10 PM
Looks great, also not sure about the badge though. I reckon if you could etch a lion or something into it, that would be really unique!
#42
_LCGTR70_
_LCGTR70_
-
- Guests
Posted 10 March 2014 - 07:26 PM
Hey guys, had a shot at refurbishing my tail light surrounds over the weekend....
1. Remove taillight surround from lenses, being careful not to damage the lenses or seal.
2. Using a soft wire wheel and drill clean the surface and removed any minor pitting.
3. Give them a bath, remove all the dirt and grime.
4. Using a soft polishing wheel and 'autosol' polish the surround.
5. Mask up the lenses.
6. Paint...I used a black epoxy enamel (you don't have to prime the surface) took over 8 hours to dry but sicks very nicely to the surface.
7. Re assemble taillights (not quite there, just trying to find some pinstripe tape to do the twin taillight lines)
Cheers,
Did you bath them in some sought of grime remover?
Also have you used a satin black or matt?
#43
Davis
-
- Members
-
- 343 posts
Forum Fan
- Name:Drew
- Location:.
- Car:LC 2 door
- Joined: 26-October 13
Posted 10 March 2014 - 07:40 PM
Did you bath them in some sought of grime remover?
Also have you used a satin black or matt?
I just used dishwasing detergent and washed thoroughly in hot water.
For paint I used gloss black 'white knight' epoxy enamel in spray can... I also did a light clear coat after to seal the paint and polished chrome. (not sure if it's the 'right' way but worked for me)).
#44
Davis
-
- Members
-
- 343 posts
Forum Fan
- Name:Drew
- Location:.
- Car:LC 2 door
- Joined: 26-October 13
Posted 11 March 2014 - 05:11 PM
Ok, so once again I find myself paying the price for the previous owners shit repairs. Obviously the top roof / window frame had suffered from some rust which resulted in the roof being cut back, but seriously you should have seen the terrible effort repairing this area with miscellaneous pieces of flat steel. The first 2 photos show what we were working with (much worse in person), fortunately mike catts came to my rescue again with a replacement roof section. This area still requires a bit of work to get right, but is looking much better. On a side note I now have the remainder of the roof section left over which would be perfect to fill a sunroof....happy to help out any genuine SA member needing this repair section.
Attached Files
-
IMG_2827a.jpg 83.07K
10 downloads
-
IMG_2828a.jpg 80.97K
7 downloads
-
IMG_2991a.jpg 91.01K
7 downloads
#45
Davis
-
- Members
-
- 343 posts
Forum Fan
- Name:Drew
- Location:.
- Car:LC 2 door
- Joined: 26-October 13
Posted 11 March 2014 - 05:25 PM
So this week Ive been playing around with my standard dash trying to customise it a little, I picked up some auto meter gauges and mounted them with some angled pvc pipe so they better face the driver. Still a bit of work to be done and will post some more photos as i make progress.
I've also been going through my boxes of parts and cleaning them up in anticipation of fitting them to my car once painted. Lastly, I picked up my bonnet hinges, catch and associated engine bay nuts and bolts today.... I had them anodised and im pretty happy with the finished product.
Cheers
Attached Files
-
IMG_2986a.jpg 98.3K
11 downloads
-
IMG_2874a.jpg 91.67K
8 downloads
-
IMG_2993a.jpg 83.14K
9 downloads
#46
Davis
-
- Members
-
- 343 posts
Forum Fan
- Name:Drew
- Location:.
- Car:LC 2 door
- Joined: 26-October 13
Posted 17 March 2014 - 05:34 PM
Picked up a set of superlite wheels this week, they 15 x 6 with a positive 24 offset and 113 backspace. I'm very happy with the fit, even with the current tyres they don't hit and have ample room under the guards. The rims came with 195/70/15 tyres but my intention is too fit 205/50/15...which will keep my rolling diameter the same as factory. I think they suit the car nicely...will obviously look better once lowered and some lower profile tyres are fitted. Cheers
Attached Files
-
IMG_3017a.jpg 70.83K
7 downloads
-
IMG_3010a.jpg 93.09K
8 downloads
-
IMG_3009a.jpg 82.65K
8 downloads
#47
stevemc32
-
- Members
-
- 297 posts
Forum Fan
- Name:Steve
- Location:Sydney
- Car:LJ 4 Door
- Joined: 14-September 12
Posted 17 March 2014 - 06:16 PM
I've got 205/50R15 tyres on a set of Volvo steelies of the same specs as your Superlites and I reckon they're pretty much spot on. My one is lowered by about 40 years which some measurements have indicated to be about 1.5 inches all around and the wheels and tyres work nicely.
#48
Davis
-
- Members
-
- 343 posts
Forum Fan
- Name:Drew
- Location:.
- Car:LC 2 door
- Joined: 26-October 13
Posted 18 March 2014 - 08:24 AM
Cheers Stevemc32, good to know the bigger tyres still fit nicely. What brand tyres are you running and what can I expect to pay?
#49
stevemc32
-
- Members
-
- 297 posts
Forum Fan
- Name:Steve
- Location:Sydney
- Car:LJ 4 Door
- Joined: 14-September 12
Posted 18 March 2014 - 09:12 PM
I've got old rubbish tyres on it at the moment as it's not roadworthy but was quoted about $95 each for Chinese 205/50R15's or around $160 each for known brand versions.
#50
purrlx
View Garage
-
- Members
-
- 1,330 posts
Forum Fixture
- Name:Danny
- Location:Gladstone
- Car:LX hatch
- Joined: 23-December 11
View Garage
Posted 19 March 2014 - 08:47 AM
Looking good with those wheels ,progress is always good
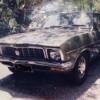
What's the other car in background
What's the other car in background


0 user(s) are reading this topic
0 members, 0 guests, 0 anonymous users

