Jump to content


Removing battery tray from LH/LX


  • Please log in to reply
18 replies to this topic

#1 _Squarepants_

_Squarepants_
  • Guests

Posted 13 June 2009 - 03:46 PM

As I'm sure all LH/LH (UC???) owners know, the battery tray usually suffers from a fair bit of corrosion, mainly from leaky batteries.
Since I have relocated my battery to the boot, I decided that there was no point having a rusty, crappy looking battery tray in the engine bay.
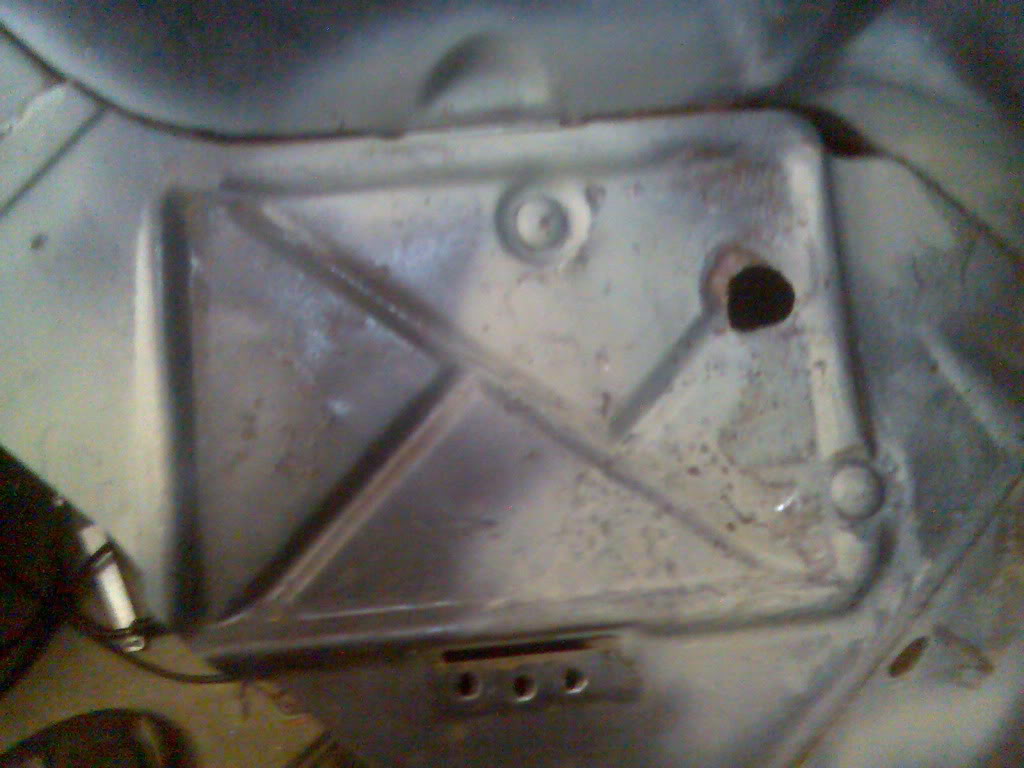
Posted Image

So I cut it out.

Posted Image

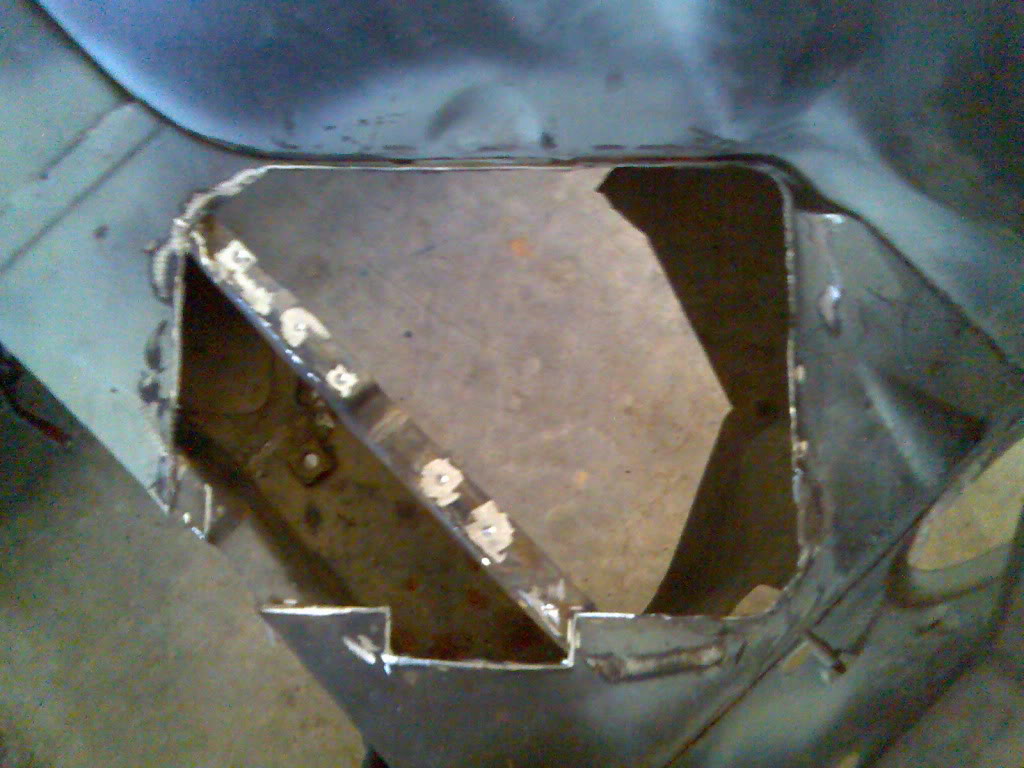
I had to drill a couple of spot welds, but it's mainly grinder work.
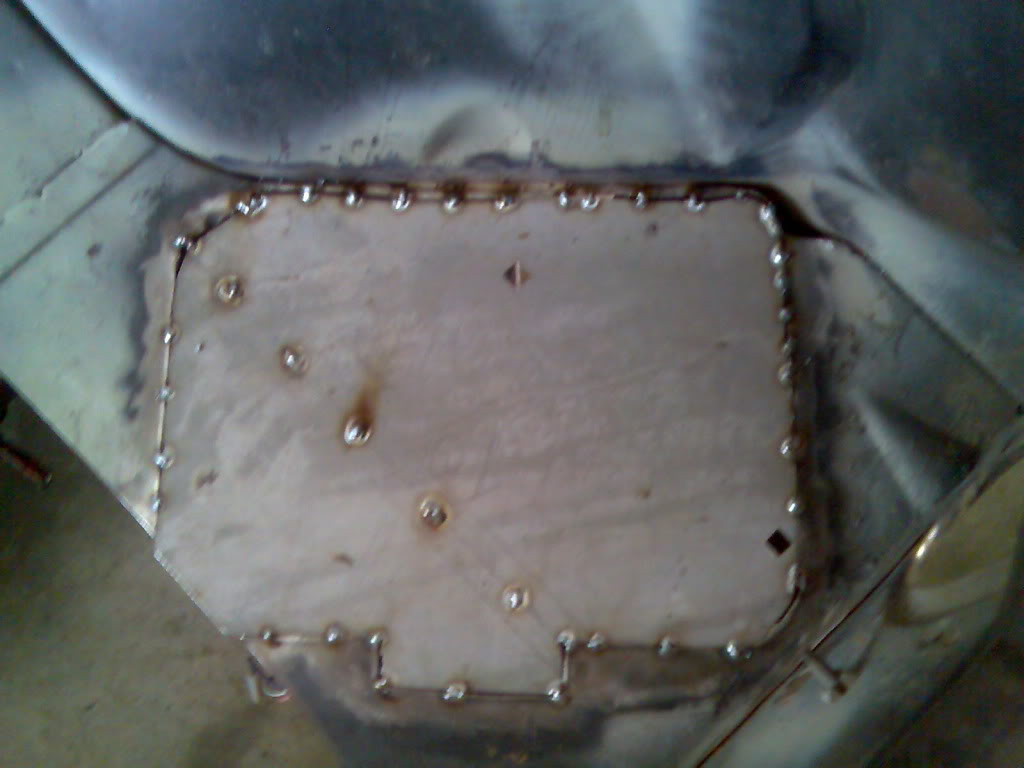
I then made up a plate to fit the cut out.

Posted Image

From memory there is a spacer required underneath it for the bumper mounting bracket to bolt up to, approx. 1/2" thick as far as I remember, due to contours of the original tray. I can't remember the exact details of it, but if you're doing this sort of mod yourself, I'm sure you'll be able to figure it out for yourself. It's pretty obvious when your doing it.
This is it all welded, ground back and etch primed...

Posted Image

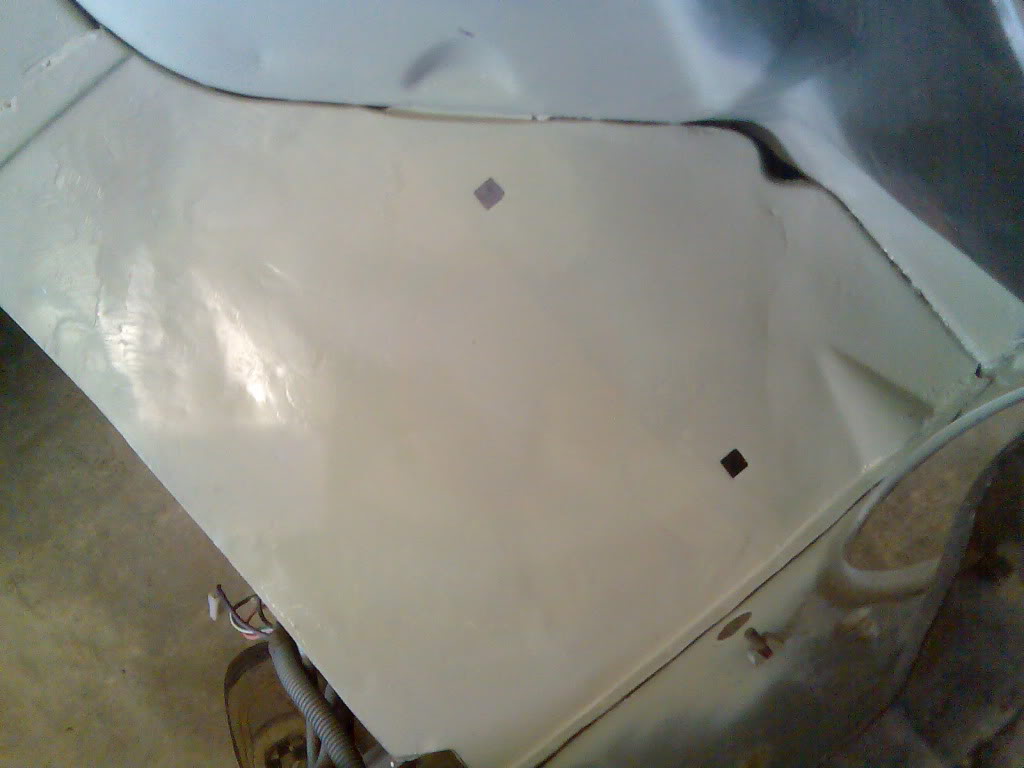
It gives a cleaner, smoother look to the engine bay and really wasn't that hard.
I hope someone finds this useful and/or inspiring. :spoton:

#2 mitchg

mitchg

    The guy with the Torailer

  • Members
  • PipPipPipPipPipPip
  • 3,111 posts
  • Name:Mitch
  • Location:Ingleburn, NSW
  • Car:Was a '77 LX V6 Torana + Torailer now VX SS
  • Joined: 19-May 07

Posted 13 June 2009 - 06:18 PM

Looks tops mate. Well done. Wish I had of done this when I repainted my engine bay. The battery tray doesnt look very good without a battery in it. Cant wait to see it finished!

#3 benno81

benno81

    Forum Fixture

  • Members
  • PipPipPipPipPip
  • 709 posts
  • Joined: 30-September 08

Posted 13 June 2009 - 08:28 PM

wouldnt it have been easier to drill spot welds and remove and fabricate new panel???
i have replaced both sides of mine i fabricated a new battery tray as every one told me the uc one that rare spares sells doesnt fit
but i did the old mans lh tray using the uc one from rare spares took 10mins to modify and it looks the same as lh/x

#4 benno81

benno81

    Forum Fixture

  • Members
  • PipPipPipPipPip
  • 709 posts
  • Joined: 30-September 08

Posted 13 June 2009 - 08:46 PM

Posted Image
Posted Image
sorry to take over ur post just thought i would show my replacements

#5 _Squarepants_

_Squarepants_
  • Guests

Posted 13 June 2009 - 09:46 PM

wouldnt it have been easier to drill spot welds and remove and fabricate new panel???


That's what I did. Did you even read the post??? Unless you are talking about the whole inner guard, in which case, No, it would not have been easier.

Mitch, it is finished, it has been for like 2 years, look here: http://www.gmh-toran...showtopic=36330
I posted this to try to make use of the new "Fabrication" section as it hasn't seen much action yet.

#6 benno81

benno81

    Forum Fixture

  • Members
  • PipPipPipPipPip
  • 709 posts
  • Joined: 30-September 08

Posted 13 June 2009 - 10:03 PM

i meant the battery tray its spotted in place from factory

#7 _ass308_

_ass308_
  • Guests

Posted 14 June 2009 - 07:48 AM

nice job

#8 _Squarepants_

_Squarepants_
  • Guests

Posted 14 June 2009 - 08:14 PM

i meant the battery tray its spotted in place from factory

Are you confusing it with an LC/J battery tray?

#9 _nial8r_

_nial8r_
  • Guests

Posted 14 June 2009 - 08:26 PM

benno81 on the right side what did you do with the number that is stamped on that part ??? im gonna be replacing both sides of mine next but that number has me a little worried !!! also how have you hidden the tops of the bolts that are ontop of both sides that hold the bar suppport brackets ??

any neat job on the replacement of the batter tray to dude :spoton: but i think i will be drilling all the spots out and where it over laps onto the rail i will do a neat butt joint weld so it can be smooth all the way from the firewall to the support, just my opinion, shoot me down if need be.... :huh:

#10 _mello92_

_mello92_
  • Guests

Posted 17 June 2009 - 10:56 AM

Lee, in regards to that number, you could just cut the number out of the old section, clean it up, and weld it into the new piece. I havent done that, just what Ive heard.

Cheers.

Edited by mello92, 17 June 2009 - 10:56 AM.


#11 _nial8r_

_nial8r_
  • Guests

Posted 17 June 2009 - 01:11 PM

Lee, in regards to that number, you could just cut the number out of the old section, clean it up, and weld it into the new piece. I havent done that, just what Ive heard.

Cheers.


Mello92 thats what i think i would have done but then i have to think of when i paint in the engine bay that number is gonna disaper under the coats of paint ??? just when i think i have one problem solved another pop's up !!!

#12 benno81

benno81

    Forum Fixture

  • Members
  • PipPipPipPipPip
  • 709 posts
  • Joined: 30-September 08

Posted 17 June 2009 - 01:55 PM

i havent done anything about that number yet but will b restamping it when it comes time before painting just
have to make sure u use 8mm stamps not that easy to cum by these days

#13 _Squarepants_

_Squarepants_
  • Guests

Posted 17 June 2009 - 10:27 PM

Mello92 thats what i think i would have done but then i have to think of when i paint in the engine bay that number is gonna disaper under the coats of paint ??? just when i think i have one problem solved another pop's up !!!

You can still see them under a light coat...
Mask it up and paint the rest of the bay, then pull off the tape and give it a light coat over the top.
Posted Image

#14 _mello92_

_mello92_
  • Guests

Posted 17 June 2009 - 10:58 PM

Mask it up and paint the rest of the bay, then pull off the tape and give it a light coat over the top.


Thats what I was gonna suggest. That bit doesnt need heaps of layers, really.

#15 _nial8r_

_nial8r_
  • Guests

Posted 18 June 2009 - 08:11 AM

by the time i have primmed and painted the bay in 2k im pretty sure the number will be none-more :<_<:

#16 Ruts

Ruts

    How Fast!?

  • Moderators
  • PipPipPipPipPip
  • 1,118 posts
  • Location:Bargo, NSW
  • Car:Blown A9X replica, Black SS hatchback, LH SLR5000
  • Joined: 23-December 06

Posted 18 June 2009 - 08:12 AM

Thats what I was gonna suggest. That bit doesnt need heaps of layers, really.


Agreed.

Whenever you paint an engine bay you should always make sure that the chassis number can be read. The last thing you want is to be stopped by a police officer or an RTA inspector who wants to read the chassis number but can't. So what happens then is they can direct you to the have your pride and joy booked in for "identity check" to try and find the number. So you roll up to where you need to go and then they start scratching the paint off where the number should be. Nothing worse than having to touch up an engine bay which has had paint scratched off it only to reveal that the chassis number was there in the first place but was covered by layers of paint.

Edited by Ruts, 18 June 2009 - 08:18 AM.


#17 _moot_

_moot_
  • Guests

Posted 18 June 2009 - 02:49 PM

when you car is in hi-fill ready for paint,go over the chassis number with a pick to dig he crap out of it

#18 _moot_

_moot_
  • Guests

Posted 19 June 2009 - 02:59 PM

by the time i have primmed and painted the bay in 2k im pretty sure the number will be none-more :<_<:


you'll have alot of trouble at rego time if your chassis number has been re-stamped.you might wanna cut around it like i did


Posted Image

#19 makka

makka

    A m��se once bit my sister

  • Members
  • PipPipPipPipPipPip
  • 3,559 posts
  • Name:Cohen
  • Location:ya daughters place
  • Joined: 08-November 05

Posted 14 August 2009 - 07:57 AM

^^^^^thats how I am doing it


0 user(s) are reading this topic

0 members, 0 guests, 0 anonymous users