
Glad I could help Matty, I know what it's like when people lend a hand, so what goes around, come around.
Cheers.

My Shed Build!
Started by
MRLXSS
, Oct 12 2009 08:06 AM
104 replies to this topic
#76

knoath
-

- Members
-

- 2,036 posts
far.... FAR
- Location:Melbourne, Northern Subs
- Joined: 09-November 05
Posted 05 November 2009 - 07:20 AM
#77
MRLXSS
-
- Members
-
- 12,396 posts
The Render Garage
- Name:Matt
- Location:Upwey, Melbourne
- Car:355 LX Hatchback, DeLorean DMC-12, LX SS Hatch, VY Cross8 Crewman
- Joined: 09-November 05
Posted 06 November 2009 - 08:58 AM
Alrighty!
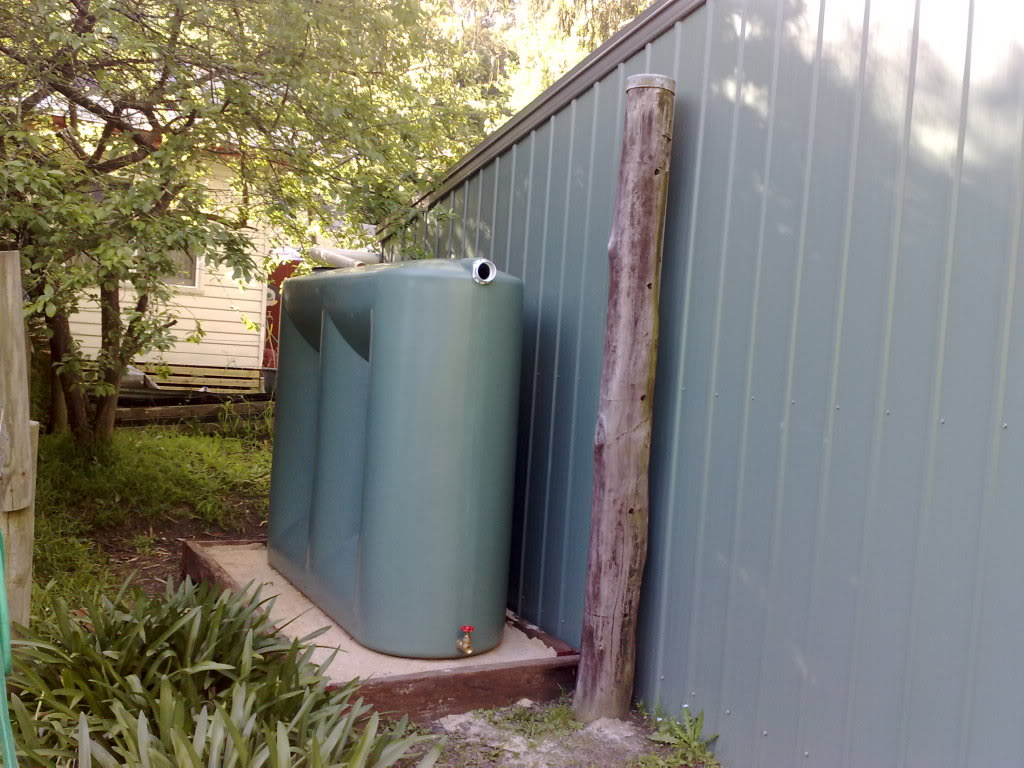
Here is the water tank! It really just blends it nicely to the shed wall! It will be good when it rains and fills up!
Will probably get another identical one to sit next to it, next year so we have 5000L of Storage down there to wash cars, etc.
And me again putting my roof plumbing skills to work!
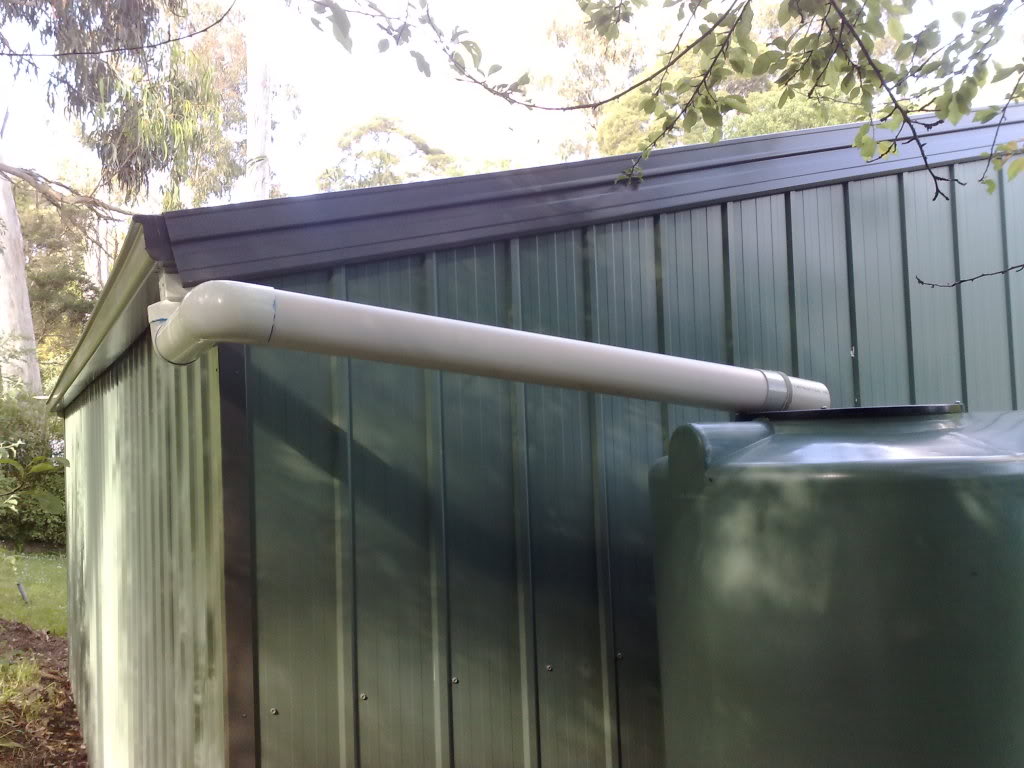
I still need to trim the other side of the roof and fit its gutter, but i won't bother plumbing that gutter up to this tank. It will just go straight to the new tank when it goes in.
Here is the water tank! It really just blends it nicely to the shed wall! It will be good when it rains and fills up!
Will probably get another identical one to sit next to it, next year so we have 5000L of Storage down there to wash cars, etc.
And me again putting my roof plumbing skills to work!
I still need to trim the other side of the roof and fit its gutter, but i won't bother plumbing that gutter up to this tank. It will just go straight to the new tank when it goes in.
#78
_Barman_
_Barman_
-

- Guests
Posted 08 November 2009 - 02:50 PM
How to stop it raining...install a water tank
How to make it rain...wash your car
Hey nice job on the shed,tank and dog.
How to make it rain...wash your car
Hey nice job on the shed,tank and dog.
#79
_Barman_
_Barman_
-
- Guests
Posted 08 November 2009 - 03:03 PM
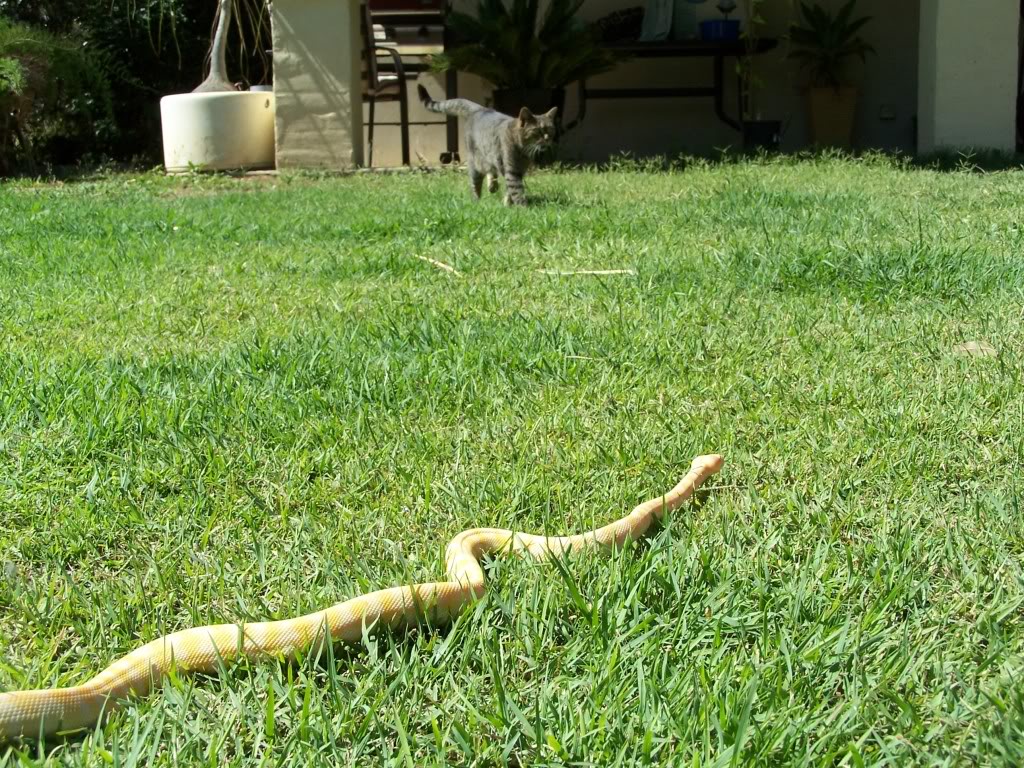
Heres my newest pet,goes well with 2 rotties 1 boxer 1 cat
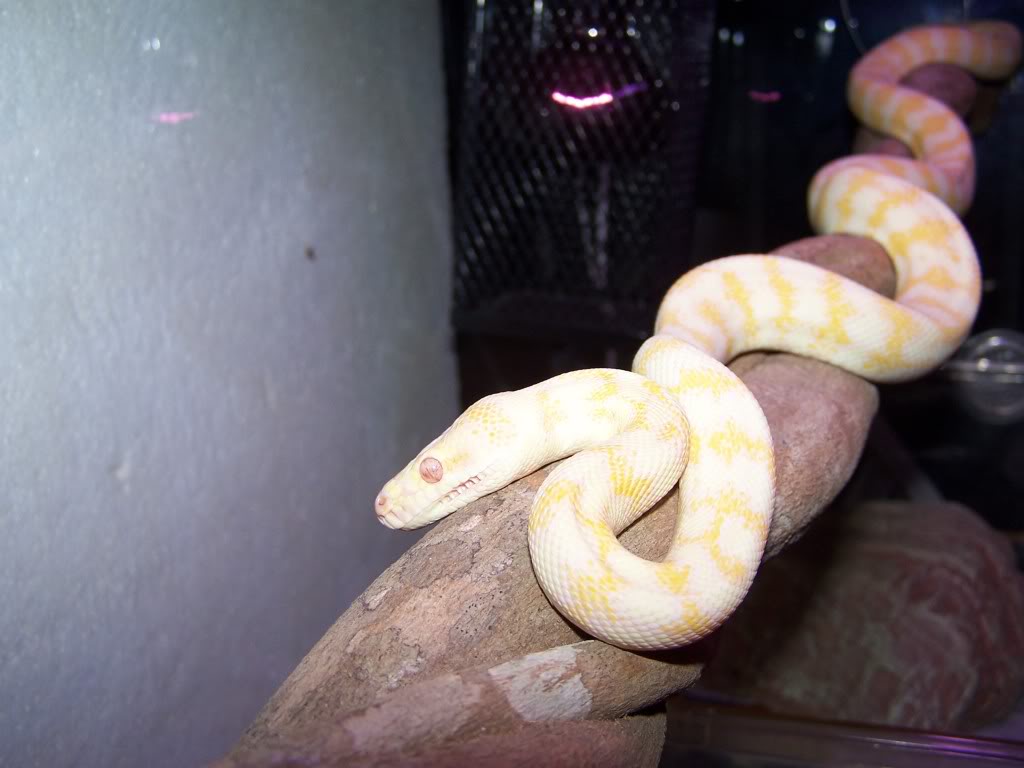

shes an Albino darwin pyton,about 7 months old and 1.1mtrs long, shell be 3 mtrs when grown,
and she will eat that cat no problem,
cost me $5500, that why my tranny isnt fixed yet,
cheers Baz
shes an Albino darwin pyton,about 7 months old and 1.1mtrs long, shell be 3 mtrs when grown,
and she will eat that cat no problem,
cost me $5500, that why my tranny isnt fixed yet,
cheers Baz
#80
GML-31
-

- Members
-
- 5,239 posts
Oh My, Don't you post alot
- Name:Kev
- Location:Highland Park
- Car:too many
- Joined: 08-November 05
Posted 08 November 2009 - 03:25 PM
crikey didnt realise snakes were so expensive
#81
Heath
 View Garage
-

- Administrators
-
- 18,329 posts
I like cars.
- Name:Heath
- Location:Eastern Suburbs, Melbourne
- Car:Heavily Modified UC Sunbird Hatchback
- Joined: 07-November 05
View Garage
Posted 08 November 2009 - 03:32 PM
lol that is one expensive pet!
My three legged cat named Osama is ample
My three legged cat named Osama is ample
#82
MRLXSS
-
- Members
-
- 12,396 posts
The Render Garage
- Name:Matt
- Location:Upwey, Melbourne
- Car:355 LX Hatchback, DeLorean DMC-12, LX SS Hatch, VY Cross8 Crewman
- Joined: 09-November 05
Posted 08 November 2009 - 03:47 PM
How to stop it raining...install a water tank
How to make it rain...wash your car
Hey nice job on the shed,tank and dog.
How to make it pour with rain... Buy a watertank, and have it sitting in the front yard without being connected!
HAHA You are spot on Baz!
DAMN! That snake is bloody cool as! But expensive!!! Will it get sunburnt cos its albino? Do you have to put sunscreen on it? LOL
#83
mr5000
-

- Members
-
- 3,449 posts
chief break-everything
- Location:melbourne
- Car:77 lx 4door
- Joined: 08-January 06
Posted 09 November 2009 - 06:37 AM
why not just use the existing down pipe to plumb up to the tank for now and when you decide to get another just re direct it slightly easy and you already got all the bits
#84
MRLXSS
-
- Members
-
- 12,396 posts
The Render Garage
- Name:Matt
- Location:Upwey, Melbourne
- Car:355 LX Hatchback, DeLorean DMC-12, LX SS Hatch, VY Cross8 Crewman
- Joined: 09-November 05
Posted 09 November 2009 - 07:22 AM
why not just use the existing down pipe to plumb up to the tank for now and when you decide to get another just re direct it slightly easy and you already got all the bits
Yeah, I still have to finish trimming the roof so the gutter will fit, and i kinda can't be #@$^%&. LOL!
Wanna come do it for me?
#85
mr5000
-
- Members
-
- 3,449 posts
chief break-everything
- Location:melbourne
- Car:77 lx 4door
- Joined: 08-January 06
Posted 09 November 2009 - 06:40 PM
what needs to be trimmed?
#86
_Barman_
_Barman_
-
- Guests
Posted 10 November 2009 - 07:14 AM
Its the "albino" bit that makes her expesive,
normal Darwin pythons go for $600/$1000,
cheers Baz
normal Darwin pythons go for $600/$1000,
cheers Baz
#87
MRLXSS
-
- Members
-
- 12,396 posts
The Render Garage
- Name:Matt
- Location:Upwey, Melbourne
- Car:355 LX Hatchback, DeLorean DMC-12, LX SS Hatch, VY Cross8 Crewman
- Joined: 09-November 05
Posted 10 November 2009 - 07:31 AM
what needs to be trimmed?
Where nathan went out on the other side roof sheets. We fixed up most of it, but they'll still overhang the gutter, so need to chop some off so the water drops into the gutter, and not over it!
A big arse angle grinder would make it easy as! LOL
#88
mr5000
-
- Members
-
- 3,449 posts
chief break-everything
- Location:melbourne
- Car:77 lx 4door
- Joined: 08-January 06
Posted 10 November 2009 - 03:09 PM
i reckon use ya snips much neater cut
#89
Guns n roses
-

- Members
-
- 575 posts
Forum Fixture
- Joined: 08-November 05
Posted 10 November 2009 - 06:45 PM
how long do they live till barman?
#90
MRLXSS
-
- Members
-
- 12,396 posts
The Render Garage
- Name:Matt
- Location:Upwey, Melbourne
- Car:355 LX Hatchback, DeLorean DMC-12, LX SS Hatch, VY Cross8 Crewman
- Joined: 09-November 05
Posted 11 November 2009 - 08:49 AM
i reckon use ya snips much neater cut
Hmmmm, Maybe, my snips are pretty ordinary!
#91
mr5000
-
- Members
-
- 3,449 posts
chief break-everything
- Location:melbourne
- Car:77 lx 4door
- Joined: 08-January 06
Posted 12 November 2009 - 07:03 AM
haha dont be a girlabout it your snips are good they are new and cut
#92
MRLXSS
-
- Members
-
- 12,396 posts
The Render Garage
- Name:Matt
- Location:Upwey, Melbourne
- Car:355 LX Hatchback, DeLorean DMC-12, LX SS Hatch, VY Cross8 Crewman
- Joined: 09-November 05
Posted 12 November 2009 - 07:25 AM
Ok, maybe its my office hands that aren't up to the task!
#93
mr5000
-
- Members
-
- 3,449 posts
chief break-everything
- Location:melbourne
- Car:77 lx 4door
- Joined: 08-January 06
Posted 12 November 2009 - 06:07 PM
haha office hands
#94
MRLXSS
-
- Members
-
- 12,396 posts
The Render Garage
- Name:Matt
- Location:Upwey, Melbourne
- Car:355 LX Hatchback, DeLorean DMC-12, LX SS Hatch, VY Cross8 Crewman
- Joined: 09-November 05
Posted 21 January 2010 - 11:26 AM
Well,
Bit of an update.
Had 4 weeks off over Xmas, had big plans to finish the shed flooring etc... Didn't think that i needed lots of $$ for that.. hahaha!
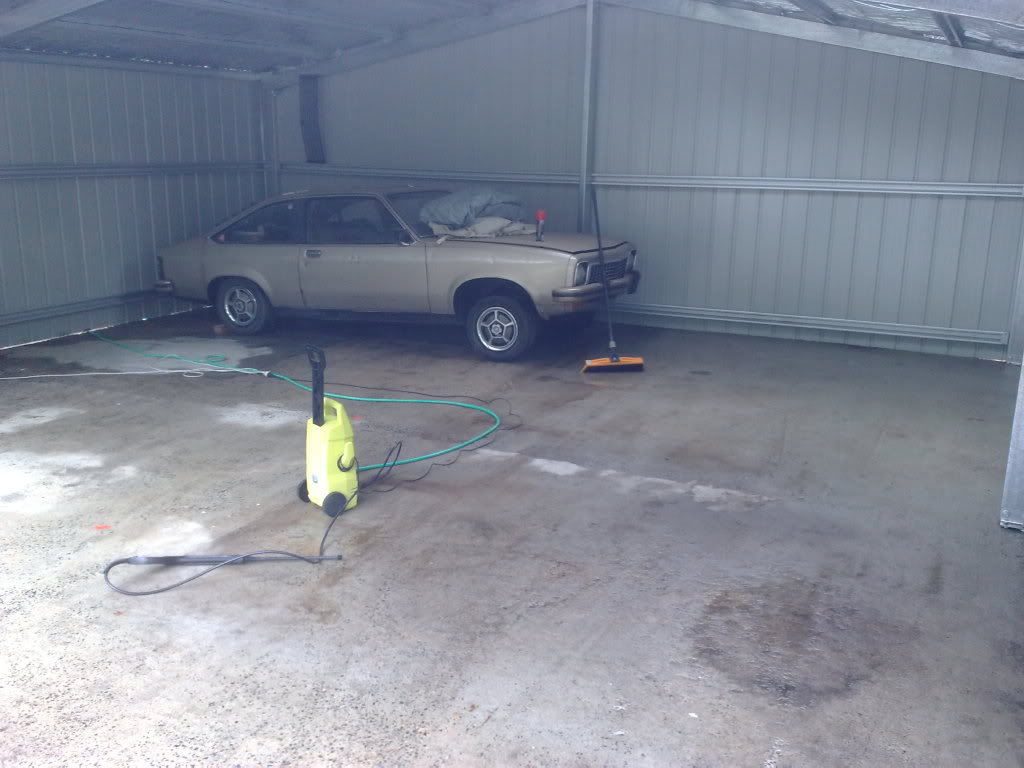
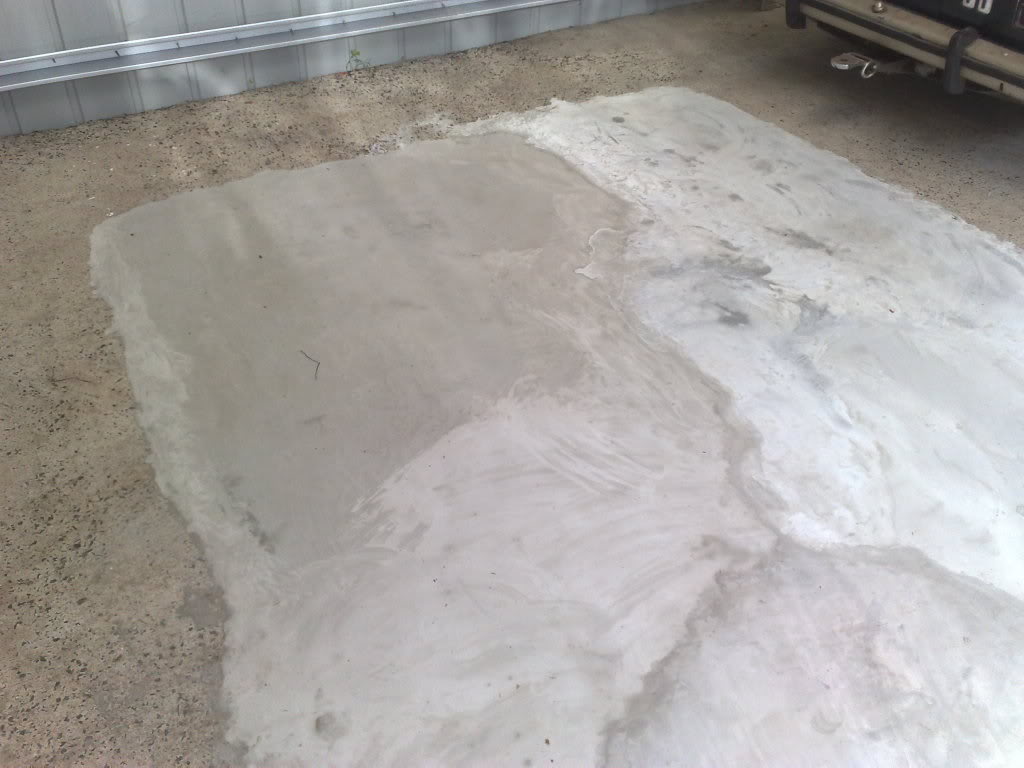
I did managed to fill in the major suspect areas in the floor, and i also bought a bag of Self Levelling Stuff ($38 a bag, so not cheap) and tried that out. Pretty happy with the result, going to buy more bags as i can afford it, it will be a good way to smooth off the floor, too allow for jacks and stuff to roll across the surface easily.
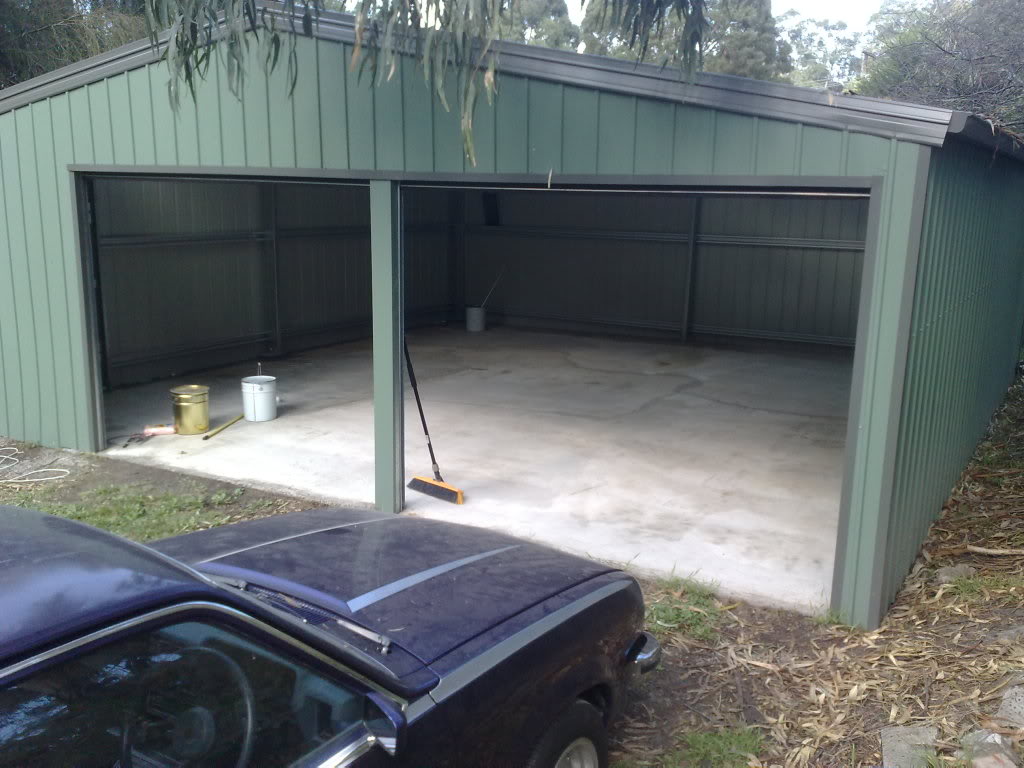
I did manage to pressure wash the hole surface! Amazing how dirty it was!! I can't wait to finish the flooring and get the paint down! It's gonna be great!
Bit of an update.
Had 4 weeks off over Xmas, had big plans to finish the shed flooring etc... Didn't think that i needed lots of $$ for that.. hahaha!
I did managed to fill in the major suspect areas in the floor, and i also bought a bag of Self Levelling Stuff ($38 a bag, so not cheap) and tried that out. Pretty happy with the result, going to buy more bags as i can afford it, it will be a good way to smooth off the floor, too allow for jacks and stuff to roll across the surface easily.
I did manage to pressure wash the hole surface! Amazing how dirty it was!! I can't wait to finish the flooring and get the paint down! It's gonna be great!
#95
Ruts
-

- Moderators
-
- 1,118 posts
How Fast!?
- Location:Bargo, NSW
- Car:Blown A9X replica, Black SS hatchback, LH SLR5000
- Joined: 23-December 06
Posted 21 January 2010 - 11:40 AM
I'm happy to donate another cat for your snake. Just don't tell the missus.
#96
MRLXSS
-
- Members
-
- 12,396 posts
The Render Garage
- Name:Matt
- Location:Upwey, Melbourne
- Car:355 LX Hatchback, DeLorean DMC-12, LX SS Hatch, VY Cross8 Crewman
- Joined: 09-November 05
Posted 08 February 2010 - 12:30 PM
Well, I'm slowly making progress...
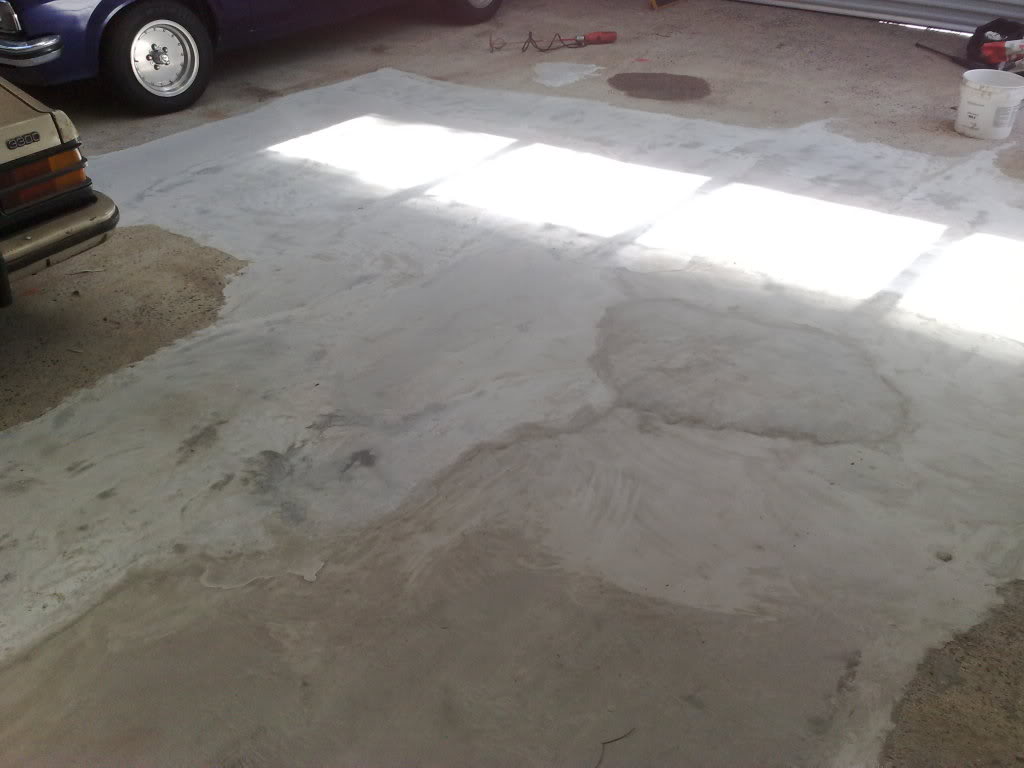
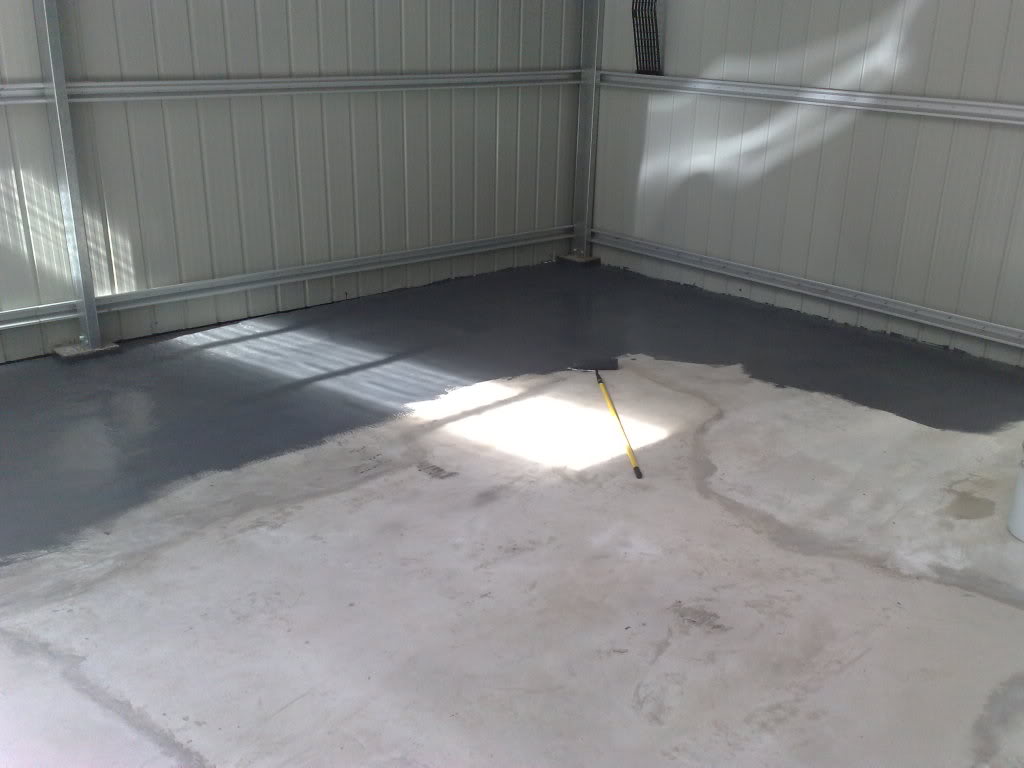
We bought some bags of self leveller, that stuff is great! It costs like $30 a bag, so we haven't been able to buy it all in one hit... So far we've used three bags of the stuff. You basically mix it up as thin as paint (Maddy is a pro at getting the right mixture!)... Then you just pour it over, roughly spread it out to get the best coverage... Then it just settles level and smooth! Its great stuff! I was going to hire a concrete grinder, but it worked out cheaper to put this stuff down than to hire a grinder! And i'd prefer to put more concrete under me than take concrete away
We are going to try and buy the remaining bags we need this week and finish it asap! I can't wait to paint it all and get it looking shit hot!
Here are a few pics... The area closer to us we did first, and the mix was a bit thicker... So its not as smooth, we are gonna chuck another layer over that to get it perfect.
Oh, and notice the f*ckING trans fluid! Car decided to get its rags and drop all that the other night... It just randomly, every couple of months decides to drop a litre of trans fluid! No idea why!
And, we got this in yesterday as well.. (excuse my mate justin, he likes to take his clothes off!)
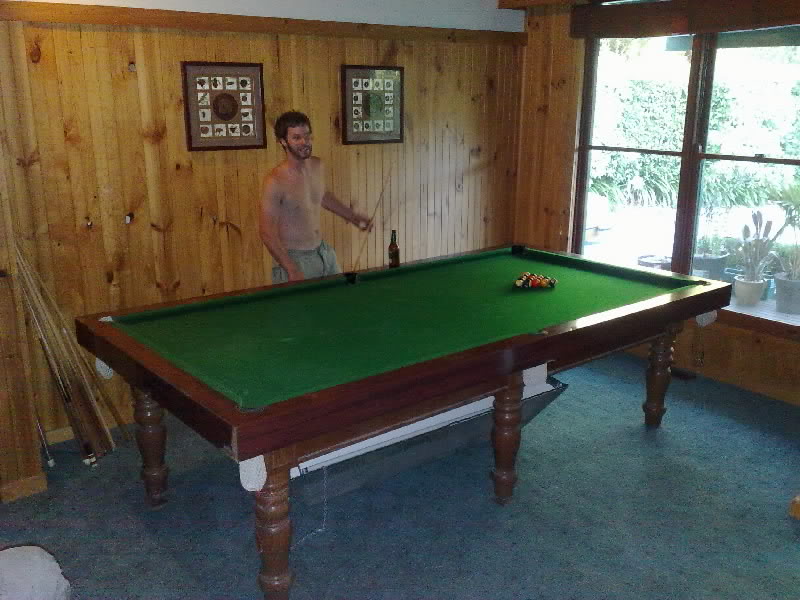
It's a i think 9x5'' Slate top table (f*ckING HEAVY!!!!) Not much clearance around the table, but its only temporary there... until we build the games room downstairs!
On other good news... The Donated beer fridge works! And my first batch of homebrew is drinkable!
We bought some bags of self leveller, that stuff is great! It costs like $30 a bag, so we haven't been able to buy it all in one hit... So far we've used three bags of the stuff. You basically mix it up as thin as paint (Maddy is a pro at getting the right mixture!)... Then you just pour it over, roughly spread it out to get the best coverage... Then it just settles level and smooth! Its great stuff! I was going to hire a concrete grinder, but it worked out cheaper to put this stuff down than to hire a grinder! And i'd prefer to put more concrete under me than take concrete away
We are going to try and buy the remaining bags we need this week and finish it asap! I can't wait to paint it all and get it looking shit hot!
Here are a few pics... The area closer to us we did first, and the mix was a bit thicker... So its not as smooth, we are gonna chuck another layer over that to get it perfect.
Oh, and notice the f*ckING trans fluid! Car decided to get its rags and drop all that the other night... It just randomly, every couple of months decides to drop a litre of trans fluid! No idea why!
And, we got this in yesterday as well.. (excuse my mate justin, he likes to take his clothes off!)
It's a i think 9x5'' Slate top table (f*ckING HEAVY!!!!) Not much clearance around the table, but its only temporary there... until we build the games room downstairs!
On other good news... The Donated beer fridge works! And my first batch of homebrew is drinkable!
#97
_Liam_
_Liam_
-
- Guests
Posted 08 February 2010 - 10:27 PM
Hey mate, good effort for doing it yourself.
As someone previously stated, much easier to make portal frames up on ground. My way varies (built sheds for a living)
For Frame - Put Sides and roof portal and rafters together, then check diagonals, get them square and do it up. Put the other portals and rafters on top and match up to original, then you can mark your wall purlins on the portal with a nicko. You can also then mark the wall purlins as to where the portal should sit (same for roof purlins). (Makes it easier to square). Put your eave brackets on the ground as well. Put some braces against a peg in the ground and (We used to use the top hat and screw it to a wooden stake in ground.) lift portal frame up and get plumb and then screw that top hat to the portal to keep it plumb. Then you can stand next portals and brace them with your wall purlins obiously. Then you square up the roof using the purlins that were marked earlier. Then you can put your strap bracing on. Some people like the adjustable strapping, i just use the normal stuff and pull it tight and put screw in where it sits, then you make a hole 15-20 mm past that hole and put a roof screw through it to pull it tight. Fasten etc. You can then put all purlins on etc. There you have a nice frame which shouldn't take more than 4 hours with two people.
For cladding - Measure from slab to centre of purlins at left, middle and right sight of frame, then take the average and add 50-75 mm for slab coverage and that measurement you write down! Don't memorize it! It's amazing how 1545 sounds like 1455 in your head. Just do wall cladding because roof can be very hard to get right, and you don't want to have to fix holes. So then you put a chalk line along slab 50-75mm down so that you can line bottom of sheet on it, one person lines it up, and other puts one screw in middle purlin on side of over lap. Easier to control plumb it up and put another screw in other side. Repeat till all wall cladding done. Now for Roof cladding you really need to get the first one right. No tricks for this just line up with edge of roof purlin and screw in. When you approach a Portal frame measure from edge of sheet to frame and then adjust next sheet accordingly. Basically thats it for cladding.
I'm too tired to write the rest... anyone interested ill be happy to oblige. Point to mention doing it this way, two guys (me and my boss) could put this up in one day (standard 6 x 9, two roller doors and one PA Door.)
#98
MRLXSS
-
- Members
-
- 12,396 posts
The Render Garage
- Name:Matt
- Location:Upwey, Melbourne
- Car:355 LX Hatchback, DeLorean DMC-12, LX SS Hatch, VY Cross8 Crewman
- Joined: 09-November 05
Posted 04 April 2010 - 10:32 PM
Well, been busy over the loooooong weekend.
Finally got the concrete paint down, looks a heap better!
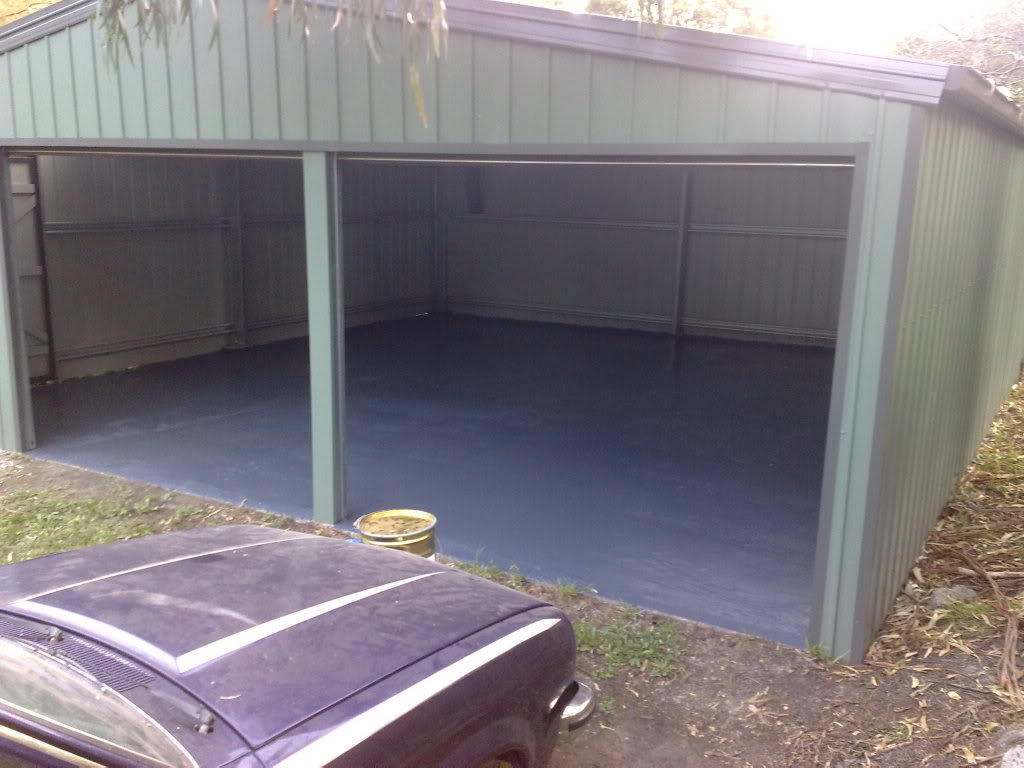
Finally got the concrete paint down, looks a heap better!
#99
_73LJWhiteSL_
_73LJWhiteSL_
-
- Guests
Posted 04 April 2010 - 10:43 PM
Now that does look good Matt. You make me envious a shed with a painted concrete floor. Whats the plan to deal with fluid leaks, gonna put pans under the cars?
Steve
Steve
#100
MRLXSS
-
- Members
-
- 12,396 posts
The Render Garage
- Name:Matt
- Location:Upwey, Melbourne
- Car:355 LX Hatchback, DeLorean DMC-12, LX SS Hatch, VY Cross8 Crewman
- Joined: 09-November 05
Posted 04 April 2010 - 10:49 PM
Yeah, I'll whack a pan under my car, as its so tempremental at the moment with its leaky fluids. WILDUC doesn't really leak, so that should be fine to leave.
Its bloody slippery on the paint though! With socks you could slide from one side of the shed to the other! LOL!
We did a coat yesterday, then a REALLY thick coat today! It's made the surface a lot smoother (Still not perfect! but when you compare it to how it started its bloody awesome!
Its bloody slippery on the paint though! With socks you could slide from one side of the shed to the other! LOL!
We did a coat yesterday, then a REALLY thick coat today! It's made the surface a lot smoother (Still not perfect! but when you compare it to how it started its bloody awesome!


1 user(s) are reading this topic
0 members, 1 guests, 0 anonymous users

