Jump to content


- - - - -

1974 LH TORANA RESTORATION


  • Please log in to reply
320 replies to this topic

#1 _LH SLR 3300_

_LH SLR 3300_
  • Guests

Posted 04 December 2010 - 05:58 PM

I swapped my daily driver Hyundai Excel plus small cash adjustment for this 1974 LH Torana S back in august.
Posted Image
Posted Image
Posted Image
Posted Image
Posted Image
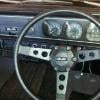
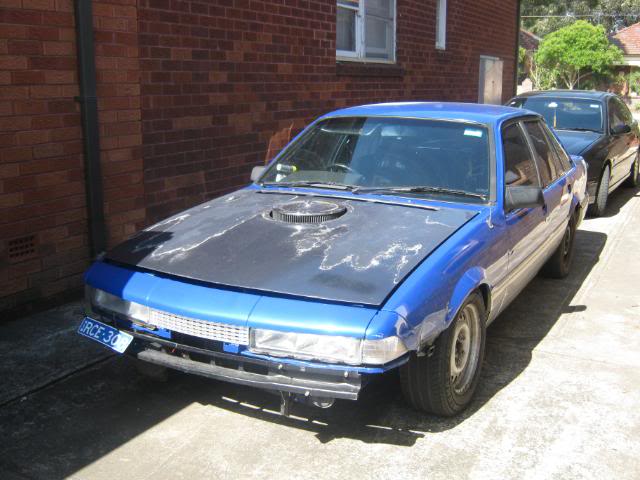
It came with 11 months rego, logs books & is 100% original down to the hubcaps, factory black trim, carpet & factory fitted Air Chief radio. The body is OK but has minor rust in some of the common spots, so while i've been using the car as a daily driver of sorts, i've been slowly repairing the worst areas to keep it from deteriorating further. The first area that needed attention was the windscreen plenum as everytime it rained the floor would fill with water.
Posted Image
So one afternoon when i was bored, i made a repair panel.
Posted Image
Posted Image
A few hours after work of measuring & trial fitting then i was ready to start cutting away the rusty metal.
Posted Image
Posted Image
A sunday afternoon's work had the section welded in place, sealed & painted. Before refitting the dash etc, i sprayed around half a can of cavity wax inside to prevent the rust coming back any time soon.
Posted Image
Posted Image
Within days, it poured rain but this time the floor stayed dry Posted Image . Not so the boot. The RH tail light recess was badly rusted allowing water to enter the boot.
Posted Image
Posted Image
Posted Image
The boot floor is pretty good on this car but i knew it wouldn't stay this way for long if i didn't attend to the rusted tail light recess, so i started by making a repair section one afternoon when i had nothing to do.
Posted Image
The fun part of cutting the rusted area out. This was one of the most challenging rust repairs i've done to date.
Posted Image
I spent the best part of a rainy saturday doing this repair but it turned out OK so i'm happy.
Posted Image
Posted Image
Posted Image
Posted Image
Posted Image
Posted Image
Posted Image
While i had the welder out, i attended to some minor rust on the sills. The car has a stainless steel trim mould affixed to the top of both sills & rust had come up around the welded studs & plastic clips that attach the mould to the sill on both sides.
Posted Image
Posted Image
Posted Image
This was also a tricky repair as i am retaining the stainless moulds, so i had to weld & grind without damaging the studs. I cleaned the rust up as best i could with a small air sander & a die grinder with a wire wheel, then used a silicon bronze welder to fill the holes. The silicon bronze welder doesn't generate as much heat as a MIG, therefore it doesn't blow holes as easily, doesn't distort the panel as much & the welds are alot easier to grind. The finished repair, all studs intact & very little body filler needed.
Posted Image
Posted Image
I've done these repairs, plus a couple of other minor ones, over the past three months or so when i'm not restoring my SL/R or working on other people's cars. Next repair is a cut-n-shut on the lower radiator support panel. It is completely rusted through the tie bar & the rust extends along the base to where the front guards bolt on, so it's easier for me to replace the whole length of the lower support. I managed to score a damaged support that is actually rust free here so it'll be a good challenge to do the cut-n-shut while the original support is still attached to the car.

#2 _nicko61_

_nicko61_
  • Guests

Posted 04 December 2010 - 08:34 PM

very clean and your repairs are excellant. but what on earth is a silicon bronze welder?

#3 _LH SLR 3300_

_LH SLR 3300_
  • Guests

Posted 04 December 2010 - 08:57 PM

Thanks, most anyone can do similar quality repairs with paitence & basic welding skills. Hopefully anyone who views my posts can learn & i'm always willing to pass on my knowledge to others Posted Image . A silicon bronze welder is similar to a MIG but has finer heat, wire feed etc functions, uses diferent wire & gas. I'll post a pic of one tomorrow. Cheers Matt

#4 lxsstorana

lxsstorana

    Forum Fixture

  • Members
  • PipPipPipPipPip
  • 2,499 posts
  • Name:Mick
  • Location:Eastwood, Sydney
  • Car:SS Hatchback
  • Joined: 23-March 06

Posted 04 December 2010 - 09:18 PM

Great car Matt and nice repairs as usual. :spoton:

Cheers Mick.

#5 _Herbinator_

_Herbinator_
  • Guests

Posted 04 December 2010 - 11:43 PM

Great to see the restoration bug is still nibbling away.

#6 _BATHURST-32D_

_BATHURST-32D_
  • Guests

Posted 05 December 2010 - 06:19 AM

well i for one know by hand that you would have plenty of skill in this department and will be watching with great intrest.
really good workmanship so far :ph34r:

cheers gong

#7 tsn007

tsn007

    Forum Fixture

  • Members
  • PipPipPipPipPip
  • 1,010 posts
  • Name:Tony
  • Location:LIVERPOOL, NSW
  • Car:LX hatch, LX sedan
  • Joined: 25-April 07

Posted 05 December 2010 - 06:57 AM

Brilliant work again !!!

#8 LHSL

LHSL

    Forum Fixture

  • Members
  • PipPipPipPipPip
  • 995 posts
  • Name:Phillip
  • Location:SYDNEY
  • Car:1974 LH SL; 2 x 1975 LH S Toranas
  • Joined: 30-March 07

Posted 09 December 2010 - 05:23 PM

Keep up the great work and the mini tutorials always learning off this forum and people like you.

Cheers,
Phillip

#9 _BCR42Y_

_BCR42Y_
  • Guests

Posted 09 December 2010 - 08:33 PM

Always look forward to reading one of your threads Matt, the quality of your work is first class!

Excellent work there!

Did you happen to keep a template of the repair section you made?, I am sure there would be alot of people out there that could use that part under the dash.

Look forward to seeing photo's as you progress with this car.

#10 _LH SLR 3300_

_LH SLR 3300_
  • Guests

Posted 26 December 2010 - 07:37 PM

Thanks for the positive comments, they are very much appreciated Posted Image , Halil, i didn't keep the template as i make each panel as i need them but i can replicate any i make fairly easily if needed. Anyhow, i found myself with some spare time at home so i decided to tackle the rusted lower radiator support panel (tie-bar). It was pretty bad & the complete lower front apron was rusted too.
Posted Image
Posted Image
Someone in the car's past had bogged the rust in the apron, it was so badly rusted two of the bolts came away with the apron when i removed it from the car.
Posted Image
Posted Image
Even though repair sections are available, i am using a damaged second hand support panel to do a "sectional repair". This way once the repair is finished, it will retain the factory original appearence & the repair will be hard to pick.
Posted Image
I began by unpicking & cutting away the rusted tie-bar.
Posted Image
Posted Image
Posted Image
Posted Image
Posted Image
Then, i started cutting the tie-bar from the donor support making sure i left plenty of "overlap".
Posted Image
Then i sat the replacement tie-bar on the car & held it in place with vice clamps. During this process i also trial fitted the guards & replacement front apron panel to check alignment.
Posted Image
Posted Image
Posted Image
Using an air hacksaw & cut-off wheel started trimming the replacement section to "butt up" to the radiator support. As i'm joining it behind the factory spot welded flange to "hide" the repair, i had to remove the tie-bar & unpick the excess steel. This is where i became so involved in the job i neglected to take pics but here is the section welded in.
Posted Image

Posted Image
Posted Image
Posted Image
I welded from behind where i can lightly grind the welds & hide them with stoneguard, on the front face of the support where the penetrated welds were visible, i used an small air sander & belt sander to sand them flush.
Posted Image
Posted Image
I haven't welded the flanges beneath the front bumper mounting recesses yet as i will use the inverter spot welder at work to spot weld them to replicate the factory appearence. For the time being i applied some black etch primer & GMH black to seal the repair from rust. I'm pretty happy with how the repair turned out, no bog will be needed to hid the joins as the gloss black finish shows.
Posted Image
Posted Image
Posted Image
I also used this oppertunity to replace both original guards as they were badly rusted & had several substandard repairs.
Posted Image
Posted Image
Posted Image
Posted Image
The front end all back together. It actually has better panel alignment now than what it had before i started the repair.
Posted Image
Posted Image
Posted Image
Next step in the repair will be to spot weld both flanges & give the whole support a coat of GMH black.

#11 _nzstato_

_nzstato_
  • Guests

Posted 26 December 2010 - 07:50 PM

Very nice repair there, definitely giving me something to aim for...

#12 GML-31

GML-31

    Oh My, Don't you post alot

  • Members
  • PipPipPipPipPipPipPip
  • 5,239 posts
  • Name:Kev
  • Location:Highland Park
  • Car:too many
  • Joined: 08-November 05

Posted 26 December 2010 - 09:20 PM

wasnt sure if it was bog or bubble gum...

#13 _DrFegg_

_DrFegg_
  • Guests

Posted 26 December 2010 - 09:20 PM

Nice work! Was that an original intact rubber boot mat that I see?? Very rare to see one in one piece and they tend to trap moisture underneath causing rusting. Keep the photos coming....

#14 _LH SLR 3300_

_LH SLR 3300_
  • Guests

Posted 26 December 2010 - 09:44 PM

Yes that is the original rubber boot mat you see, it is in exceptional condition with no holes or tears. Despite the fact they do trap moisture beneath them, the boot floor is actually pretty good with only minor surface rust in the spare wheel recess. Even though this car is showing it's age, it hasn't been played with or modified from standard in any way. It came with all log books, owner's manual & original purchase reciept from Fair Deal Motors in Parramatta. It also has the original motor right down to the factory hose clamps & even still has the factory fitted radiator with fan warning decal. Not that this is such a big deal to most as it's only a poverty pack LH & not a "pedigree" like an SL/R 5000 but the fact that it has survived 36 years without being cut up, modified, butchered or rusted beyond repair is impressive in my mind. Cheers Matt

#15 _DrFegg_

_DrFegg_
  • Guests

Posted 26 December 2010 - 10:13 PM

Your lucky, if you ever suffer from temporary insanity, im first on the list to buy it from you.(fat chance).
Nearly had one recently but it didnt eventuate. Saw an add somewhere for aftermarket rubber boot matts but dont know if he did toranas.
Anyways, again, great thread.

#16 _ToranaGuy_

_ToranaGuy_
  • Guests

Posted 05 January 2011 - 12:00 PM

Nice work on the rust repairs man, I have a couple more little repairs to do to my LH which is only a "s" spec as well, but had not been modified before me. Nice to see another good pretty clean original being fixed up. I'm modifying mine somewhat, but most of the mods are hidden or period type mods.

Keep up the good work!

Cheers

ToranaGuy

#17 _Yella SLuR_

_Yella SLuR_
  • Guests

Posted 05 January 2011 - 05:24 PM

Nice work. LH's have the best owners.

#18 _LH SLR 3300_

_LH SLR 3300_
  • Guests

Posted 25 January 2011 - 03:47 PM

Picked this up the other day.
Posted Image
Posted Image
Posted Image
It is still registered & goes alright, has enough stick to do this to a 28 spline Borg Warner axle.
Posted Image
Posted Image
Thinking of putting the running gear into my LH but not 100% certain yet. I kind of like the 173 & column shift tri-matic, but they are showing their age & the Torana would be alot of fun to drive with a nice V8 in it. Got a couple of months to think about it.

#19 _TUFF75LH355_

_TUFF75LH355_
  • Guests

Posted 25 January 2011 - 04:43 PM

hey matt that engine would look good between the rails of the torry would make a nice cruiser with power to boot when needed, love all your torrys you do a top job.. what did you pick the vl up for if you dont mind me asking cheers ben

#20 Neils LX

Neils LX

    Forum Fixture

  • Members
  • PipPipPipPipPip
  • 2,074 posts
  • Name:a
  • Location:North west NSW
  • Joined: 18-March 07

Posted 25 January 2011 - 05:46 PM

Pull the motor from the VL and whack it into the torrie, and the front off the VL should bring some good coin if your gonna pull it down.

#21 _moot_

_moot_
  • Guests

Posted 27 January 2011 - 03:32 PM

your a sucker for punishment :stirpot: haha

if you need my help on anythng let me know,but dont leave it till december :3gears:

#22 _LJ355_

_LJ355_
  • Guests

Posted 28 January 2011 - 07:56 PM

Great score with the vl Matt if I had of known wade was selling it I would have bought it myself

It was a nice car

#23 gtrboyy

gtrboyy

    Lotsa Posts!

  • Members
  • PipPipPipPipPipPip
  • 3,147 posts
  • Location:SYDNEY,NSW
  • Joined: 07-November 05

Posted 29 January 2011 - 06:10 AM

Do a burnout!!!!!!!!!

Matt,I still have the complete vk efi 202 collecting dust that came out of my silver vk if you want another option for your torrie,or possibly hook it up to a vn v6 delco...better economy/go/mod choices.

#24 _nicko61_

_nicko61_
  • Guests

Posted 29 January 2011 - 07:25 AM

did you end up getting a pic of that welder bud?

#25 _moot_

_moot_
  • Guests

Posted 29 January 2011 - 05:10 PM

hey matt,if that vl has a 28 spline diff,can ya sell it to me? :buttrock:


1 user(s) are reading this topic

0 members, 1 guests, 0 anonymous users