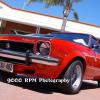
Dirtbags dream car rebuild! HK monaro!
#376

Posted 11 November 2011 - 11:15 AM
would make life sooooooooo much easier!
#377
 _Torrie_Man_
Posted 11 November 2011 - 05:26 PM
#378
 _dirtbag_
Posted 11 November 2011 - 05:51 PM
The magnetic earth is pretty good. Still needs to go on bare metal, but it hangs on really well. Plus you just turn the knob to release it.
#379

Posted 11 November 2011 - 06:21 PM
Maybe a stupid question.. but how do you fill the master cylinder???
LOL, I was thinking the same thing.
#380

Posted 11 November 2011 - 07:31 PM
#381
 _SLR Torrie_
Posted 12 November 2011 - 01:18 PM
This will be one wicked Monaro! Love the work Tim.
John.
#382

Posted 15 November 2011 - 07:12 PM
Well it's been a while between posts, so I thought I'd do a quick update.
I rust converted and primed the rear quarter and engine bay first.
Welcome back Dirtbag -
I got a question: How anal are you when you weld in your patches? I'm always grinding welds down, and re welding and grinding, and filling in pin holes etc etc so it looks like there was never a replacement panel in the first place. Is this just overkill and a waste of my time? I notice with your patch welds, there is like a 'squiggly' outline on where the new panel meets the old (where the join is).
Cheers
#383
 _itzww3_
Posted 20 November 2011 - 05:25 PM
#384
 _Skapinad_
Posted 20 November 2011 - 05:52 PM
#385
 _itzww3_
Posted 20 November 2011 - 06:15 PM
#386

Posted 20 November 2011 - 06:50 PM
hey Dirtbag, your up early, (or up late)
HK Monaro is my 3rd fav car after HQ monaro,
is it yours or a customer?
Hi guys. I like the stacking them on their side comment Paul : )
Barman, unfortunately for me this isn't mine.
I'll be doing pretty much everything on this car, body, paint, suspension, assembly etc. It'll be basically a stock resto, except for the ride height and driveline. No body mods at all. Just the way an HK monaro should be : )
I can't wait to get stuck into it.
I'm pretty sure the owner is happy to stick with the glide. I'd have a manual, but that's just me. I'm still going to enjoy building this car.
Hey Brett, what did you want for those 10" convo pros?
Just to quote a couple from the first page.
Not having a go but read not just look.
Dirtbag is our resident fixit guru, he's that busy with everyone else's projects he doesn't really have much time for his own.
Edited by Mort, 20 November 2011 - 06:53 PM.
#387
 _itzww3_
Posted 20 November 2011 - 07:30 PM
#388
 _dirtbag_
Posted 06 December 2011 - 07:22 PM
I can't remember if I've already posted this, but I've now done the other side of the engine bay.


I've also fixed the rust under the rear window.


So after cutting the old outer panel off I ended up with this open seam. So I welded it up. Exciting, I know : )


I then replaced some of the inner metal.

Same as on the other side.


I then cleaned the inside up a bit and rust converted it.

Then I glued the outer panel on.


That's it for now : )
#389

Posted 06 December 2011 - 08:48 PM
#390
 _dirtbag_
Posted 06 December 2011 - 09:33 PM
#391

Posted 07 December 2011 - 06:48 AM
cheers
Glenn
#392
 _berro59_
Posted 15 January 2012 - 07:40 PM
#393
 _AD_75_
Posted 24 January 2012 - 03:39 PM
#394
 _greenmachine215_
Posted 12 April 2012 - 10:26 PM
Will supply lounge and alcohol and boob magazines!
#395
 _dirtbag_
Posted 13 April 2012 - 09:53 AM
How serious are you? Do you want just brake or clutch too?
#396

Posted 13 April 2012 - 02:43 PM
#397
 _dirtbag_
Posted 22 April 2012 - 09:49 AM
UCANG, sorry I haven't replied sooner to your questions. Yes I do try to metal finish everything as best as I can, but the rear quarter on the monaro isn't properly finished yet, as the rare spares front section didn't replace all of the previous dodgy repairs so I still need to cut a bit out and replace it. Also none of the car has been panel beaten yet so that'll line everything up better as well.
Well I've done a couple of little things to the car lately. Just small but I can now say it's rust free at last : )
There were a couple of small holes in the passengers door jam. I just die ground them out to find good metal and welded them up.


I then popped the engine bay back off so I could fix a couple of little bits.
First thing I did though was finish seam welding the top of the engine bay. Normally I wouldn't recommend fully welding seams like this but on a car where the whole front is just bolted on I feel that's a good enough flex point : )

This is the small amount of rust that's on each side of the engine bay where it meets the firewall.

So I cut it out and repaced it.

Then on the inside on the drivers side at the base of the rear seat someone had done this. i have no idea why. The other side is fine.

I'm just going to replace the face of this part, rather than trying to straighten it.

I cut the front off which made it a lot easier to straight the top section of the bit that I'm keeping in place.


I know it's not a very interesting post but it's all getting there. Next job will be to mount the engine bay with all bolts and do the rack and pinion conversion, then I can hang all the panels and get the gaps sorted.
#398
 _dirtbag_
Posted 06 May 2012 - 10:06 AM
I started by bolting the engine bay back on with all bolts this time. What a fun job that was : ) Here it is with just the top two on the firewall. Even struggling to get this bit on by myself was still the easy part : )

Anyone who's had to do this will know just how tricky it is to get the 4 lower chassis bolts in place. The original bolts got pretty hammered trying to get them out so I bought new ones from rare spares. Cheap too. Only $75!!!!! Yikes, for 4 bolts! Oh well, had to be done.

I then started hanging panels. I started with the boot as it's the lightest : ) I managed to get the gap reasonably straight with a bit of adjusting.

Then went on the doors and front guards.
The door gaps will get a little bit of attention when the time comes as I'm not happy with them at all.


Guard to door gap isn't too bad, but I'd like it to be a bit closer.

The top of the guard curls in to the body a bit so I'll sort that out too.


The main reason for wanting the engine bay bolted on fully was so I could sort out the rack and pinion conversion. It's a CRS one.
Unfortunately the decision was made after the front end was powder coated but I rang the powder coaters and they said if I sand out the edges they can touch it up so that's good.
To say the CRS instructions are rubbish is a mighty understatement.

The kit also came with a plate to weld under the crossmember. It's a straight piece but the crossmember isn't so I'll need to put a couple of small folds in it.

Once I was happy with the positioning I welded the mounts on. I'm not the greatest welder in the world but this wont fall off : )

I folded the piece for the underside so it follows the shape of the crossmember.

Once I sanded the powder coat off I welded it on.

Ready to go back in the car.

The steel sleeve for the front crossmember bush was pretty rusty and crusty so I machined up a new one. I'm going to machine another mm off it so it can get powder coated when the crossmember gets touched up.

I had to drill out a couple of holes I'd covered in the engine bay where the steering box used to sit. I just drilled them from the other side as the holes were still there.

I also had to trim a little bit off the lip on the chassis rail.

So I could bolt this bracket on.

It then gets this shaft carrier mounted to it.

Next step was sorting out the uni joints and steering shaft, which comes in one big length that you cut to size yourself. Lazy much CRS!

The Uni joint that goes on the rack was easy enough, but the shaft is too bit to fit in the other unis, so I'll need to ream them out. What a bloody pain! Also, the steering column is miles bigger than the shaft provided so there's no chance it's going to fit. This means I'll have to pull the column apart and machine the end down. I don't mean to be a whinging assbag but for what this kit cost I expected better. Also some instructions would be useful, other than saying if the shaft doesn't fit ream the unis.
Here's the column and shaft together. Considering the shaft is too big I don't know how they expect the column to fit in one of their unis.

Well that's as far as I got yesterday as I don't have a reamer so I'll have to wait until tuesday to get one as tomorrow is labour day, whatever the hell that means? hahaha.
Edited by dirtbag, 06 May 2012 - 10:10 AM.
#399

Posted 06 May 2012 - 10:38 AM
That shaft carrier is as ugly as anything Ive seen them make.
Functional,but poxy looking.
Can you change it or are you stuck with it?
#400
 _nicko61_
Posted 07 May 2012 - 07:59 AM
Edited by nicko61, 07 May 2012 - 07:59 AM.
0 user(s) are reading this topic
0 members, 0 guests, 0 anonymous users


 View Garage


