Jump to content


- - - - -

Liam's LX 4 Door Rebuild.


  • Please log in to reply
211 replies to this topic

#201 _Quagmire_

_Quagmire_
  • Guests

Posted 02 May 2012 - 08:34 PM

Yeah mate definitely. Mine is supposedly a pre cut to just go straight in, but you know how that goes


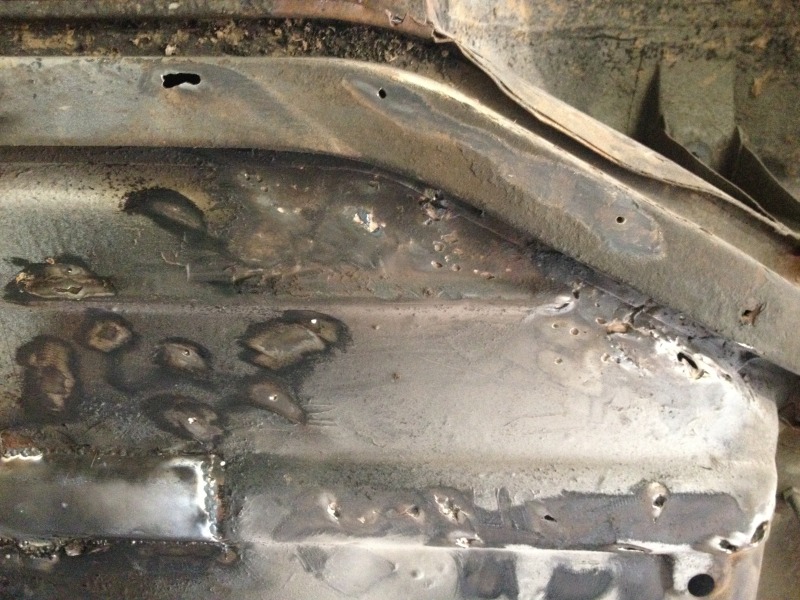
Just need to run a bit of mild steel wire (About 3 mm) up the panel gap where the rear door jam is. And that's done.

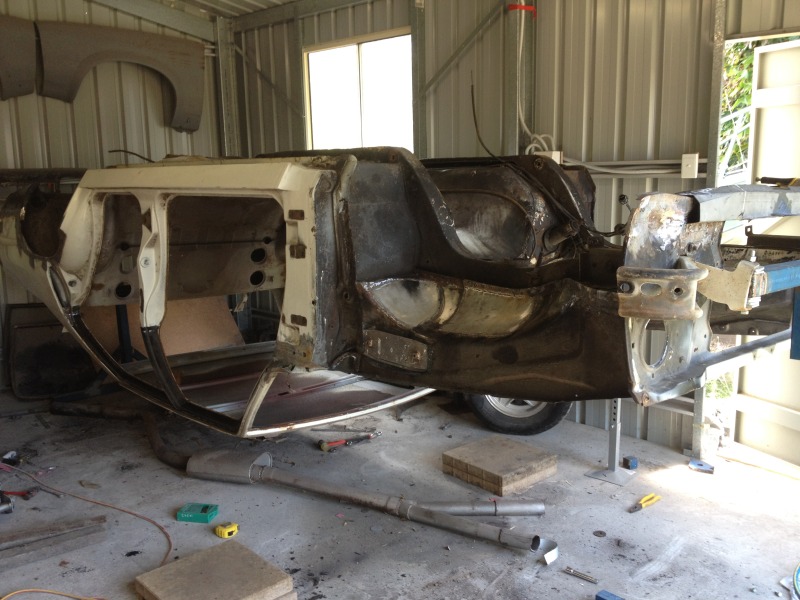
Also cut and tacked on the new rear 1/4.


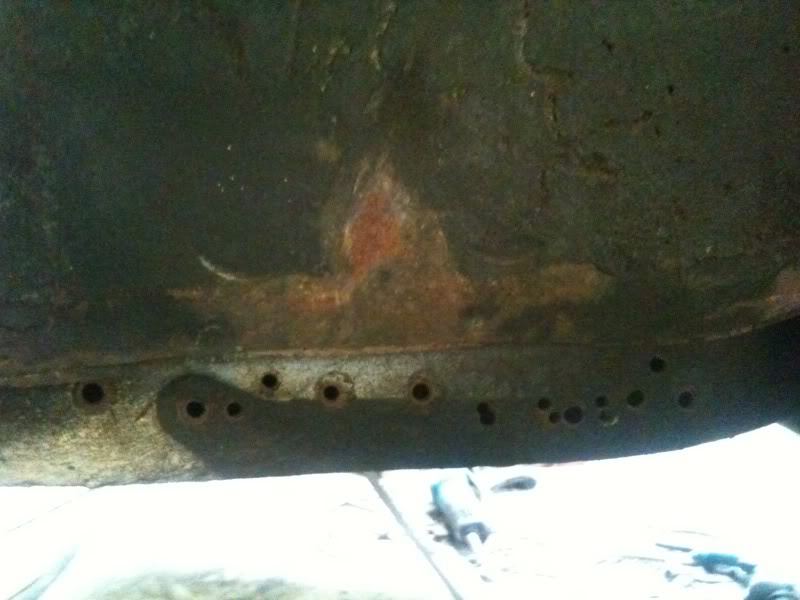
I was very happy to find that this side didn't have anywhere near as much rust as the other side.

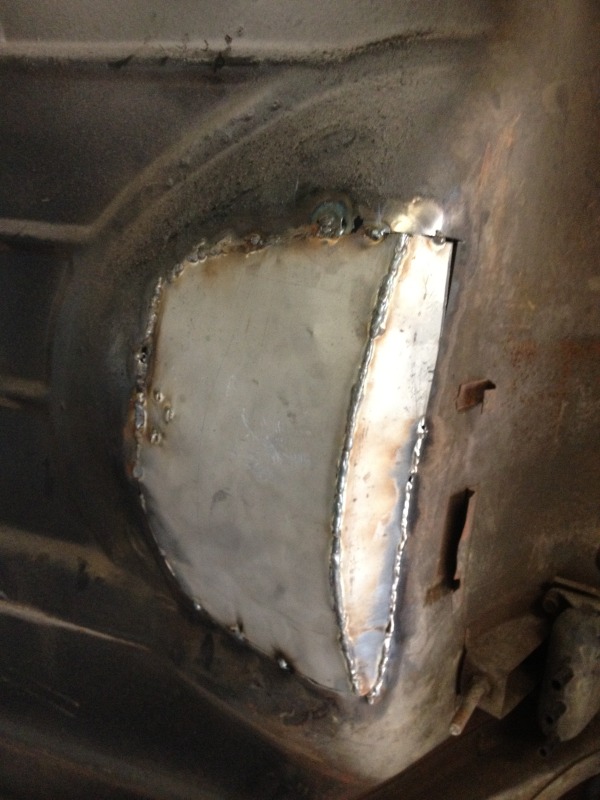
Also regarding the other side. Have a look at this. Down to the left of the shock, on the chassis...


Posted Image

It looks like something was mounted there, but I have no idea what it could be... Any ideas?

Will finish that 1/4 tomorrow, and get a start on the beaver panel... God I hate sound deadener.

there speed holes...less wieght more fast :)

probaly a tow bar mount.....but gees he had a few goes at it.....

#202 _Liam_

_Liam_
  • Guests

Posted 02 May 2012 - 09:01 PM

Cheers Lee, I know mate, still gets you down a bit.

Quag, I thought so but no holes on the other rail... Very wierd.

#203 _Liam_

_Liam_
  • Guests

Posted 05 November 2012 - 06:03 PM

:ph34r:

Posted Image

Mind the mess. After several months of no progress I'm officially back into it. More updates to follow in the coming days.

#204 torana_nick

torana_nick

    Forum Fixture

  • Members
  • PipPipPipPipPip
  • 759 posts
  • Name:Nick
  • Location:victoria
  • Car:LH Torana Project
  • Joined: 11-December 11

Posted 05 November 2012 - 07:45 PM

Exciting times mate.. I am slowly finishing off my back yard and I am gonna start mine again I really want to get in it!!
How long do you recon until your in yours mate?

#205 _Liam_

_Liam_
  • Guests

Posted 05 November 2012 - 07:47 PM

Knowing my luck a couple of years. I'm aiming for on the road in 2014.

I look forward to seeing an update on yours Nick.

#206 _Liam_

_Liam_
  • Guests

Posted 17 November 2012 - 05:26 PM

Hmm well I've been getting into the repairs, just alot of welding really the floors look in very good nick underneath so I'm happy with that. However the boot is another story, the wheel well was rusted badly so I cut it out and made a new bit and 3/4 welded it in when I realised some bumps so I did some exploration...

Posted Image
Posted Image

Not a very good pic, but every circle is basically a hole, some 50-100 of them only in the drivers side, so I'm wondering if I should just cut that section out or rip the whole boot out and get a boot from Gav at Retro Rods, what youse reckon?

#207 _Quagmire_

_Quagmire_
  • Guests

Posted 17 November 2012 - 06:00 PM

how much do you value your time?
and you've seen the tread on his floors...while they are very good they're not perfect
so imo it boils down to
do you want to save time and have the repairs looking 90% right?
or diy with all the hassle it involves but know that it is 100% to your liking?

#208 _Liam_

_Liam_
  • Guests

Posted 17 November 2012 - 06:02 PM

Too true Al, I don't value my time much at all TBH haha. It's a good escape from reality.

F it, I'll just persevere, whilst I'm there I'll square up the inner guard as well to get that extra 20 mm of clearance.

#209 _Quagmire_

_Quagmire_
  • Guests

Posted 17 November 2012 - 06:59 PM

find any more rivets? :)

#210 _Liam_

_Liam_
  • Guests

Posted 17 November 2012 - 07:06 PM

Certainly did, that section I cut out of the spare wheel well, had about 20 of em and a bit of flattened colorbond.

#211 _Emu_

_Emu_
  • Guests

Posted 17 November 2012 - 09:11 PM

lol, great thread :D

#212 _nial8r_

_nial8r_
  • Guests

Posted 28 February 2013 - 06:51 PM

got your thread again Liam cheers mate :D


0 user(s) are reading this topic

0 members, 0 guests, 0 anonymous users