
Okay, I've never done this before. So I've been told I'm being too ambitious, but hey! You have to start somewhere so you can learn from your mistakes.
I was in a crash not too long ago and now the car needs a new front end. I was paid out by the insurance company because they weren't willing to pay cost of fixing it. So I have now taken it on board to fix it myself.
I found a cheap one on ebay and I bought it (still waiting to pick it up). It has a few problems with it and will need to be stripped back to bare metal.
The very end of the left chassis rail was bent out a little, and I have been told that I will need a big hammer and an oxy, which dad is sourcing for me.
I work for a smash repairer doing a lot of odd jobs, assembly, disassembly, cleaning/detailing, paint prep etc. So I have a fairly basic understanding in what I am doing and have support if need be.
The car has a few small spots of rust in it here and there (the usual spots) that will need cleaning up shortly. I have plenty of time on my hands (surprisingly) and want to learn.
My plan is to straighten on all the panels that need it as much as I can. I want to use as little bog as possible so, things could take a while.
I however don't have experience in welding, panel re-shaping, and painting. But, as I said you have to start somewhere.
I had some things arrive in the mail today.
[Will post pictures when photobucket comes back from maintenance.]
New Front End
Started by
_ivekilledem_
, Jul 19 2012 02:57 PM
20 replies to this topic
#2

hanra
-

- Members
-

- 10,840 posts
Oh My, Don't you post alot
- Name:Brad
- Location:Farrrrrr North Qld
- Car:1975 LH SL/R 5000, 1967 Morris Cooper S, E36 BMW, Toyota Corolla, Isuzu DMax
- Joined: 24-March 11
Posted 19 July 2012 - 03:08 PM
What sort of car is this in regards to?
#3
_ivekilledem_
_ivekilledem_
-

- Guests
Posted 19 July 2012 - 03:15 PM
What sort of car is this in regards to?
WB Ute
Heres the thread I made about the crash.
http://www.gmh-toran...-wb-ute-crashed
#4
_CHOPPER_
_CHOPPER_
-
- Guests
Posted 19 July 2012 - 04:09 PM
The WB's are quite easy to work on. Just start at the front bumper and remove bits until you see the part that needs fixing/replacing.
#5
_ivekilledem_
_ivekilledem_
-
- Guests
Posted 19 July 2012 - 04:32 PM
The front end has already been pulled apart. So, I know what parts need replacing. I am not in the same city as the car is, (it's at my sister's place because she has a wicked shed). I meant to take photos of it all stripped, but it got too dark to take photos once it had all been done.The WB's are quite easy to work on. Just start at the front bumper and remove bits until you see the part that needs fixing/replacing.
The engine mounts will need to be replaced, the rubber has come off of the mount, and there is a small crack in the part that is welded to the sub-frame. So that will need the engine pulled out to do. While the engine is out I may as well clean up the wiring and re-paint the engine bay black. These are my ideas anyway.
This is what arrived in the mail

And I found a cheap supplier of these locally
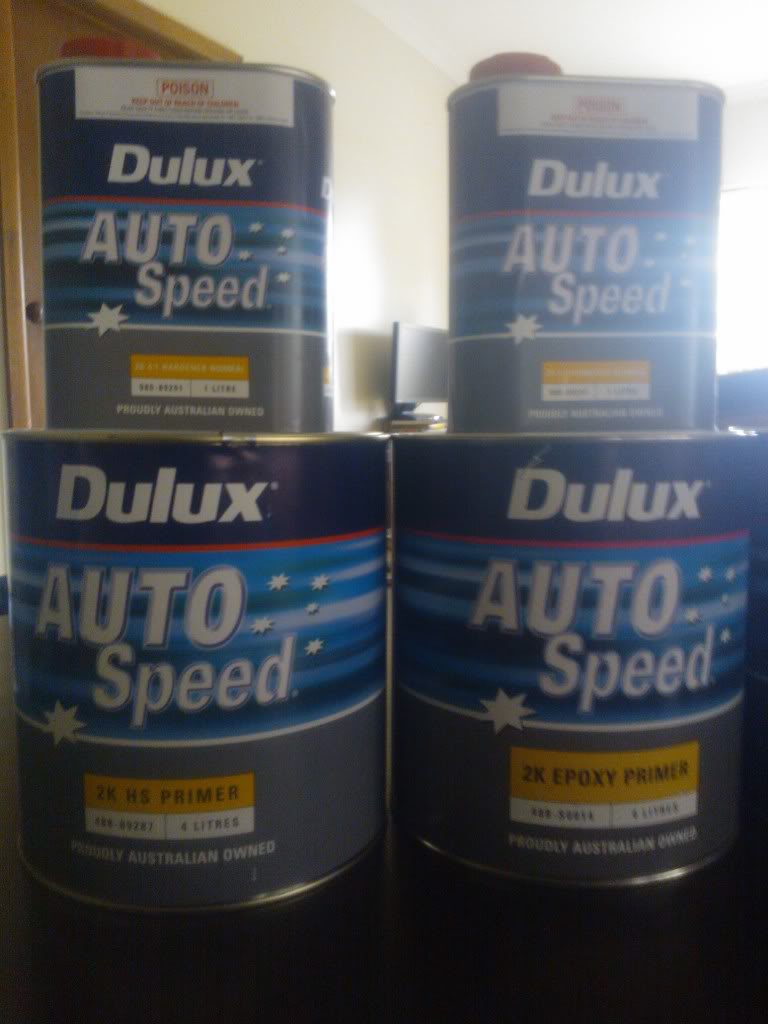
Yes, I know that is a shitload of paint. HEAPS too much in fact. But if all goes well, I intend to venture on further and prime my dad's car too. His needs it too, It consists of surface rust and faded taxi green (HG Kingswood).
Edited by ivekilledem, 19 July 2012 - 04:36 PM.
#6
_CHOPPER_
_CHOPPER_
-
- Guests
Posted 19 July 2012 - 05:40 PM
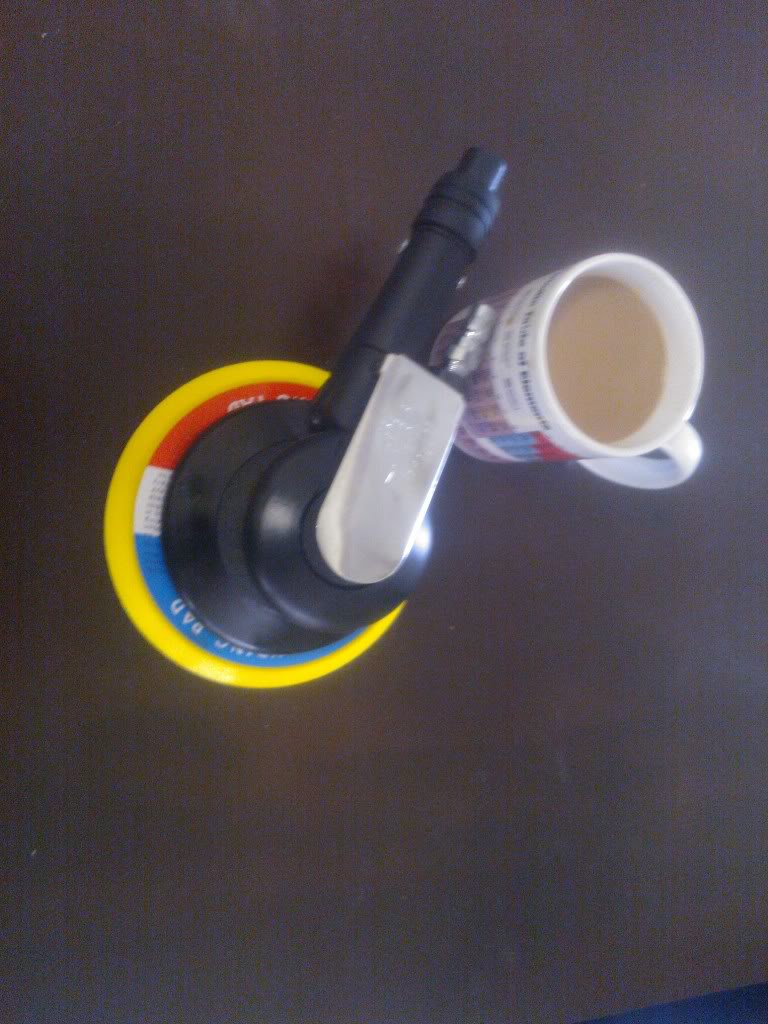
You got a cup of coffee sent in the mail?
#7
dattoman
-

- Administrators
-
- 16,473 posts
Do I feel lucky? Well, do ya, punk?
- Name:Neil
- Location:Perth Western Australia
- Car:LX SS , 76 Cadillac , 3 x dattos
- Joined: 04-February 07
Posted 19 July 2012 - 06:02 PM
2 by the looks
#8
S pack
-

- Members
-
- 15,556 posts
Scrivet Counter
- Name:Dave
- Location:Luggage Point
- Car:73 LJ
- Joined: 25-January 10
Posted 19 July 2012 - 06:44 PM
That's a great deal, buy 2 cups of coffee and get a free spray gun and sander. 
#9
_ivekilledem_
_ivekilledem_
-
- Guests
Posted 20 July 2012 - 09:27 PM
Yeah, you guys wouldn't believe what they sell online these days!
I'm going to pick the new front end up tomorrow, so I should be able to take some photos of the car it's coming off, and my ute.
I'm going to pick the new front end up tomorrow, so I should be able to take some photos of the car it's coming off, and my ute.
#10
_a.vas_
_a.vas_
-
- Guests
Posted 21 July 2012 - 03:34 PM
HA! got that same mug! help me study up for chemistry 
#11
_ivekilledem_
_ivekilledem_
-
- Guests
Posted 31 July 2012 - 06:51 PM
Okay, so I haven't updated for a while. been busy with uni and other things.
But I got some photos for everyone else to look at.
The radiator that came with the front end well...It wasn't much good. I took the tanks of so that the 6 cyl tanks could be fitted, and figured that the worst I could do is need to buy a new radiator (which I had budgeted for anyway). after taking all of the inlets/outlets and tanks off, I found that almost all of the cores were blocked!
I don't have any pictures, but will get some
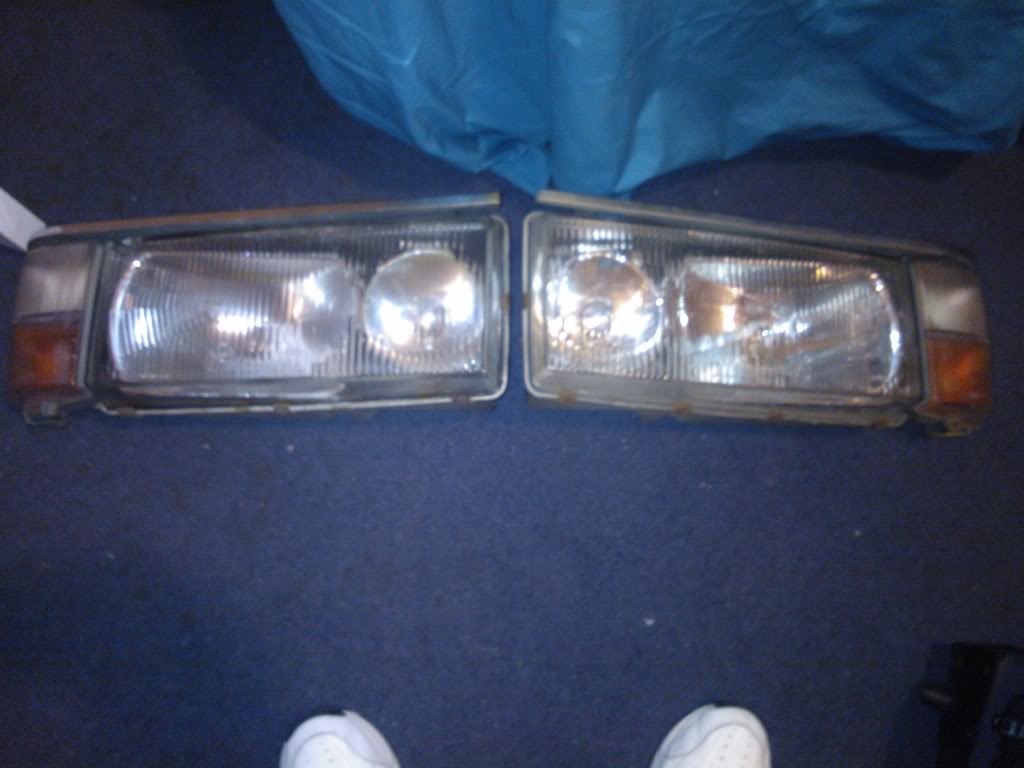
The headlights are in a fairly good condition
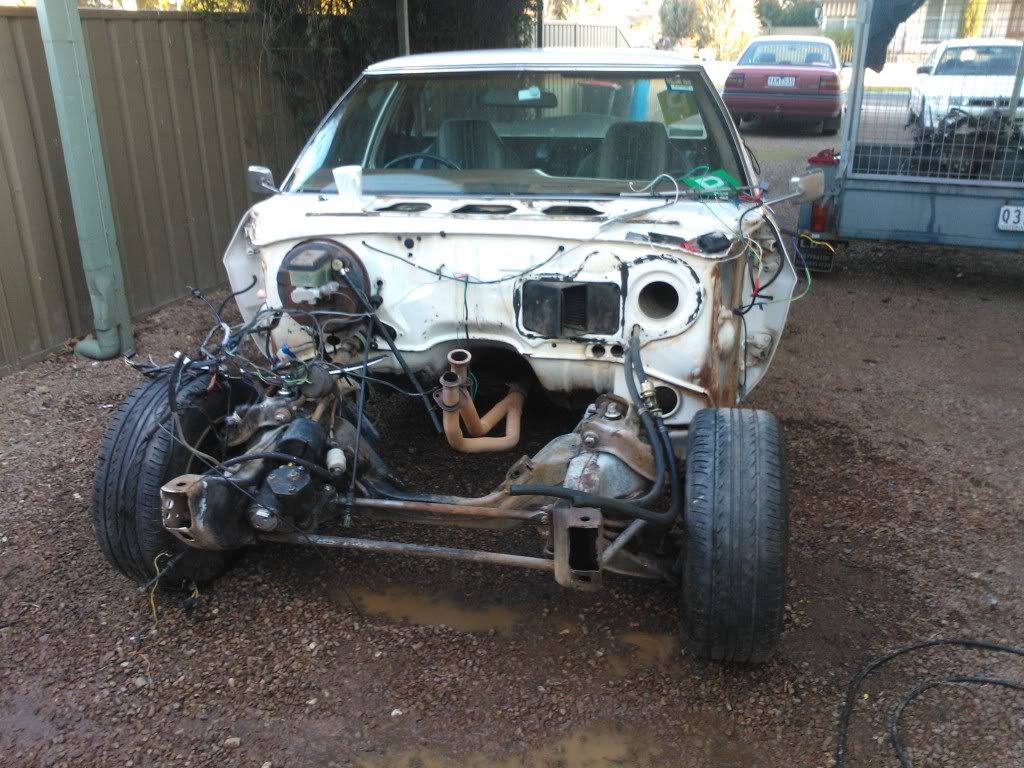
This is the ute as it sits currently

This is the only structural damage to the car. As you can see, the very end of the rail is splayed out a little. I intend to heat it up with an lpg torch (if I can find the right tip), with the old bar arm on it, which is straight and belt it back in with a big hammer.
This is what the rail should look like, this is of the right rail.

The old guards collecting dust.
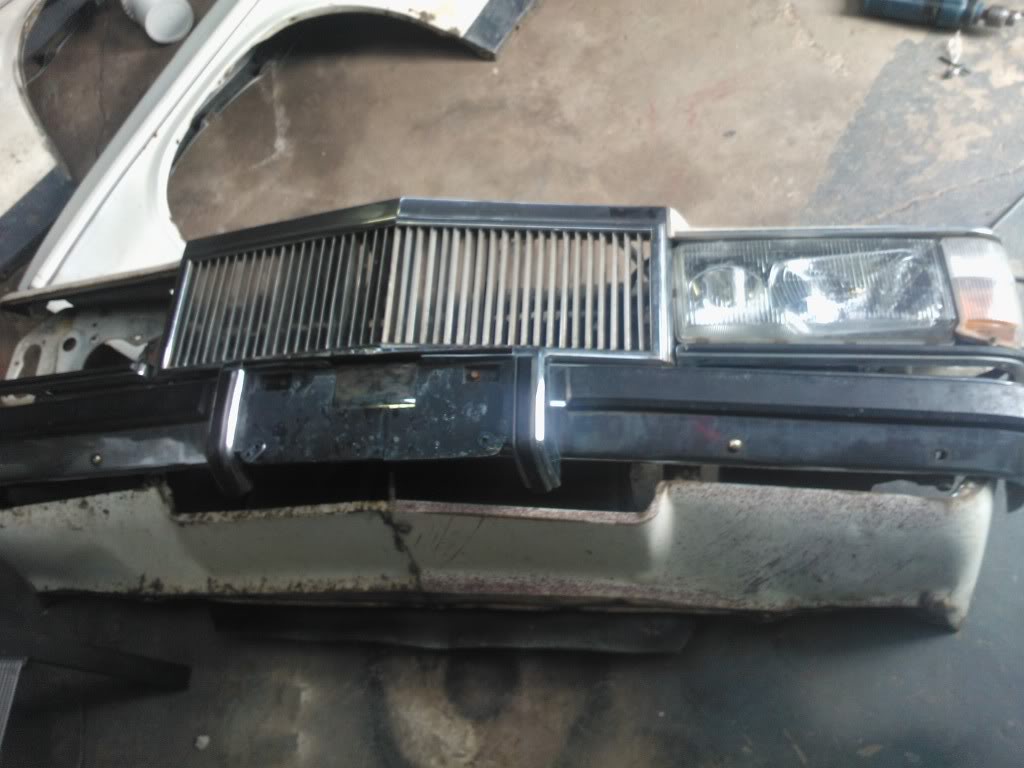
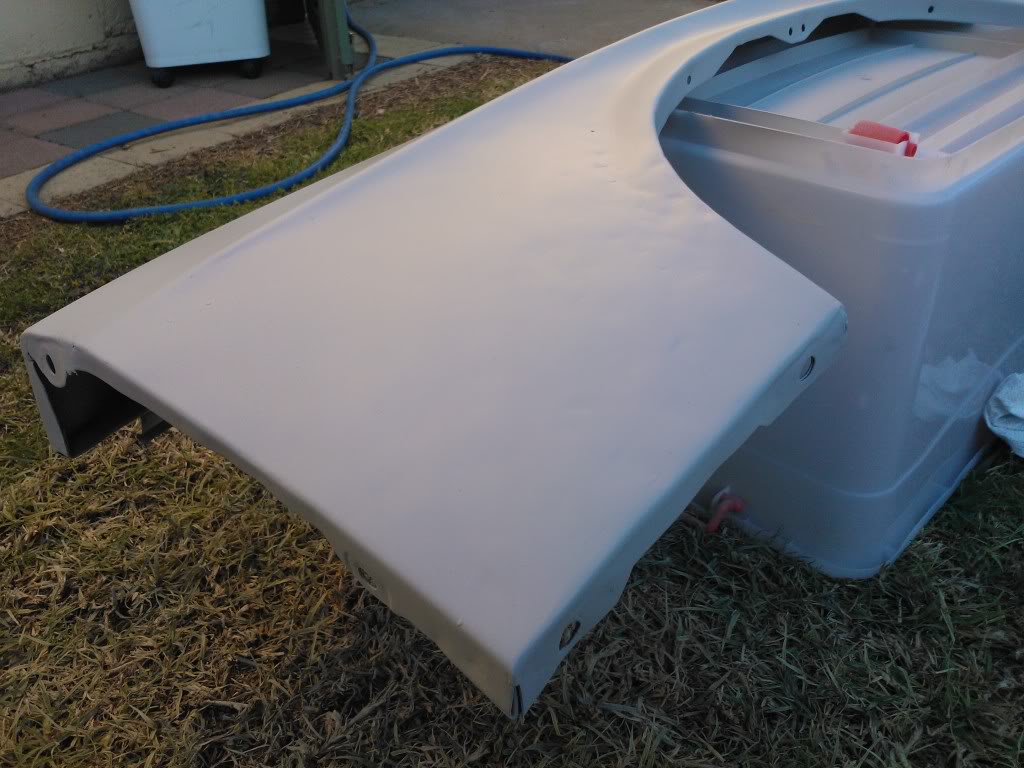
The new front end with one headlight in it. As you can see, it's a little bit rough, I'm thinking I might use the old stone trays, as the right one is very straight, and the left one needs to be repaired, but it still straighter than the new ones
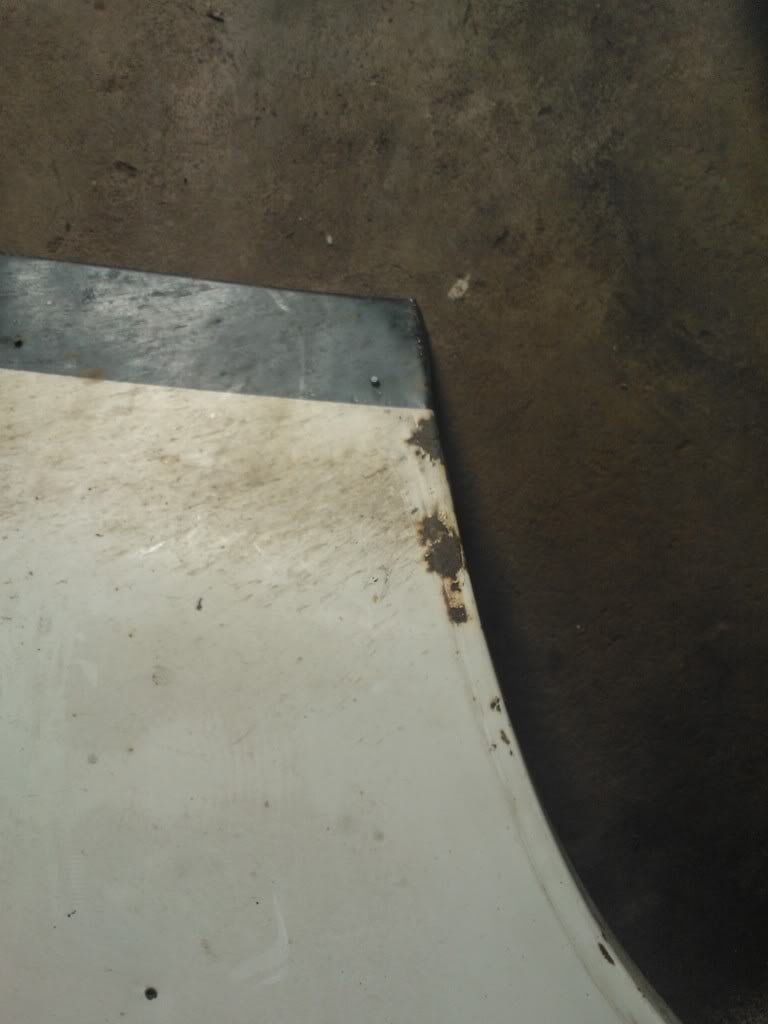
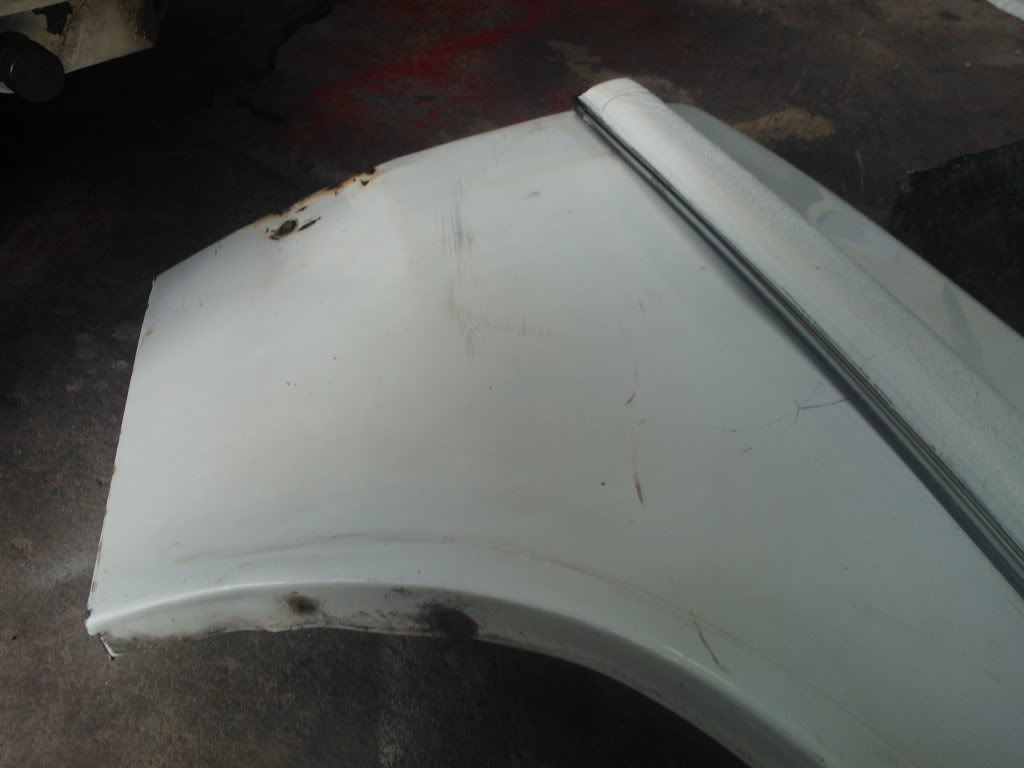
There's a few issues with the new guards, here is an example. there's some small rust patches in them, whereas my guards are are rust free!
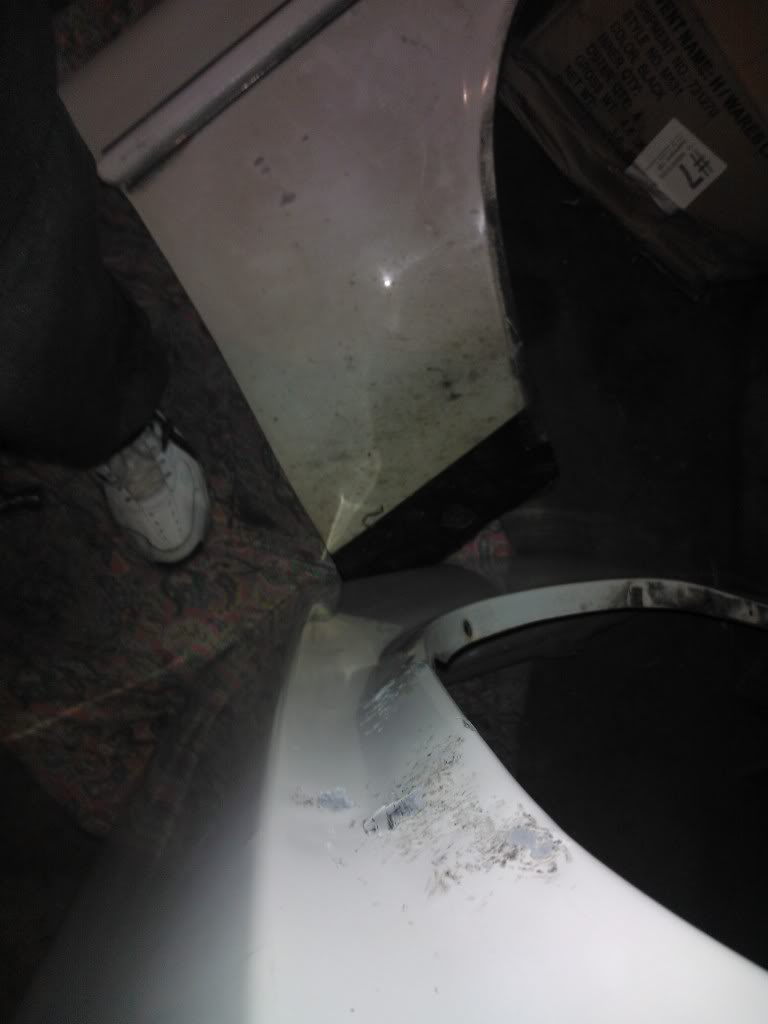
Here's the lower left guard. It's hard to tell, but there's a few creases that needed to be straightened out. I gave it a try, but it still needs more work. (This picture is from before any work was done on it)
The lower right guard. Again hard to tell, but this has a fairly distinct crease between the arch and the moulding strip. again I have had a bit of a go at straightening it, but still needs some more work. (This picture is from before any work was done on it)
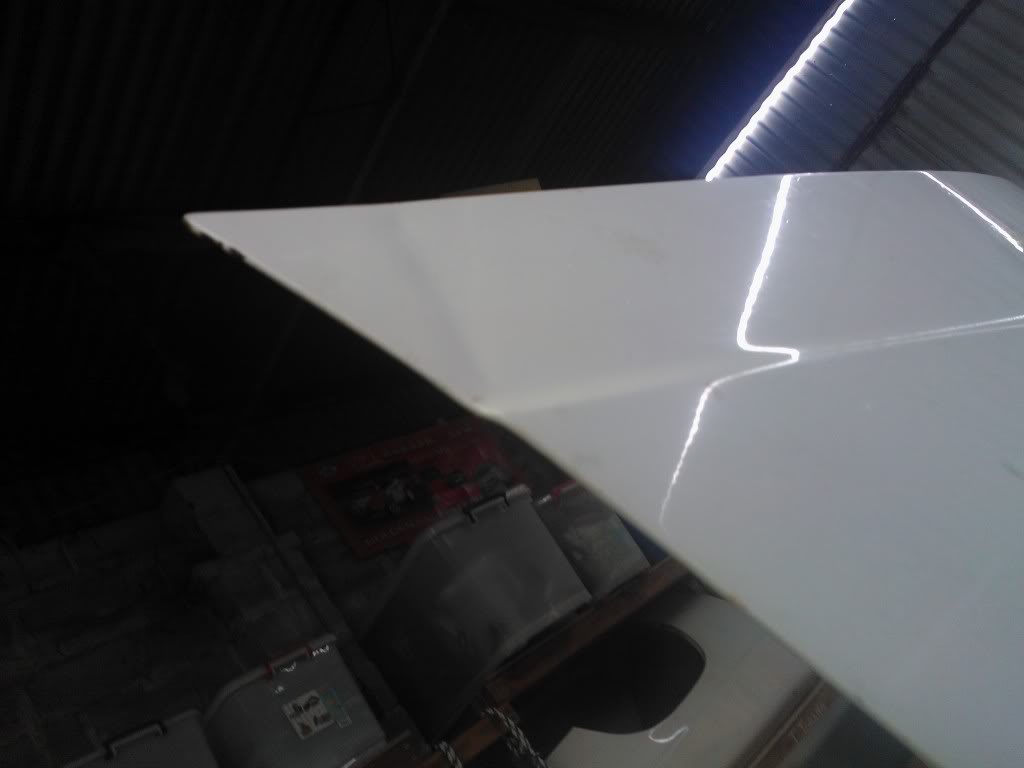
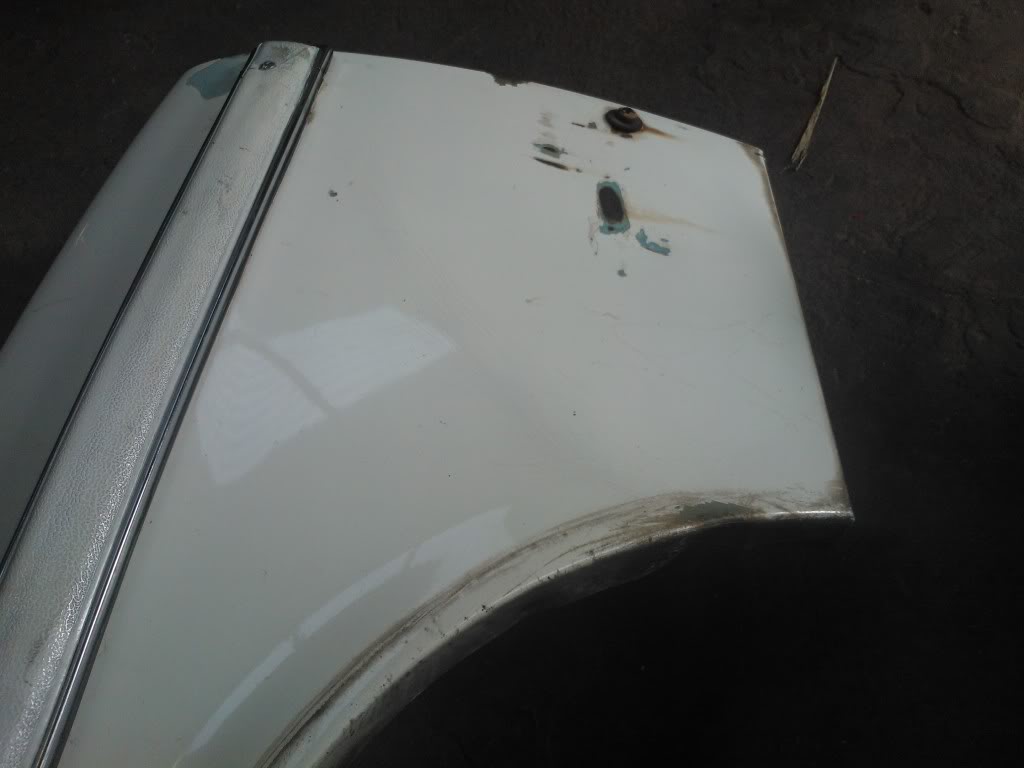
Here's a crease in the new bonnet that I didn't see :( If anyone can tell me how to go about pulling this one out, I'm open to suggestions.
This is the old left guard. As you can tell, I have had a go at repairing it. I think it went pretty well, but still needs some more work. Not bad considering it was my first try.
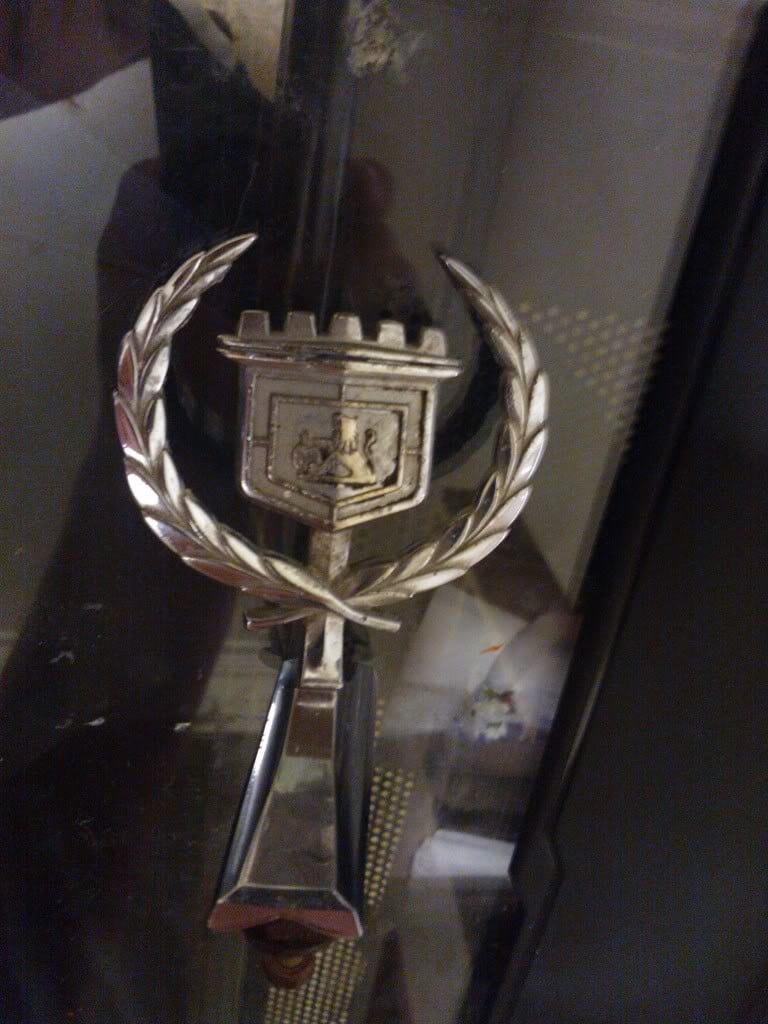
The only piece the the front end was missing was this. I found this looking through the archives on gumtree. I was hoping it would be in a better condition. there's a little bit of rust/growths and pitting in spots
So, here's where I am at. I have undone all of the wiring, cables, mounts etc. for the engine and geardbox to come out. I just need to detach the speedo cable and the crossmember mounts and out she comes. I think while it's all out I'll replace the reverse light switch. that way people can tell when I am reversing!. It was broken when I got the box, but I wasn't too stressed.
Just on a side note, I probably have said this before, but I really want to stress that I want as little bog in this as possible. I don't mind if I have to spend quite a bit longer repairing with a hammer and a dolly.
Next on the agenda is to decide whether or not to unblock the radiator core, or get a new one. then it will be on to straightening the rails. But my 21st is coming up on Thursday so I will probably be...pre-occupied this weekend.
But I got some photos for everyone else to look at.
The radiator that came with the front end well...It wasn't much good. I took the tanks of so that the 6 cyl tanks could be fitted, and figured that the worst I could do is need to buy a new radiator (which I had budgeted for anyway). after taking all of the inlets/outlets and tanks off, I found that almost all of the cores were blocked!
I don't have any pictures, but will get some
The headlights are in a fairly good condition
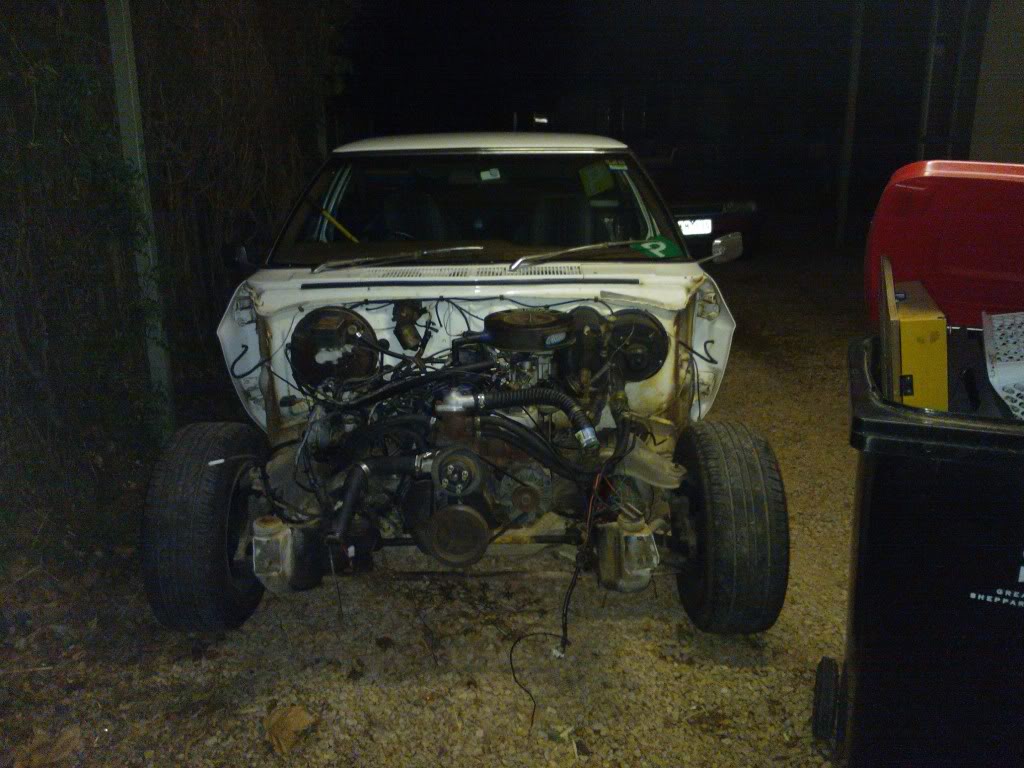
This is the ute as it sits currently
This is the only structural damage to the car. As you can see, the very end of the rail is splayed out a little. I intend to heat it up with an lpg torch (if I can find the right tip), with the old bar arm on it, which is straight and belt it back in with a big hammer.
This is what the rail should look like, this is of the right rail.
The old guards collecting dust.
The new front end with one headlight in it. As you can see, it's a little bit rough, I'm thinking I might use the old stone trays, as the right one is very straight, and the left one needs to be repaired, but it still straighter than the new ones
There's a few issues with the new guards, here is an example. there's some small rust patches in them, whereas my guards are are rust free!
Here's the lower left guard. It's hard to tell, but there's a few creases that needed to be straightened out. I gave it a try, but it still needs more work. (This picture is from before any work was done on it)
The lower right guard. Again hard to tell, but this has a fairly distinct crease between the arch and the moulding strip. again I have had a bit of a go at straightening it, but still needs some more work. (This picture is from before any work was done on it)
Here's a crease in the new bonnet that I didn't see :( If anyone can tell me how to go about pulling this one out, I'm open to suggestions.
This is the old left guard. As you can tell, I have had a go at repairing it. I think it went pretty well, but still needs some more work. Not bad considering it was my first try.
The only piece the the front end was missing was this. I found this looking through the archives on gumtree. I was hoping it would be in a better condition. there's a little bit of rust/growths and pitting in spots
So, here's where I am at. I have undone all of the wiring, cables, mounts etc. for the engine and geardbox to come out. I just need to detach the speedo cable and the crossmember mounts and out she comes. I think while it's all out I'll replace the reverse light switch. that way people can tell when I am reversing!. It was broken when I got the box, but I wasn't too stressed.
Just on a side note, I probably have said this before, but I really want to stress that I want as little bog in this as possible. I don't mind if I have to spend quite a bit longer repairing with a hammer and a dolly.
Next on the agenda is to decide whether or not to unblock the radiator core, or get a new one. then it will be on to straightening the rails. But my 21st is coming up on Thursday so I will probably be...pre-occupied this weekend.
Edited by ivekilledem, 31 July 2012 - 06:54 PM.
#12
_ivekilledem_
_ivekilledem_
-
- Guests
Posted 02 August 2012 - 07:07 PM
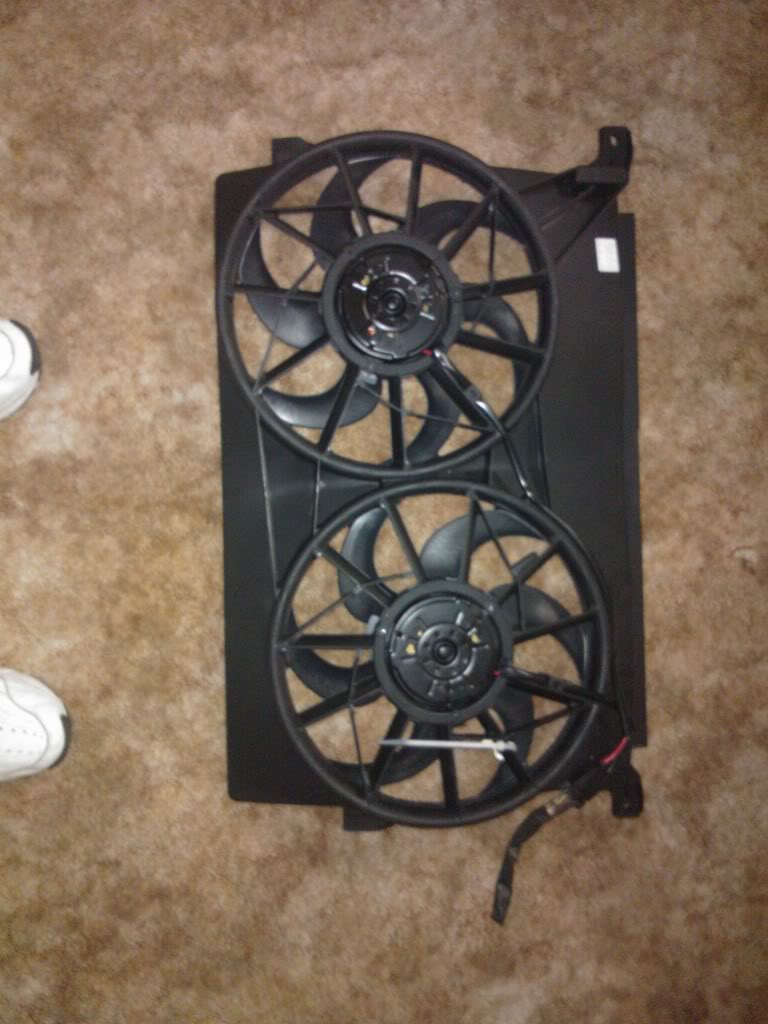
I purchased a set of AU thermos off ebay earlier in the week for $44. Pretty good price if you ask me. Anyway, they were at a local wreckers so I went to pick them up. On arrival I said I was there for the fans from ebay. The guy took off round the back, and another guy emerged about 2 minutes later and said "Look, I have just tested them, and they are dead, so this is what I'll do for you." He walked around the front counter and picked up a set of fans on display "I'll give you this set, they're brand new for the same price". Needless to say, I had no objections. It was obvious that they were brand new. Good score or what?
#13
Heath
 View Garage
-

- Administrators
-
- 18,327 posts
I like cars.
- Name:Heath
- Location:Eastern Suburbs, Melbourne
- Car:Heavily Modified UC Sunbird Hatchback
- Joined: 07-November 05
View Garage
Posted 11 August 2012 - 07:02 PM
Hell that was a good price to begin with, what you ended up with is grouse. I just can't believe that a wrecker actually tested something he was selling! hahaha
I think you should be recommend them to at least a few people you speak to.
I think you should be recommend them to at least a few people you speak to.
#14
Neils LX
-

- Members
-
- 2,074 posts
Forum Fixture
- Name:a
- Location:North west NSW
- Joined: 18-March 07
Posted 12 August 2012 - 08:51 PM
Hell that was a good price to begin with, what you ended up with is grouse. I just can't believe that a wrecker actually tested something he was selling! hahaha
I think you should be recommend them to at least a few people you speak to.
You still get the odd one test a starter or elec fans but not many.
#15
_ivekilledem_
_ivekilledem_
-
- Guests
Posted 25 August 2012 - 08:52 PM
It's been a while since I've updated and to be honest I haven't made much progress. I have just been too busy to do anything really. I'm also waiting for some better weather before I strip the panels. I have completely disassembled the rad support and nose cone. I purchased a new radiator, but somehow the radiator had been damaged in transport and has a dent in one of the tanks, so I will need to take that back at some point. I have pulled apart the headlights and will be painting the body of them black instead of silver and I will be getting two of the four the reflectors resilvered.
Things that I have made progress on and have pictures for are...Dad went out and got a hotter/bigger tip for the LPG torch so I got to straightening out the end of the rail. Not all is well, the rail is bent further down. It's not bent by much but it's enough to stop the bar going on all too nicely.
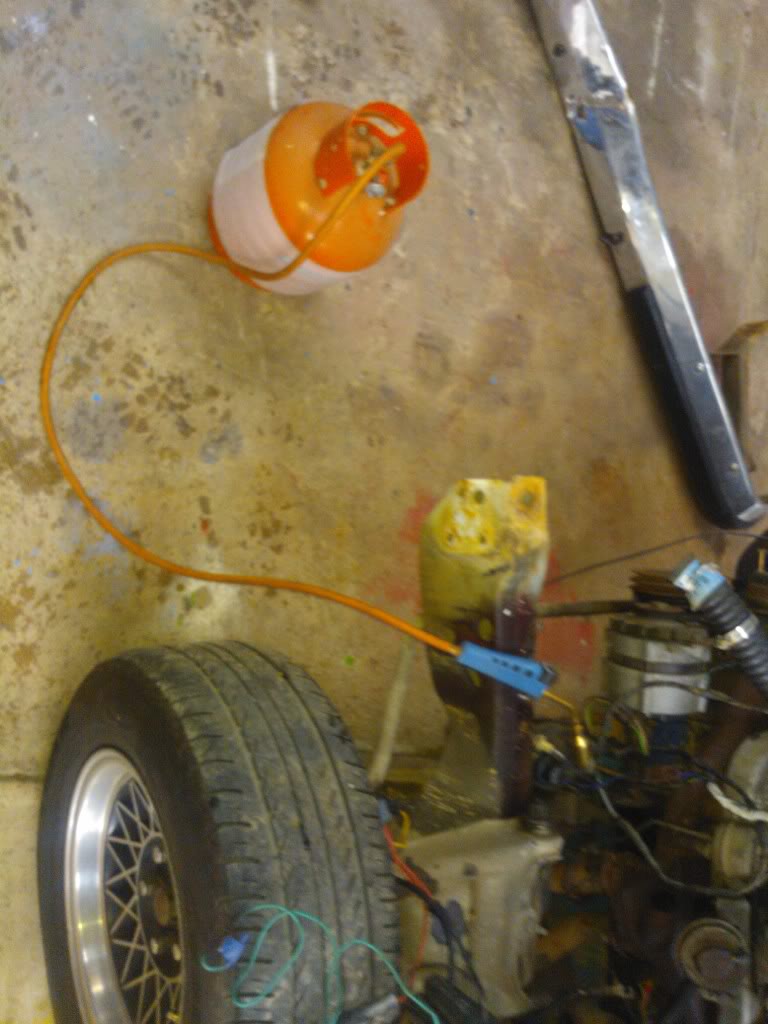
Here's the setup I used to straighten the end of the rail. Not sure if this is taken before or after as it's not very clear.
If you look, you can see where the paint is flaking off just behind where the bar bolts on, this is where the rail has started to collapse.
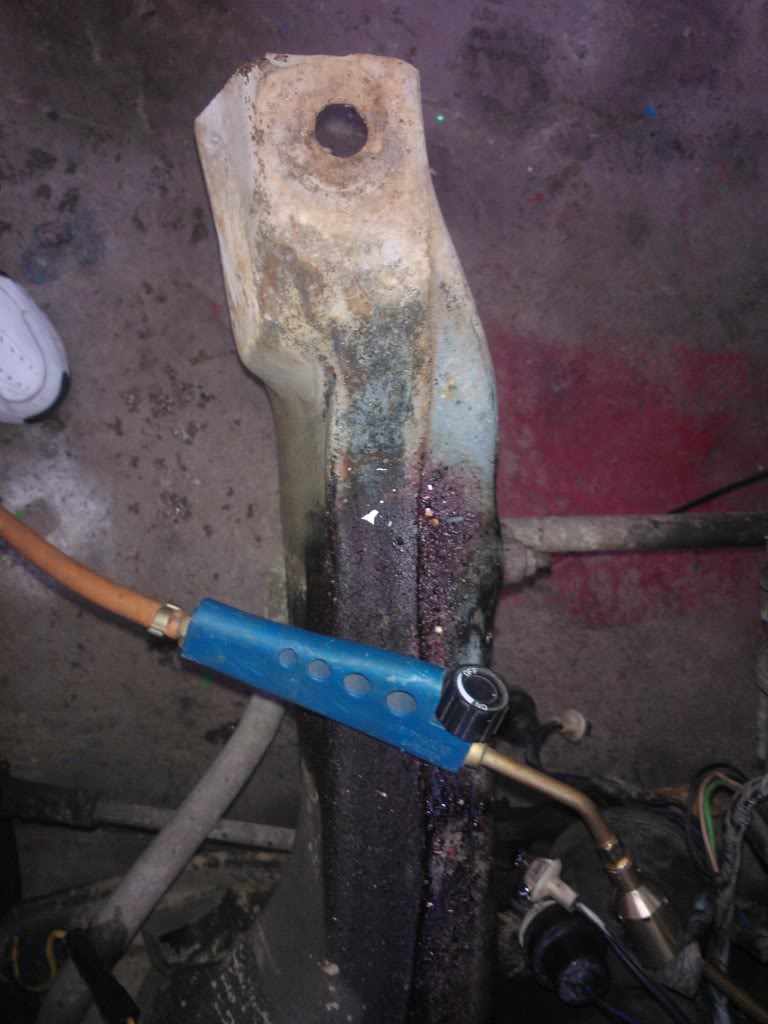
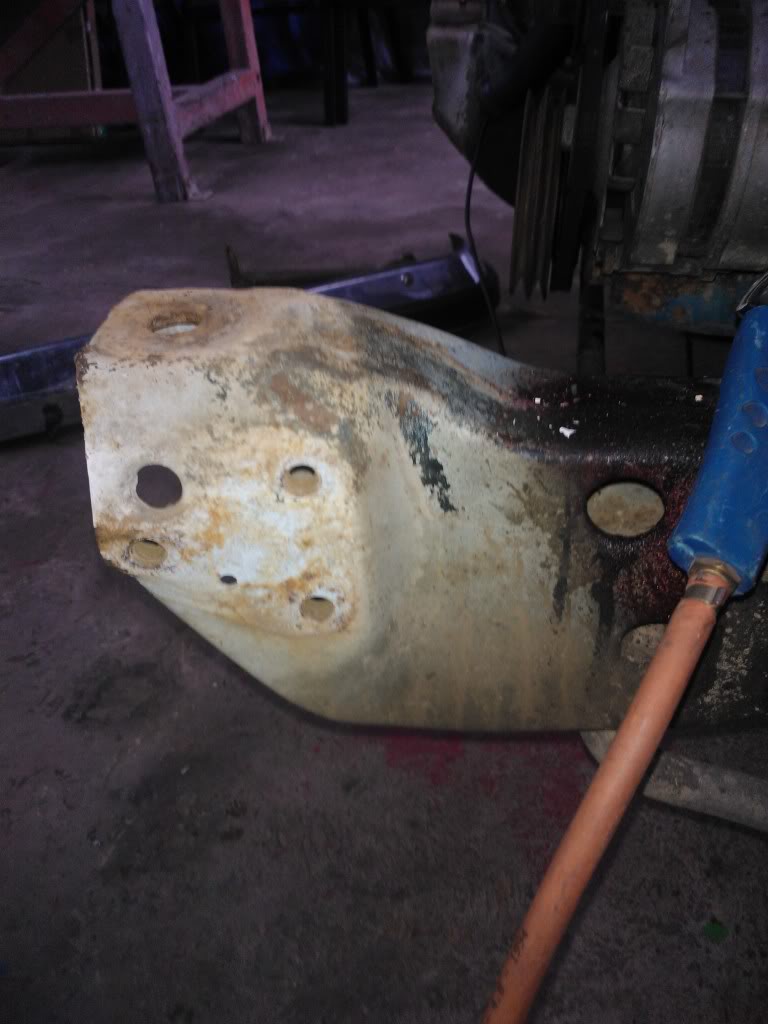
This is probably the best angle to show how far out the rail is.
After starting to strip this one I decided it would be better to just put some pressure pack primer on it and leave it in the shed in case I ever need it.
Plans for the next few weeks are dedicate some more time to the car. First thing to do is actually get the engine out and start doing some measuring so that I can straighten the rail properly. Also is to strip and paint black all of the inner panels such as inner guards, rad support, and the rest of the engine bay. Here's hoping the weather will be better. It has rained almost every day in the last two weeks.
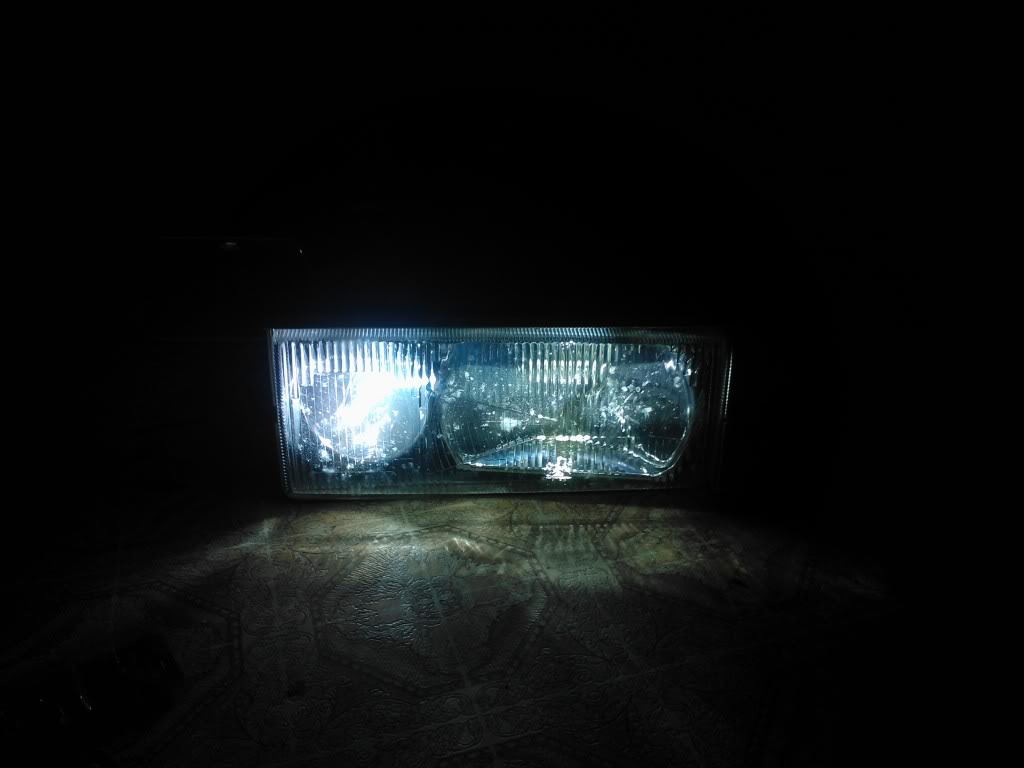
Also, here is a picture of one of my headlights with a 55W HID in the high beam and a 35W HID in the low beam. Both are 6000K I would prefer 5000K for both of them, but they were cheap
Still no-one has any ideas of how to get the crease out of the bonnet?
Things that I have made progress on and have pictures for are...Dad went out and got a hotter/bigger tip for the LPG torch so I got to straightening out the end of the rail. Not all is well, the rail is bent further down. It's not bent by much but it's enough to stop the bar going on all too nicely.
Here's the setup I used to straighten the end of the rail. Not sure if this is taken before or after as it's not very clear.
If you look, you can see where the paint is flaking off just behind where the bar bolts on, this is where the rail has started to collapse.
This is probably the best angle to show how far out the rail is.
After starting to strip this one I decided it would be better to just put some pressure pack primer on it and leave it in the shed in case I ever need it.
Plans for the next few weeks are dedicate some more time to the car. First thing to do is actually get the engine out and start doing some measuring so that I can straighten the rail properly. Also is to strip and paint black all of the inner panels such as inner guards, rad support, and the rest of the engine bay. Here's hoping the weather will be better. It has rained almost every day in the last two weeks.
Also, here is a picture of one of my headlights with a 55W HID in the high beam and a 35W HID in the low beam. Both are 6000K I would prefer 5000K for both of them, but they were cheap
Still no-one has any ideas of how to get the crease out of the bonnet?
Edited by ivekilledem, 25 August 2012 - 08:56 PM.
#16
_mick74lh_
_mick74lh_
-
- Guests
Posted 25 August 2012 - 11:14 PM
Great to see you repairing the car. As for the crease in the bonnet, I'm no expert as far as actually straightening that out goes, but could you temporarily fit the bonnet and guards back onto the car just to see how far out that corner of the bonnet is. It would at least give you a guide for where to pull it out to.
I havent done this personally, but if you tack some steel rod or something that you can grip with a slide-hammer in several spots along that crease and working your way along the points you've tacked, go wack wack to pull them up out, that could work.
Also, its a bit hard to tell in the photos but again if you bolt the bonnet back to the car to guide you, you might find that corner of the bonnet needs to be folded back down a tad.
Running a speedfile (with course paper - something like 80 grit) along the areas you're beating before you bare-metal them can help to show up where the metal is sitting too high.
Edited by mick74lh, 25 August 2012 - 11:14 PM.
#17
_ivekilledem_
_ivekilledem_
-
- Guests
Posted 28 August 2012 - 08:18 PM
I took the reflectors from the left headlight down to Zeus Products today get them vacuum metalised. He said that they weren't in the best shape, but he would do what he could. After talking to him for a bit he said it's quite common for people all over the place to send in WB reflectors to be re-silvered. Which to be honest I don't find to be all that surprising because they are bloody expensive. He said that the high beam reflector will cost about $15-20 and the low beam will cost $35-50 depending on how much work actually needed to go into them. But that's still shitloads better than buying new ones or even getting them re-chromed.
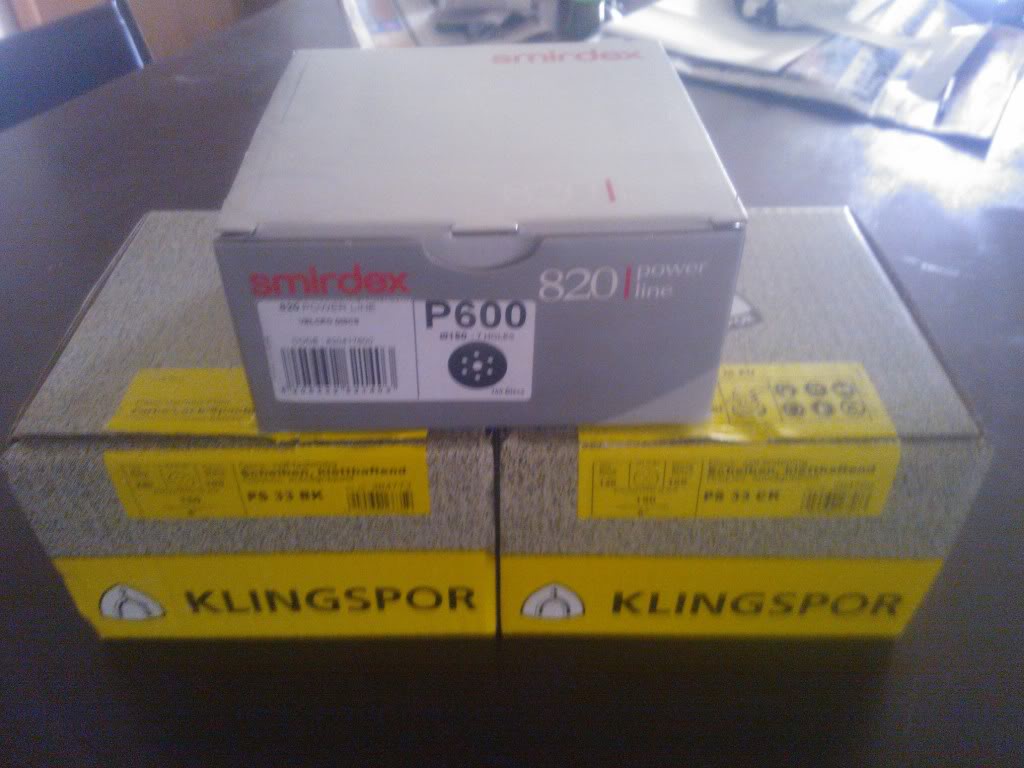
Also on the updates, I had these arrive in the mail today. They are admittedly not the best thing money could buy, but they were cheap ($195 delivered) and after talking with OldJohnno, they can perform well enough when you clean up inside a couple of the flanges.
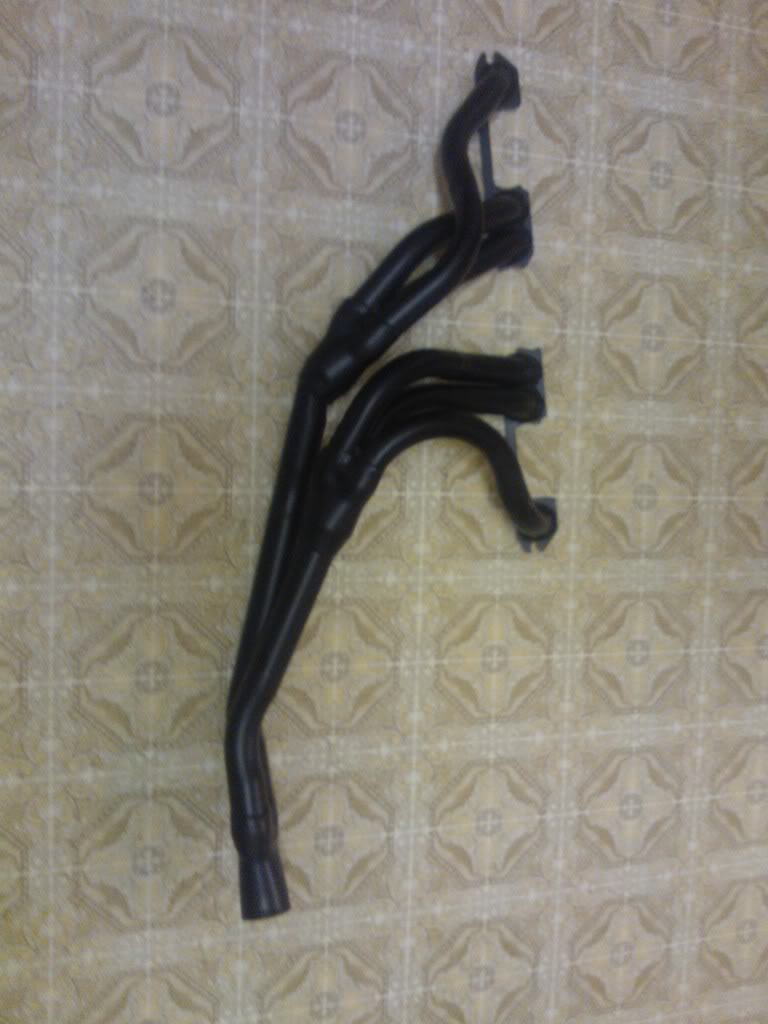
Also on the updates, I had these arrive in the mail today. They are admittedly not the best thing money could buy, but they were cheap ($195 delivered) and after talking with OldJohnno, they can perform well enough when you clean up inside a couple of the flanges.
Edited by ivekilledem, 28 August 2012 - 08:28 PM.
#18
Neils LX
-
- Members
-
- 2,074 posts
Forum Fixture
- Name:a
- Location:North west NSW
- Joined: 18-March 07
Posted 29 August 2012 - 03:32 PM
Its prob too late but found a solid WB ute full WB Caprice front $1500 if your interested.
#19
orangeLJ
-

- Members
-
- 10,259 posts
Yes, yes I do post alot!
- Joined: 02-May 06
Posted 03 September 2012 - 01:11 PM
HIDs in a standard, non projector housing is not only frOcking annoying to other road users, but illegal.
The glare they throw is insane.
The glare they throw is insane.
#20
_ivekilledem_
_ivekilledem_
-
- Guests
Posted 04 September 2012 - 04:32 PM
Actually no, it's not illegal. It's only illegal for cars complianced after 1 October 1991. If they are complianced after after that date they are required to be fitted with sufficiently effective anti-glare devices, which must at least consist of automatically levelling headlights, and headlight washers. I spent a while on the phone with someone from vicroads making sure that this is the case for Victoria. Actually, there are no national requirements for headlights or type of bulbs at all if the car is complianced before then. Each state and territory does however have their own requirements regarding road-worthiness.
The headlights are pointed slightly down, they light the road better than 100/90 H4 headlights and produce less glare for other road users. That and they don't melt the bloody H4 plugs. They produce less glare then the FG Falcons. I hate travelling towards one of them. I am also very appreciative of other road users when I am behind them, as a general rule of thumb, if I can see a car in front of me, I use my low beams.
More to come
Edited by ivekilledem, 04 September 2012 - 04:43 PM.
#21
_ivekilledem_
_ivekilledem_
-
- Guests
Posted 05 September 2012 - 09:35 PM
Woo, some progress, even if no-one is following this.
The rail has been fully straightened now, using much the same methods as earlier, except with the assistance of a crowbar this time. No pictures of that, but you really can't tell anyway except that the bar fits on the rails properly.
There was finally enough good weather to give me to to bare-metal and epoxy, then hi-fill the guard. Baby steps!
As it was the first time I had done this, there were some issues. But as far as I'm concerned things went well.
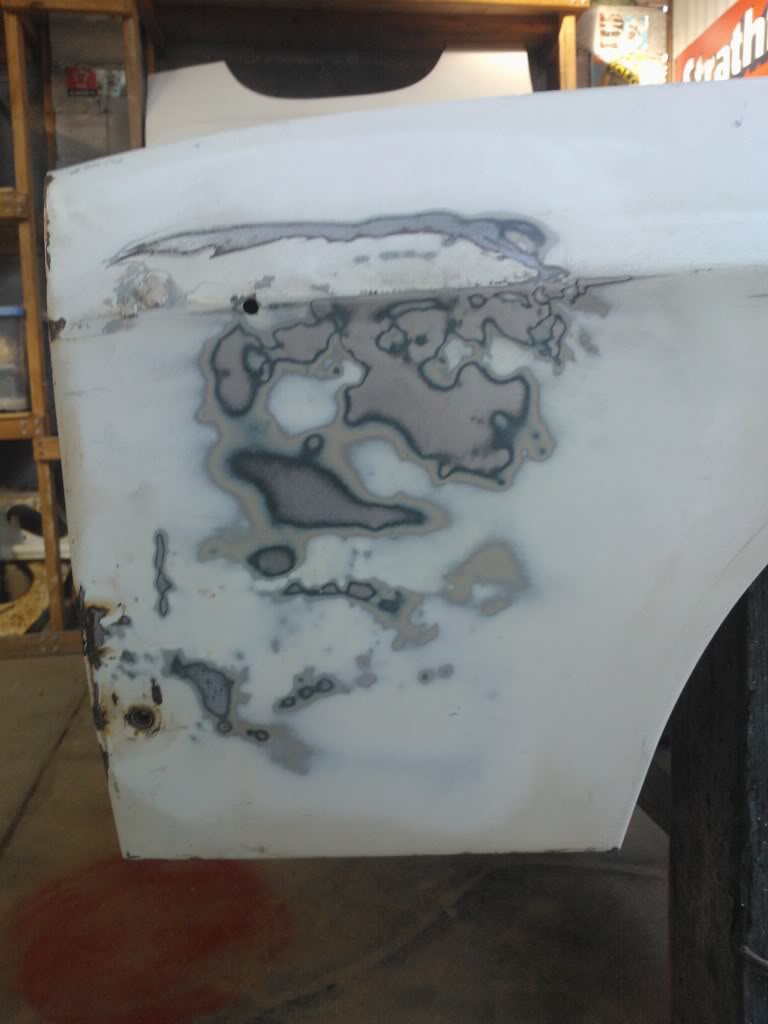
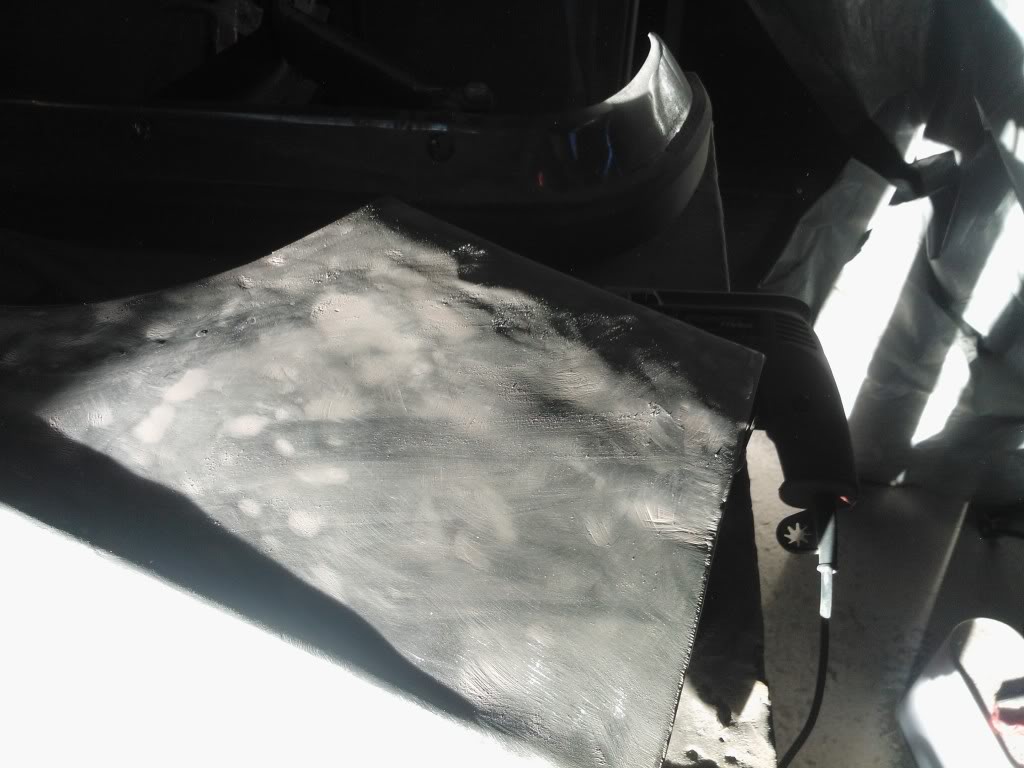
Stripping the guard seemed like a fairly simple task, and then bog happened...I was originally going to do it all with 120 grit, but after no prevail with that, I went down to my local paint supply store and got some 36 grit discs to put on the buff. Even with that it took a LONG time to get through to metal. There was a lot of bog in spots that didn't even need it. There was only a small section of the panel that was actually shaped by the metal. All around the edges of the panel was all bogged up to 1.5mm thick. Again, there was no need for this. Some of the small dents in the panel didn't have any signs of repair work, they had just bogged over them!. Although I must commend them on their bog work.
After a good go at it with a 36 grit. The bog in some spots was was more than 5mm this
Another picture of the same thing
Here is an example of the bog around the edges
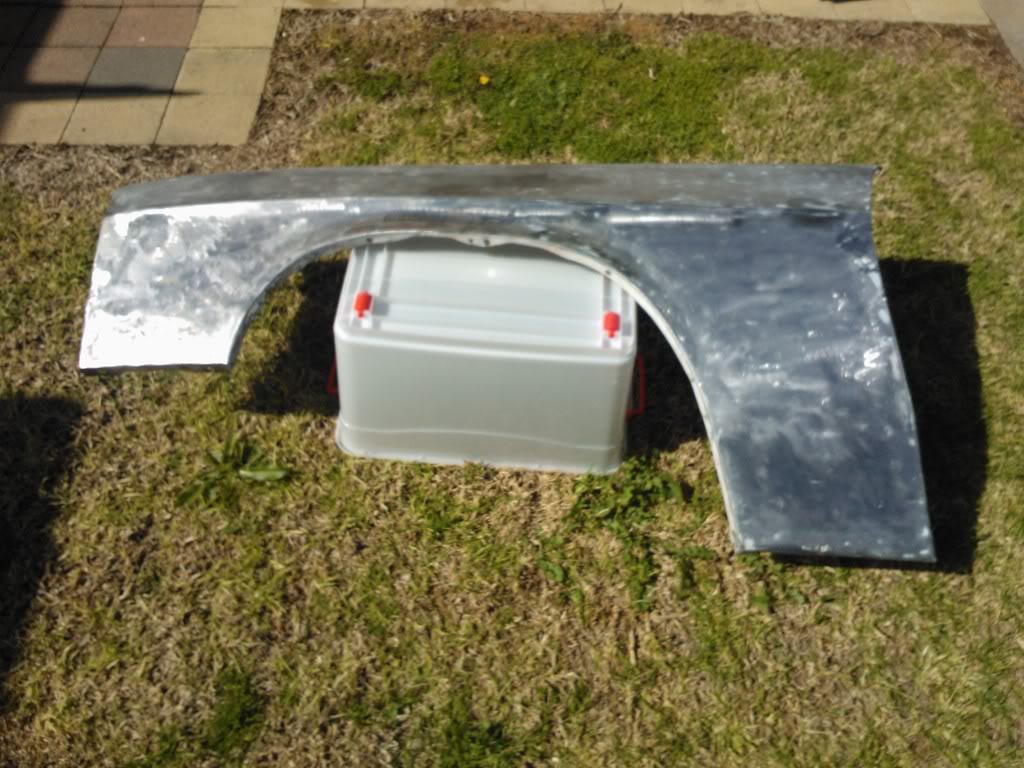
When I did eventually get through it all, I was left with what I thought was cellulite (fat cells)
These are pictures of the front of the guard.
Eugh!
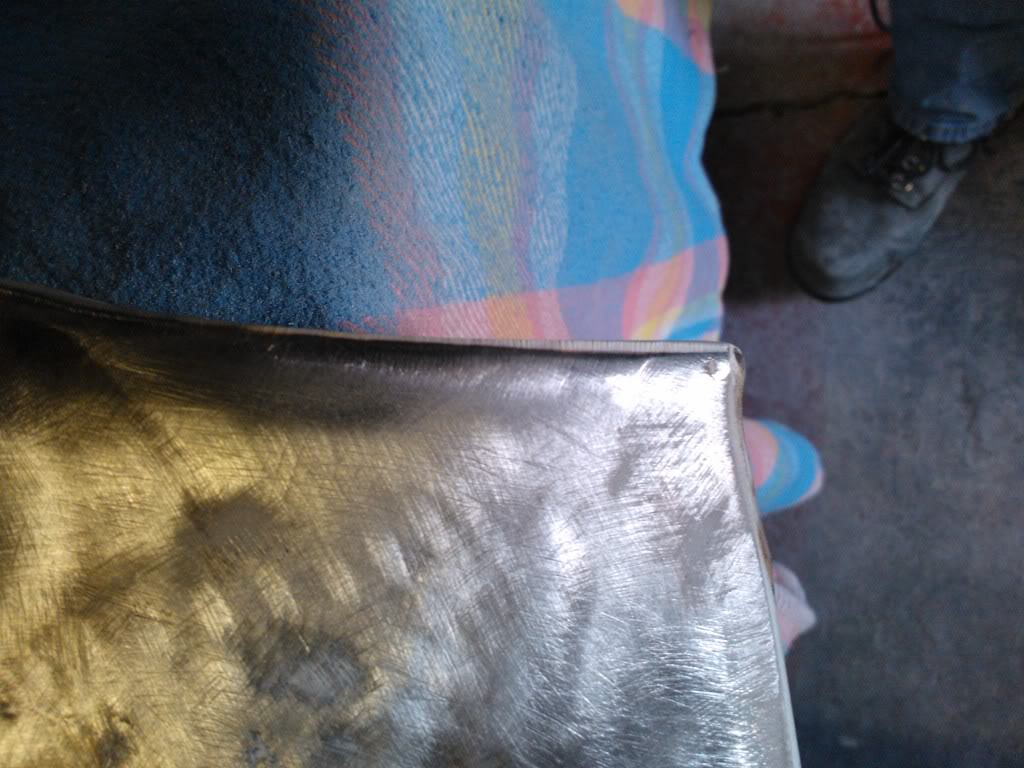
Finally I got it all into bare metal
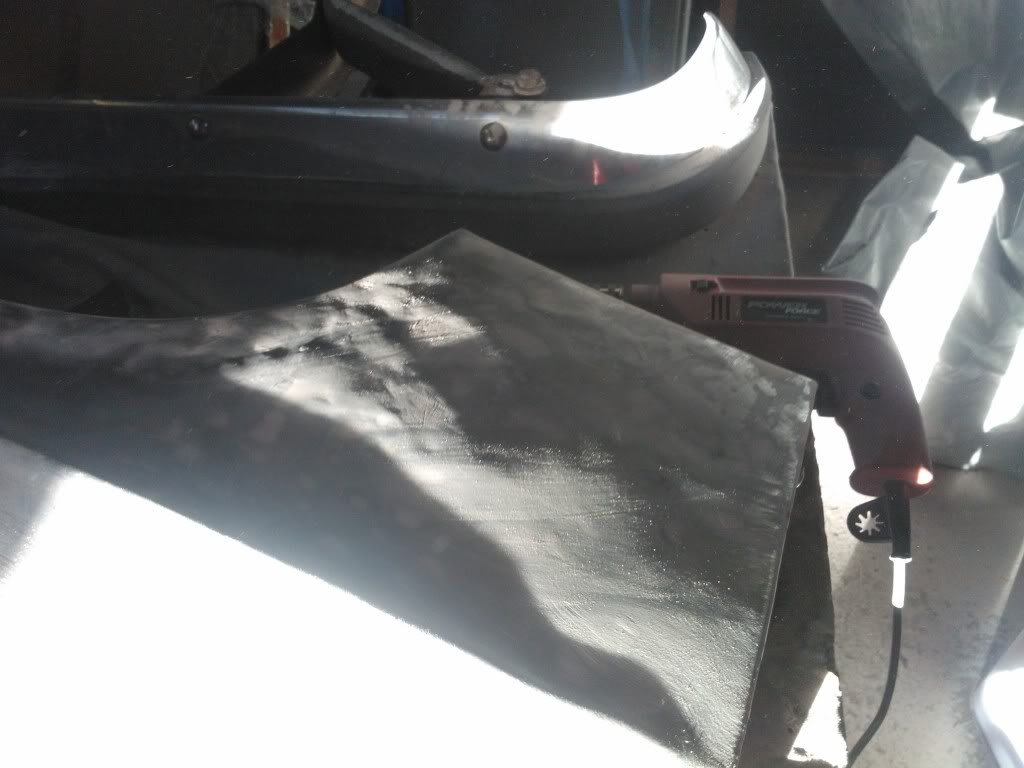
I then got it into Urethane Epoxy. There must have been a little bit of oil on it that I didn't clean off properly, and I ended up with the paint running away from the metal in a small area, but more primer fixed it. I also put too much thinners in the mixing cup accidentally because it was a brand new tin and I wasn't mixing up much paint. Because of that I ended up with a lot of orange peel on the panel.
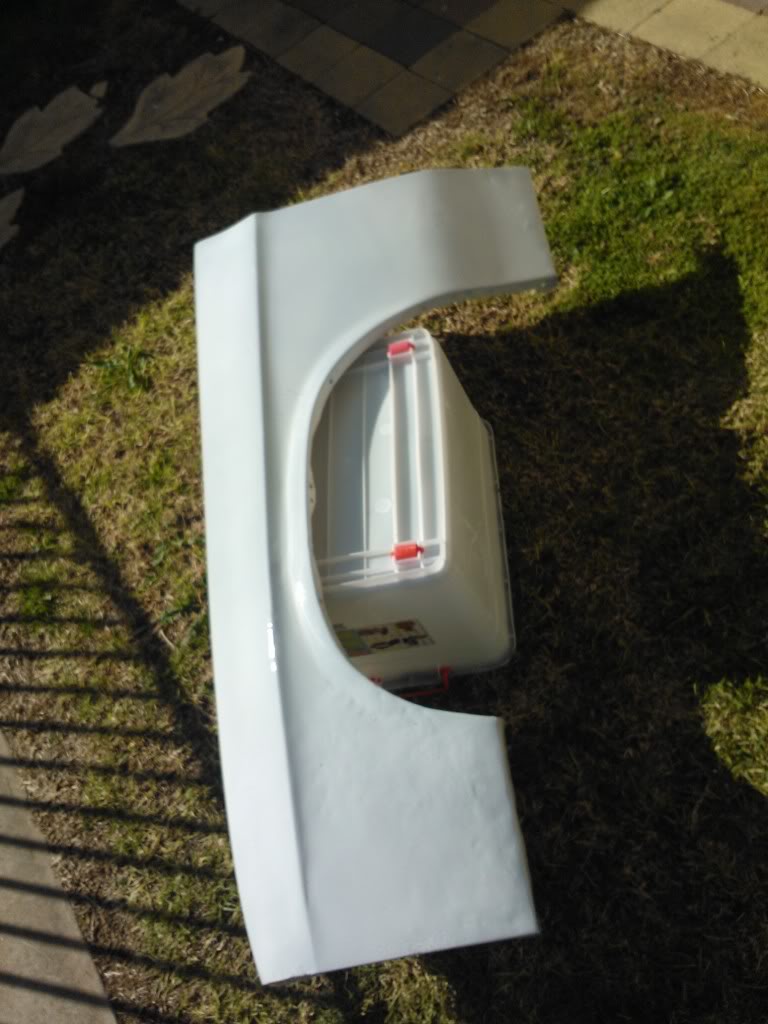
After that had dried I went on to blocking the epoxy, this was to get rid of the orange peel, and to clean up some of the surface just over the panel in general.

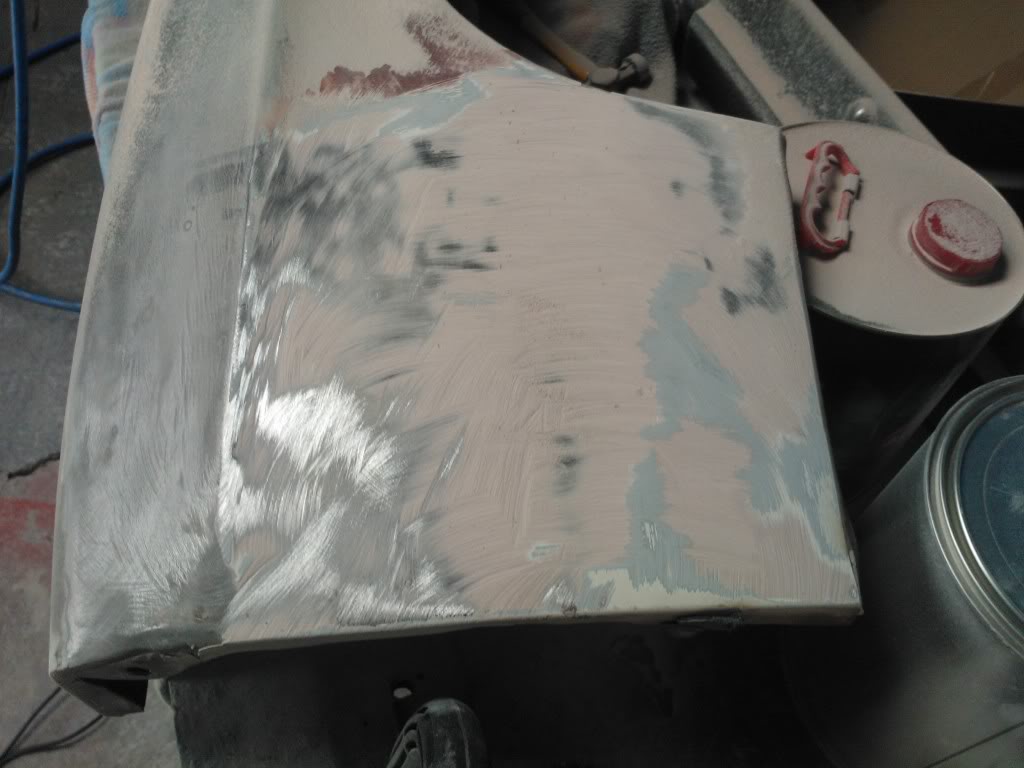
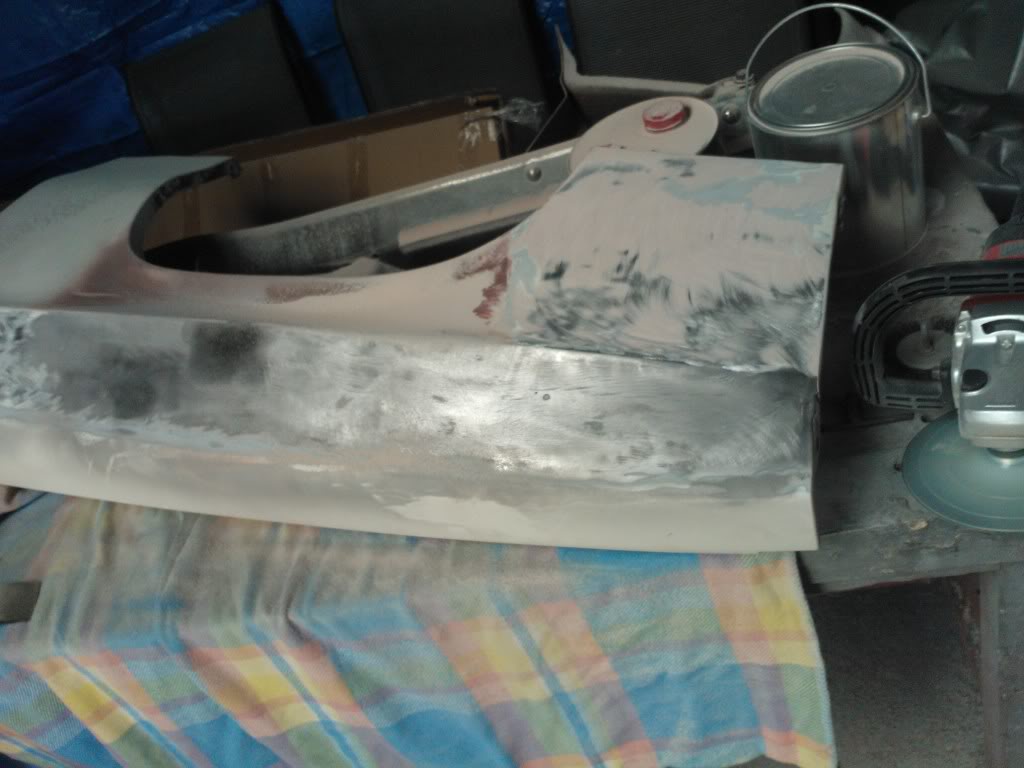
I was then able to hi-fill the whole panel, Surprisingly I had no problems with this. That is where the panel work stands at the moment
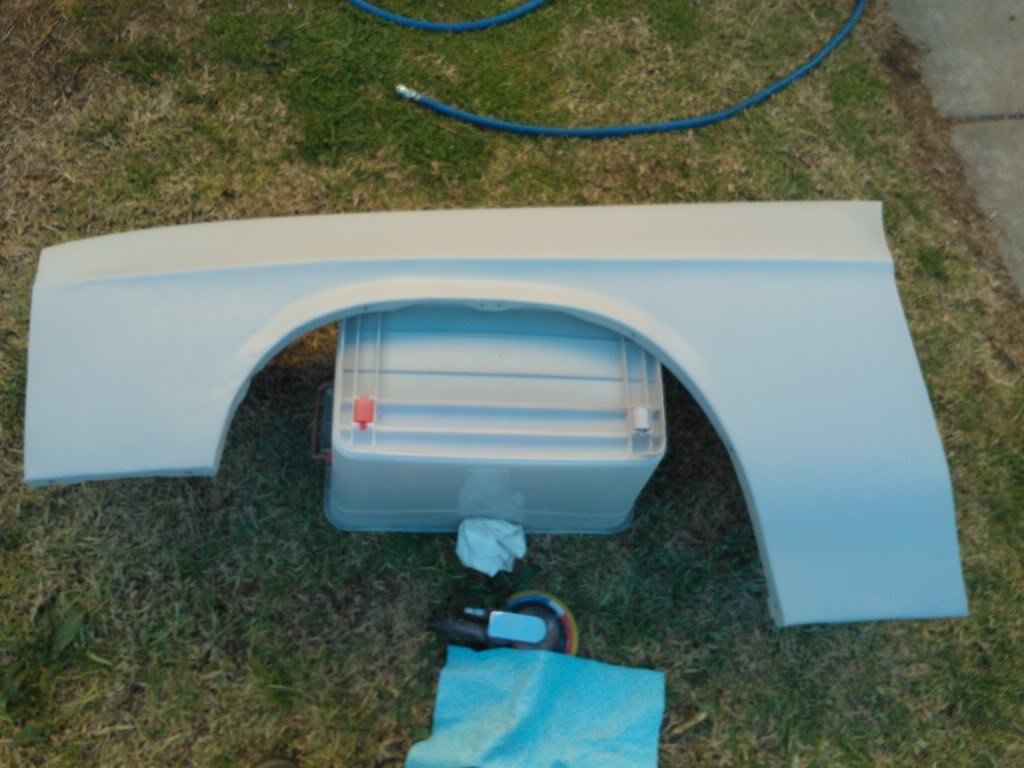
However the front of the panel did turn out extremely well I think I will be able to just block it without the need for bog. One thing I forgot to mention is I attempted some repairs to the worst areas when the metal was bare. Here's how it looks in the hi-fill.
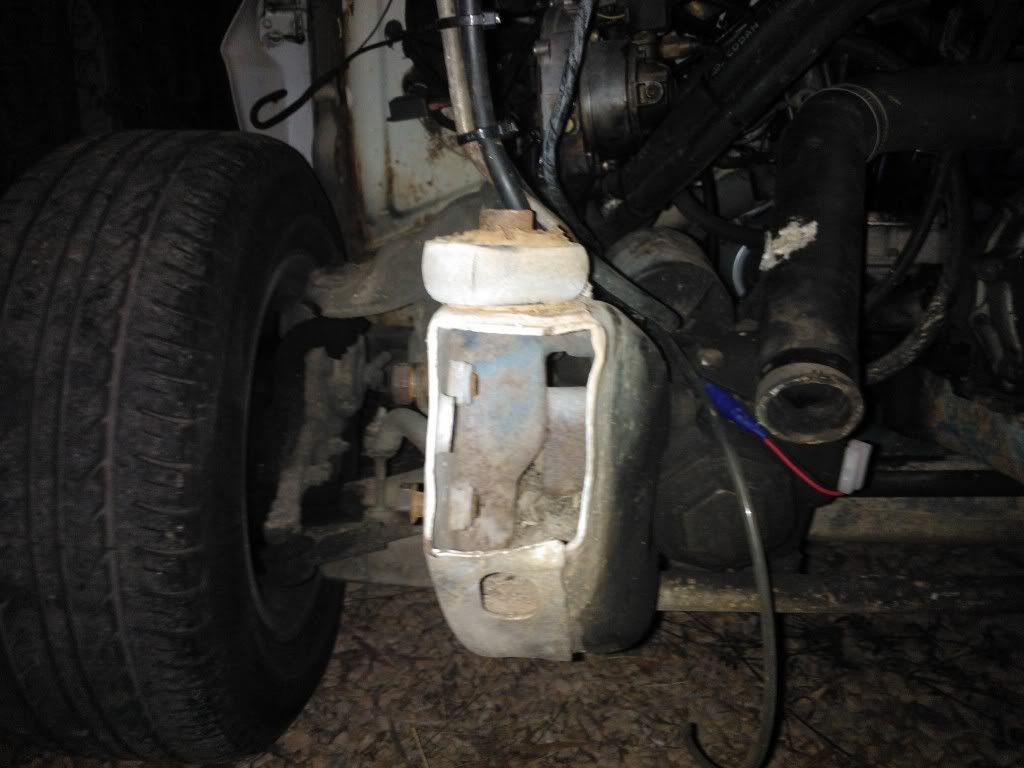
The engine mounts had small fractures in them, so I got my brother to weld them up. I ground back the welds to make it look nice (no pics).
The whole engine bay is going black, so the chassis rails, steering components and and firewall were all given a good degrease. The firewall also was stripped (except the brake booster, which was just unbolted and moved forward). That should give me enough access to give it a quick sand and to paint it all. Eventually the car will get a proper do up (some 15 years away) with the cab off the chassis etc. But for now this will do.
The rail has been fully straightened now, using much the same methods as earlier, except with the assistance of a crowbar this time. No pictures of that, but you really can't tell anyway except that the bar fits on the rails properly.
There was finally enough good weather to give me to to bare-metal and epoxy, then hi-fill the guard. Baby steps!
As it was the first time I had done this, there were some issues. But as far as I'm concerned things went well.
Stripping the guard seemed like a fairly simple task, and then bog happened...I was originally going to do it all with 120 grit, but after no prevail with that, I went down to my local paint supply store and got some 36 grit discs to put on the buff. Even with that it took a LONG time to get through to metal. There was a lot of bog in spots that didn't even need it. There was only a small section of the panel that was actually shaped by the metal. All around the edges of the panel was all bogged up to 1.5mm thick. Again, there was no need for this. Some of the small dents in the panel didn't have any signs of repair work, they had just bogged over them!. Although I must commend them on their bog work.
After a good go at it with a 36 grit. The bog in some spots was was more than 5mm this
Another picture of the same thing
Here is an example of the bog around the edges
When I did eventually get through it all, I was left with what I thought was cellulite (fat cells)
These are pictures of the front of the guard.
Eugh!
Finally I got it all into bare metal
I then got it into Urethane Epoxy. There must have been a little bit of oil on it that I didn't clean off properly, and I ended up with the paint running away from the metal in a small area, but more primer fixed it. I also put too much thinners in the mixing cup accidentally because it was a brand new tin and I wasn't mixing up much paint. Because of that I ended up with a lot of orange peel on the panel.
After that had dried I went on to blocking the epoxy, this was to get rid of the orange peel, and to clean up some of the surface just over the panel in general.
I was then able to hi-fill the whole panel, Surprisingly I had no problems with this. That is where the panel work stands at the moment
However the front of the panel did turn out extremely well I think I will be able to just block it without the need for bog. One thing I forgot to mention is I attempted some repairs to the worst areas when the metal was bare. Here's how it looks in the hi-fill.
The engine mounts had small fractures in them, so I got my brother to weld them up. I ground back the welds to make it look nice (no pics).
The whole engine bay is going black, so the chassis rails, steering components and and firewall were all given a good degrease. The firewall also was stripped (except the brake booster, which was just unbolted and moved forward). That should give me enough access to give it a quick sand and to paint it all. Eventually the car will get a proper do up (some 15 years away) with the cab off the chassis etc. But for now this will do.


1 user(s) are reading this topic
0 members, 1 guests, 0 anonymous users

