

Talk about life getting in the road Steve.
At the moment I'm on crutches left leg in a splint. No work, no shed time, stuck on the couch.
As they say That's Life.Looking forward to you're updates.Maybe it's about time I start my own build thread .
Time is something I have at the moment for a change.
Cheers Graham .

201 replies to this topic
#126

gad05
-
- Members
-

- 420 posts
Forum Fan
- Name:Graham
- Location:Brisbane
- Car:73 lj 2 door , 74 lj sedan.
- Joined: 11-January 09
Posted 25 March 2014 - 08:46 PM
#127
ljv8
-
- Members
-
- 299 posts
Forum Fan
- Name:Steve
- Location:Vic
- Car:LC GTR
- Joined: 17-May 09
Posted 26 March 2014 - 07:39 PM
Oh geez that sucks sorry to hear that Graham hope it heals up nice and quick. We take our mobility for granted till something like that happens.
Yeah get into a build thread, always interesting to see what people have done or are working on.
Also Dave forgot to mention thanks for the kind words. I must admit I borrowed the update number method for my posts after reading Grants build thread. Using a numbering system makes it easy to find what you crapped on about if someone has a question or wants more info about a particular step in the build.
Steve
#128
_greg2240_
_greg2240_
-

- Guests
Posted 26 March 2014 - 09:33 PM
great project, whats with the chains on the engine crane etc?
#129
nstood
-

- Members
-
- 92 posts
Forum Member
- Name:Neil Stoodley
- Location:Buderim
- Car:1970 LC GTR Verdoro Green
- Joined: 29-November 12
Posted 18 May 2014 - 08:22 AM
Hi Steve,
Getting close to start building my engine (so far still all body work!!) - are you still interested in sending a 161 mould so I too can go down the route of making an engine size thingy for my 3.3?
Cheers,
Neil
#130
ljv8
-
- Members
-
- 299 posts
Forum Fan
- Name:Steve
- Location:Vic
- Car:LC GTR
- Joined: 17-May 09
Posted 04 June 2014 - 09:25 PM
Sorry guys haven't been online for ages.
Greg the chains are the second last line of defense for any would be low life thieves that manage to get into my shed. The last line of defense is my 12 gauge
Neil PM me re the 161 badge mould and we can work something out if your interested.
Update #25
It's been a bit of a tough summer. Having to shift my attention away from the car for a little while. Was also out of work for a couple of months and spent most of my time chasing jobs and agents and doing the long list of jobs around the house. Lack of cash flow didn't help.
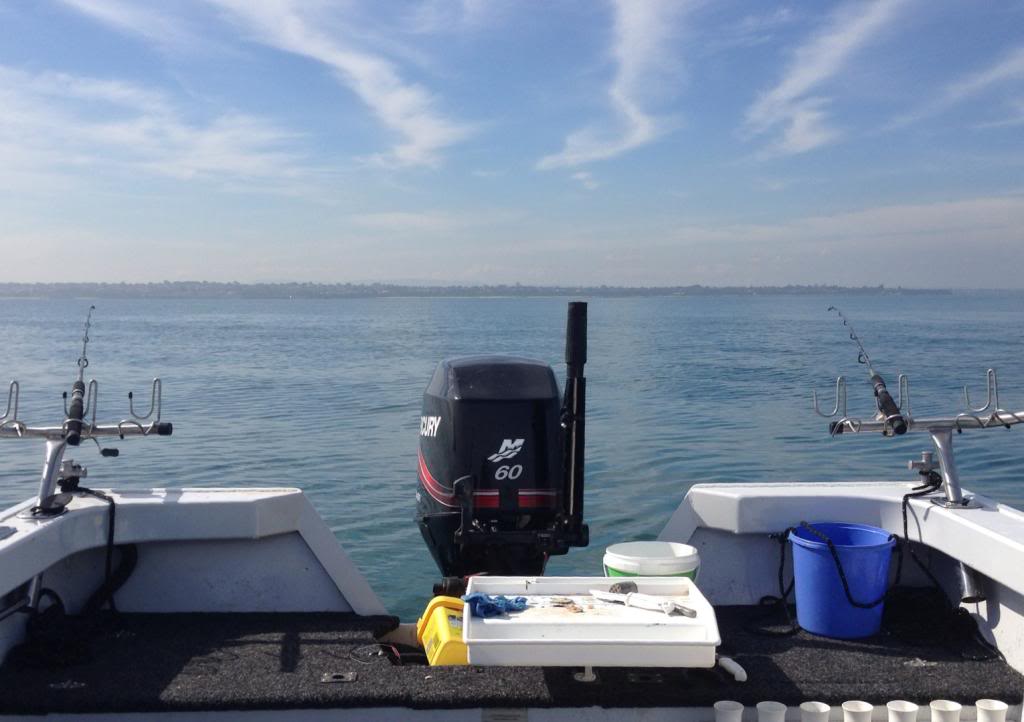
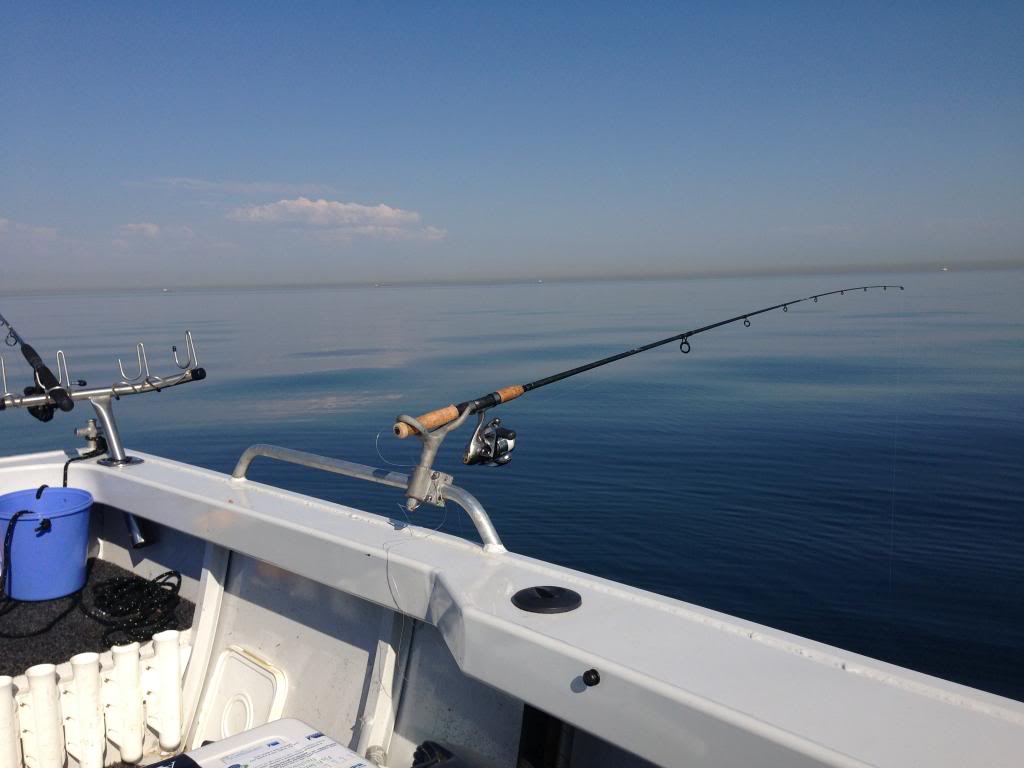
Wasn't motivated to work on the car and when I had spare time the call of the sea was too much and took the boat out a couple of times instead. A good feed of fresh snapper and flatties is hard to beat.
A bit off the topic but I'm sure there are plenty of Torana freaks who love their boats too!
I received my door trims from Dash Original earlier in the year. They were the most expensive of all the reproducers but they did an amazing job. Thanks to Limo who supplied the fiberglass tops, Dash turned them around pretty quickly.
I was going to cut the rear trim around the wheel tubs myself, but Dash Original offered to custom make them if I supplied a template. I made a template around my modified wheel arch and floor pan / seat rail. I was a bit nervous receiving them to see if anything was lost in translation. The rear trims fit perfectly. I was wrapped. I omitted the handle holes from the rear trims as my floor is raised and they would most likely interfere with the seat base.

Front trims are spot on.

Got my ashtrays re chromed for the rear trims too. Look gold in the photos due to my fluro lights.
Before

After

The best pair of bonnet hinges I had were on the car when it was sandblasted by the previous owner so they appeared to be a bit pitted. One reputable re plater refused to do them and said I would be better off buying another set. I spent a few months watching eBay but all were more worn than my set.
I had my tail light surrounds done by Sterling Plating in Heidelberg Victoria. They were recommended to me by a fussy Ford freak (aren't they all) that said their work is of a high standard. I was very happy with the job on my tail light surrounds they were a bit pitted but re chromed ok. I showed him my hinges and he basically said yeah they may come out shit if they were sandblasted but let's give it a try, it was only $40 to zinc them. The hinges came out fantastic with no visible pitting. To say I was happy was an understatement.

That made up my mind to use Sterling for the rest of my plating. Started putting together a list of things to be zinced. Again was constrained by time and lazy to clean everything. I really should have hit everything with a wire brush but just dropped them off. They acid bath and clean them anyway. Everything came out brilliant. Only the bonnet catch didn't come out perfect, but it was a bit rough to begin with. Then my cat looking for food knocked it off the work bench to make matters worse. Luckily the spanner in my hands that was throw by sheer impulse didn't make contact with the poor cat or I would have had some explaining to do.
I took photos of all the bits to be dropped off and labeled the photos. Knowing me they might not get put together for a month or a year. Glad I did cause when I got back a big box of nuts and bolts it was like oh shit what goes where.
Look yellowish in the photos but that's just my fluro lights all are silver but I think the correct term is blue zinc. Got most of the items I needed zinced done. Below is just a subset of the photos as nuts and bolts are a bit boring to look at.
Before

After

Before

After

Before

After

Before

After

Before

After

Before

After

Before

After

Before

After

Put another coat of Holden Orange on the sump and a few spots that needed a second coat like the oil pump, didn't take any photos but came out nice.
Got into gear to finish all the front end painting with the KBS rust seal. No bubbling this time. Changed my brushes to some very soft and thin bristled brushes. They were actually sample pot brushes from Bunnings. They don't hold too much paint so easier to do a thin coat. Also have a feeling that last time when everything bubbled I may have shook the can or not stirred it properly. Did a final coat on all suspension arms and the front cross member and came out perfect.
Went to do the Kbs Blacktop top coat and the unopened tin had gone thick and gooey. Called KBS and the Blacktop particularly in satin has lots of solids in it. I basically have to use a strong paddle/stirrer and really get into it, give it a really good long mix and it should come good. Maybe a little thinner. Was also told the Blacktop in satin doesn't brush on too well it's better spayed or applied with a foam brush. That wasn't in any of the publications, If it comes out shit I'm giving up on it. The whole appeal of it to me was being able to brush it, and the product drying smooth with no visible brush marks. Will have everything sandblasted and just sprayed with acrylic satin if it looks crap after brushing.
If it works out its assembly time. Got all the ball joints and bushes and all the nuts and bolts are zinced so not far off if I can spend some time on it.
I gave up on Kbs for the rims, just sanded them back and painted them with satin black acrylic. Need one last coat then will get the tyres fitted.
Hopefully will be able to spend a bit of time finishing things off so I can get it rolling sooner rather than later.
Greg the chains are the second last line of defense for any would be low life thieves that manage to get into my shed. The last line of defense is my 12 gauge
Neil PM me re the 161 badge mould and we can work something out if your interested.
Update #25
It's been a bit of a tough summer. Having to shift my attention away from the car for a little while. Was also out of work for a couple of months and spent most of my time chasing jobs and agents and doing the long list of jobs around the house. Lack of cash flow didn't help.
Wasn't motivated to work on the car and when I had spare time the call of the sea was too much and took the boat out a couple of times instead. A good feed of fresh snapper and flatties is hard to beat.
A bit off the topic but I'm sure there are plenty of Torana freaks who love their boats too!
I received my door trims from Dash Original earlier in the year. They were the most expensive of all the reproducers but they did an amazing job. Thanks to Limo who supplied the fiberglass tops, Dash turned them around pretty quickly.
I was going to cut the rear trim around the wheel tubs myself, but Dash Original offered to custom make them if I supplied a template. I made a template around my modified wheel arch and floor pan / seat rail. I was a bit nervous receiving them to see if anything was lost in translation. The rear trims fit perfectly. I was wrapped. I omitted the handle holes from the rear trims as my floor is raised and they would most likely interfere with the seat base.
Front trims are spot on.
Got my ashtrays re chromed for the rear trims too. Look gold in the photos due to my fluro lights.
Before
After
The best pair of bonnet hinges I had were on the car when it was sandblasted by the previous owner so they appeared to be a bit pitted. One reputable re plater refused to do them and said I would be better off buying another set. I spent a few months watching eBay but all were more worn than my set.
I had my tail light surrounds done by Sterling Plating in Heidelberg Victoria. They were recommended to me by a fussy Ford freak (aren't they all) that said their work is of a high standard. I was very happy with the job on my tail light surrounds they were a bit pitted but re chromed ok. I showed him my hinges and he basically said yeah they may come out shit if they were sandblasted but let's give it a try, it was only $40 to zinc them. The hinges came out fantastic with no visible pitting. To say I was happy was an understatement.
That made up my mind to use Sterling for the rest of my plating. Started putting together a list of things to be zinced. Again was constrained by time and lazy to clean everything. I really should have hit everything with a wire brush but just dropped them off. They acid bath and clean them anyway. Everything came out brilliant. Only the bonnet catch didn't come out perfect, but it was a bit rough to begin with. Then my cat looking for food knocked it off the work bench to make matters worse. Luckily the spanner in my hands that was throw by sheer impulse didn't make contact with the poor cat or I would have had some explaining to do.
I took photos of all the bits to be dropped off and labeled the photos. Knowing me they might not get put together for a month or a year. Glad I did cause when I got back a big box of nuts and bolts it was like oh shit what goes where.
Look yellowish in the photos but that's just my fluro lights all are silver but I think the correct term is blue zinc. Got most of the items I needed zinced done. Below is just a subset of the photos as nuts and bolts are a bit boring to look at.
Before
After
Before
After
Before
After
Before
After
Before
After
Before
After
Before
After
Before
After
Put another coat of Holden Orange on the sump and a few spots that needed a second coat like the oil pump, didn't take any photos but came out nice.
Got into gear to finish all the front end painting with the KBS rust seal. No bubbling this time. Changed my brushes to some very soft and thin bristled brushes. They were actually sample pot brushes from Bunnings. They don't hold too much paint so easier to do a thin coat. Also have a feeling that last time when everything bubbled I may have shook the can or not stirred it properly. Did a final coat on all suspension arms and the front cross member and came out perfect.
Went to do the Kbs Blacktop top coat and the unopened tin had gone thick and gooey. Called KBS and the Blacktop particularly in satin has lots of solids in it. I basically have to use a strong paddle/stirrer and really get into it, give it a really good long mix and it should come good. Maybe a little thinner. Was also told the Blacktop in satin doesn't brush on too well it's better spayed or applied with a foam brush. That wasn't in any of the publications, If it comes out shit I'm giving up on it. The whole appeal of it to me was being able to brush it, and the product drying smooth with no visible brush marks. Will have everything sandblasted and just sprayed with acrylic satin if it looks crap after brushing.
If it works out its assembly time. Got all the ball joints and bushes and all the nuts and bolts are zinced so not far off if I can spend some time on it.
I gave up on Kbs for the rims, just sanded them back and painted them with satin black acrylic. Need one last coat then will get the tyres fitted.
Hopefully will be able to spend a bit of time finishing things off so I can get it rolling sooner rather than later.
#131
gad05
-
- Members
-
- 420 posts
Forum Fan
- Name:Graham
- Location:Brisbane
- Car:73 lj 2 door , 74 lj sedan.
- Joined: 11-January 09
Posted 05 June 2014 - 09:48 AM
Hi Steve ,
Glad to see you're back on track, plated parts look really good.
Our progects can be a real test of endurance sometimes,
Just keep living the dream.
Cheers Graham .
Glad to see you're back on track, plated parts look really good.
Our progects can be a real test of endurance sometimes,
Just keep living the dream.
Cheers Graham .
#132
ljv8
-
- Members
-
- 299 posts
Forum Fan
- Name:Steve
- Location:Vic
- Car:LC GTR
- Joined: 17-May 09
Posted 05 June 2014 - 08:13 PM
Thanks Graham for the kind words. I guess the money and time challenges will make the end result that much more rewarding and enjoyable.
Steve.
Steve.
#133
gad05
-
- Members
-
- 420 posts
Forum Fan
- Name:Graham
- Location:Brisbane
- Car:73 lj 2 door , 74 lj sedan.
- Joined: 11-January 09
Posted 05 June 2014 - 08:26 PM
Spot on Steve,that's exactly what I keep telling my wife.
Don't think she believes me.
All part of the challenge I suppose.
Cheers Graham .
Don't think she believes me.
All part of the challenge I suppose.
Cheers Graham .
#134
ljv8
-
- Members
-
- 299 posts
Forum Fan
- Name:Steve
- Location:Vic
- Car:LC GTR
- Joined: 17-May 09
Posted 10 November 2014 - 08:12 PM
Update #26
Been ages since I have posted.
Haven't done a heap of work but have been chipping away.
Financially I don't have any spare cash to finish her off as fast as I would like so that has dampened my enthusiasm a little. Now I'm keen to keep going with what parts I have, and get it in a state where it's ready for interior without having to spend too much money.
I have given up on the KBS route and ended up just giving all front end bits I already painted with KBS a once over with a scotchbrite pad and sprayed everything with a standard satin black acrylic. As mentioned previously my KBS Blacktop paint went solid in the sealed can, and after speaking with Kbs support it has a very short shelf life as it contains so much solids. You would however expect it to last at least 12 months! They also said the satin finish is best sprayed on not brushed as it can show the streaks and unevenness when brushed.
I found the whole Kbs process a real time waster and wouldn't go down that path again. It's probably okay for floor pans where you don't see it or if it's sprayed on. Having to re strip components and sand everything back because of gassing bubbles was a pain, and wasted a lot of time. Other bits I have cleaned up eg stub axels, sway bar, etc I have just hit them with a wire brush on the grinder, a good degrease and wash, then a quick prime and a couple of sprayed coats of acrylic satin black. All have turned out ok. It's going to be a driver not a show car so I'm not after a show quality finish.
I like the KBS degreaser and paint stripper but that is probably all I will use moving forward.
Finally got my grill and headlight surrounds back from Vinneys. Took a long, long, long time but it was worth the wait. Dents knocked out, broken bars re-welded and re plated. The finished product looks amazing and it's almost a shame that the center bar is going to be blue and most of the grill and surrounds black. I prefer the painted look over the raw look on GTR's so it will have to be done.


I got rid of my spare LJ Girlock calipers a while ago as I was going to go with LX disks and calipers I had on my old LJ. I remembered I had a set of XU1 caliper spacers and decided to go back to the Girlocks for authenticity. Found a grotty second hand set, cleaned up and pulled them apart to see if they are useable. Had plenty of years of grime and asbestos built up!

Hit them with the power wire brush on the outside then pulled them apart.


Had plenty of grunge inside the bores and a bit of surface rust but nothing dramatic. Definitely useable once they are cleaned inside and out, as the piston forms a seal against the piston and rubber seal not the bore. Even if the bores are a bit rough as long as I get new pistons, seals and O rings they will work perfectly (I hope).
I knew I had a set of XU1 spaces I don't even remember where I got them from but have been in storage for 20+ years. See pic below for difference between std caliper and XU1 bolts to go with the spacers. From what I read on this site you can get away using the short bolts with the spacers but I have a full set of long bolts so will use them.

I have a set of stubs that still had the factory daubs on them. Was in two minds about stripping them back and painting them, but they were pretty grubby and had some surface rust. I cleaned them as best as I could but they looked crappy and just to retain the daubs, it wasn't worth it. They weren't even the original ones on my GTR so I blitz them with the wire brush on the angle grinder in preparation for painting.

I'm focused on now finishing my front end, pushing in the bushes and getting it mounted and rolling. The front end chassis spacers were covered in electrical tape. I remembered doing that 25 odd years ago when I did a front end rebuild on my old LJ on a minimal budget. The tape was still in place but decided to fix them a little better. When peeling back the tape I remembered the grooves that were worn into them years ago because the plastic insulation wore through and the bolts must have been loose or something.

Thought the neatest way to replace that plastic coating would be with electrical heat shrink. Took one spacer to Jaycar and found the perfect heat shrink for them. Allowed me to shrink one full coat the entire length and a double covering on the ends. The second covering was a tight fit but got it on there and seems more durable than electrical tape. Won't be seen but I know it's done right.
The little piece in the photo is the factory coating and a double heat shrink is fairly close to that thickness.

So now with no spare money to spend on her for the next few months I will be doing everything I can with what parts I already have. Luckily I have a bit of a stock pile and have enough to finish the front end, then start sorting out things like the door lock mechanism assembly, stripping and painting the diff and arms, putting in the wiring harness, finishing the final coat of paint on the engine, etc. Bring on those hot summer nights, and spending hours in the shed with a few cold ales!
Been ages since I have posted.
Haven't done a heap of work but have been chipping away.
Financially I don't have any spare cash to finish her off as fast as I would like so that has dampened my enthusiasm a little. Now I'm keen to keep going with what parts I have, and get it in a state where it's ready for interior without having to spend too much money.
I have given up on the KBS route and ended up just giving all front end bits I already painted with KBS a once over with a scotchbrite pad and sprayed everything with a standard satin black acrylic. As mentioned previously my KBS Blacktop paint went solid in the sealed can, and after speaking with Kbs support it has a very short shelf life as it contains so much solids. You would however expect it to last at least 12 months! They also said the satin finish is best sprayed on not brushed as it can show the streaks and unevenness when brushed.
I found the whole Kbs process a real time waster and wouldn't go down that path again. It's probably okay for floor pans where you don't see it or if it's sprayed on. Having to re strip components and sand everything back because of gassing bubbles was a pain, and wasted a lot of time. Other bits I have cleaned up eg stub axels, sway bar, etc I have just hit them with a wire brush on the grinder, a good degrease and wash, then a quick prime and a couple of sprayed coats of acrylic satin black. All have turned out ok. It's going to be a driver not a show car so I'm not after a show quality finish.
I like the KBS degreaser and paint stripper but that is probably all I will use moving forward.
Finally got my grill and headlight surrounds back from Vinneys. Took a long, long, long time but it was worth the wait. Dents knocked out, broken bars re-welded and re plated. The finished product looks amazing and it's almost a shame that the center bar is going to be blue and most of the grill and surrounds black. I prefer the painted look over the raw look on GTR's so it will have to be done.
I got rid of my spare LJ Girlock calipers a while ago as I was going to go with LX disks and calipers I had on my old LJ. I remembered I had a set of XU1 caliper spacers and decided to go back to the Girlocks for authenticity. Found a grotty second hand set, cleaned up and pulled them apart to see if they are useable. Had plenty of years of grime and asbestos built up!
Hit them with the power wire brush on the outside then pulled them apart.
Had plenty of grunge inside the bores and a bit of surface rust but nothing dramatic. Definitely useable once they are cleaned inside and out, as the piston forms a seal against the piston and rubber seal not the bore. Even if the bores are a bit rough as long as I get new pistons, seals and O rings they will work perfectly (I hope).
I knew I had a set of XU1 spaces I don't even remember where I got them from but have been in storage for 20+ years. See pic below for difference between std caliper and XU1 bolts to go with the spacers. From what I read on this site you can get away using the short bolts with the spacers but I have a full set of long bolts so will use them.
I have a set of stubs that still had the factory daubs on them. Was in two minds about stripping them back and painting them, but they were pretty grubby and had some surface rust. I cleaned them as best as I could but they looked crappy and just to retain the daubs, it wasn't worth it. They weren't even the original ones on my GTR so I blitz them with the wire brush on the angle grinder in preparation for painting.
I'm focused on now finishing my front end, pushing in the bushes and getting it mounted and rolling. The front end chassis spacers were covered in electrical tape. I remembered doing that 25 odd years ago when I did a front end rebuild on my old LJ on a minimal budget. The tape was still in place but decided to fix them a little better. When peeling back the tape I remembered the grooves that were worn into them years ago because the plastic insulation wore through and the bolts must have been loose or something.
Thought the neatest way to replace that plastic coating would be with electrical heat shrink. Took one spacer to Jaycar and found the perfect heat shrink for them. Allowed me to shrink one full coat the entire length and a double covering on the ends. The second covering was a tight fit but got it on there and seems more durable than electrical tape. Won't be seen but I know it's done right.
The little piece in the photo is the factory coating and a double heat shrink is fairly close to that thickness.
So now with no spare money to spend on her for the next few months I will be doing everything I can with what parts I already have. Luckily I have a bit of a stock pile and have enough to finish the front end, then start sorting out things like the door lock mechanism assembly, stripping and painting the diff and arms, putting in the wiring harness, finishing the final coat of paint on the engine, etc. Bring on those hot summer nights, and spending hours in the shed with a few cold ales!
#135
ljv8
-
- Members
-
- 299 posts
Forum Fan
- Name:Steve
- Location:Vic
- Car:LC GTR
- Joined: 17-May 09
Posted 13 July 2015 - 01:43 PM
Update #27
Getting my Torana mojo back over the last couple of months and getting pumped to get the thing on the road. This is a pretty big update as it has been a while since I have been online and I have been getting stuff done for a change!
Finished off the front end by pushing all of the new bushings in. Was a bit tricky to get the top arm done and came up with a bit of a contraption. Nice thick piece of redwood with a good sized hole cut out for one side. And I used a front wheel bearing shell that fit the bush frame perfectly. Also found a solid pipe that I could use to push the bearing shell. Twenty tons of pressure and they are in like Flynn.

Very late night blonde moment..

Lower bushings and ball joints were much easier.

Assembled the front end not sure if I used enough shims but it's a starting point and I copied the setup on my spare complete front end.


Sprayed the front springs black which were a disgusting pedders red. Just threw in my old shocks for now. Will have to get a pair of koni's to match the back, but paint them green of course to look factory. I had a pair of spring isolators in good nick i was able to use. Got the springs in by having the front end upside down on the bench. Climbed up and with the spring in and stub axle lined up I sat on the lower arms and bounced up and down on them till the stub poked through the ball joint and I was able to hand tighten the nut. Took a few goes, nearly fell off twice, hurt my arse, but got them in. Bugger spring compressors, lucky they were lowered springs though!
Found a link on the site for the starting point measurement of the radius rods into the kframe. It’s also in the LC factory workshop manual. Put the reco’ed steering rack on. All set to blow, put it under the car with the jack then realized I forgot the outrigger bushes. Ok easy will just put them in. Ahah not so easy. Pull it out, try on the floor, lots of swearing and throwing things.
Put it back on the bench, these mothers are not easy to get in. Used a mini home made press with a bolt nut couple of washers and a steel bar with a center hole. Still was tricky to get it in and did a little damage from various attempts and screwdriver puncher wounds. They were in.
Ok front end back under the car. Outrigger bolts I had were 2cm too short WTF. Off to the bolt shop. Got the four upper bolts in first then rear bolts. Left side easy, right side a little off. A bit of frigging around and it's in phew. Locked it up but then I notice k frame is not dead center. Ugggghhhhhhhhhh.


Ended up buying a set of Superpro outrigger bushes to replace these butchered rubber ones. After a couple of busy weeks I found some time to drop down the cross member, and pull out the outrigger bushes. I backed off the crossmember to chassis bolts, the front ones almost all the way and the rear ones all the way out. That way it can swing down but won't fall out. As you can see from the pic below the offending side was a bit damaged from initially trying to get it in with force and it literally fell out when I went to pull it out. The other side was very secure and I had to destroy it to get it out.


Still took a lot of patience to get the Superpro's in but it was easier than the rubber ones. Probably because the steel insert is molded into the rubber type but with the Superpros it is added later. Bit of stuffing around with the home made press, bit of jiggling with the screwdriver to feed the ends in evenly and in they pop. The big brass tube helped see what was happening when tightening the bolt. It's important not to overdo it and just a little at a time until the entire lip of the bush is in the sleeve, then tighten up all the way. This same brass tube is the perfect size to press in the diff and rear suspension bushes in. It's a piece cut from a S bend from an old laundry sink.


Then had to push in the bush sleeve. Used the same long threaded bolt, but had to pack it up a bit as it didn't have thread all the way. I pushed the bush in from the tapered end, same deal lots of grease, nice and easy and in she went.

Getting the cross member back in I greased up the chassis and outside of the outrigger bushes with the Superpro grease. I then put the jack under the crossmember with a cut down redgum fence post that I used as a pivot to angle the outrigger arms in. Using the paint scraper trick to guide the outrigger bushes which someone else mentioned on this forum worked a treat. I.e putting a thin wide paint scraper between the outrigger bush and chassis while tilting the arms up. It literally guides them into the chassis with minimal effort and no damage. Also this time I did everything kneeling in the engine bay which made things a little easier. Then used a jack to raise and align each outrigger arm with the bolt holes, and pushed through each bolt.
Took my time carefully tightened everything up slowly and in sequence. First did the crossmember to chassis bolts. Tightened up the outrigger bolts. Then torqued everything up to the correct specs in the workshop manual and she is dead center in perfect alignment.
I think the first time I did it, I rushed it and dodged up that one rubber outrigger bush. Then over tightened it on that side and it popped out, so was user error! I hate having to do things twice but that's what you get when you're impatient.
Didn't like the new crossmember to body rubbers either they were flat cut with no taper. My old ones were the original style with a taper and in good nick so reused those.

Threw some old disks on for now to get it rolling. These were on the car when I got it. I have a feeling braking performance would have been poor with these pizza cutters! A new standard LC disk is 12.7mm. Down to 12mm and they are throw away. These babies are 7.3mm, talk about getting the most out of your rotors, there are even chunks missing from them, wouldn't have stopped very well though.

Tore steering column down. I don't have the original this one is out of a 3 on the tree LC. Steering shaft thread is completely and utterly shagged. Will have to recut a thread on it.

Top bearing is easily available but going to struggle with the bottom one. Mine is in two pieces for the column shift. Plan to junk all the shift levers and mech. Will go to the bearing shop and see if anything will fit. No one seems makes the nylon lower bush which is a shame. Also the indicator mechanism is broken, and because it has a column shift and column lock need a new reproduction shroud. Not going to be an easy or cheap fix..

In the end I gave up on the steering column was going to take a lot of time, effort and money to fix it. I will eventually fix it as a spare after the car is all done, but for now purchased a reco LC floor shift column from Norm on eBay. He is one of the few places that actually recondition columns, and the good thing I didn’t need a change over. Not cheap but the way I see it manual LC steering columns rarely come up and when they do, they fetch good money and still need work. Norm completely referbs them and his work is outstanding. Also he replaced the lower nylon bush with a re-manufactured one he is able to source or get’s made. It's the tightest Torana column I have ever seen and to me it’ worth every cent.
My attempt at repairing my column would not have looked anything like this.


Just dummied in to see how it looks.

Also jacked up the entire car, put it on stands and ripped out the diff. Sent the nuts and bolts off for zincing and got started on cleaning up the diff housing and rear suspension arms. Will also need to replace all the arm and diff bushings with new ones.
Pressed all the bushes out of the diff arms. I was amazed how much pressure it took to get them out. They were seriously jammed in there, but could not resist 20 tonnes of pressure. When they let go, they really let go.
Rear diff and arms are being stripped of their layers of paint. And at one stage my diff and trailing arms was bright green. Don't ask, I was 18 and it was the early nineties... Even back then it didn't last long though as it looked hideous.


Need to finish stripping out the hard to reach areas with paint stripper and give everything a first coat of paint. Once the first coat of paint is applied will push in all the bushes. Then it’s diff assembly time.
These babies have been sitting under my house for 14 years. They are original date stamped 1975 sprint masters, with the long bolt holes, rather than the newer taper style. Shame they are not 72/73 would have bumped up the value. Will clean them up and might put a set of tyres on these also to alternate between the steelies and sprinties when I am in the mood.


#136
ljv8
-
- Members
-
- 299 posts
Forum Fan
- Name:Steve
- Location:Vic
- Car:LC GTR
- Joined: 17-May 09
Posted 26 August 2015 - 07:58 AM
Update #28
Blew a couple of grand (the wife’s new handbag budget) at Rarespares a few weeks back. She was wrapped, not!
Got a GTR steering wheel, full rubber kit, bushings for the diff, key locks, GTR badges, brake hoses, all door handles, armrests, and a number of little bits and pieces. Was going to cost me $60 to chrome an old door handle and a brand new one is $27.50. No brainer really. If it was a concourse resto, numbers matching car, yeah would have gone to the extra expense of all genuine GMH. It’s just a bitsa car, with mounting costs to finish it and there is absolutely nothing wrong with the Rares product.


Been focusing on the diff and suspension arms. Cleaned them all up, stripped off the paint and wire brushed them.

Drilled out the bush rubbers to get them out then butchered out the bush housing. Chopped the tops off the bump stops, then drilled a hole and pulled them out with a screwdriver

Put the first coat of paint on the rear arms, then pushed in the bushes. Started out using a long bolt and a tube spacer to get them started.

Then finished them off in the press.


Layed a couple more coats of satin acrylic on the diff arms to finish them off.
First coat on the diff

Found by hand took a hell of a lot of force to get the bushings in, and stripped three long bolts, until I went and purchased a high tensile bolt. The high tensile bolt made short work of the bushings on the diff housing. Could not get it into the press, so a nut and bolt press, with plates was the only way to get them in.

These bump stops are not going in the holes. I tried soap, grease, boiling them as per tips on site, stugots! Another tip I found was to compress them with a hose clamp or piston ring compressor to the same width as the hole, then hammer them in. Tried hose clamps, no luck just slip out. A 40mm pipe repair clamp is a good option around $55 at Reece, which is almost three times the cost of the bump stops! Tried a fence clamp no good, persisted with hose clamps, close but no chance!

Was going to give up, got desperate, ended up rasping the bottom edges to form a taper to help it locate and go into the housing.

With some silicone spray, a hose clamp to compress it leaving a little exposed on the bottom to locate it and get it started with screwdrivers, then some angry hammer work because of how much time I have wasted on these things, and got it half in. Then screwdrivered them in the rest of the way. I didn't take any rubber off the shoulder or top half of the bump stop, so now that they are in they don't move around at all.

Never want to do that again. Luckily the diff was only sprayed in a first coat of acrylic, and not powder coated cause I did a bit of damage to the paint work. Have to clean it up now and lay on some final coats so the housing can be mounted under the car.
#137
gad05
-
- Members
-
- 420 posts
Forum Fan
- Name:Graham
- Location:Brisbane
- Car:73 lj 2 door , 74 lj sedan.
- Joined: 11-January 09
Posted 30 August 2015 - 09:58 PM
Feel you're pain Steve.I did my bump stops a few months ago.
I used boiling water and plenty of grease.My housing is powder coated so a real nightmare
trying not to scratch.But all good in the end.
Steering column looks great, nice shopping at Rears.
Cheers Graham.
I used boiling water and plenty of grease.My housing is powder coated so a real nightmare
trying not to scratch.But all good in the end.
Steering column looks great, nice shopping at Rears.
Cheers Graham.
#138
ljv8
-
- Members
-
- 299 posts
Forum Fan
- Name:Steve
- Location:Vic
- Car:LC GTR
- Joined: 17-May 09
Posted 30 October 2015 - 11:21 AM
Update #29
Finally got that bump stop in, thanks Graham gave up on the clamps and persisted with the lube and screwdrivers as you suggested and got the last one in.
Finished painting the diff housing after that. Cleaned up the backing plates, axles and diff center and painted everything up.
So sick of cleaning dirty rusty bits… Next project will invest in a sand blaster! Would have saved me a shit load of time.

It’s a great feeling to be assembling instead of cleaning and painting for a change. Biggest issue I have had is missing bolts or finding old bolts and nuts that are stripped. Been wasting a lot of time going through the shed digging into the boxes and bags of Torana bits trying to find nuts and bolts. I pulled my old Torana apart 20 odd years ago, so stuff has been lost over time. Because of this I have been wearing out the road to the local bolt shop! Luckily they have had everything I needed and exact lengths which is handy. Need to keep a note of all the bolts and size for future reference.

Picked up my Federal 595 tyres. For the 13x6 rears fitted 205/60/13. For the 13x5.5 front’s fitted 185/60/13’s. Was a hard choice was going to go the 205 on the 5.5’s but they would have looked a bit bulgy. Happy with my choice in the end, and looks like it will sit nice in the guard and not rub. Also when I brought them my tyre guy said there were only 7 tyres left in the country and the 13”’s are listed as obsolete. So purchased another two 185’s and threw them on my spare 4.5’s for now till I find another two 5.5” rims. They are directional so didn't make sense to get just one spare.

Picked up a new Bosch starter. My old one was pretty stuffed.

Got a new 70amp Bosch alternator also with an internal reg. My regulator bolt holes were welded up by the previous owner.

And a new master cylinder. I was really happy to see the dark finish to mimic the old cast iron look. Not a big nut master but it’s not a concourse, matching numbers resto but a practical streeter! Also I didn’t know that Bosch owned PBR. I’m going to use my old LJ small booster, which matches the booster size the GTR had.

These old rear wheel cylinder are nicely rusted up, but contain those important words “Australia”, and not “China”. So proud to see what this great country was capable of producing, and still is. It’ just that greed for the highest possible profit has killed manufacturing in this country. Makes me sick in the stomach the dependence this country now has on China.

Anyone else see what’s missing from the new wheel cylinder and feel the same way as I?

It’s a real shame that Barry from Bairnsdale didn’t have a hand in manufacturing these!

Diff all assembled and under the car. Man what a good feeling to see it coming together. I’m looking forward to rolling it out in the sunlight to get a good look at it.

It’s starting to look like a car instead of a bare painted shell!

Had to throw the wheels on and see how it looks. It’s still up on the jacks so everything is hanging down and drooping..

Next steps, put in rear springs (was missing the top bolt), put in shocks, finishing assembling the rear brakes, connect up the hand brake. I have a set of Koni adjustable shocks for the rear which is nice. Will just throw in the standard springs and my shock for now. Once the car is all together and motor and box in can then workout if the springs have to go up or down in height. Will also paint the shocks dark green.
Need to then fit the steering column, straighten up the front wheels as best as possible then I will be able to drop it off the axle stands and have it rolling. I will then be able to move it over in my shed so I can get cracking on assembling the doors. Happy days are days in the shed!
#139
Ice
-

- Members
-
- 15,126 posts
Cool
- Name:Gene
- Location:Galaxy's away from Ipswich
- Car:77 HZ Sandman Van
- Joined: 03-January 07
Posted 30 October 2015 - 02:40 PM
Very nice Steve your doing a grand job love the colour by the way
#140
_LS2 Hatch_
_LS2 Hatch_
-
- Guests
Posted 03 November 2015 - 08:47 PM
Just read your thread. Car coming along very very nicely.
Unfortunately Macka had to move his Mediterranean Blue LC on. I was lucky enough to be able to purchase the car.
Needless to say I am very interested in this build.
Can't wait to see it in the flesh and parking the two side by side
Unfortunately Macka had to move his Mediterranean Blue LC on. I was lucky enough to be able to purchase the car.
Needless to say I am very interested in this build.
Can't wait to see it in the flesh and parking the two side by side
#141
RallyRed
-
- Members
-
- 7,843 posts
Oh My, Don't you post alot
- Name:Col
- Location:NSW
- Car:LC GTR etc
- Joined: 02-October 11
Posted 04 November 2015 - 07:16 AM
Great update.
Looking really nice.
Looking really nice.
#142
Potta
-

- Members
-
- 6,026 posts
Oh My, Don't you post alot
- Name:Craig
- Location:Gozzy, WA
- Car:LC GTR, LC 4 door
- Joined: 01-May 09
Posted 07 November 2015 - 12:24 AM
The car looks awesome, look forward to the next update.
I feel your pain with those bump stops, I had to do my front ones which are meant to be easier but they were still a hassle.
Rubber grease, some well directed brute force and a wide blade screwdriver did the job for me too.
But when your fingers feel like they are going to fall off and your thumbs can't grip anymore and the bump stop finally slips in you can't help but wonder why the hell couldn't you do that half an hour ago?
#143
ljv8
-
- Members
-
- 299 posts
Forum Fan
- Name:Steve
- Location:Vic
- Car:LC GTR
- Joined: 17-May 09
Posted 09 November 2015 - 07:53 AM
Thanks guy's for the positive feedback really appreciate it!
Congrats Grant you scored yourself a beautiful car well done mate. Yes when mines on the road a catchup will be great, and will be nice to get some photo's side by side. They are both blue LC GTR's but also unique in their own ways.
Hey Potta yeah you hit the nail on the head with the bump stops. Frustrating but once they are in didn't seem that hard when the last attempt worked!
Have made some good progress since my last update, rear brakes done, handbrake cable connected, springs and shocks in, steering column in, front wheels (kind of) straight, 4 wheels bolted on. Ready to drop it off the stands in a couple of days, just need to put in the handbrake cable clips under the body (once I find them) and the boots that lead to the interior and bolt up the handbrake assembly. Then it's on the ground for now.
Started assembling the right hand door, both handle's on, lock in, regulator in, so getting there.
Will post a detailed update soon with pics and some issues I had.
Steve.
#144
ljv8
-
- Members
-
- 299 posts
Forum Fan
- Name:Steve
- Location:Vic
- Car:LC GTR
- Joined: 17-May 09
Posted 13 November 2015 - 08:53 AM
Update #30
Bolted up the springs and shocks. Was missing the top spring bolts so estimated the length required and picked up a few sets from the bolt shop. I noticed the top metal dust cover sleeves on my rear Koni’s have been cut off, just leaving the top cap. I am guessing the previous owner did this to clear the bulbous McCreary G60’s he was fitting. Bit of a shame but don’t think it will affect the function, considering the front shocks have no dust cover sleeves.
Finished assembling the rear brakes. Thought I might have purchased the wrong cylinders as the pistons arms are large and flat, while one of my spare diffs had the thin piston arms with the prongs. But after scanning through gmh-torana.com.au found a number of good previous discussions that confirm the prong type wheel cylinders were for a corresponding front drum braked car, not a disk braked car. Rear wheel cylinders for front disk / rear drum brakes are part number P5573G. Rear brake shoes are part number BS1132, so all good. Rear brakes all together, dug out my old hand brake cables. Were in pretty good condition, needed some straightening, then cleaned them up and painted them. Connected them to the drums, put in the s bend clips to hold the cables to the body brackets. Fitted a new set of boots that lead to the trans tunnel, and bolted in the hand brake mechanism. All baby steps but getting there!

With a bit of patience and climbing in and out of the engine bay (from underneath) got the steering coupling and steering column bolted in. Was doing it on my own so had to hold the bolts in the cabin with heavy vice grips, while climbing underneath and fitting the washers and nuts. Also put the GTR wheel on. Forgot how skinny these things are, would have liked a thicker wheel but nothing else looks right inside a GTR, apart from the Corvette wheel I guess which is slightly thicker. I don’t mind the mooneyes wheel if I can fit it to the GTR boss and if the horn button can attach. http://www.mooneyesu...t-p/gs270pw.htm Will leave it orig for now, but have to do some research, unless I get used to the skinny wheel.


Tried on a set of center caps that were actually cut from damaged HK GTS hubcaps many, many years ago. Because I probably won’t run the chrome trim rings, looks a bit more aggressive without them, and was thinking to get the center caps in black as per the LC XU1. I think black on black will look better than all black wheels with the red center caps. Everyone else in the family said red is the way to go. Not sure yet, roughly painted one black to see how it looks.
Do I go GTR Red?

Or XU1 Black?

Attention has turned to assembling the left hand door. Purchased a full set of locks from rares. Meant to be for LC, and while the lock body is identical the lever arms are definitely not. Luckily I had a set of locks on my spare doors that I could take the lever arms from, or would have been a bit confused trying to fit these.

Of course the lock body won’t go into the door cavity because of the layers of paint. Very careful filing to not chip the paint and finally got the lock in. External door handle was easy enough.

Connected up the door check straps, and fit new springs. Again referred to this site and found a few good links on which way they should be assembled. Don’t know how I would get by without this site, everyone's valuable input and knowledge sharing certainly helps keep the dream alive. Made a rookie mistake though, didn’t have any clevis pins on hand for the door to body connection and put in a bolt and nut that was a touch too long. Door wouldn’t fully close, and took a few minutes to work out why. Pulled springs off and checked again without the spring, still no go, wtf. Had a Doh! moment when I checked the bolt length and cavity recess size. Shorter bolt (for now) so when closed it fits inside the recess and all good.

Door catch assembly in, and door lock mechanism in. Internal handle mechanism and connecting rod in. Snib rod in. Window regulator in. Good progress, but have noticed one key difference before I could proceed. The front corner of the window frame where the ¼ vent sits is missing the little metal triangle fill plate on the left door. The strange thing is this is riveted on and the previous owner removed it for some reason and of course wasn’t with the car. The drivers side one is present. What is even stranger is that in all the years I owned the shell I never noticed it. Looked through my old photo’s and I can see the left hand side never had it before it went to the panel shop. It even went through the panel shop, and got painted and the guy’s didn’t notice it either. I only noticed it when I was dummy fitting the ¼ glass and noticed the gap. Luckily I have spare doors from my old J, so drilled out the rivet and in the process of cleaning it up and painting it for fitting.

Hello little triangle!

Where are you little triangle?

Luckily had my old doors to pilfer or would have been frocked.

Next little challenge. I purchased a full set of new glass. I have to take the metal guides for the regulator off the old windows and put them on my new glass. Looks like they were wedged in with a rubber seal that’s gone hard and won’t budge. Tried gently tapping them off but was getting a bit late at night to hammer in a tin shed in suburbia. Might have to heat gun it a little to soften the rubber, then belt them with a piece of timber and hammer. Not sure how I’m going to secure them in the new glass. I’m thinking maybe a strip of bike tube rubber and sikaflex. Not visible so doesn’t have to be pretty just functional and secure.

I have had the majority of these parts kicking around my shed for 17 years, seats, doors, engines, gear boxes, diffs, suspension, boxes and boxes of stuff. They have survived moving house, and being shoved and dragged from shed to shed. They also survived the numerous comments, like “oh you will never use this stuff again, just throw it out”, and “are you still into this car thing I thought you grew out of it”! To all the non believers “middle finger up” It’s pretty exciting to finally see them leave their resting places and going back on a Torana.
It’s pretty exciting to finally see them leave their resting places and going back on a Torana. Next steps: fit left hand glass, drop it in door frame, install ¼ vent then add baily channels, and weather stripping, and then put the window on the regulator. Then she’s hitting the deck so I can assemble the right hand door. Should be much easier once I have finished the left and worked out all the tricks and traps.
#145
Potta
-
- Members
-
- 6,026 posts
Oh My, Don't you post alot
- Name:Craig
- Location:Gozzy, WA
- Car:LC GTR, LC 4 door
- Joined: 01-May 09
Posted 15 November 2015 - 12:54 AM
i would go the red centre caps, but the black ones look good too.
#146
_LS2 Hatch_
_LS2 Hatch_
-
- Guests
Posted 15 November 2015 - 06:43 AM
On the centre caps, I can't decide, need more time.
Black looks good, but the red does break it up.
Can you get a photo of both in the one photo.
This is a hard decision. Good thing is I don't think there will be a wrong one
Black looks good, but the red does break it up.
Can you get a photo of both in the one photo.
This is a hard decision. Good thing is I don't think there will be a wrong one
#147
nstood
-
- Members
-
- 92 posts
Forum Member
- Name:Neil Stoodley
- Location:Buderim
- Car:1970 LC GTR Verdoro Green
- Joined: 29-November 12
Posted 15 November 2015 - 07:48 AM
Do you have any concerns with the 70amp alternator? After speaking with a guy that had an amp guage failure I am worried about my 55amp. Apparently the guage is only rated to 40amp so over time may eventually succumb to the high currents delivered by new alternators . Not trying to scare or anything but ...
#148
ljv8
-
- Members
-
- 299 posts
Forum Fan
- Name:Steve
- Location:Vic
- Car:LC GTR
- Joined: 17-May 09
Posted 16 November 2015 - 07:02 AM
Hey guy's thanks for the input yeah it's a hard choice, think I'm swaying toward the red but haven't decided yet. Will roll the car out in the sunlight soon and get a good side on shot.
Nstood, nah not worried I don't have the original GTR wiring loom, and won't be running the amp gauge. I'm probably going to just run an aftermarket volt gauge in the GTR dash instead. I did read a few posts in regards to that when I was researching which alternator to buy but didn't worry about it too much as didn't plan to use the amp gauge.
#149
ljv8
-
- Members
-
- 299 posts
Forum Fan
- Name:Steve
- Location:Vic
- Car:LC GTR
- Joined: 17-May 09
Posted 07 January 2016 - 09:07 AM
Update #31
I have made some pretty good progress since the last update.
Removed regulator rails from the bottom of the old windows, by using a solid piece of timber, and a sharp whack with a mallet. Came out pretty easily when targeting a corner. The old rubbers didn’t come off cleanly but didn’t matter.
First attempt to fit the new door glass was a total failure. I thought I would use bike tube rubber with some silastic. Seemed secure enough but with the new glass and new bailey channels it was a tight fit, and the window just peeled off the regulator, doh! When I put the door together I found the windows were mega tight. Wouldn’t go any higher than halfway. Found a link on this site in regards to punching out the holes for the rivets in the ¼ vent frame, so fixed that up. Also found the top of the ¼ vent frame was pulled out when it was removed and didn’t align too well with the top of the door frame and had to be hammered back into place. This also made more space for the glass to slide up and down.
Second attempt at the regulator rails was a total success. Used Sikaflex 227 with no rubber. Basically marked the glass where it needs to locate in the rail, filled the rail with Sikaflex, slid the glass in, removed a little of the excess and left it to dry for a couple of days. I did this with the regulator bolted in place and the glass loosely in place with the ¼ vent frame removed.
Once dried re-assembled the door, put bailey channels back in and glued where required. Window was still tight but much better than before. Kept working it and spraying the channels with silicone spray. Got it to a point where it goes up and down firmly but won’t break anything. Did the same thing on the left hand door.
Then I grabbed a seat belt & seat rail bolt, and worked all the seat belt bolt and seat frame bolt holes as they were full of deadener & paint. Didn’t want the carpet put down then discover a dodgy bolt hole. There were a couple blocked up so cleaned them out and all good for final assembly.
In preparation for sending the car to the trimmer, the next step was to put in the rear and main body wiring harness that goes up the right hand quarter and under the carpet. I have a old butchered LJ wiring harness, and a semi butchered LC wiring harness. Someone had cut the interior light wire probably because it was too hard to get out, so had to join and solder one from the LJ harness. Also there was one melted wire in the harness that runs along the floor, that had to be repaired. So cut the good wire from my old LJ harness and soldered and heat shrinked it in. Taped it all up with loom tape. Even though I had to make repairs I was able to retain all the correct wire colors which I was happy about.
Torana left my garage for the first time in two years to get the roof lining done, carpet fitted, rear seat customised for the tubs, and windows fitted.
After dropping off my seats and seeing them lying on the floor the penny dropped and we realised I had two front left hand seat backs. WTF. It was really strange because these seats were off my old LJ but it had been nearly 20 years since I had that car, so my dodgy mods were long forgotten. Also one had the holes and plastic inserts for a headrest and one didn’t. Went through some very old photos late in my LJ’s life and it all started to come back to me. I ran my LJ without headrests and had some crappy sheepskin seat covers on them. Then remembered I had a crack in the RH rear back seat frame. I got one from the wreckers off a LC which was a left hand one. I put my black vinyl cover on it and left the headrest off. I mounted it on my RH seat base. I must have thrown out my broken RH seat back. I now remember the drivers side seat pivoting the wrong way and pivoted out of the door opening. Back in the day with junior wages we made do with what we had! Couldn’t leave it like that and pay good money on a retrim on two left hand seats. So a bit of a hunt and a friend helped me locate a RH seat back. Life saver and work can continue.
Headlining was made up and installed. Found all my screws for the side pop-out windows, sun visors, mirror, interior light, etc.

Underfelt and carpet is fitted. Rear door/panel cards, scuff plates, rear parcel shelf, and front kick panels are all fitted.
Front and rear windows have been fitted. Also the window fitter put the rear pop out windows into the frames for me, and did a nice job. First time I have ever seen glass on my car!


My original doors had the orange vinyl that is material backed to keep water from splashing on the door cards. One was a bit butchered and the other was ripped. I wanted to put it back on considering how much these door cards hurt the back pocket, don’t want them with even the slightest bit of water damage. The missus went to spotlight and found a comparable material. It was black with the material backing, and is only very slightly thicker than the original material.
Cut it to size using the original as a template.

Fitted it to the doors by using the trim clip plastic holders and some gasket glue in roughly the same locations as the original plastic. Worked out pretty good and happy with the result. If they need to be peeled off for maintenance the gasket glue will give up it’s bond pretty easily.

Started to finalise the RH door by fitting the Dash Original supplied door cards. Geez, lining up the door card retainer clips to the holes in the door was a pain. Also I’m missing the stainless top retainer rails which doesn’t help. My doors are not original they were off a LJ so the originals must have been rusted out. Got all the clips lined up, put on the door opener and window winder handle. Fitted the door pull to handle, put on the lock snib, and found that the door card hole didn’t align with the door lock snib hole. Bugger. Can’t move the trim enough for it to line up so need to open up the hole in the door, so it has to come back off. Also now could not shut the door because the carpet on the door card is thick and preventing the door from shutting. Just when I thought I was done with the RH door. Some butchering and adjustment needed.

Had a look at the LH door and lined up the clips. Also found that this door the lock snib hole does not line up. Cleaned up the vinyl around the ferrule, but didn’t help. Possibly the fiberglass top holes are slightly out or Dash Original mounted them slightly out. It’s only about 3 or 4mm out on both sides, but there is not a lot of tolerance built in to the door snib hole. It needs to align perfectly. The window winder and door opener handles line up perfectly and the door trim is center on the door. Will have to take the door cards off and open the door holes up with a dremel or file. Damn these doors, have spent so many hours working on these doors, they have fought me all the way. So over it!
Removed the dodgy screw and bolt and put in a clevis pin in the door retaining strap. Was able to find some the correct thickness, just had to cut them down and re-drill the split pin hole. Put a washer top and bottom and looks and works better than a screw and bolt.

My seats are now done. The back seat had to be customised to fit around the tubs. My only requirement was to look original as possible while hiding the tubs so they are not visible internally. The tubs did protrude a fair bit and the seat frame had to be heavily modified to sit over them. The back seat was never going to look 100% perfectly original with the modifications done to my car, but I’m really happy with the end result. We started out with a LJ S two door back seat and it’s been turned into a GTR seat with the rear humps. Surprisingly I can sit in the back and my head just touches the roof lining and I’m 185cm. It’s not the most comfortable, you can just feel the tubs at your back through the foam, but for the kids or short arses it’s fine.


Front seats were also not original GTR seats but with the correct padding, and pinning in all the right places they look pretty good.
In the photos below front seats are not bolted in, just dummied in to see how they look. I forgot how small and cramped LC’s are! How the hell did I drive these cars I always hated my Torana LJ S seats back in the day, they were never comfortable as they were old and pretty knackered. I always wanted good aftermarket seats like Recaro’s or something but in my opinion no aftermarket seat looks good in an LC. They are either too tall, or too wide. I was really surprised how comfortable my new front seats now that they are fully refurbished. They are not Recaro’s but far more comfortable than my original seats. Can’t wait to drive this thing!
I always hated my Torana LJ S seats back in the day, they were never comfortable as they were old and pretty knackered. I always wanted good aftermarket seats like Recaro’s or something but in my opinion no aftermarket seat looks good in an LC. They are either too tall, or too wide. I was really surprised how comfortable my new front seats now that they are fully refurbished. They are not Recaro’s but far more comfortable than my original seats. Can’t wait to drive this thing!

Spent another big chunk of money at Rares for all the finishing items. Ended up going for the red GTR wheel center caps and trim rings. My little boy didn’t like my idea of the black caps and no trim rings, it had to be more bling. Got bumpers, engine mounts, door mirror, stainless body mouldings, front indicators, rear brake hoses, etc, etc, etc. Oh my poor bank balance.. Bread and water for the next month.
Put boot seal on but the damn thing doesn't close and doesn't even look like wanting to close. Can someone please let me know if I have put the seal on backwards before I start adjusting the catch. Read a few posts on this site and seems to be a common problem with the aftermarket boot seal but just wondering if I have it the wrong way around. The instructions Rares provided are a little confusing.


Next steps: fit seat belts, clean paint and fit front seat rails, finish entire wiring harness. Need to modify my LC wiring harness for my GTR dash, and the constant 12v mod for electronic ignition. I’m also toying with the idea of putting in some hidden speakers and a hidden small amp so I can listen to some tunes using an iPod or iPhone, so will incorporate the wiring for that. Once that’s done will probably focus on brake lines, and fuel lines then the motor is going in.
#150
Potta
-
- Members
-
- 6,026 posts
Oh My, Don't you post alot
- Name:Craig
- Location:Gozzy, WA
- Car:LC GTR, LC 4 door
- Joined: 01-May 09
Posted 07 January 2016 - 12:36 PM
That interior looks awesome.


Also tagged with one or more of these keywords: Stevo, LC GTR, Phantom Grey, Tate, GTR
Holden Tech →
Electrical →
LC rear indicator screwsStarted by dacastle , 06 Apr 2024 |
|

|
||
Holden Tech →
General Questions and Help →
TaillightsStarted by dacastle , 01 Apr 2024 |
|
|
||
Holden Tech →
Engine →
accelerator holesStarted by dacastle , 07 Dec 2022 |
|

|
||
Holden Tech →
Engine →
2600N engineStarted by stealthxu1 , 28 Jul 2021 |
|

|
||
Members Area →
Members Projects & Plans →
The Sally ReportStarted by _The Handbrake_ , 23 Jun 2019 |
|
|
1 user(s) are reading this topic
0 members, 1 guests, 0 anonymous users

