
Thanks Graham, I have been looking at the Parts Cloner tank on ebay for a while now with all the accessories. It's definitely priced well.

LJ Sedan
Started by
stevemc32
, Jan 13 2013 09:07 PM
388 replies to this topic
#76

stevemc32
-
- Members
-

- 324 posts
Forum Fan
- Name:Steve
- Location:Sydney
- Car:LJ 4 Door
- Joined: 14-September 12
Posted 16 October 2013 - 08:25 AM
#77
madtoranajzedded
-
- Members
-
- 2,893 posts
Sir ask alot
- Name:Maz
- Location:Southern Tasmania
- Car:72 LJ SL SEDAN.
- Joined: 30-September 13
Posted 21 October 2013 - 11:29 AM
u seen RLC355s tank setup.way to go 
#78
stevemc32
-
- Members
-
- 324 posts
Forum Fan
- Name:Steve
- Location:Sydney
- Car:LJ 4 Door
- Joined: 14-September 12
Posted 22 October 2013 - 09:45 AM
u seen RLC355s tank setup.way to go
Definitely a good job done on that one, an inspirational build for sure.
I'm once again leaning towards cutting a hole in the side of the tank and using a bosch pump hanger from a fairlane that I picked up recently. It has both inlet and outlet pipes as well as the pump electrical terminals included in the top plate and a good solid mounting arm for the pump. I was a bit concerned that the weight of the pump might be a bit much for the inlet pipe on the original sender unit. Cutting the side hole would also allow me to add a small swirl pot into the tank.
Now who knows anything about grinding welding or plasma cutting old fuel tanks? It's been empty and open for a least a few months that I've owned it and since I bought it on ebay from someone's parts collection it's probably been in that condition for years. Should I give it a wash out with anything in particular prior to getting near it with spark or flame?
#79
madtoranajzedded
-
- Members
-
- 2,893 posts
Sir ask alot
- Name:Maz
- Location:Southern Tasmania
- Car:72 LJ SL SEDAN.
- Joined: 30-September 13
Posted 22 October 2013 - 02:00 PM
Definitely a good job done on that one, an inspirational build for sure.
I'm once again leaning towards cutting a hole in the side of the tank and using a bosch pump hanger from a fairlane that I picked up recently. It has both inlet and outlet pipes as well as the pump electrical terminals included in the top plate and a good solid mounting arm for the pump. I was a bit concerned that the weight of the pump might be a bit much for the inlet pipe on the original sender unit. Cutting the side hole would also allow me to add a small swirl pot into the tank.
Now who knows anything about grinding welding or plasma cutting old fuel tanks? It's been empty and open for a least a few months that I've owned it and since I bought it on ebay from someone's parts collection it's probably been in that condition for years. Should I give it a wash out with anything in particular prior to getting near it with spark or flame?
i think they degas them with exhaust fumes,check out degassing tanks
#80
gad05
-
- Members
-
- 421 posts
Forum Fan
- Name:Graham
- Location:Brisbane
- Car:73 lj 2 door , 74 lj sedan.
- Joined: 11-January 09
Posted 23 October 2013 - 09:54 PM
Steve did you have to do any floor pan mods to fit that w58 box in ?
Cheers Graham.
Cheers Graham.
#81
stevemc32
-
- Members
-
- 324 posts
Forum Fan
- Name:Steve
- Location:Sydney
- Car:LJ 4 Door
- Joined: 14-September 12
Posted 24 October 2013 - 05:22 PM
Thanks Jason, I've done a bit of research on tank welding and I think I'm going to try sticking to just cutting it for now with a drill and hole cutter. I should be able to do this safely with it filled with water.
No floor mods at all Graham, just cut out the hole for the shifter.
I did think that I might have needed to do some tunnel bashing when I tried to get the box bolted up to the engine on my own as I couldn't get it lined up. An extra set of hands and a very slight twisting of the gearbox before mating it up got it together without any mods.
#82
gad05
-
- Members
-
- 421 posts
Forum Fan
- Name:Graham
- Location:Brisbane
- Car:73 lj 2 door , 74 lj sedan.
- Joined: 11-January 09
Posted 25 October 2013 - 09:39 AM
That's good to hear Steve.
How's clutch pedal feel with you're cable setup,what cable did you use?
Graham .
How's clutch pedal feel with you're cable setup,what cable did you use?
Graham .
#83
stevemc32
-
- Members
-
- 324 posts
Forum Fan
- Name:Steve
- Location:Sydney
- Car:LJ 4 Door
- Joined: 14-September 12
Posted 25 October 2013 - 02:37 PM
The clutch feels fine, I wouldn't say it's anything like the wife's Corolla but probably pretty similar to a VS Commodore I used to own.
The cable is a HZ/WB 6cyl Pull Type cable no. CC111, they're just over $50 from Rare Spares or might be cheaper if you buy it direct from Flex Drive. I had it shortened to 400mm between stops with 75mm travel and it came up good. If I need to get out of trouble the standard length cable will also work fine in the system.
#84
gad05
-
- Members
-
- 421 posts
Forum Fan
- Name:Graham
- Location:Brisbane
- Car:73 lj 2 door , 74 lj sedan.
- Joined: 11-January 09
Posted 25 October 2013 - 11:01 PM
Thanks for the info Steve, really helpful.
Do you have the dimensions for the firewall bush you used ?
I have a lathe at work could make one up I think.
Do you have the dimensions for the firewall bush you used ?
I have a lathe at work could make one up I think.
#85
stevemc32
-
- Members
-
- 324 posts
Forum Fan
- Name:Steve
- Location:Sydney
- Car:LJ 4 Door
- Joined: 14-September 12
Posted 27 October 2013 - 08:22 PM
The rubber bung I pulled out of the clutch rod hole was 3/4 inch diameter so that was the outside dimension I used for the main section of the firewall bush. It could probably have been just a little bigger but didn't cause any issues. The lip around the bottom is about 1mm all around so probably about 21mm diameter and that lipped section is 5mm long. The whole thing was about 45 - 50mm long but I did end up cutting it down in length before welding it in. I'll see if I can get a photo of it cut down. I'm not sure of the inside dimension, we had the cable with us at the time and just machined it out until the cable was a nice snug fit.
#86
gad05
-
- Members
-
- 421 posts
Forum Fan
- Name:Graham
- Location:Brisbane
- Car:73 lj 2 door , 74 lj sedan.
- Joined: 11-January 09
Posted 27 October 2013 - 10:15 PM
Thanks Steve .
#87
stevemc32
-
- Members
-
- 324 posts
Forum Fan
- Name:Steve
- Location:Sydney
- Car:LJ 4 Door
- Joined: 14-September 12
Posted 30 October 2013 - 09:35 AM
Here's a photo of the firewall collet cut down and welded in. It's just tacked in at the moment and I'll finish it off when I strip the body. It seems to be working well but I haven't put any real driving to it yet. If you need any further info or photos of the clutch conversion Graham, feel free to ask.
 1dscn1874.jpg 141.93K
9 downloads
1dscn1874.jpg 141.93K
9 downloads
I finally got the instrument install finished off with the fitting of a high beam indicator onto the speedo and the check engine light in the lower part of the dash panel.
1dscn1884.jpg 137.77K
12 downloads
1dscn1886.jpg 144.99K
10 downloads
I think I'll need to dim down the high beam indicator as it's pretty bloody bright at the moment and would most likely be blinding in the night time...
1dscn1887.jpg 140.22K
10 downloads
I'm also missing one of the lower dash mounting clips as shown in this photo below. If anyone has a reasonably priced replacement I'd be happy to hear from you.
1dscn1879.jpg 68.41K
14 downloads
Next up is making up some rings to mount the in-tank fuel pump hanger and working up the courage to start the modifications on the spare tank...
#88
gad05
-
- Members
-
- 421 posts
Forum Fan
- Name:Graham
- Location:Brisbane
- Car:73 lj 2 door , 74 lj sedan.
- Joined: 11-January 09
Posted 31 October 2013 - 09:33 AM
Gauges look great Steve,is you're speedo electronic or cable?
Cheers Graham.
Cheers Graham.
#89
madtoranajzedded
-
- Members
-
- 2,893 posts
Sir ask alot
- Name:Maz
- Location:Southern Tasmania
- Car:72 LJ SL SEDAN.
- Joined: 30-September 13
Posted 31 October 2013 - 01:55 PM
have you got these on ya da
ljzedded 031.jpg 561.93K
12 downloadssh steve,i think im missin what your missing
#90
stevemc32
-
- Members
-
- 324 posts
Forum Fan
- Name:Steve
- Location:Sydney
- Car:LJ 4 Door
- Joined: 14-September 12
Posted 01 November 2013 - 06:04 PM
Graham, the speedo is electronic. The W58 box I got already had a VSS and I needed this for the EFI so it was easiest just to fit an electronic speedo as well.
Jase, that clip comes off one of the earlier dash panels that doesn't have the two screw holes in the bottom. My LC had a dash with clips like that one. I'm pretty sure the clip in my picture replaced the one you're holding.
#91
madtoranajzedded
-
- Members
-
- 2,893 posts
Sir ask alot
- Name:Maz
- Location:Southern Tasmania
- Car:72 LJ SL SEDAN.
- Joined: 30-September 13
Posted 01 November 2013 - 06:51 PM
Graham, the speedo is electronic. The W58 box I got already had a VSS and I needed this for the EFI so it was easiest just to fit an electronic speedo as well.
Jase, that clip comes off one of the earlier dash panels that doesn't have the two screw holes in the bottom. My LC had a dash with clips like that one. I'm pretty sure the clip in my picture replaced the one you're holding.
i got a 72 dash steve with the holes at bottom,cant remember whether they were on it lol,they even look too short to screw onto the metal bit of the back of the dash,i think they might just sit in the lower dash mount then put the dash in,u got half a big toe nail missin,u been biting steve.
#92
stevemc32
-
- Members
-
- 324 posts
Forum Fan
- Name:Steve
- Location:Sydney
- Car:LJ 4 Door
- Joined: 14-September 12
Posted 02 November 2013 - 08:47 AM
Dropped a wheelbarrow full of concrete on the big toe about 15 years ago, really need to get the other half of the nail removed but I'm too lazy...
Here's some photos from my collection of dash parts.
The first one is from my late '69 LC S and shows no holes in the bottom of the plastic dash and the mounting clips attached to the backing plate. Ignore the date on the backing plate as it's been replaced.
1dscn1891.jpg 138.27K
6 downloads
This second one is from my late 72 LJ S and shows the locating lug with a hole right through to the front of the panel to screw into the clips mounted on the car body as in the one that I'm missing.
1dscn1892.jpg 143.98K
7 downloads
I have no idea on the date for this third one, it came with a 10/73 backing plate but doesn't have the upper brake light position. It has the locating lug but there is no screw hole through the lug to the front of the panel so I'm not sure whether it would have used either of the clips we've seen...
1dscn1894.jpg 149.4K
6 downloads
#93
madtoranajzedded
-
- Members
-
- 2,893 posts
Sir ask alot
- Name:Maz
- Location:Southern Tasmania
- Car:72 LJ SL SEDAN.
- Joined: 30-September 13
Posted 02 November 2013 - 01:32 PM
shit,that would of tickled,thanks for that steve,gotta get another dash fascia,mine got a couple cracks in temp surround,and another in amps,you gettin
close to wiring the big job up?
#94
stevemc32
-
- Members
-
- 324 posts
Forum Fan
- Name:Steve
- Location:Sydney
- Car:LJ 4 Door
- Joined: 14-September 12
Posted 02 November 2013 - 07:53 PM
That GTR dash fascia in the last picture is all smashed up on the left hand side so I had to find another one also. Took a while but finally scored the one I've used on ebay for $70 and it worked out well with the extra light position for the check engine light.
The re-wiring for the Delco has only got as far as laying out the Commodore engine loom in the shed and getting rid of things that weren't needed. I tend to only work on one thing at a time so the fuel pump situation is copping all of my limited attention at this stage. Pretty confident I can get a good result on the tank but it'll be a while before I can move on...
#95
stevemc32
-
- Members
-
- 324 posts
Forum Fan
- Name:Steve
- Location:Sydney
- Car:LJ 4 Door
- Joined: 14-September 12
Posted 07 November 2013 - 03:10 PM
Collected some steel for the fuel tank modifications the other day so thought I should get into it. I had originally planned to ask a friend to make up a couple of rings for use in mounting the fuel pump hanger so I drew up a diagram of what I was after.
1fuel rings.jpg 73.93K
8 downloads
I then decided I might as well give it a go myself and I'm certain there's got to be an easier and more accurate way of making these but it looks like it worked out in the end. First up I cut a square each from the 3mm and 2mm plates. I wanted to ensure that the screw holes were properly aligned so I tacked the plates together on the corners, marked it up and drilled out a set of pilot holes.
1dscn1901.jpg 147.01K
6 downloads
The plates were then split and the cheap arse ebay plasma cutter was used with a really rough wooden jig to cut out the circles. This is my first attempt at plasma cutting so the results are pretty woeful but I think it should be functional in the end.
1dscn1904.jpg 144.8K
6 downloads
Here's the final result. They're pretty rough but I should be able to clean them up to a respectable finish. They'll be fairly well hidden when finally fitted up anyway.
The thinner ring was originally planned to go inside the tank but I've changed my mind and this will be welded to the outside of the tank and fitted with sealed rivnuts through that ring and the tank wall.
1dscn1907.jpg 146.01K
6 downloads
1dscn1908.jpg 142.59K
6 downloads
The pump hanger rubber seal will sit on the outside of the tank wall within the thinner ring and the thicker ring will clamp down the top of the hanger onto the seal. Hope it works!
I did manage to start a couple of fires during the process and one even required the first use ever of the shed fire extinguisher.
Still waiting on my 120mm hole saw to cut the tank.
#96
orangeLJ
-

- Members
-
- 10,261 posts
Yes, yes I do post alot!
- Joined: 02-May 06
Posted 08 November 2013 - 08:08 AM
so slapping the fire with your thong didn't work?
#97
stevemc32
-
- Members
-
- 324 posts
Forum Fan
- Name:Steve
- Location:Sydney
- Car:LJ 4 Door
- Joined: 14-September 12
Posted 08 November 2013 - 08:38 AM
Yeah, the boot made short work of the first fire but the second one snuck up on me from behind and had taken hold by the time I caught on. It had also started to melt an external powerpoint on the shed wall that my grinder was plugged into so it did get the heart rate up a little...
#98
stevemc32
-
- Members
-
- 324 posts
Forum Fan
- Name:Steve
- Location:Sydney
- Car:LJ 4 Door
- Joined: 14-September 12
Posted 24 November 2013 - 09:05 PM
So I've made zero progress waiting for a Chinese 120mm hole saw from ebay to turn up for the tank mods and I started to get bored...
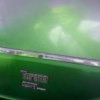
I'd been considering for a while, throwing the 12 port head onto the 173 block to get the injection going and today decided that was the way to go. The 3.3 engine is an unknown at this stage and the 173 bottom end is operational so the head swap shouldn't cause too many issues. I still think my throttle body orientation is going to cause some heartache but can't really be sure until it's into the car.
Off came the 12 port head and here's how it looks.
1dscn1914.jpg 149.96K
11 downloads
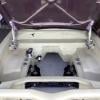
The pistons were in very good shape from what I can see, I haven't played car engines for about 20 years though, so I could be wrong.
1dscn1909.jpg 123.89K
9 downloads
From the very limited Google response it seems like the ra3301x pistons are a very low compression unleaded fuel conversion model. I'm disappointed that they're already out to 60 thou but there's still significant hone marks on the bores so I don't think it had done a lot of work since the last rebuild.
My knowledge on the unleaded fuel conversion is severely lacking, though I believe it involves new valve seats. Is this the only thing that is needed and if so is there any easy way to tell if it has already been done on the 12 port head?
Another question, when I swap the head, I know I should swap the pushrods over as well but do the lifters also need to be changed over or will the new pushrods be happy to meet the old 173 lifters?
#99
rodomo
-

- Members
-
- 18,060 posts
To advertise here, call 13TORANA
- Name:R - O - B Dammit!
- Location:Way out west of Melbourne Awstraylya
- Joined: 10-December 05
Posted 24 November 2013 - 09:13 PM
Possibly miss-firing on No.1 cyl looking at that head too? 
#100
stevemc32
-
- Members
-
- 324 posts
Forum Fan
- Name:Steve
- Location:Sydney
- Car:LJ 4 Door
- Joined: 14-September 12
Posted 24 November 2013 - 09:27 PM
Yeah, it's certainly the odd one out. Now could this be an issue with the head itself (mechanically) or is it most likely an electrical or fuel delivery issue?
Edited by stevemc32, 24 November 2013 - 09:28 PM.


0 user(s) are reading this topic
0 members, 0 guests, 0 anonymous users

