
Nice work with the rust repairs, looking good!!
 1 votes
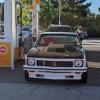
Christo's 76 LX Hatchback Build
Started by
christolx
, Dec 27 2015 09:25 PM
231 replies to this topic
#26

Racehatch
-
- Members
-

- 1,028 posts
Forum Fixture
- Location:Adelaide
- Joined: 07-November 05
Posted 16 January 2016 - 12:12 PM
#27
christolx
-
- Members
-
- 184 posts
Forum Member
- Name:Chris
- Location:Perth WA
- Car:1976 LX SL Coupe
- Joined: 05-December 14
Posted 19 January 2016 - 11:24 PM
Thanks mate! Hopefully they tackle the big stuff soon!
Thanks mate! Hopefully they tackle the big stuff soon!
Thanks mate! Hopefully they tackle the big stuff soon!
#28
christolx
-
- Members
-
- 184 posts
Forum Member
- Name:Chris
- Location:Perth WA
- Car:1976 LX SL Coupe
- Joined: 05-December 14
Posted 30 January 2016 - 07:45 PM
Just a quick walk around of the car blasted & etch primed before any of the rust repairs started.
#29
Gump
-

- Members
-
- 1,146 posts
Paisty White
- Name:Russell
- Location:Bridgetown WA
- Car:LX SL hatch
- Joined: 15-November 05
Posted 03 February 2016 - 10:48 PM
Good to see another WA hatch saved
#30
christolx
-
- Members
-
- 184 posts
Forum Member
- Name:Chris
- Location:Perth WA
- Car:1976 LX SL Coupe
- Joined: 05-December 14
Posted 06 February 2016 - 09:17 PM
Progress has been fairly slow, but they have started on repairs to the rear end.
They made up a new rear beaver panel section and welded in the Rare Spares quarter panels and also decided to cut the lower section under the tail light bucket out, in order to fit the new buckets in. That way they can spot weld the panel just like it came from factory instead of welding a seam or welding it over the top of the bottom panel.
#31
christolx
-
- Members
-
- 184 posts
Forum Member
- Name:Chris
- Location:Perth WA
- Car:1976 LX SL Coupe
- Joined: 05-December 14
Posted 06 February 2016 - 09:23 PM
2 piece patch panel has been made up to replace the lower section of the beaver panel.
 20160206_163229#1.jpg 99.18K
24 downloads
20160206_163229#1.jpg 99.18K
24 downloads
#32
christolx
-
- Members
-
- 184 posts
Forum Member
- Name:Chris
- Location:Perth WA
- Car:1976 LX SL Coupe
- Joined: 05-December 14
Posted 06 February 2016 - 09:26 PM
#33
christolx
-
- Members
-
- 184 posts
Forum Member
- Name:Chris
- Location:Perth WA
- Car:1976 LX SL Coupe
- Joined: 05-December 14
Posted 06 February 2016 - 09:33 PM
C-Pillar repair was re welded, as the previous panel beater had not got the fit correct.
This was also a Rare Spares repair section. the top left hand corner was also repaired but still needs to be finished off.
20160206_163259.jpg 106.9K
26 downloads
#34
GMHAz
-
- Members
-
- 1,175 posts
Driving the Dream
- Name:Aaron
- Location:The Garage
- Car:1977 Hatchback
- Joined: 26-November 13
Posted 07 February 2016 - 05:22 AM
Good progress being made getting rid of some of that Ugly mate
#35
_LS2 Hatch_
_LS2 Hatch_
-

- Guests
Posted 07 February 2016 - 07:07 AM
Are they going to put the join line back in the C pillar?
Mine are smooth so I'm not picking on it, just asking
Mine are smooth so I'm not picking on it, just asking
#36
christolx
-
- Members
-
- 184 posts
Forum Member
- Name:Chris
- Location:Perth WA
- Car:1976 LX SL Coupe
- Joined: 05-December 14
Posted 07 February 2016 - 07:27 PM
Thanks GMH-01X getting there,
Grant they aren't going to put the joint back in. I actually think they look good smooth. One less area to hold water?
Thanks GMH-01X getting there,
Grant they aren't going to put the joint back in. I actually think they look good smooth. One less area to hold water?
Grant they aren't going to put the joint back in. I actually think they look good smooth. One less area to hold water?
Thanks GMH-01X getting there,
Grant they aren't going to put the joint back in. I actually think they look good smooth. One less area to hold water?
#37
christolx
-
- Members
-
- 184 posts
Forum Member
- Name:Chris
- Location:Perth WA
- Car:1976 LX SL Coupe
- Joined: 05-December 14
Posted 21 February 2016 - 07:46 PM
Bit more progress on the RHS. Rear end all coming together!
2016-02-21_17.39.30.jpg 122.07K
24 downloads
#38
_jakeslxss_
_jakeslxss_
-
- Guests
Posted 21 February 2016 - 09:58 PM
nice progress chris.
i likr the look of that c pillar join smoothed off like that. might do that to mine when i get up to that stage
#39
cameron
-

- Members
-
- 371 posts
Forum Fan
- Name:Cameron
- Location:Perth WA
- Car:LX SS Hatchback
- Joined: 06-January 16
Posted 22 February 2016 - 11:11 PM
Thanks GMH-01X getting there,
Grant they aren't going to put the joint back in. I actually think they look good smooth. One less area to hold water?
Thanks GMH-01X getting there,
Grant they aren't going to put the joint back in. I actually think they look good smooth. One less area to hold water?
That joint doesn't leak if it is brazed under the overlap. You just need the surfaces very clean so the braze seals the join. IMO I prefer that the joint is part of the pillar as it just looks correct.
Cameron
#40
tuxedoss
-

- Members
-
- 1,027 posts
Forum Fixture
- Name:Brett
- Location:Sydney
- Car:ss
- Joined: 29-July 11
Posted 23 February 2016 - 07:39 PM
Ideally you want the joint to leak, water getting in from the outside isn't the biggest problem as the seam is the lowest point, it's condensation on the inside that has no where to go, and combine that with a few years of dust and dirt in there and that's why they all rusted. The best solution I've seen is drill about a 10mm hole on the inside skin, this firstly allows you to squirt some cavity wax in there once the outside skin goes on and also allows any dirt or water to come out
#41
cameron
-
- Members
-
- 371 posts
Forum Fan
- Name:Cameron
- Location:Perth WA
- Car:LX SS Hatchback
- Joined: 06-January 16
Posted 24 February 2016 - 10:35 AM
Being unpainted between the overlapping panels any moisture will always cause rust. That's why these old cars rust. They never had e-coat (aka magnetic paint) so cars where never painted in areas where you couldn't spray.The issue that most people have had with this join (which leads them to welding the join) is that it moves and this cracks/blisters the surface paint which looks like crap. Running braze to join and seal the panels and then filing and cleaning up the join solves all the issues of both rust,cracking and keeps the original look of the join on the car.
Cameron
Edited by cameron, 24 February 2016 - 10:36 AM.
#42
christolx
-
- Members
-
- 184 posts
Forum Member
- Name:Chris
- Location:Perth WA
- Car:1976 LX SL Coupe
- Joined: 05-December 14
Posted 11 March 2016 - 10:01 PM
ah i see, interesting information, but I guess i don't mind it not looking as original and appreciate that feedback.
I've just gone down to see the progress on the car this afternoon and the rear end is coming along well.
LHS
rhs1.jpg 93.51K
25 downloads
RHS
LHS1.jpg 96.79K
23 downloads
The rear end was the worst in terms of rust as you might have seen if you were following this from the start. i'm not sure if you can appreciate the work that has gone into the rust repairs so far, but i've seen the hours put in and am pretty happy to have the job well under way. Cannot wait for all the rust repair sections to be complete, and to have a shell all primed and blocked back sitting in my garage!
rear end.jpg 104.27K
25 downloads
#43
christolx
-
- Members
-
- 184 posts
Forum Member
- Name:Chris
- Location:Perth WA
- Car:1976 LX SL Coupe
- Joined: 05-December 14
Posted 29 August 2016 - 02:37 PM
Hi Guys, progress has been a bit slow of late. Here's a video link showing some of the repair work done to the drivers side door.
The work is yet to be metal finished, the door was re skinned and hung to check panel gaps before a final finish. I'm pretty happy with the work so far.
#44
Toranamat69
-
- Members
-
- 2,117 posts
Forum R&D Officer
- Location:Brisbane
- Joined: 07-November 05
Posted 01 September 2016 - 08:46 PM
Chris, how did the lower rear quarter repair from rare spares line up with the wheel arch? I just bought a rares one a couple of months back and they suit the 4 door rear quarter. There is a significant difference in where the line is in the wheel arch and rares told me sorry, you'll have to mod their rust repair to suit the hatch but yours looks unmodified.
Big job on the repairs there - keep at it.
Matt
#45
christolx
-
- Members
-
- 184 posts
Forum Member
- Name:Chris
- Location:Perth WA
- Car:1976 LX SL Coupe
- Joined: 05-December 14
Posted 22 September 2016 - 11:04 AM
Hi Matt,
Didn't hear that info from rares, they know i am working on a hatch and i replaced both left and right quarters.
I am not sure if any major modifications were done to make it fit, but as with all the panels, apparently due to some kind of copyright issue all panels need a bit of work to fit perfectly, but it seems to line up just fine.
Thanks mate nearly there...
#46
christolx
-
- Members
-
- 184 posts
Forum Member
- Name:Chris
- Location:Perth WA
- Car:1976 LX SL Coupe
- Joined: 05-December 14
Posted 02 January 2017 - 04:22 PM
So i've been fairly quiet on here for a while. Car has been at the panel shop for 12 months now, unfortunately the work has changed hands with a new tradesman working on it, but I am still pleased with the quality of the work although the progress has been slow!
Here's an update for 2017! Happy New Year All 
Doors have been repaired and re-skinned. LHS required a fair bit of work, but i am pretty pleased with how they turned out.
 door corner.png 395.59K
19 downloads
door corner.png 395.59K
19 downloads
#47
christolx
-
- Members
-
- 184 posts
Forum Member
- Name:Chris
- Location:Perth WA
- Car:1976 LX SL Coupe
- Joined: 05-December 14
Posted 02 January 2017 - 04:26 PM
LHS was completely rusted out. Was almost impossible to find a LHS replacement door in decent condition (for some reason LHS seemed to always be rusted worse than RHS)?
dor1.jpg 422.22K
19 downloads
New Skin from Rares[
attachment=69176:door skin.png]
Attached Files
-
door skin.png 941.39K
17 downloads
#48
Bigfella237
-

- Members
-
- 4,396 posts
Socially Distant
- Name:Andrew
- Location:Far South Coast of NSW
- Car:(s) not as many as I'd like but more than I've got space for!
- Joined: 31-October 14
Posted 02 January 2017 - 04:32 PM
Those guys really need to invest in a bead roller, some forming dies and a shrinker/stretcher, they're doing it the hard way there!
#49
tsn007
-

- Members
-
- 1,022 posts
Forum Fixture
- Name:Tony
- Location:LIVERPOOL, NSW
- Car:LX hatch, LX sedan
- Joined: 25-April 07
Posted 02 January 2017 - 07:20 PM
Top job on the rust repairs
looks like you moving forward now after the rust repairs..
Just remember your Hatch as probably double in value since you purchased it
#50
christolx
-
- Members
-
- 184 posts
Forum Member
- Name:Chris
- Location:Perth WA
- Car:1976 LX SL Coupe
- Joined: 05-December 14
Posted 02 January 2017 - 08:35 PM
Yea, that bloke was South African, he did things old school or "the hard way" i'm just glad it's done well either way! Thanks mate, It cost me about that haha


1 user(s) are reading this topic
0 members, 1 guests, 0 anonymous users

