Thanks HIBERN8...
Actually feel as if that is what I have been doing over the last few months. It seems like the more my house fills up with Torana parts the further I am away from the build. Unfortunately it all takes time...patience...
I decided to try and fit up the RAM Hydraulic Throwout bearing for the M22. For some reason they chose to measure clutch/flywheel together instead of fitted to the bell housing. I used the setup sheet they provided to set up the bearing and could never seem to get it to within their tolerance, so decided to use the method McLeod use to set their bearings where everything is measured when it is together and seem to have it between .150-200 with the use of one thick and one thin shim to allow for clutch wear, so I think further down the track I'll get the boys at Chev Power to check over it just to be certain.
 IMG_20180210_190525.jpg 112.36K
13 downloads
IMG_20180210_190525.jpg 112.36K
13 downloads
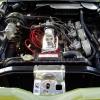
SO I have made some progress and this is where I am currently at. Put the motor and Box together last Sunday. Had a few headaches trying to figure out why the M22's input shaft and the Spigot Bearing would not mate up. At first I was thinking the clutch may not have been aligned correctly, took it back out, tried to fit the box without the clutch/pressure plate and still no luck...kind of had me stumped. Turns out the tolerances for the input shaft and Bronze Spigot Bearing when both new are very fine...so the small amount of grease I added (to aid in insertion or at least thats my experience with lubricants)  may have actually been creating an air lock or something, so removed the grease, gave the input shaft a quick rub with some emery cloth and went in with a bit of a push and then used a couple long bolts to guide the box and bell housing together. Phew!
We then worked on getting the Motor mounted up.
20180211_132348.jpg 114.62K
11 downloads
So I went with the tried and tested Tuff Mounts, and they seem to be quite a good fit. I trimmed the firewall for dizzy clearance when the rust repair work was done and can definitley see how that small amount of clearance makes just enough room. Would be quite tight without that (I understand some ppl get away with small dizzy & drilling mounts to move the motor forward slightly)
Screenshot_20180211-202034.jpg 247.6K
12 downloads
Didn't take too long to get the motor and box in. I guess that was one of the benefits of going with the M22 Muncie as it is no larger than the original 4 speed (although my trans tunnel has been butchered already). After getting the motor in, I have attempted to fit the extractors (will hopefully do that this weekend) and wow their isn't a lot of room at all. I had Sean Tapper come out this afternoon and take a look and let me know how to go about squeezing them in (as they are a custom set he made). Currently I do not have the Starter Motor in, or the steering column so I have a bit more space to work at the moment but honestly I was unsure how fitment was going to go. Shaun told me to fit up the two end pipes (as they are detachable) and then it is easier to see how it all clears the kframe/sump. So he assured me that everything was looking good,so I will have to try and get them in on the weekend, perhaps lift one side of the motor to get some extra room. I'll keep you posted. (I can definitely see why people have had so many issues with fitment of off the shelf pipes)
One thing to note. I purchased and fitted up a Whitline Swaybar when I had the K-Frame rebuilt. Apparently it is not going to fit. As it sits in the way of the collectors on the headers, so I'll be removing that and will likely sell it on if anyone is interested. Is there another swaybar that fits forward facing? K-Mac perhaps?
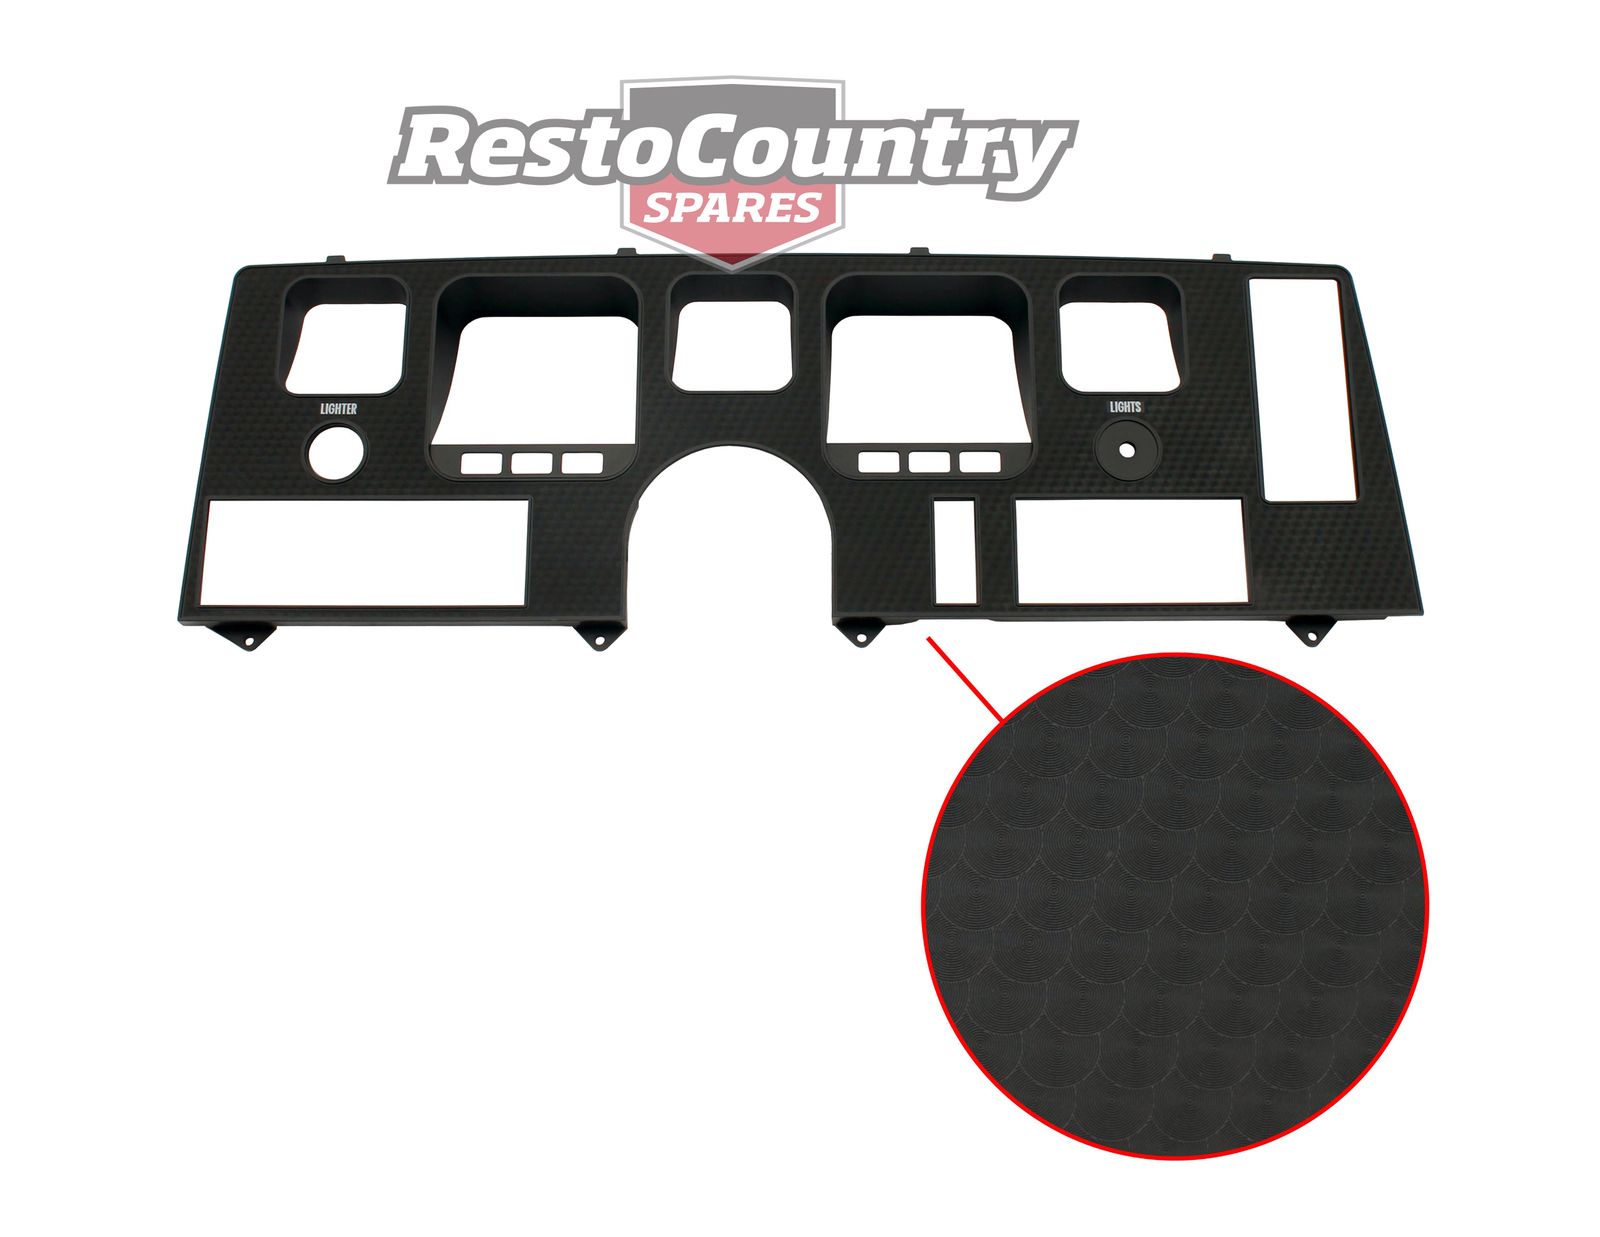
Also getting some custom Carbon Fiber work done on the dash. (here's a sneak preview) I know it is not to everyone's taste...but I think it looks mint!
IMG_20180128_151341_486.jpg 99.92K
12 downloads
Anyway...hopefully this is one step forward and I can put a bit more time into the build and this blog.
Thanks
Christo


 View Garage
 I've got someone else doing mine as I don't have the necessary skills but your thread has been an interesting read while I was working. All the best with it.