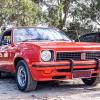
LJ GTR - a quick fixup turning into a major resto
#101

Posted 10 October 2016 - 11:35 PM
#102

Posted 11 October 2016 - 06:31 AM
Good tip Gary, I'll rip the bungs out today and have them plated. Having an RDO today, will pick up the rear window filler panel and have a crack at welding it in.
Then I'll have a better look at the boot floor, I want to finish the rear window before tackling anything else. Will also need some more MIG gas, used a whole E size bottle on the project so far!
#103

Posted 11 October 2016 - 08:00 AM
I also test fitted the new tail light surrounds, along with some NOS lenses I bought at Ballarat swap meet some time ago.
Fitted a NOS original decal to petrol cap. I know it's all coming off again, it helps with the motivation though to see some shiny bits!
Attached Files
Edited by Kevrev, 11 October 2016 - 08:03 AM.
#104

Posted 11 October 2016 - 04:27 PM
Kev,
The radiator with the blank shroud is the one that you want to use for your car. The shroud should have a small hole on the side closest to the radiator cap which allows any spilt coolant to drain away. Instead of having numbers on the shroud there should be a number stamped on the passenger side of the top tank, possibly "K3" or "L3" in your case. If not next time the radiator is pulled apart this date code can be replicated by hand if necessary, it looks like you've got the skills to do it.
I've been told by a reliable source that after 1/4/1973 that all 202 LJ's received the xu-1 radiator and should therefore have a LN decal next to the top hose inlet instead of a LE decal which early 202 Lj's would have had.
It's good to see a LJ GTR which isn't going to be a xu-1 replica. Not enough of them are kept in gtr spec in my opinion.
I've been informed by a fellow forum member that my previous information about Lj gtr's and 202 Lj's being fitted with xu-1 radiators after 1/4/73 is not correct and this was only an option. So since I wasn't around at the time and have now been told different opinions by different people may I suggest that people do further research of their own and make their own decisions either way.
Kev, sorry for sidetracking your thread, keep up the good work.
James
#105

Posted 11 October 2016 - 08:10 PM
I've been informed by a fellow forum member that my previous information about Lj gtr's and 202 Lj's being fitted with xu-1 radiators after 1/4/73 is not correct and this was only an option. So since I wasn't around at the time and have now been told different opinions by different people may I suggest that people do further research of their own and make their own decisions either way.
Kev, sorry for sidetracking your thread, keep up the good work.
James
James, the LJ XU1 radiator was the Heavy duty radiator for all LJ 6cyl engines with manual transmission (excl XU1).
#106

Posted 11 October 2016 - 08:14 PM
#107

Posted 11 October 2016 - 08:56 PM
seems strange to me to leave bumpers etc etc etc on thats all
just curious
#108
 _warren ht monaro_
Posted 12 October 2016 - 11:44 AM
Looking good Kev. Just a bit of work but it will be so much better than it was.
#109

Posted 12 October 2016 - 02:50 PM
#110

Posted 13 October 2016 - 07:41 PM
Hi Gene, it's called the snow bawl effect mate, you know do a good job sit to look at it, observe something else not quite right do that too, all of a sudden crap, i wasn't going to do that ! & thinking we're does this bit stop & that bit begin. Possibly a bit of oh great an extra 2 grand that i didn't even realize that id need to spend, nor do i know where im going to get it ect. We've all been down that road before mate. & Kev stated "quik tidy up" (now) turning into a restoration! Can seem daunting to see thing's keep progressing so fast. I think Kev is going well though. Gary.
Hi Gary you're spot on, the job has just escalated as I've found more rust and repair work needed.
The rear bumper, tail lights and fuel tank are all off the car now.
Thanks to you and and Warren for the encouragement, much appreciated.
By the way this is a Brisbane built car, it doesn't surprise me that the blackouts are wrong I'll be looking for some advice when it comes times to respray the car.
And James don't worry about sidetracking the thread, I'll be wanting to get the correct radiator in the car so any tips on what it should have are helpful
Anyway here's how the bootlid came out after the repairs. Tiny bit more filling and sanding needed but getting there
Attached Files
#111

Posted 13 October 2016 - 07:48 PM
Also started on the rear window filler panel, looks to be a pretty good fit. I had to cut out more rust on the passenger side, cut and folded another piece of steel.
Attached Files
#112

Posted 13 October 2016 - 07:54 PM
I also have to repair a section of parcel shelf on the passenger side just in front of the filler panel, yet more cutting/fabricating/welding.
I bought some cavity spray to coat inside the rear window panel, and some more weld thru zinc primer.
Hopefully what I've brought is alright, panel beater supply place reckons it's good stuff.
#113

Posted 13 October 2016 - 07:59 PM
G/day Kev
The correct part number radiator for LJ 3300 (M) is 2809857E.
The 2809857 radiator you have suits LC 2600 (M) and 2850 (M) .
#114

Posted 13 October 2016 - 08:11 PM
Hi Dave,
Do you know what the E on the end of the part number means? Almost the same part number, maybe different number because of mounting holes? (just guessing)
The LJ radiators I've seen have 8 mounting holes to mount to the body, the LC one I have has only 4 holes
#115

Posted 13 October 2016 - 08:32 PM
Hi Dave,
Do you know what the E on the end of the part number means? Almost the same part number, maybe different number because of mounting holes? (just guessing)
The LJ radiators I've seen have 8 mounting holes to mount to the body, the LC one I have has only 4 holes
No idea what the E stands for, sorry.
#116

Posted 13 October 2016 - 08:54 PM
Hi Dave no probs, thanks anyway would be interesting to see if the E was stamped in the radiator after the part number also
#117

Posted 13 October 2016 - 09:45 PM
#118

Posted 15 October 2016 - 08:36 PM
Todays progress, attacked the dent in the rear quarter with the dent puller.
Used lots of weld on studs to spread the load, came out pretty well
Attached Files
#119

Posted 15 October 2016 - 08:58 PM
Next was inside the boot, used Gary's tip to attack the sealer with a heat gun and scraper, then the wire brush.
Not good news, started pretty good around the fuel tank, but by the time I got to the wheel well and rear section near the bumper mount it started looking pretty ugly.
Could be worse I suppose, just needs more work than expected
Attached Files
#120

Posted 15 October 2016 - 09:38 PM
#121

Posted 15 October 2016 - 09:41 PM
#122

Posted 16 October 2016 - 07:22 AM
Hi Gary thanks for the tip on shrinking the metal, I'll give that a try.
I'm going for the PPG 302 Multietch primer, decided against the 408 Epotec as it is only suitable for use under 2 pac paint, and I'll be painting the car in acrylic. My HT looks good in photos, (it was used in the Rare Spares ads) not perfect up close but at least it's together and driveable.
It will get a good tidy up one day, might end up as a "Quick fixup on HT Monaro turning into major resto" thread!
#123
 _warren ht monaro_
Posted 17 October 2016 - 01:24 PM
Looking good Kev.
I had a laugh at the "Quick fixup on HT Monaro turning into major resto" thread!
We both know how these things go.
#124

Posted 23 October 2016 - 11:22 PM
Hi Dave,
Do you know what the E on the end of the part number means? Almost the same part number, maybe different number because of mounting holes? (just guessing)
Hi Kev
Think I found what the E at the end of the radiator part number in the LJ parts catalogue stands for.
E = Exchange.
I was looking at info regarding GMP&A replacement radiator assemblies.
GMP&A had what they called Exchange Radiators available for most GMH petrol engine passenger vehicle models.
Although they were called Exchange radiators they were actually complete ready to bolt in brand new assemblies.
All the available exchange radiator part numbers are suffixed with an E.
Obviously these E suffixed part numbers were also printed in the parts catalogues.
Whether or not the E was also added to the end of the part number stamped into the fan guard is anyone's guess however that may only apply to the exchange radiators.
#125

Posted 24 October 2016 - 11:28 AM
I agree with Cyan being 1 of the better colours as well but that's my Xu-1s colour as well ,
Soon you will be on the road and cruising,
Keep enjoying the journey thanks for the build thread.
Warren
0 user(s) are reading this topic
0 members, 0 guests, 0 anonymous users


 View Garage


