Jump to content


Photo
- - - - -

My '76 LX Project


  • Please log in to reply
387 replies to this topic

#326 toryman76

toryman76

    Forum Fixture

  • Members
  • PipPipPipPipPip
  • 1,082 posts
  • Location:Melbourne, Vic
  • Joined: 16-January 06

Posted 24 August 2015 - 09:24 PM

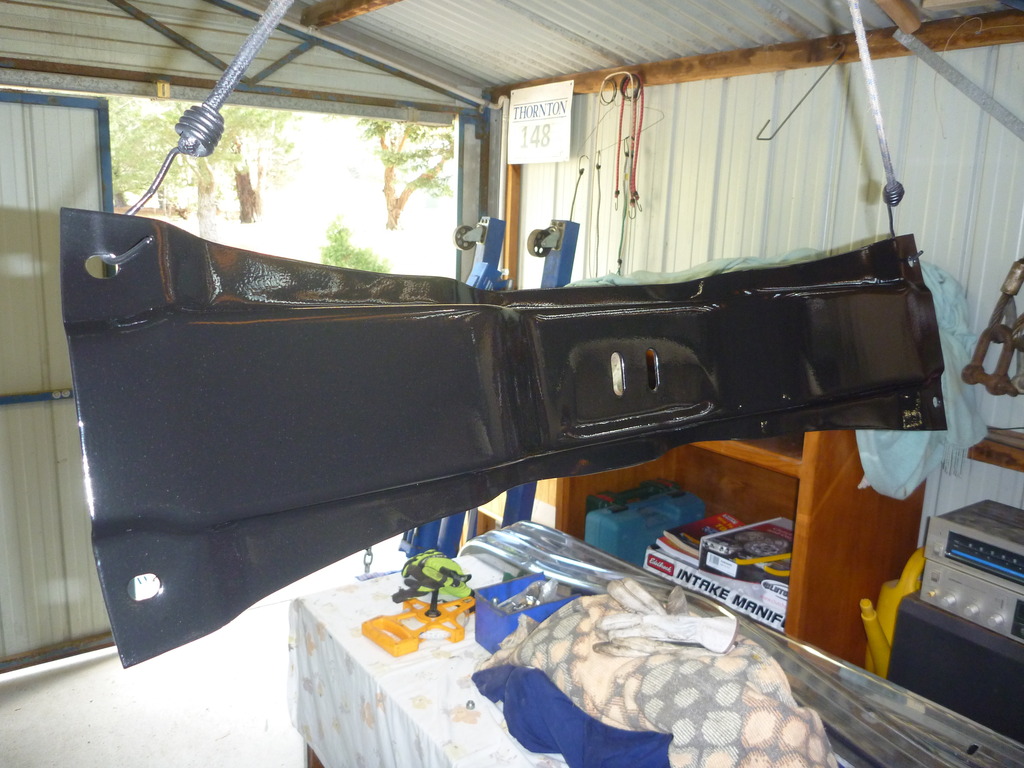
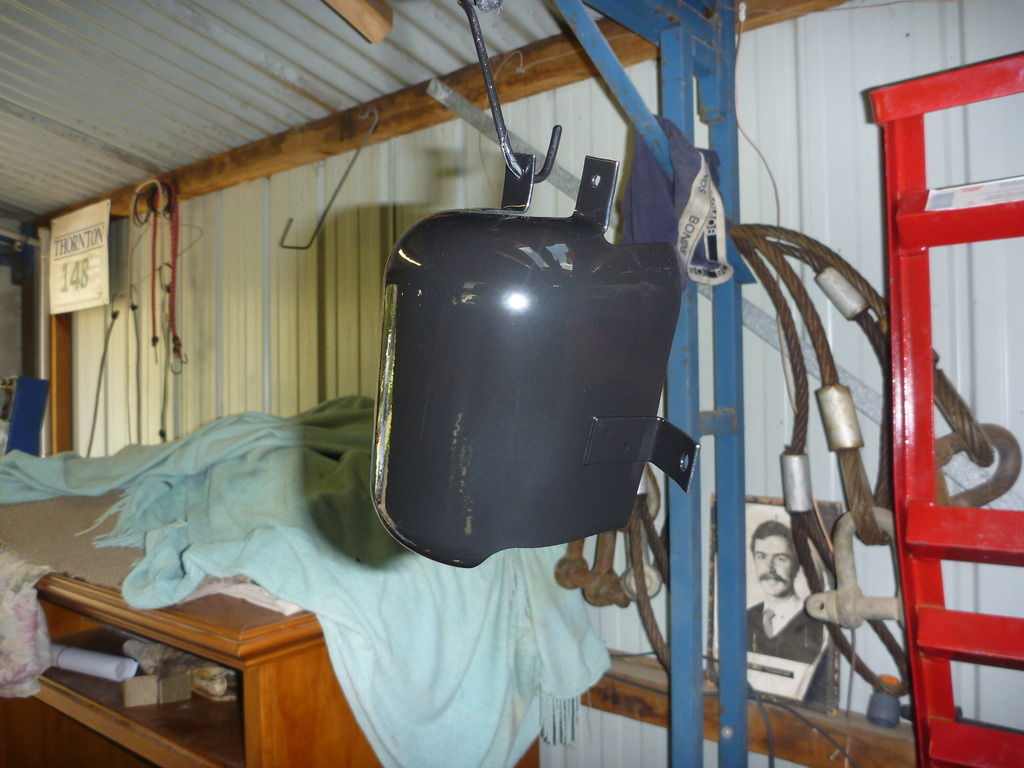
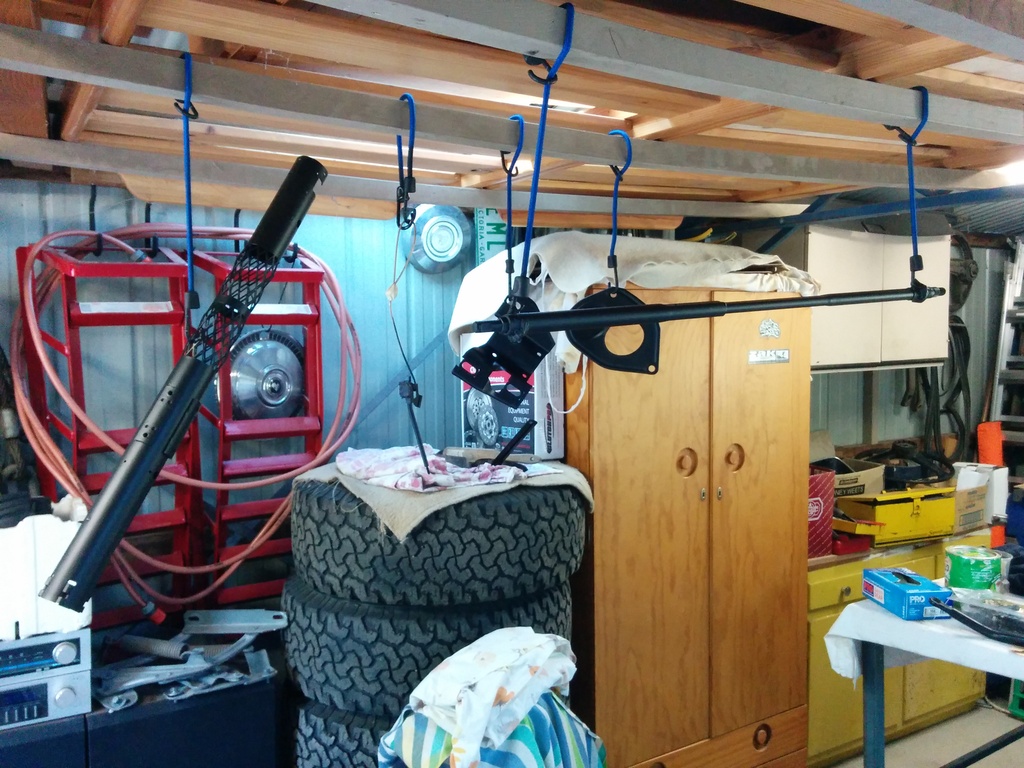
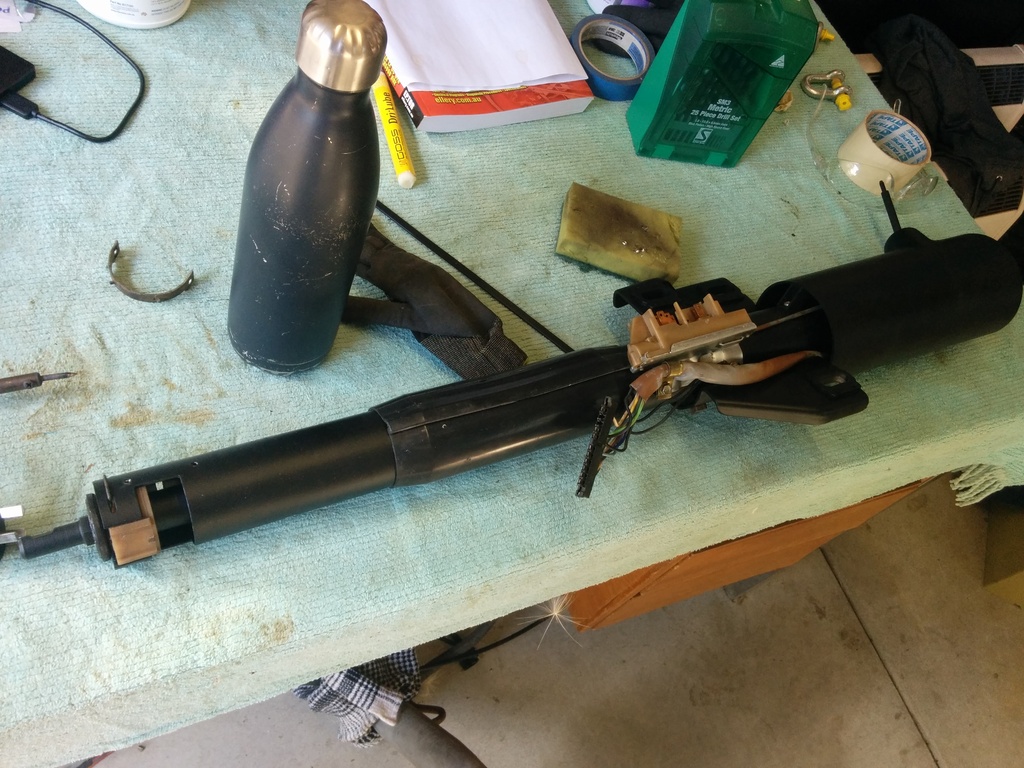
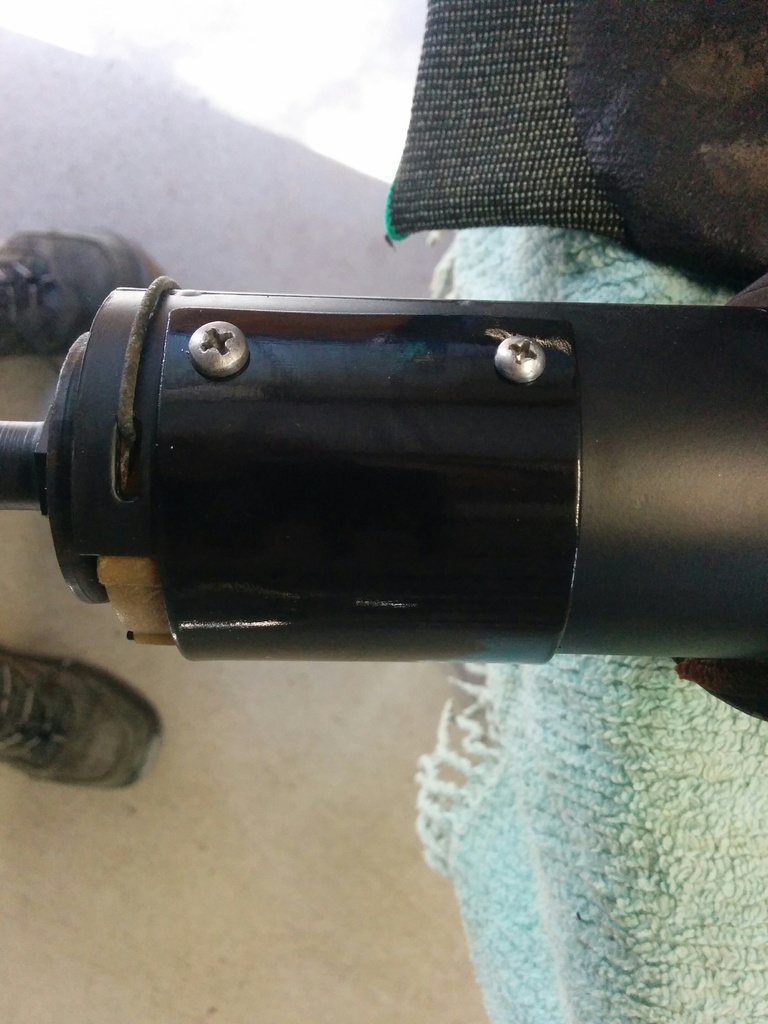
Small update. Still plugging away at it on the weekends. Geez its hard only being able to work on it on weekends! Anyway, I missed a couple of parts to get powdercoated so decided to paint them myself. Gearbox cross member and steering coupling gaurd were stripped back to baremetal, cleaned, primed, top coated in GMH black and clear coated. Probably a bit overboard for a gearbox cross member but it looks nice!


P1040480.jpg

P1040481.jpg


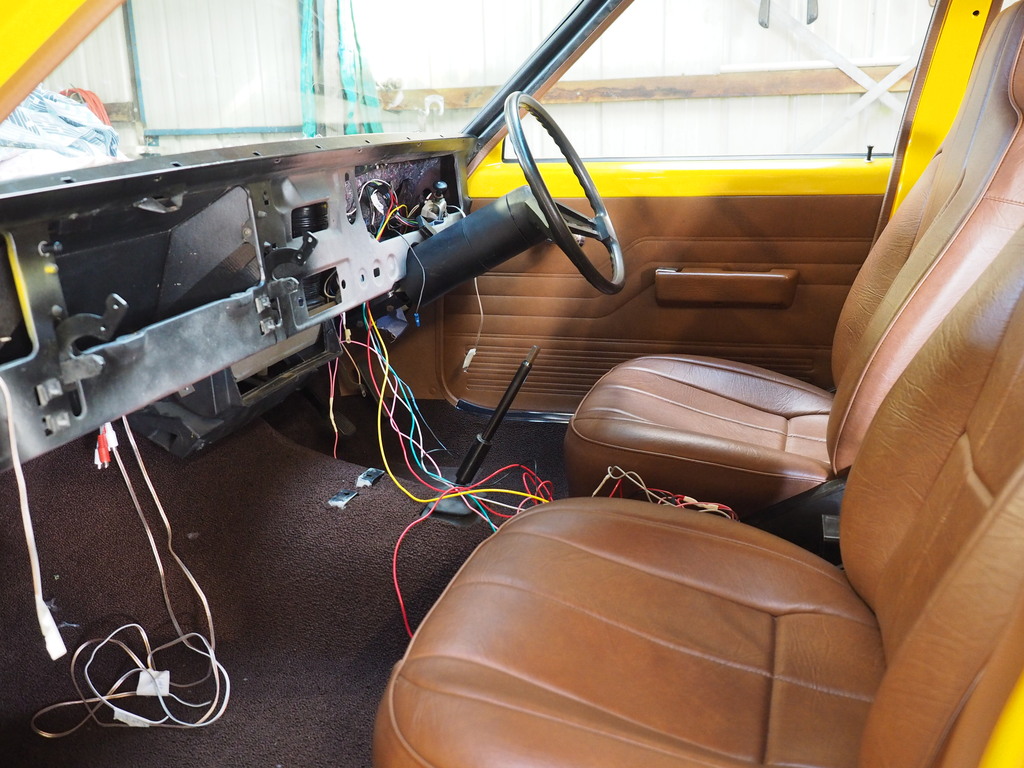
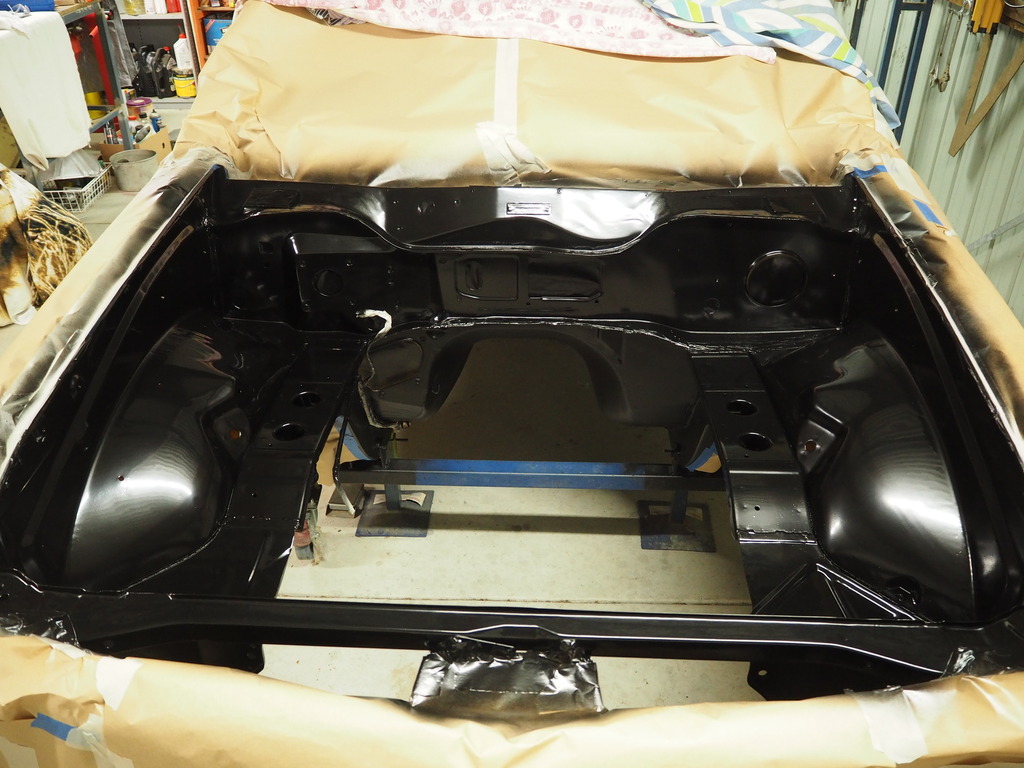
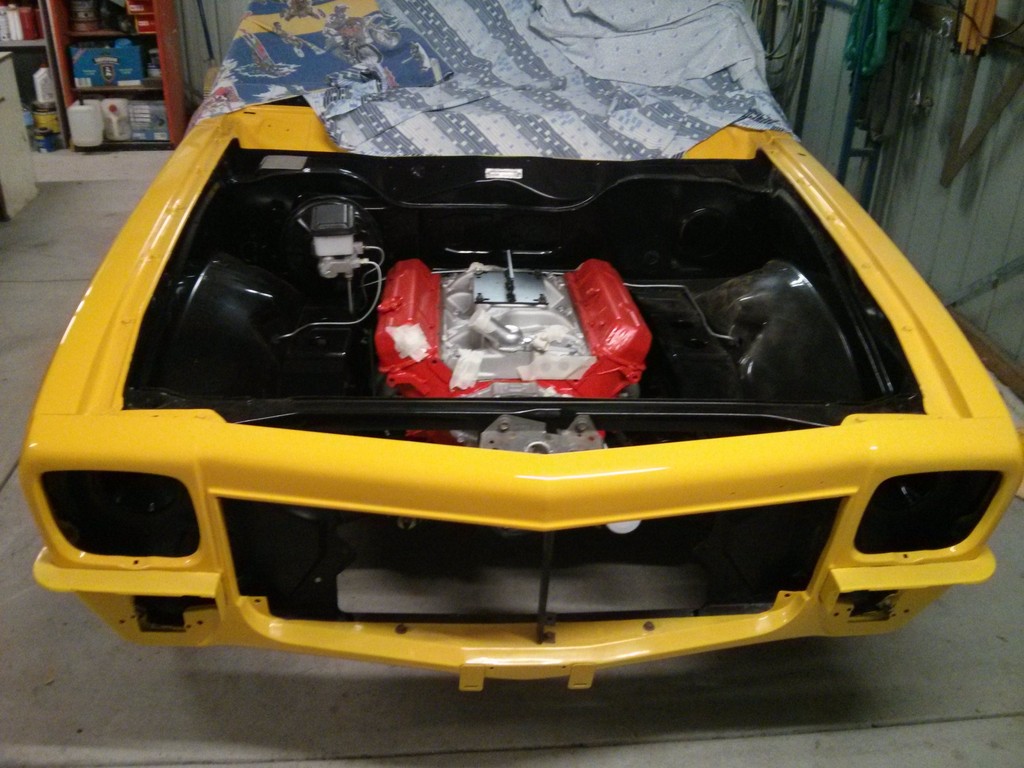
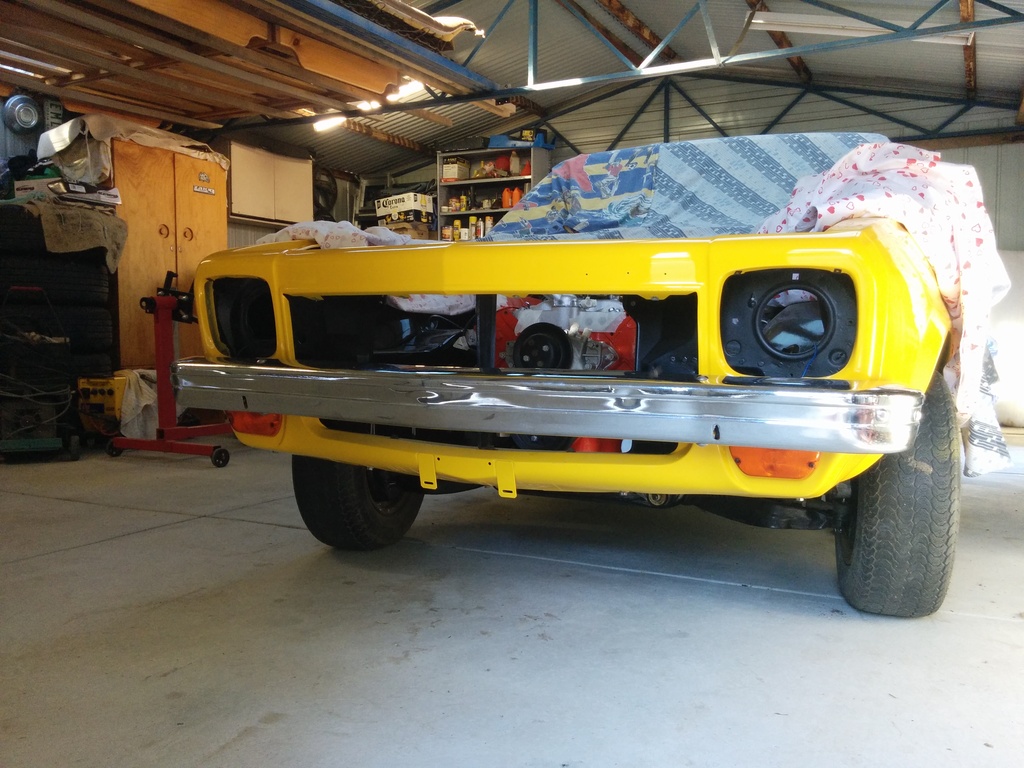
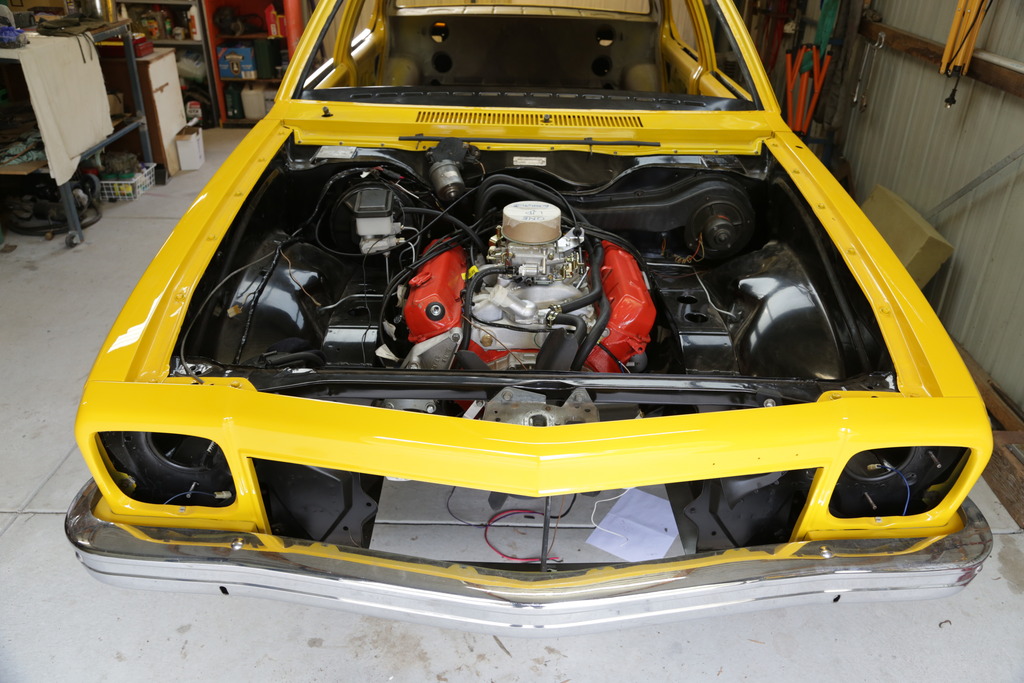
I was so happy with the finish that I am even contemplating clear coating the engine bay. What are your guys thoughts on a shiny black engine bay? The panel beater talked me out of 2-pak in the engine bay because of the gloss finish, so its still acrylic which means I can still clear coat it myself. The small work I have done in the bay I am already easily chipping the paint no matter how careful I am, so my thinking is that with a clear coat it will give it some further protection. Oh and also it will look shiny! Thoughts guys?


#327 toryman76

toryman76

    Forum Fixture

  • Members
  • PipPipPipPipPip
  • 1,082 posts
  • Location:Melbourne, Vic
  • Joined: 16-January 06

Posted 30 August 2015 - 09:02 PM

So I spent the week contemplating the engine bay and I decided to clear coat it. I must say I am very very happy I did this. Firstly upon closer inspection I think my panel beater was a little bit careless in places and had a little bit of overspray in there. So I tidied it up with a 1200 grit wet rub, cleaned with prepsol and hit it with roughly two coats of black mixing through the clear finishing with about four or so coats of clear. It has really made it pop and contrasts much better against the glossy yellow. Hopefully it is a bit more 'durable' now too, but only time will tell! Not much else done on the car as this turned into a huge job... So it was two steps forward ten steps backwards but I am much happier with the bay now.


P8290061.jpg


#328 Covert

Covert

    Forum Fixture

  • Members
  • PipPipPipPipPip
  • 1,987 posts
  • Location:In my LH
  • Car:LH
  • Joined: 08-November 13

Posted 01 September 2015 - 12:01 AM

looks great 


#329 toryman76

toryman76

    Forum Fixture

  • Members
  • PipPipPipPipPip
  • 1,082 posts
  • Location:Melbourne, Vic
  • Joined: 16-January 06

Posted 06 February 2016 - 08:11 PM

No update since mid last year... Gee I am slack! My project is still ticking along. I have now installed the engine and the front end. Little tip for anyone looking to try and do what I did, don't install the engine to the cross member first!! This worked ok for my trial fit with old bushes, rubbers etc but with new bushes etc it is just all too stiff. So I think the best way to do it is the traditional way in through the engine bay after the front cross member is installed by itself. Reason being is that it becomes very difficult to align the trailing arm bolts to the chassis as the whole unit is so rigid.

After the engine was installed I had to open up my hole for the gearshift because I originally didn't make it big enough for the rubber boot kit. This was awkward given I already had the gearbox installed. I took it very slowly and carefully with the grinder to open it up to the correct size.

I then embarked on rebuilding the heaterbox which proved to be challenging when trying to source foam for the flaps. After a failed trip to Clark Rubber I ended up using some foam that you can buy from AutoBarn for under bonnet insulation. It has a sticky back and is around 10mm thick. It has a mesh type stuff over it so all I did was peel that back so its just the foam. Seemed to be as close as I could get to the original stuff whilst trying to use something that was reasonably heat resistant.

I have also replaced all the underdash insulation with carpet underlay I got from a local trimmer.

I have started mapping out my electrical wiring too. I have sent off my main wiring loom to an auto elec to have the mods done for my electronic ignition as well as a few additional wires for the tacho, temp gauges etc.

Anyway I hope I don't leave it so long between updates next time! Heres a few snaps.


IMG_20151024_171305.jpg


IMG_20151025_200255.jpg


IMG_1453.jpg


IMG_20160204_205157.jpg


#330 toryman76

toryman76

    Forum Fixture

  • Members
  • PipPipPipPipPip
  • 1,082 posts
  • Location:Melbourne, Vic
  • Joined: 16-January 06

Posted 08 February 2016 - 11:31 AM

Few more things done on the weekend. I finished putting together the heater box as well as completely stripping the steering column for its new paint job and cleaning/re-greasing all components. I was originally going to do the lower bearing mod as detailed on the forums but decided against this once I realized the lower bearing was in pretty good nick.


Can anyone tell me whether or not the heather box is meant to have a gasket between the box and the firewall around the mounting bolts? I don't recall one being there when I took it off but I know it has been removed by the previous owner due to the re-cored heater. Also on the far left of the photo below is the original yellow squishy rubber gasket that seals the pipes to the firewall. I have seen someone on here doing a neat mod with a aluminium plate and two grommets. Can anyone tell me if this plate is meant to be sealed to the box and the firewall using something like windscreen sealant?


IMG_20160207_113510.jpg


IMG_20160207_180120.jpg


#331 _LS1 Taxi_

_LS1 Taxi_
  • Guests

Posted 08 February 2016 - 01:31 PM

Great progress.

A little more on k frame install with engine & box on k frame. IMHO this is still way easier and safer than going through the top. I get the k frame centred enough to get the 4 nuts loosely on, then using a scissor jack between the frame and the bumper bar mounts I align the frame enough to get the rigger bolts through. Each to his own but I've done this on dozens of cars are find it the easiest.

#332 toryman76

toryman76

    Forum Fixture

  • Members
  • PipPipPipPipPip
  • 1,082 posts
  • Location:Melbourne, Vic
  • Joined: 16-January 06

Posted 08 February 2016 - 02:38 PM

That's a nice little tip with the bumper bar mounts! I didn't think of this one. If I ever need to do this again I will be sure to use that idea. I ended up trying a series of ratchet straps etc until I found the right combo to get the outriggers in. 


#333 toryman76

toryman76

    Forum Fixture

  • Members
  • PipPipPipPipPip
  • 1,082 posts
  • Location:Melbourne, Vic
  • Joined: 16-January 06

Posted 16 February 2016 - 08:04 PM

Had another big one on the weekend. I had my main loom modified for the electronic ignition (simply added the extra wire for 12V) and added an extra wire to cater for my oil pressure gauge. I found that my main loom had a spare brown wire which I will utilize for the tacho. The water temp light wire will be re-routed to be used for the water temp gauge. The loom was simply given to me with the extra wires in there so it was up to me to work out where I needed to run these wires for taping them up. I ended up re-taping them all the way up to where the engine loom plugs in. No idea whether I will plug them from here or run them direct yet. So the main wiring loom is loosely back in the car.

I spent most of Sunday taking my time re-assembling the steering column. Pretty glad I did this soon after stripping it down, as it was quite involved I found. I didn't go to the effort of striping down the ignition switch as it felt really good to me, but I did clean and re-grease the indicator switch. I re-greased the upper and lower bearings and re-assembled the unit. I found the hardest part was getting the c-clip back on. I ended up making a sleeve that was a neat fit over the shaft and just long enough to get the steering wheel nut on. I compressed the spring by doing up the nut, them carefully pried the spring away from the sleeve and pushed the clip on. I didn't like the hole left at the bottom for the column shift links so I made up a cover plate out of some aluminum.

I cleaned up all clips for the front nose cone and tried my best to carefully pry these over the holes using taped up screw driver to open them up and trying not to scratch paint, but it was nearly impossible to do this without a small amount of paint coming off... Not ideal but I didn't see any other way. Anyway, indicators are installed, as well as the bumper mounts and the front bumper.

Here are some photos.

IMG_20160214_172912.jpg


IMG_20160214_173418.jpg


IMG_20160213_174607.jpg


#334 toryman76

toryman76

    Forum Fixture

  • Members
  • PipPipPipPipPip
  • 1,082 posts
  • Location:Melbourne, Vic
  • Joined: 16-January 06

Posted 22 May 2016 - 10:02 PM

Been a while since my last post. Been ticking away on the car but doing lots of little things mostly in the engine bay so not much to show. This weekend I got the exhaust up and the fuel tank installed. Not far off from firing up the engine, probably in the next month or so.


308A9960.jpg


IMG_20160522_154312.jpg


#335 _kayesem_

_kayesem_
  • Guests

Posted 25 May 2016 - 04:48 AM

Nice work : )


#336 toryman76

toryman76

    Forum Fixture

  • Members
  • PipPipPipPipPip
  • 1,082 posts
  • Location:Melbourne, Vic
  • Joined: 16-January 06

Posted 08 August 2016 - 09:06 PM

Saturday 30th of July 2016 for the first time in 10 years I heard a running engine in my Torana, and more importantly its a nice 5L V8 instead of the 6cyl it started life as. To say I'm happy is an understatement!! The first 20min run in went pretty smoothly with only one hiccup of leaking oil out of the sender/switch bulkhead on the oil pump. We fixed that up and all was good. I have a few electrical gremlins to deal with but having run the engine in now these issues seem like small fry.


Now on to the interior. 


#337 ben23

ben23

    Forum Member

  • Members
  • PipPipPip
  • 236 posts
  • Name:Ben
  • Location:Campbelltown, New South Wales
  • Car:'77 LX 2850 sedan
  • Joined: 02-October 14
Garage View Garage

Posted 08 August 2016 - 10:31 PM

Congratulations mate shes coming up a treat. Can't believe you kept the motivation to keep building it after all this time, I'm two years into my Torana build and I'm already over it haha, still up to the rust repairs, hopefully ill be ready to send it to the panel beater soon. The first start is always the best, got a injected 5 litre and auto lined up for mine. So keen to get it running eventually. The worst part I find has been making a decision on colour. Which master and brake booster did you use?


#338 neglectedtorana

neglectedtorana

    Forum Fixture

  • Members
  • PipPipPipPipPip
  • 967 posts
  • Name:Tom
  • Location:Central Coast
  • Car:LX Torana Sunbird
  • Joined: 06-March 12

Posted 08 August 2016 - 11:47 PM

Beautiful car and great work keeping the build going over a long time plus the 4 year break.

Well done!

#339 purrlx

purrlx

    Forum Fixture

  • Members
  • PipPipPipPipPip
  • 1,330 posts
  • Name:Danny
  • Location:Gladstone
  • Car:LX hatch
  • Joined: 23-December 11
Garage View Garage

Posted 09 August 2016 - 06:22 AM

Well done getting the engine going, just the motivation to finish a project.


#340 Cook

Cook

    Forum Fixture

  • Members
  • PipPipPipPipPip
  • 1,505 posts
  • Location:Melbourne
  • Car:LX Hatch
  • Joined: 27-February 15

Posted 09 August 2016 - 06:35 AM

Well done.  I can only imagine the feeling of hearing it purr into life.  Cheers Ron


#341 toryman76

toryman76

    Forum Fixture

  • Members
  • PipPipPipPipPip
  • 1,082 posts
  • Location:Melbourne, Vic
  • Joined: 16-January 06

Posted 09 August 2016 - 08:43 AM

Yeah thanks guys. It was pretty special actually. Dad and I have been working on this together and when we both heard it running we had a little moment! Motivation has certainly come and gone over the years but I am fully committed right now to getting it on the road.


Ben - I have fitted the brake booster and master to replicate the A9X setup. This master has the incorporated proportioning valve as I wanted to clean up the brake lines etc in the engine bay. It is a reconditioned VH360 booster and a brand new P10050 master cylinder I purchased from Terry at Hydroboost. He was fantastic to deal with, knew exactly what I wanted and his pricing is fair especially for the hard to find VH360 booster.


#342 toryman76

toryman76

    Forum Fixture

  • Members
  • PipPipPipPipPip
  • 1,082 posts
  • Location:Melbourne, Vic
  • Joined: 16-January 06

Posted 22 March 2017 - 11:31 AM

I've have been ticking along pretty nicely these last 9 months since my last update and the car is nearing the finish line. For the first time I can finally start to see the light at the end. Brackets for console been fitted, carpets been installed, roof lining is in, front two seats are in, all seats have been reupholstered, original door cards back in, pinch weld and scuff plates fitted, SLR instrument cluster finally purchased (off getting reco'd as we speak), speakers fitted to kick panel area, front and rear windows fitted. So not much left mostly interior work, but I couldn't be happier with how its all coming together. Will post up some of my latest photos over the weekend.


#343 toryman76

toryman76

    Forum Fixture

  • Members
  • PipPipPipPipPip
  • 1,082 posts
  • Location:Melbourne, Vic
  • Joined: 16-January 06

Posted 26 April 2017 - 09:40 PM

Only a month late updating with photos B)


'Original' wiper blades were in a pretty ordinary shape. One was bent upwards almost at right angles. Managed to save it with some patience and a hammer...

P1040587.jpg


Rear seats installed with original seat belts. New custom vinyl parcel shelf installed. I think I have used the wrong clips here though. I feel like these ones are meant to be a larger head. Can anyone confirm? I have used the same clips as I did for the kick panels.

P1040582.jpg


P1040580.jpg


After the front and rear windows went in

P3250068.jpg


P3250067.jpg


P3250057.jpg


#344 308mate

308mate

    Forum Fixture

  • Members
  • PipPipPipPipPip
  • 523 posts
  • Name:scott
  • Location:Wootton - between Newcastle & Taree, NSW
  • Car:76 SS hatch (Royal Plum, Chevron Chamois interior), HQish Van (Orchid Metallic)
  • Joined: 19-May 09
Garage View Garage

Posted 27 April 2017 - 08:11 PM

Tory looks great mate congratulations. Enjoy.


#345 Redslur

Redslur

    Has been Torana owner

  • Members
  • PipPipPipPipPipPip
  • 3,532 posts
  • Name:Gerry
  • Location:Canberra
  • Car:HQ GTS Replica 350.
  • Joined: 08-November 05

Posted 28 April 2017 - 12:04 PM

Coming up beautifully.  Keep at it!


#346 toryman76

toryman76

    Forum Fixture

  • Members
  • PipPipPipPipPip
  • 1,082 posts
  • Location:Melbourne, Vic
  • Joined: 16-January 06

Posted 29 April 2017 - 08:55 AM

Cheers fellas. The list is slowly dwindling down now.

#347 Heath

Heath

    I like cars.

  • Administrators
  • PipPipPipPipPipPipPip
  • 18,314 posts
  • Name:Heath
  • Location:Eastern Suburbs, Melbourne
  • Car:Heavily Modified UC Sunbird Hatchback
  • Joined: 07-November 05
Garage View Garage

Posted 29 April 2017 - 11:34 PM

Continuing the great work! Everything is looking immaculate. Brown trim has certainly warmed on me.

#348 toryman76

toryman76

    Forum Fixture

  • Members
  • PipPipPipPipPip
  • 1,082 posts
  • Location:Melbourne, Vic
  • Joined: 16-January 06

Posted 30 April 2017 - 04:22 PM

Honestly I was a bit worried about going yellow with brown interior but all my door cards arm rests etc were in immaculate condition that I couldn't bring myself to buy new ones. Now that I've got it all in I think it looks unreal and it certainly is something different. Not a colour combo most would go for especially with chrome yellow. But I'm super happy with how it's come up.

#349 My390

My390

    Forum Member

  • Members
  • PipPipPip
  • 101 posts
  • Name:Dale
  • Location:Central Vic
  • Car:LX sedan
  • Joined: 05-September 16

Posted 30 April 2017 - 06:39 PM

Looking great. About ten years ahead of me. Just started taking panels off. Catch up soon. Your better looking Uncle. Plenty of good info here.

#350 toryman76

toryman76

    Forum Fixture

  • Members
  • PipPipPipPipPip
  • 1,082 posts
  • Location:Melbourne, Vic
  • Joined: 16-January 06

Posted 30 April 2017 - 09:51 PM

Welcome aboard!! If you need any pointers sing out. Definitely must come see the new toy.


2 user(s) are reading this topic

0 members, 1 guests, 0 anonymous users


    Facebook (1)