
i wonder if people will be saying the same thing about our tastes in 30 to 40 years time.......oh well i like it nowLooking at Squirrels pics with the sun roof I shake my head...What were we thinking in the 70s??? Hahaha!
R

LC 2Door S Project to XU1
Started by
_squirralien_
, Jun 06 2008 03:01 PM
203 replies to this topic
#76
 _lcv871_
_lcv871_
-

- Guests
Posted 04 October 2008 - 07:00 PM
#77
_squirralien_
_squirralien_
-
- Guests
Posted 04 October 2008 - 07:25 PM
your sunroof hole beats mine for sure and your flares are just,,,,,,, lovely,,,,,,, well, i think a torana in any condition is great to look at, what are your plans for your 70's style machine, I hope the flares are going, unless of coarse if you like them, its a horrible job repairing sunroof holes
#78
red6
-
- Members
-

- 591 posts
Forum Fixture
- Location:Melbourne
- Car:1971 Lc Torana S 2 Door
- Joined: 11-November 05
Posted 04 October 2008 - 07:34 PM
i wonder if people will be saying the same thing about our tastes in 30 to 40 years time.......oh well i like it now
id put money on it
#79
_threeblindmice_
_threeblindmice_
-
- Guests
Posted 04 October 2008 - 08:01 PM
I cut a whole roof off another car I thought the hole to big to fill , an other thing you will need is the metal roof lining retainer rods. The seats inserts in mine are done in the same material as the door trims ,that really sets it off . When you talk about 30 or 40 years ago ,the fads , in the early 60's the back only was lowered ,giving the cars a negative rake .
#80
rodomo
-

- Members
-
- 17,999 posts
To advertise here, call 13TORANA
- Name:R - O - B Dammit!
- Location:Way out west of Melbourne Awstraylya
- Joined: 10-December 05
Posted 04 October 2008 - 08:28 PM
. When you talk about 30 or 40 years ago ,the fads , in the early 60's the back only was lowered ,giving the cars a negative rake .
Ha! Ha! That's because it was so easy to fit lowering blocks to the rear

#81
_squirralien_
_squirralien_
-
- Guests
Posted 05 October 2008 - 01:00 AM
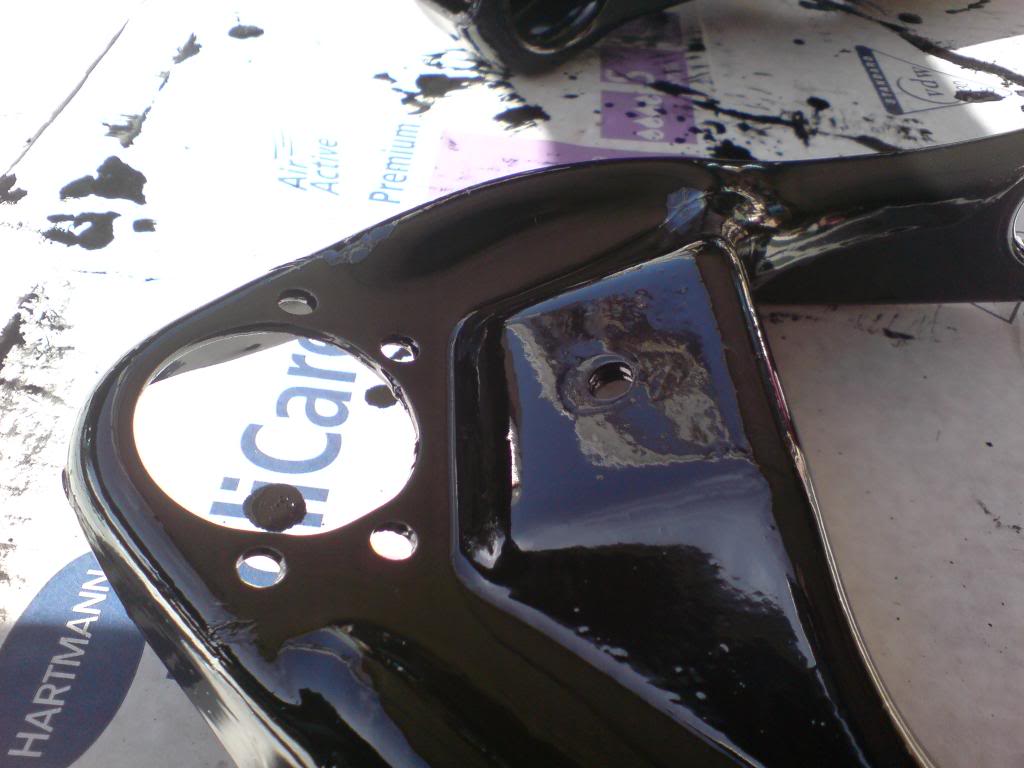
Ok here are some pictures of parts that I have accumulated over the last few months, not alot reall but just to show that I have been doing something as small as it is.
Here are a few bits mainly the Zinc plated crossmember for the gearbox and the fan which I might take back to get chromed yet
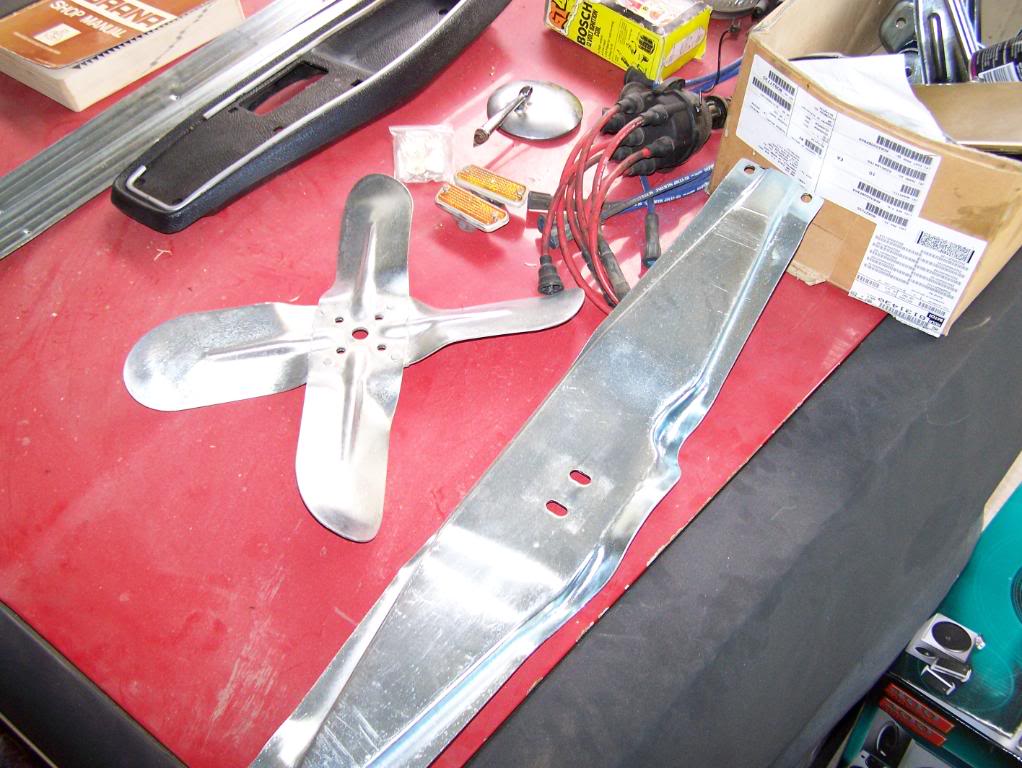
Here are a few other bits that you can see, especially the newly Zinc plated scuff plates and an Auto consol which I plan on cutting out to accomodate the manual gear shifter, and of coarse the workshop manual
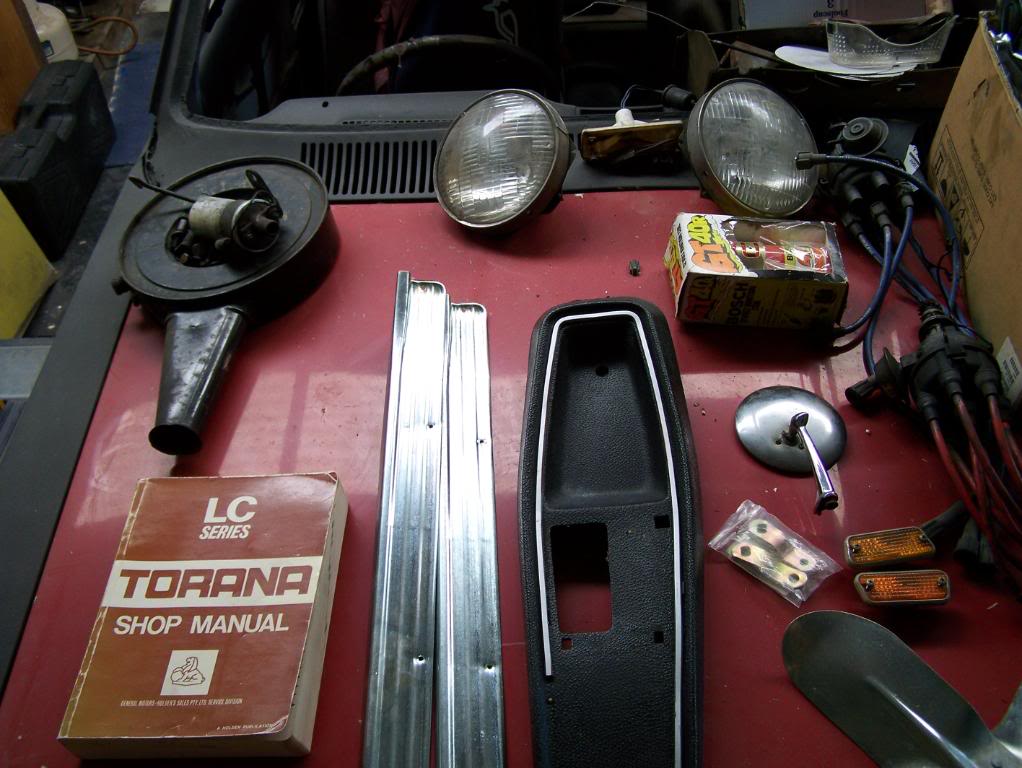
Zinc Plated bonnet hinges and springs

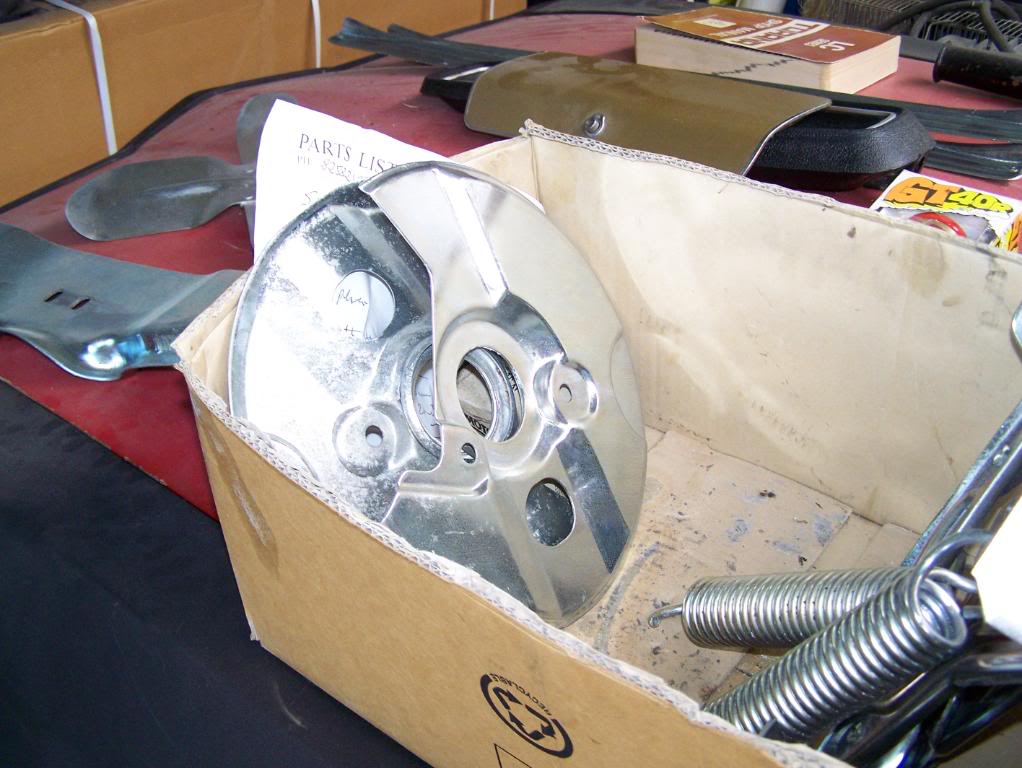
Zinc Plated front disk backing plates
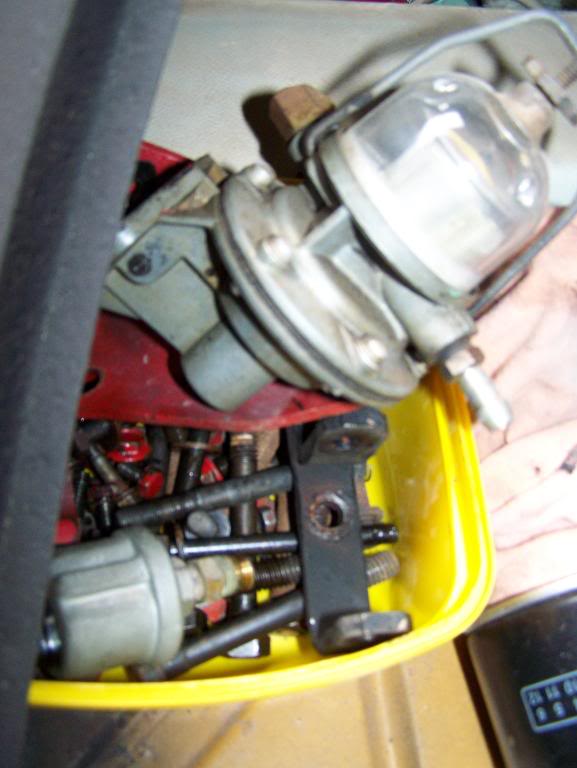
The start of my bolts n bits to be chromed,, just the screws and clip from the fuel pump not the whole thing
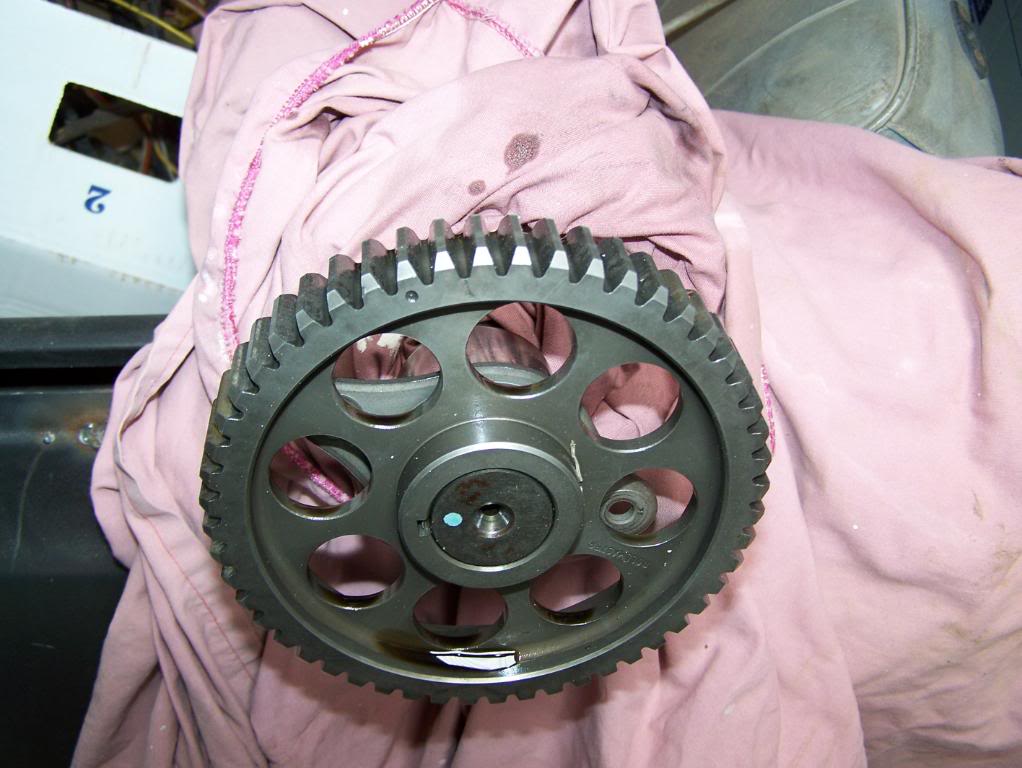
Straight cut gears on the end of the Crow cam thats wrapped up and also on the end of the crank
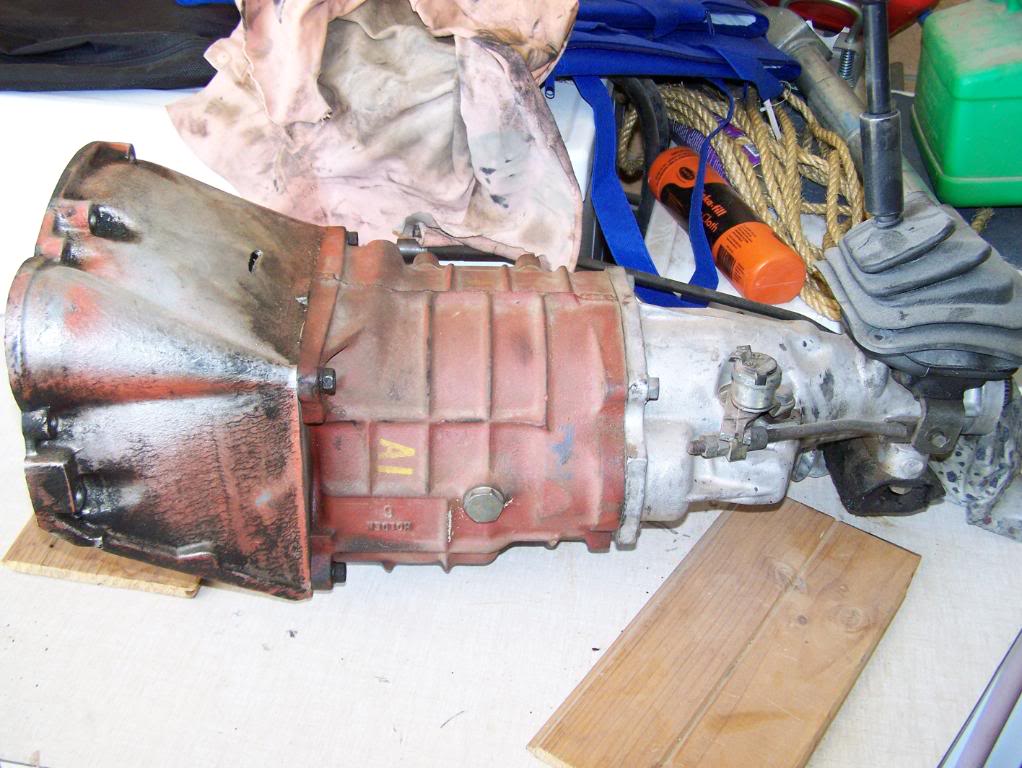
The gearbox Aussie 4 spd I got from "Tyre Fryer"
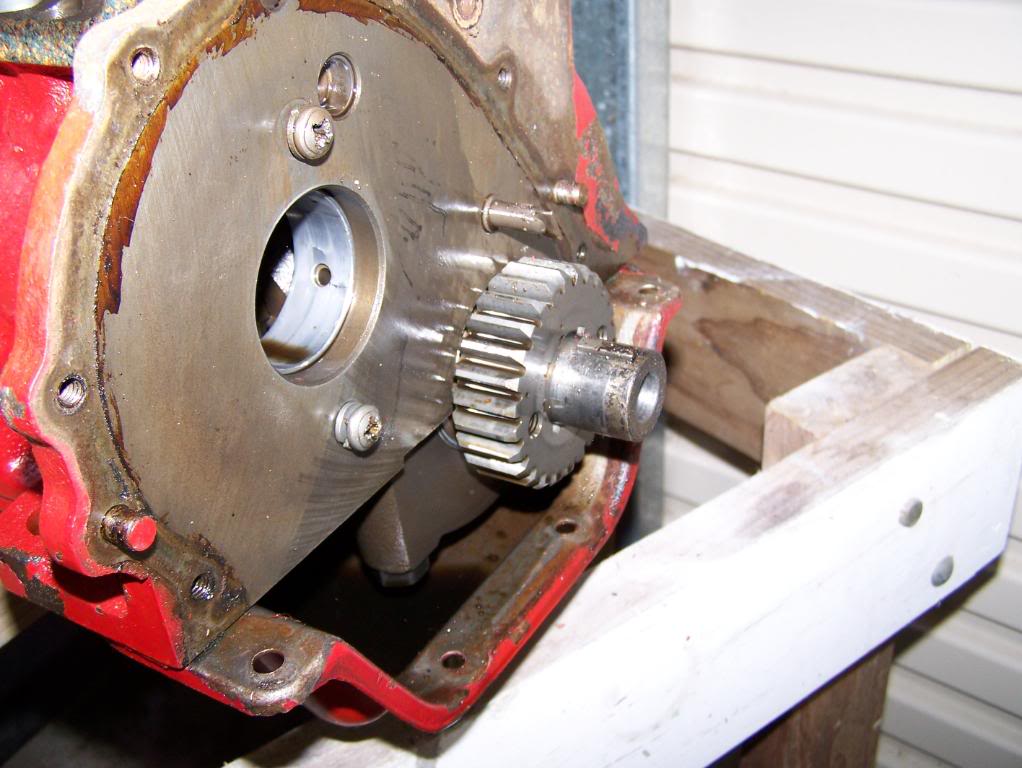
The motor I got that was supposed to be 30 thou that was actually 60 thou, I love the way some people can outright lie to your face.
well I got heaps off the motor and it does have a good sump and pickup, its supposed to have starfire rods as well but I haven't looked yet.
There are also many other parts like alternator, starter motor, most of the glass just one bit to pick up from Tim, Also got a tailshaft, new clutch kit, all the front end bushes, tie rod ends and ball joints all in the rubber not nolathane. I also have all my seats and the vynal to recover them in.
I am also going to body shultz all under the car and wheel arches, oh also got a petrol tank, a very average front bumper.
I am sure there is more but I just can't remember them at the moment.
Here are a few bits mainly the Zinc plated crossmember for the gearbox and the fan which I might take back to get chromed yet
Here are a few other bits that you can see, especially the newly Zinc plated scuff plates and an Auto consol which I plan on cutting out to accomodate the manual gear shifter, and of coarse the workshop manual
Zinc Plated bonnet hinges and springs
Zinc Plated front disk backing plates
The start of my bolts n bits to be chromed,, just the screws and clip from the fuel pump not the whole thing
Straight cut gears on the end of the Crow cam thats wrapped up and also on the end of the crank
The gearbox Aussie 4 spd I got from "Tyre Fryer"
The motor I got that was supposed to be 30 thou that was actually 60 thou, I love the way some people can outright lie to your face.
well I got heaps off the motor and it does have a good sump and pickup, its supposed to have starfire rods as well but I haven't looked yet.
There are also many other parts like alternator, starter motor, most of the glass just one bit to pick up from Tim, Also got a tailshaft, new clutch kit, all the front end bushes, tie rod ends and ball joints all in the rubber not nolathane. I also have all my seats and the vynal to recover them in.
I am also going to body shultz all under the car and wheel arches, oh also got a petrol tank, a very average front bumper.
I am sure there is more but I just can't remember them at the moment.
#82
_squirralien_
_squirralien_
-
- Guests
Posted 18 October 2008 - 10:37 PM
Well I have finaly got my standard bore block, and an unknown sump, well you can mainly see the sump but the block looks good, it has been sitting on a shelf for 20 years and hasn't got the pitting in the sides of the bores in the water gallery area. Im going to dissasemble and get it off to the engineers to give it a nice bath and have a really close inspection and hopfully then the work will start on my block, I will get them to obtain all the parts and assemble the block for me so theres a reasonable chance it will run.
#83
_squirralien_
_squirralien_
-
- Guests
Posted 25 October 2008 - 01:07 AM
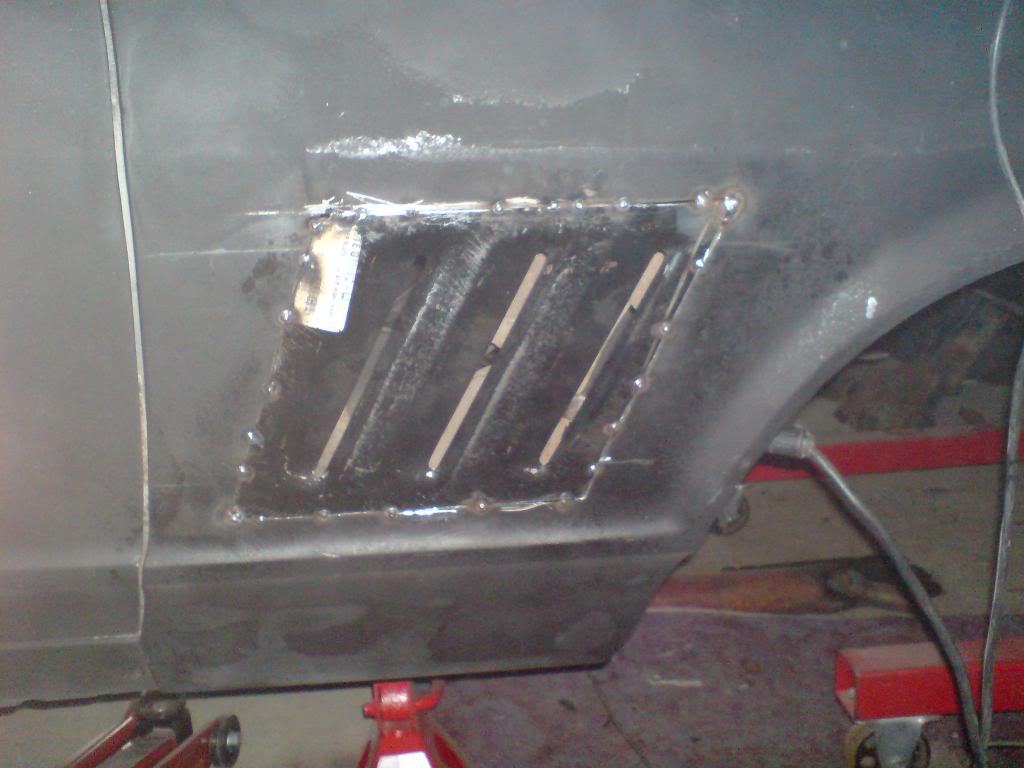
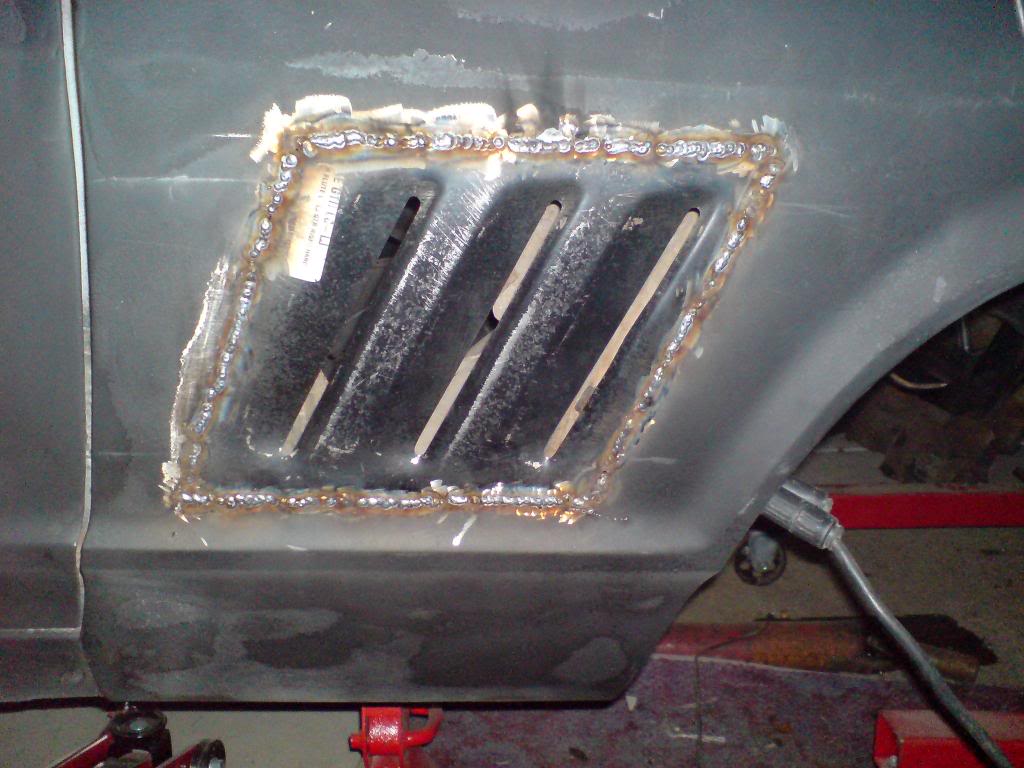
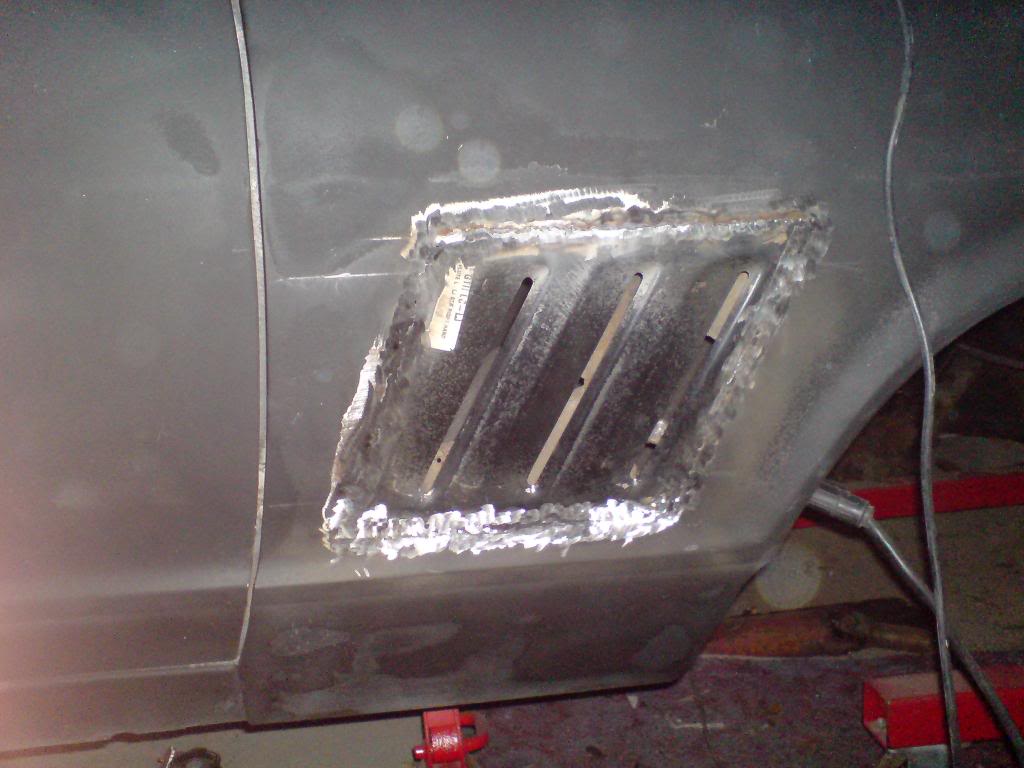
Ok finally some work to the torana to show, I tell you it was a great feeling instead of building a laundry.
These pictures say it all, I have put the first flute in my left guard, I only get about 3 hours on a good day so it will be a slow progression and let me tell you the chuck it in bug was nipping at the heels, it seemed like I was never going to get to work on it with so little time each day and the laundry certainly dragged on. Anyway here are the photos I took of the first flute instalation.
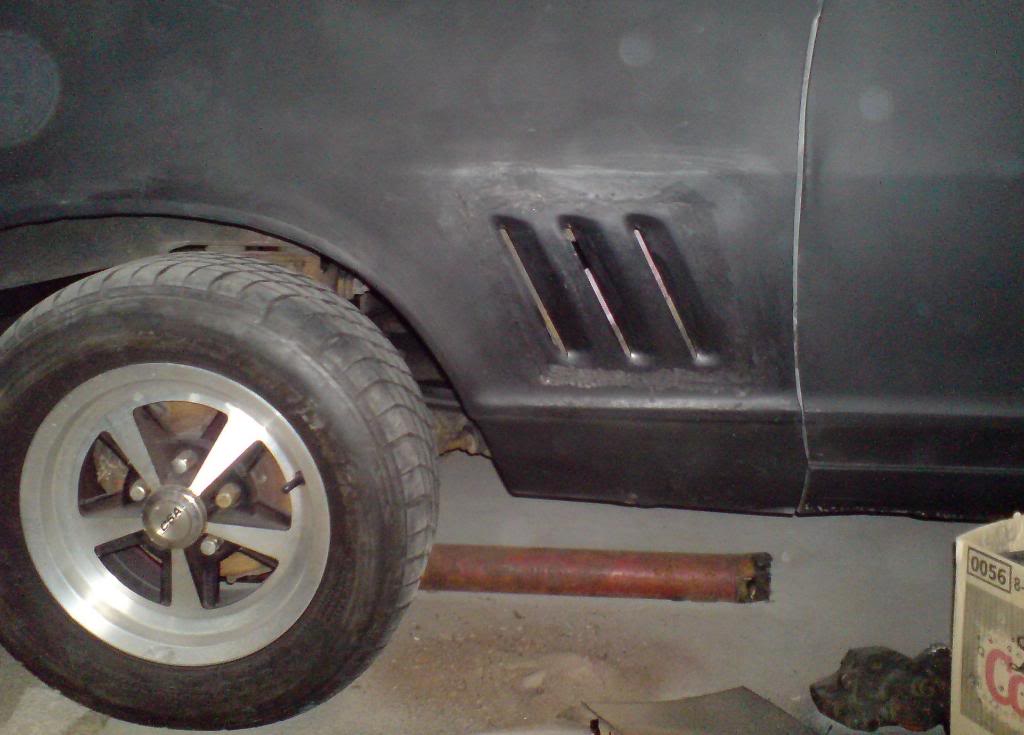
Oh yes and the pile of crap under the guard on the floor is the garnet media that was sitting in the bottom of the guard from the media blasting,
I am also going to get some of that POR15 or what ever it is to paint on the back of the flute to prevent any chance of rust around the flute like you see all to often and once it has been painted (top coat) the fish oil will be blasted through every crevis.
I know alot of people like to keep the cars standard, like original S badges and all that but I am doing an XU-1 mock up, I would do a real one if I could stretch the budget maybe a few times over but I will be extremely happy with the end product.
Oh and through the hole before adding the flute I had a thorough inspection and found no rust behind the guard at all, I am happy about that
These pictures say it all, I have put the first flute in my left guard, I only get about 3 hours on a good day so it will be a slow progression and let me tell you the chuck it in bug was nipping at the heels, it seemed like I was never going to get to work on it with so little time each day and the laundry certainly dragged on. Anyway here are the photos I took of the first flute instalation.
Oh yes and the pile of crap under the guard on the floor is the garnet media that was sitting in the bottom of the guard from the media blasting,
I am also going to get some of that POR15 or what ever it is to paint on the back of the flute to prevent any chance of rust around the flute like you see all to often and once it has been painted (top coat) the fish oil will be blasted through every crevis.
I know alot of people like to keep the cars standard, like original S badges and all that but I am doing an XU-1 mock up, I would do a real one if I could stretch the budget maybe a few times over but I will be extremely happy with the end product.
Oh and through the hole before adding the flute I had a thorough inspection and found no rust behind the guard at all, I am happy about that
Edited by squirralien, 25 October 2008 - 01:10 AM.
#84
RIM-010
 View Garage
-
- Members
-
- 8,075 posts
DON'T PANIC
- Name:Tim
- Location:Cowell, SA
- Car:LJ 2 Door - HQ Premier
- Joined: 01-March 06
View Garage
Posted 25 October 2008 - 11:07 AM
Good to see some progress mate. One step at a time is the way to go, there's no point rushing it.
I've still got this window in my room, and I'm free all week if you want to come and grab it...
Tim
I've still got this window in my room, and I'm free all week if you want to come and grab it...
Tim
#85
Heath
View Garage
-

- Administrators
-
- 18,314 posts
I like cars.
- Name:Heath
- Location:Eastern Suburbs, Melbourne
- Car:Heavily Modified UC Sunbird Hatchback
- Joined: 07-November 05
View Garage
Posted 25 October 2008 - 02:57 PM
You don't need an excuse for doing what you want to your car. Well maybe if you do something distasteful or dodgy then expect to cop a bit of constructive criticism but yeah, I don't think anyone is really here to pass judgement on others.I know alot of people like to keep the cars standard, like original S badges and all that but I am doing an XU-1 mock up, I would do a real one if I could stretch the budget maybe a few times over but I will be extremely happy with the end product.
The work looks great, did you manage to get it all nicely lined up? (can't really see much from side-on view)
#86
_squirralien_
_squirralien_
-
- Guests
Posted 26 October 2008 - 10:42 AM
Hi Tim I will give you a call sometime today, I love seeing progress on my car, I have been helping a mate do his car for a while now and he is getting very close to finishing and I have been using his as motivation but now its time for my car.
Heath, yes I think it has turned out really well, here are another couple of shots that might help you to see what your looking for
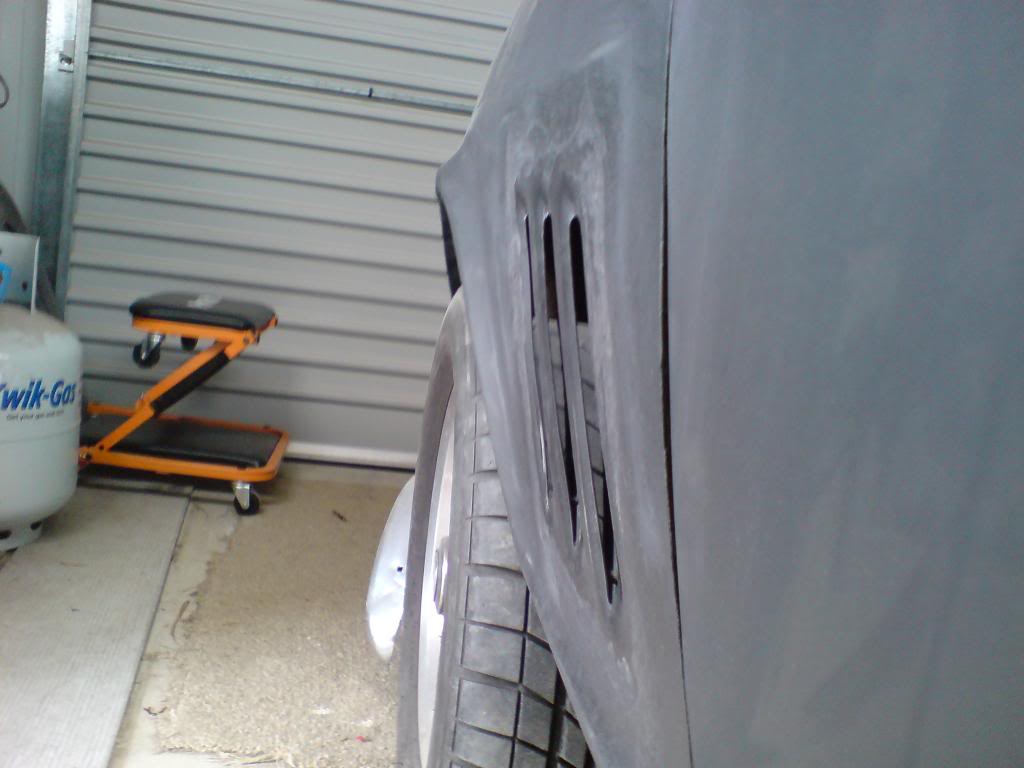
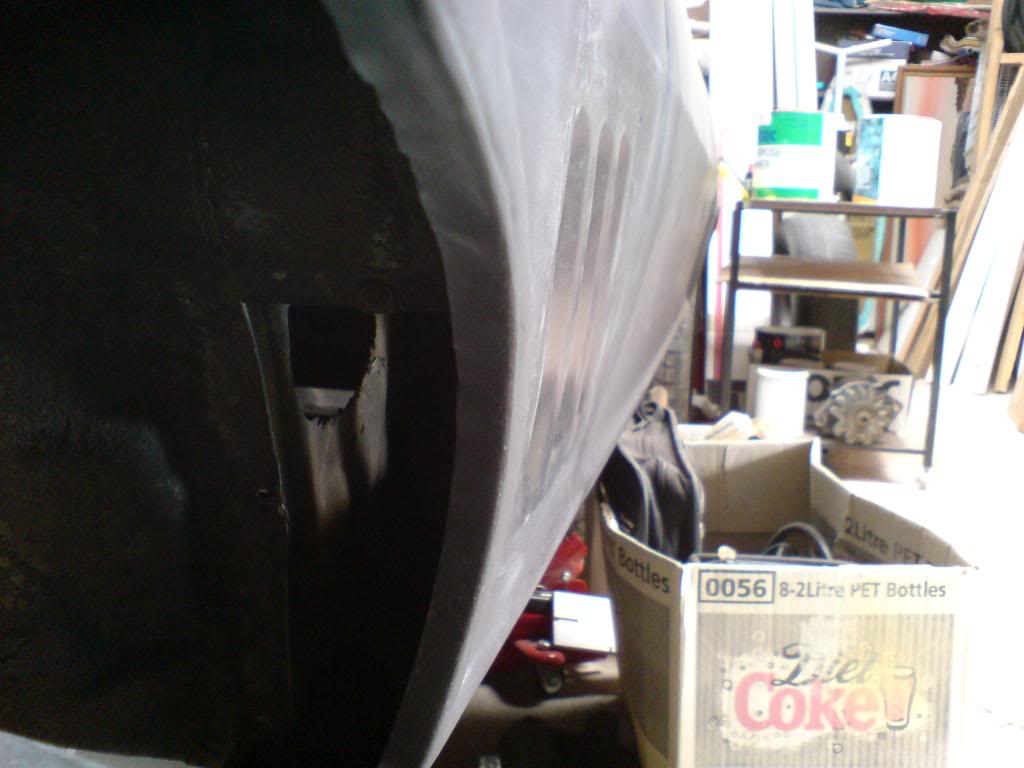
well thats just after grinding the welds down a bit and applying a bit of primer to cover the bare metal
Oh well look at that, in this last photo you can see that I have a speaker hole to repair, it wasn't just the back parcel shelf that someone had butured
Heath, yes I think it has turned out really well, here are another couple of shots that might help you to see what your looking for
well thats just after grinding the welds down a bit and applying a bit of primer to cover the bare metal
Oh well look at that, in this last photo you can see that I have a speaker hole to repair, it wasn't just the back parcel shelf that someone had butured
Edited by squirralien, 26 October 2008 - 10:44 AM.
#87
RIM-010
View Garage
-
- Members
-
- 8,075 posts
DON'T PANIC
- Name:Tim
- Location:Cowell, SA
- Car:LJ 2 Door - HQ Premier
- Joined: 01-March 06
View Garage
Posted 26 October 2008 - 10:55 AM
No worries mate, give us a yell whenever you want to come and grab it.
Tim
Tim
#88
_squirralien_
_squirralien_
-
- Guests
Posted 26 October 2008 - 01:06 PM
The work looks great, did you manage to get it all nicely lined up? (can't really see much from side-on view)
Heath I took some measurements from a friends genuine front fluted guard and I was to expect mine to be within a few ml. here or there but as it stands now it's possition is mm perfect to the points of reference on the genuine guard, the task just gets harder from here on as I have to try to get the other side mm perfect aswell or it will be something that I will know forever, and I will let you all know how I go even if it is out a bit, fingers crossed it will be fine.
#89
Heath
View Garage
-
- Administrators
-
- 18,314 posts
I like cars.
- Name:Heath
- Location:Eastern Suburbs, Melbourne
- Car:Heavily Modified UC Sunbird Hatchback
- Joined: 07-November 05
View Garage
Posted 26 October 2008 - 06:49 PM
haha cool mate. Looks good in the latest photos.
(you only see one side at a time so don't lose too much sleep over it)
lol keep up the good work mate!
(you only see one side at a time so don't lose too much sleep over it)
lol keep up the good work mate!
#90
_squirralien_
_squirralien_
-
- Guests
Posted 21 January 2009 - 06:20 PM
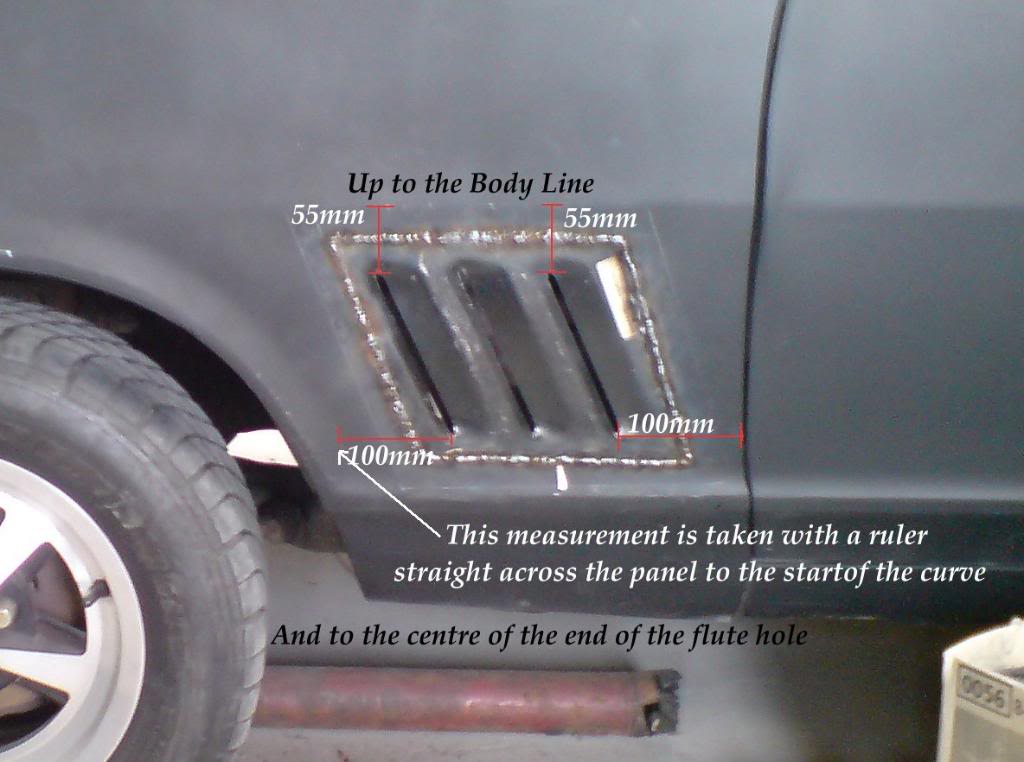
This is a picture with the measurements to put the flutes in, I took these measurements from a friends XU-1 and I managed to get it spot on, fingers crossed for the otherside which I will be doing in the next week or so, If the flutes are the same as the ones I got from rare spares I took 20mm off the top and bottom of the fltes and 15mm off each side of the flutes before marking the guard ready to cut the holes.
#91
_squirralien_
_squirralien_
-
- Guests
Posted 20 March 2009 - 01:42 AM
Hi, just an update, just starting to get moving on it again, I have been helping two friends with their cars and also have had alot of other things consuming time. One friend is doing a genuine LC XU-1 and the other a faker shaker.
I have done my other flute and the middle dash section which I will put pictures up for soon, the other flute cme out pretty good, not quite as good as the passeger side as I was a bit cramped for space and did rush it a bit trying to finish it before picking my daughter up from school,, what a no no, but it came out ok, it will be fine, I think the position is good. I have also started on the drivers side floor and went down and bought some POR.15 ouch that hurt.
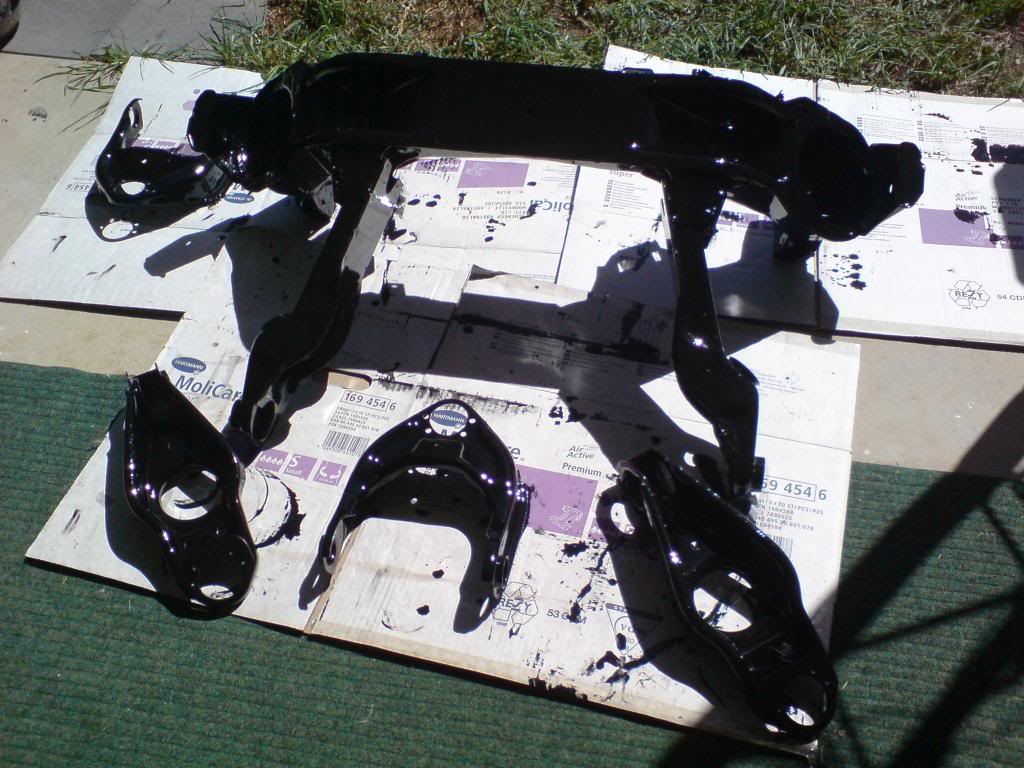
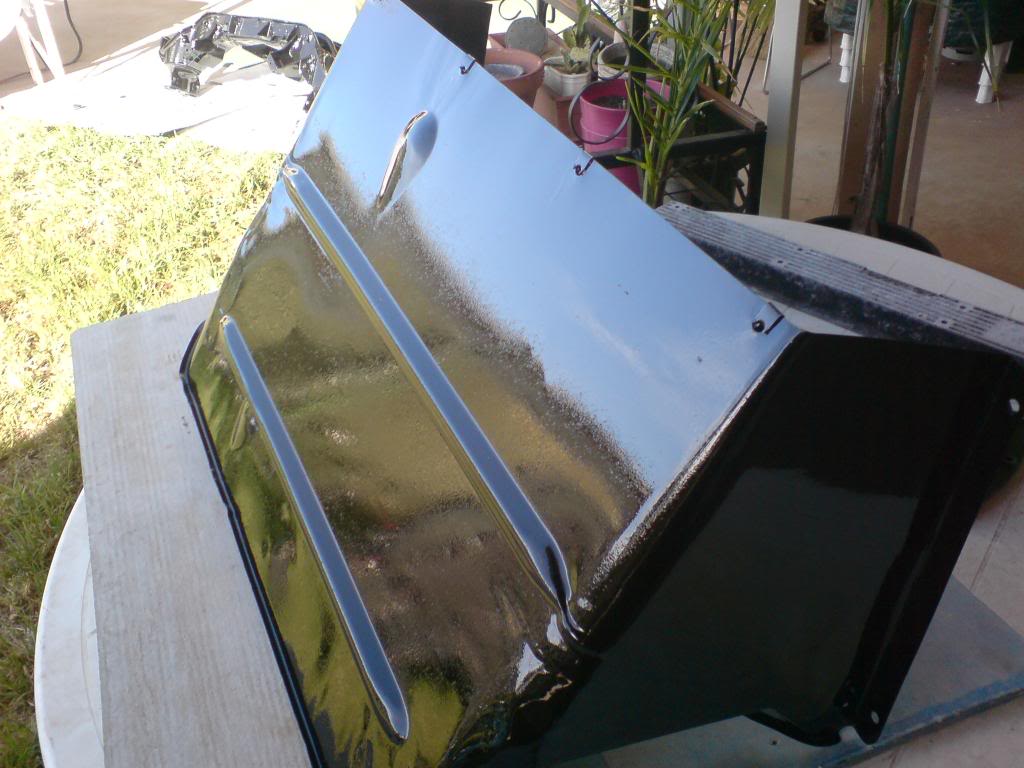
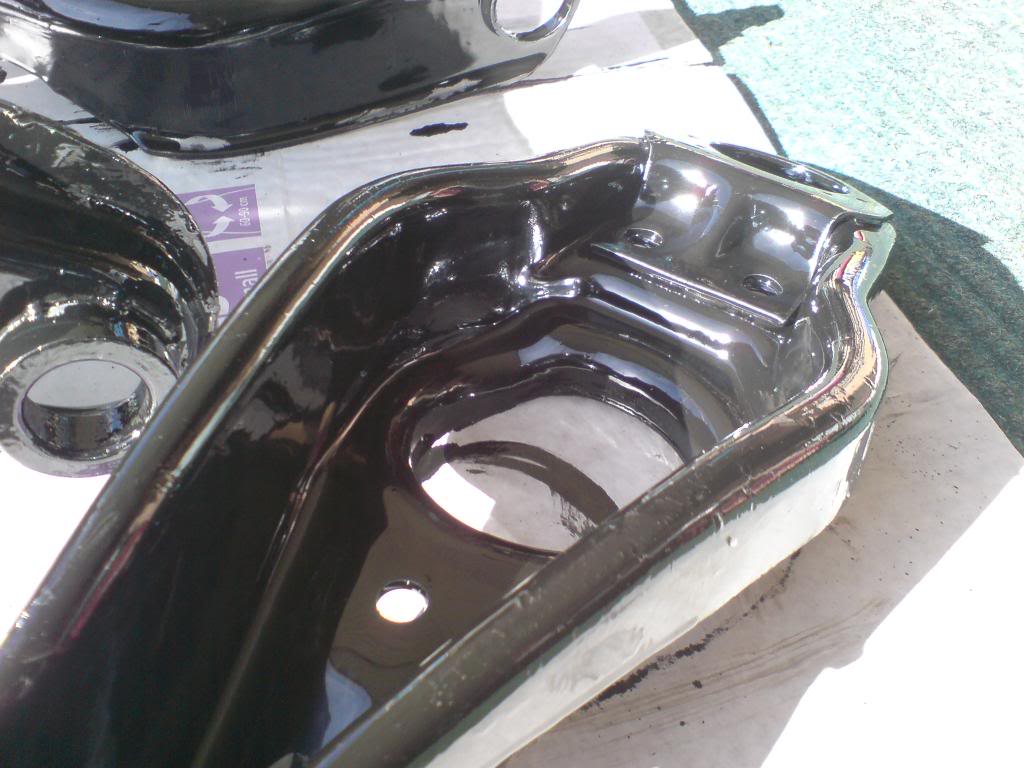
A friend came and helped me get the front end out and also the diff, the front end was hot bathed (I think thats some sort of acid bath at the engineers) now the K frame and wish bones are all nice and clean and will get the POR15 job and I got their gloss black to use as a top coat on the suspension and diff. Also due to get alot of stuff like all the engine bolts and some suspension bits, brackets and stuff from the chromers, some chrome and some gold zinc like the brake backing plates, should look nice, the brake lines are getting done in gold zinc aswell. My motor has been ready for a while but they said they are to busy to work out the bill and take my money (they just moved and I said no hurry), I will be getting the engine back next week and also dropping the wishbones and what ever to get the ball joints and rubber bushes pressed in after the POR treatment, My splash tray for under the motor will be por15ed and gloss black.
There are still a heap of the little stuff that I am looking for not that I can think of them right now.
My friends XU-1 is just about to get sent off for painting 2Pak yellow dolly so I will post a picture when thats done.
Oh and we have ordered the door trims from NSW and they should be here in a couple of weeks so I will also place some pics and comments on them when they arrive, they should be great.
Just a few things I am after, original type rocker cover with no dents and an original type oil cap with the two groves in the top, brake booster xu-1 type, Chrome moldings for the drivers door and passengers side rear quarter and also the two rear gutter mouldings, a good boot lid would be nice, rear parcel shelf pieces the two sections with the four circle indentations, someone put speaker holes in mine with a hammer and screwdriver I am sure.
Oh linkages for the triple stromberg 150's I have the three adjustable links to the accelerator brackets, but need the long linkages and brackets, also the one along the firewall. Anyway just thought I would mention it just incase you have anything getting in your way in the shed, there is more but I may only find out what when i need to put it on the car.
Thanks for having a read and I will get some more pictures up very soon
I have done my other flute and the middle dash section which I will put pictures up for soon, the other flute cme out pretty good, not quite as good as the passeger side as I was a bit cramped for space and did rush it a bit trying to finish it before picking my daughter up from school,, what a no no, but it came out ok, it will be fine, I think the position is good. I have also started on the drivers side floor and went down and bought some POR.15 ouch that hurt.
A friend came and helped me get the front end out and also the diff, the front end was hot bathed (I think thats some sort of acid bath at the engineers) now the K frame and wish bones are all nice and clean and will get the POR15 job and I got their gloss black to use as a top coat on the suspension and diff. Also due to get alot of stuff like all the engine bolts and some suspension bits, brackets and stuff from the chromers, some chrome and some gold zinc like the brake backing plates, should look nice, the brake lines are getting done in gold zinc aswell. My motor has been ready for a while but they said they are to busy to work out the bill and take my money (they just moved and I said no hurry), I will be getting the engine back next week and also dropping the wishbones and what ever to get the ball joints and rubber bushes pressed in after the POR treatment, My splash tray for under the motor will be por15ed and gloss black.
There are still a heap of the little stuff that I am looking for not that I can think of them right now.
My friends XU-1 is just about to get sent off for painting 2Pak yellow dolly so I will post a picture when thats done.
Oh and we have ordered the door trims from NSW and they should be here in a couple of weeks so I will also place some pics and comments on them when they arrive, they should be great.
Just a few things I am after, original type rocker cover with no dents and an original type oil cap with the two groves in the top, brake booster xu-1 type, Chrome moldings for the drivers door and passengers side rear quarter and also the two rear gutter mouldings, a good boot lid would be nice, rear parcel shelf pieces the two sections with the four circle indentations, someone put speaker holes in mine with a hammer and screwdriver I am sure.
Oh linkages for the triple stromberg 150's I have the three adjustable links to the accelerator brackets, but need the long linkages and brackets, also the one along the firewall. Anyway just thought I would mention it just incase you have anything getting in your way in the shed, there is more but I may only find out what when i need to put it on the car.
Thanks for having a read and I will get some more pictures up very soon
#92
_BATHURST-32D_
_BATHURST-32D_
-
- Guests
Posted 20 March 2009 - 06:25 AM
just thought i would let you know, that you dont need the disk brake backing plate, as the xu1 did not have them, and your gearbox should be an opel.
mate you are doing a very good job there with the car, well done keep up the good work, anything you need for a lc xu1, just pm me and i will help to the best of my ability.
cheers john gong
mate you are doing a very good job there with the car, well done keep up the good work, anything you need for a lc xu1, just pm me and i will help to the best of my ability.
cheers john gong
#93
_squirralien_
_squirralien_
-
- Guests
Posted 20 March 2009 - 07:46 AM
and your gearbox should be an opel.
I went for the aussie 4 spd because I was told that it was better and stronger than the original opal ? theres something different a questioning statement or it could just be me being puzzled.
I am trying to be as authentic as possible without being brand name and numbers concious, it will never be a real one so I don't see the point in paying the extra dollars to be to concerned about the fine print, I do know one thing this is going to be one awsom torana that I am sure any XU-1 owner would be hopefully proud to park there car next to. Maybe some might not want to as this will look so new everywhere. Well my goal from the start was to build my own XU-1 because I couldn't afford a real one, I will be more than happy with this machine.
Thanks for your comments John and I will send you a PM soon, my eyes are still blury, early morning after a late night catching up on some PC repairs.
#94
_squirralien_
_squirralien_
-
- Guests
Posted 21 March 2009 - 02:27 AM
Well here are some pictures of the other side flute that I put in a week or two ago
Also here are a few photos of the stone tray, front K frame and wishbones that I have now done in the POR15 treatment, And let me tell you I love the stuff, its a bit of a pain to work with but what a beautiful paint treatment. This is nearly dry aswel not fresh and wet, and to think I bought the gloss coat aswel, well the gloss coat is resistant to UV the main treatment that I have done here isn't. Apparently it will still last forever but might just loose some shine over time without the gloss coat.
I am going to do the diff with it also and the floors and boot floor after all the small repairs are done and also around the flutes of coarse, then it won't suffer from the dreaded rust around the flutes disease (rustyfluteitis)
#95
wot179
-

- Members
-
- 6,784 posts
Green Eggs and Spam
- Name:Jesus Bloody Christ
- Location:Sunny Santa Maria
- Car:Goon
- Joined: 06-February 09
Posted 21 March 2009 - 08:06 AM
Well I have finaly got my standard bore block, and an unknown sump, well you can mainly see the sump but the block looks good, it has been sitting on a shelf for 20 years and hasn't got the pitting in the sides of the bores in the water gallery area. Im going to dissasemble and get it off to the engineers to give it a nice bath and have a really close inspection and hopfully then the work will start on my block, I will get them to obtain all the parts and assemble the block for me so theres a reasonable chance it will run.
I think this sump is HKTG.
#96
_squirralien_
_squirralien_
-
- Guests
Posted 21 March 2009 - 08:35 AM
I think this sump is HKTG.
ok thanks for that, a friend also thought that but wasn't 100% sure
#97
_squirralien_
_squirralien_
-
- Guests
Posted 21 March 2009 - 10:44 PM
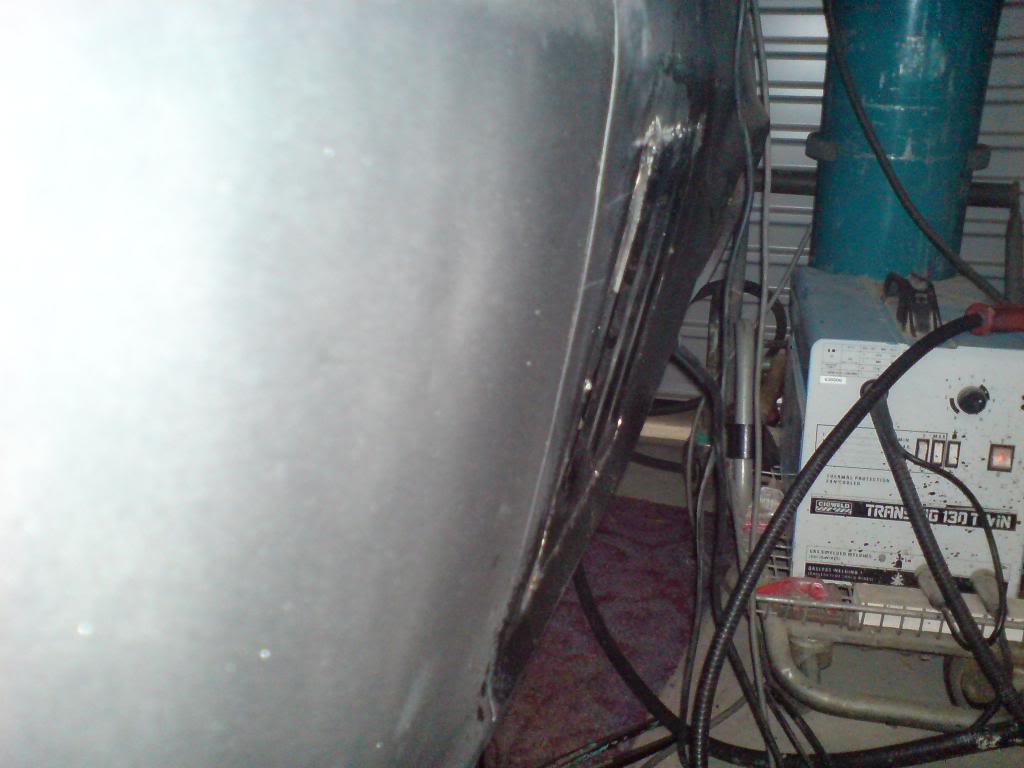
I can't believe it after looking over the pictures I have uploaded just above I have noticed that I have been welding over carpet,, thats not a good idea, I might shift that before I continue.
#98
_squirralien_
_squirralien_
-
- Guests
Posted 27 March 2009 - 12:47 AM
I have just got my motor back and the head, I also have a heap of chroming to pick up , its ready now but I am flat out at the moment and that will have to wait till Monday, I can't wait to get photos of the motor and post them up for you all to see altho I am sure it will just look like a reconditioned motor. It is all wrapped in plastic at the moment and i will get it on to the engine stand and I will have to mask it up and paint it red and get it ready for all the chrome bits and pieces. I have got my brake lines and a number of other things gold zinc'ed so I think they will look great,
I was thinking about getting the sump and timing cover done in gold zinc, any thoughts on that, or painted red like the motor, the gold zinc has the coloured rainbow effect through it a bit and I saw on one of the car shows the other day the brand new sump that went on a motor they were building was gold zinc and I thought it looked pretty good.
Its so easy to get carried away with all the coatings and painting and sometimes difficult to draw the line and keep it tasteful but as I haven't done alot of this before to this standard I am not sure where to far is as yet.
I have also got the two peice exhaust manifold coming for it so I don't have to put extractors on it
POR-15
I absolutely love the first coating that I put on the K frame and wish bones but the gloss black went on to thick and the supplier said I must have got an end of batch that was a bit thicker, as a result the wishbones came out not as good as I would have liked so they went back to be hot tanked again (chemicals), I thought the gloss black would flatten out and after a few days I was not happy with it so I will start again. My suggestion would be to spray the gloss black if you are to use it and that way you make sure it is thinned enough to spray and you should get a beautiful result. The first coating of POR-15 flatened out and was absolutely great and looked like the items were powder coated and that was applying it with a brush but I wasn't as lucky with the gloss.
The next job is to clean up the diff and prepare that for paint and of coarse paint it, I am not to sure what I will paint the diff in yet.
then it is time to finish off the welding and POR-15 the areas where I have welded up and especially the flutes, then its time for body shultz all under the car floor, wheel arches, boot and also I will be doing the inside of the car floor and some areas in the boot, also I will do the middle sections inside the door skins and quarter panel skins. After the car is finished as far as paint is concerned before anything goes inside the car it will be internally swimming in fish oil, every crevis I can access.
All the brakes will be new from pads to hoses, I just can't wait it is just going to slow, the thought of the car finished is a dream that will become a reality
The new door trims should arrive in a couple of weeks hopefully and I will place pictures of them up here for sure.
Ok thats it for my update for a little while ( few days to a week or two)
Thanks for having a read and putting up with my jibba jabba.
#99
_squirralien_
_squirralien_
-
- Guests
Posted 05 April 2009 - 12:20 AM
today I picked up some more bolts brackets and rear brake backing plates, they were all done in the gold zinc, I had to leave the brake lines behind for a second attempt as they looked a bit chunky so they are going to polish them up and re try them with the gold zinc, most of the lines are new apart from the rear lines but they had a green paint or powder coat on the new lines so it prevented the finished result from being 100% so they are going to do them again. I also got the new engine mounts well that was a few weeks ago.
Over the next week or so i want to try to get the engine on to the stand and mask it up and paint it red,
I must pull my finger out and take some more photos to put up here, maybe the chrome and zinc work and also some of the motor and head
If anyone has any tripple stromberg linkages at a reasonable price I would be interested in a pm message
Thanks for reading the progress
#100
_darrenmark1_
_darrenmark1_
-
- Guests
Posted 05 April 2009 - 09:22 AM
Mate are you going to paint the block before putting it together?


0 user(s) are reading this topic
0 members, 0 guests, 0 anonymous users

